Equidistant Uniform Mesh Control. What more do you need?
Equidistant mesh control was added in 2016 SOLIDWORKS Flow Simulation. Since then I have only used the option a few times. Shame on me, With all software you fall back into the habits of how you have always done things, in this case adding an additional body to apply a local mesh control, or adding local mesh control to the faces of the object requiring refinement. With 2017 now released, I have been getting several questions regarding the equidistant mesh control and what it is used for. Now I do not feel as bad. I’m not the only one slowly adopting new functionality.
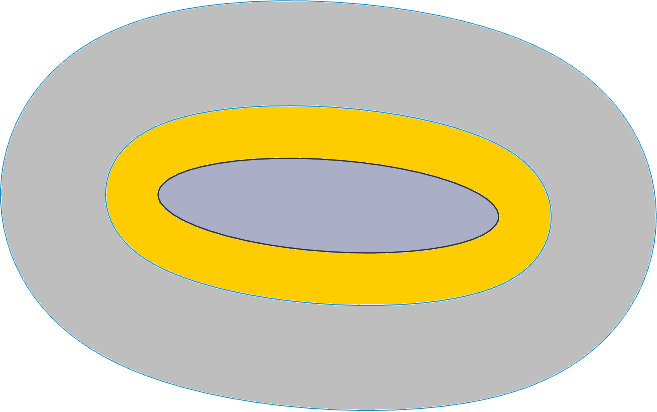
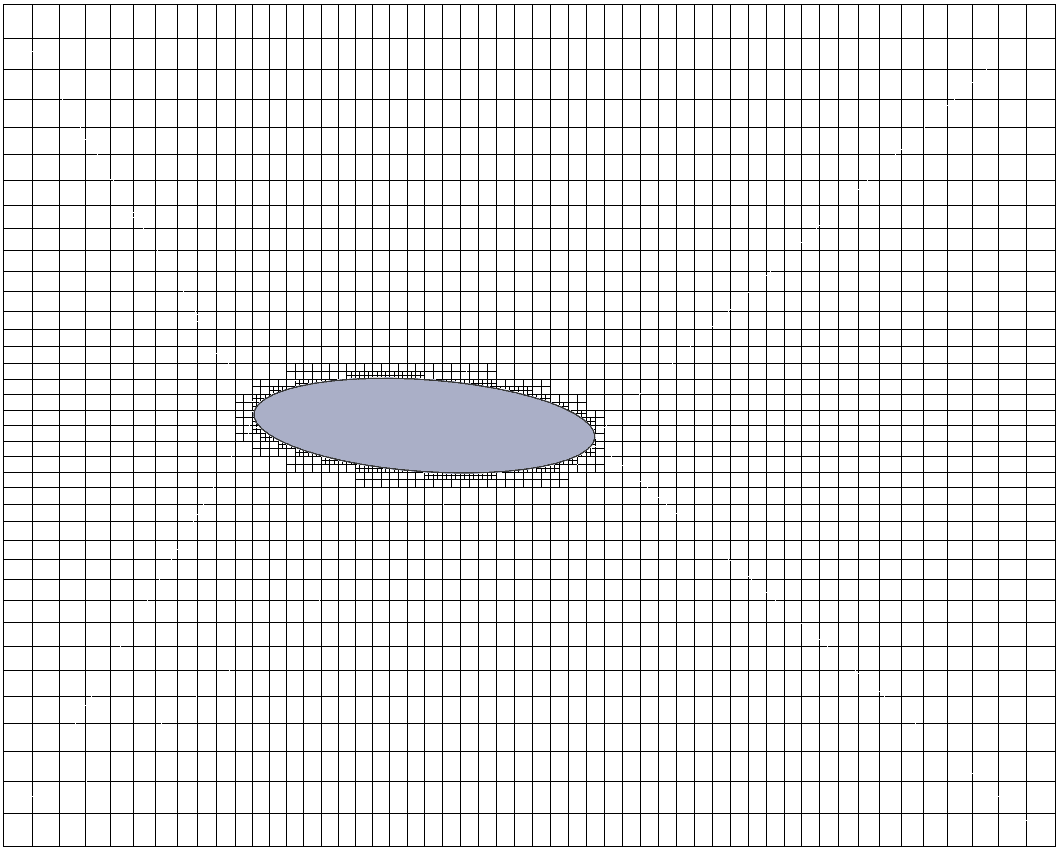
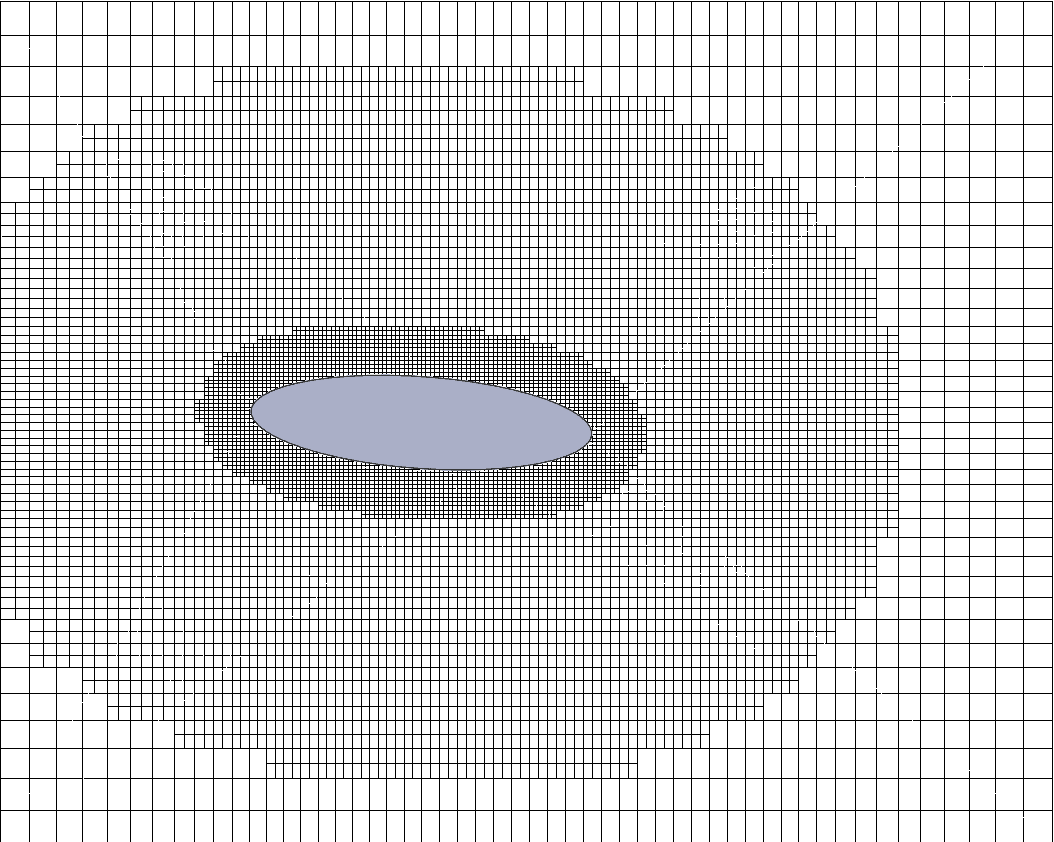
The equidistant refinement ensures a uniform mesh around selected entities with minimal effort. Think of the equidistant mesh as up to three offset zones from a specified body, that flow keeps the mesh uniform within. For example the image below has two zones around the ellipse. The yellow zone being 1/2 an inch away, and the gray being 1-1/2 inches away. Both zones would be meshed with uniform levels of mesh control.
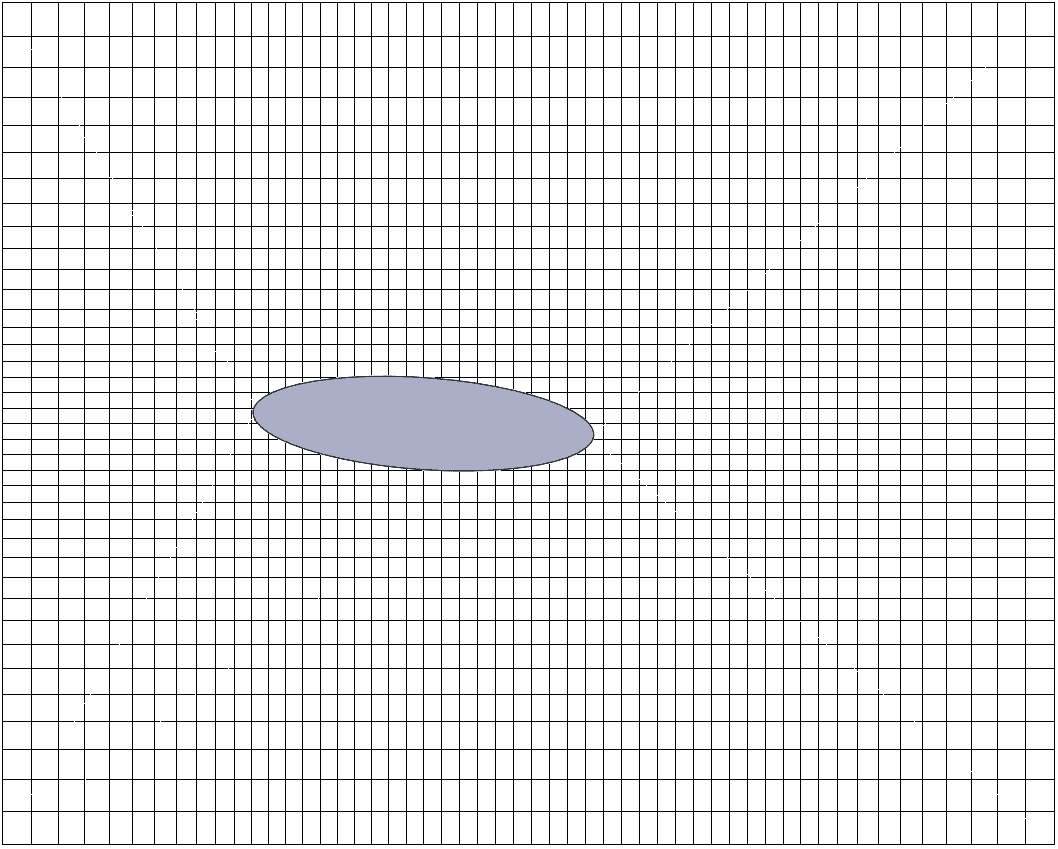
To better explain this option let’s look at the above ellipse with four separate studies. All studies are external and are moving air over the ellipse at a positive angle of attack.
- Default Mesh – Keeps the default level of 3 for the mesh.
- Local Mesh – Adds to the default mesh a local mesh refinement on the face of the ellipse.
- Equidistant 1 – Adds to the default mesh an equidistant local refinement 1/2 an inch uniformly.
- Equidistant 2 – Adds to the default mesh an equidistant local refinement 1/2 and 1-1/2 inches uniformly.
The default mesh does a good job of capturing the ellipse geometry and how the flow interacts with the body. You can see that if the boundary layer was of importance the mesh could be refined to better capture the flow affects in this area. For reference the flow is moving Left to Right with respect to the plots in all studies. The standard mesh totaled 41,800 cells in the mesh.
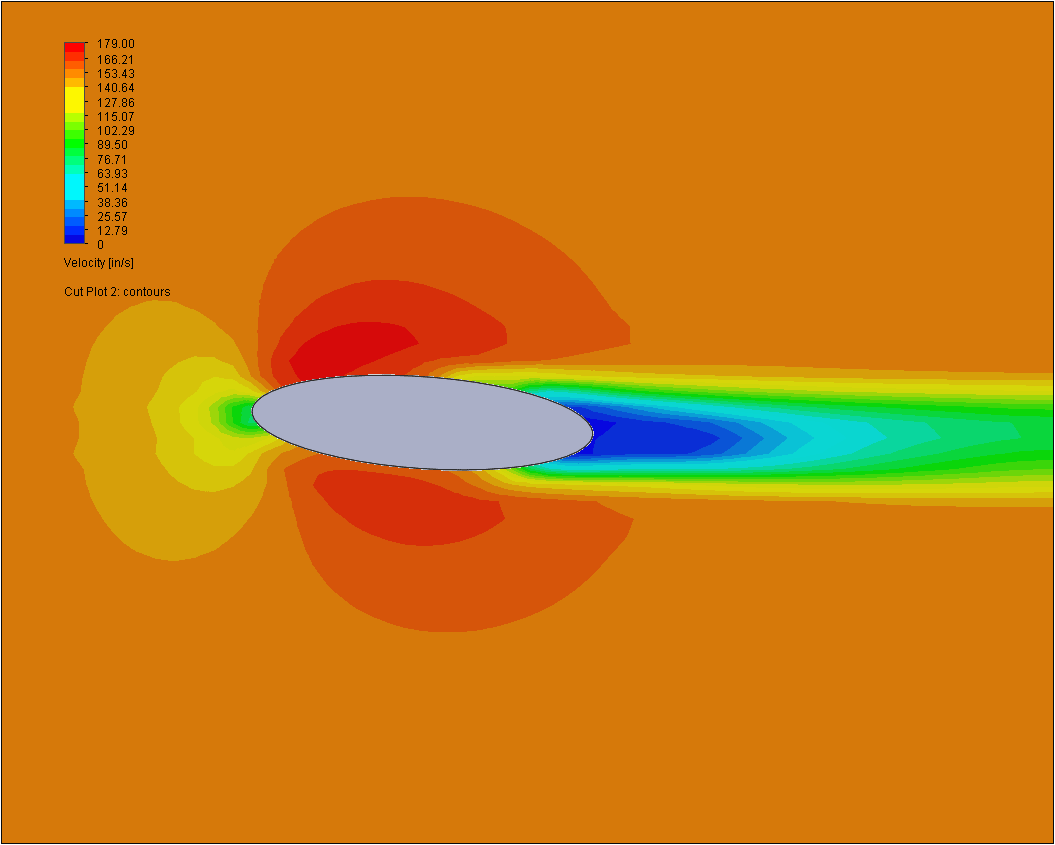
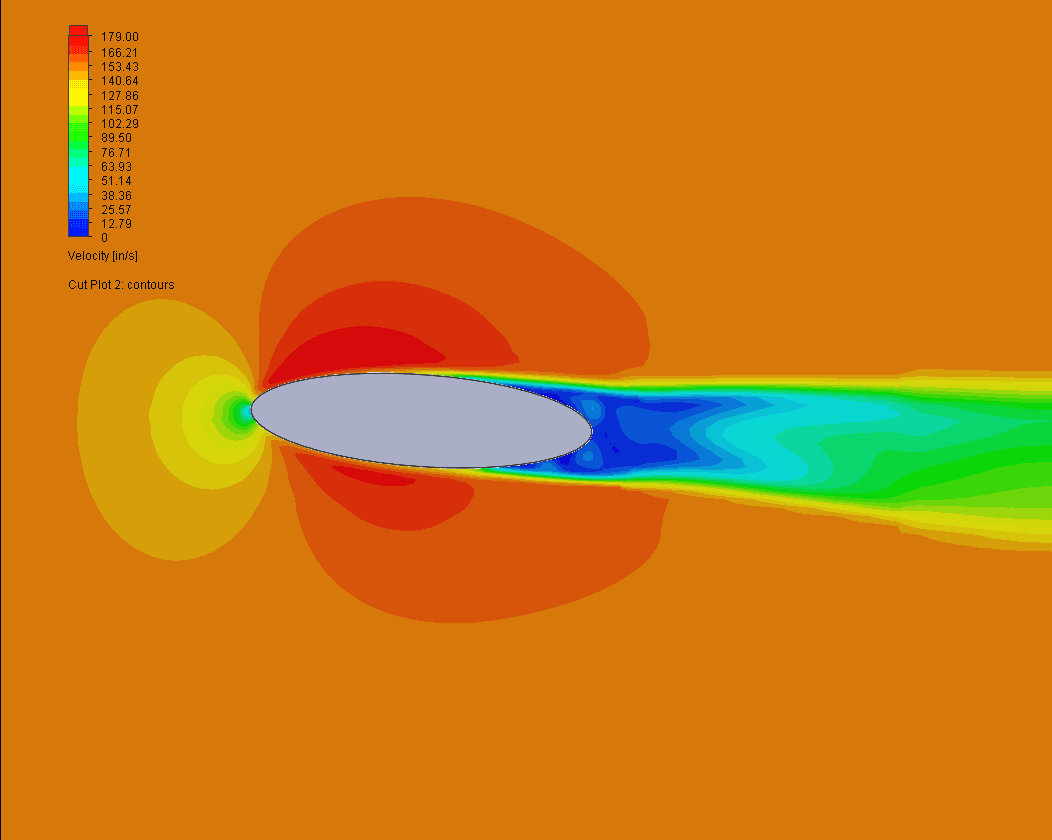
The uniform mesh shows a good representation of the leading edge velocity variance, and shows a relatively uniform velocity of the trailing edge. A re-circulation or non uniformity may be expected here, and leads to adding a local mesh to the face of the ellipse. This also could be dome by adding a body in the model around the ellipse and applying a local control to the body. Make sure the body is turned off in the component control otherwise flow will go around the mesh body rather than through it.
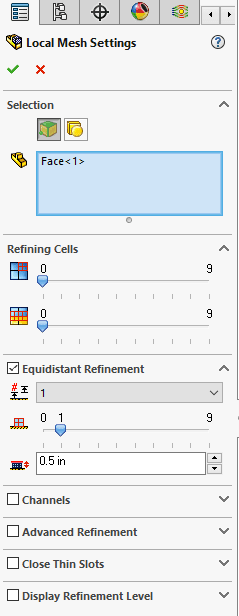
You can add the Local Mesh by selecting the Local Mesh icon in the Flow Tree or the Flow Command Manager Tab. 
Below you see that the mesh was refined around the ellipse. This lead to a better understanding of the boundary layer and shows a refined plot at the leading and trailing edge of the ellipse. The local mesh cells totaled 81,816.
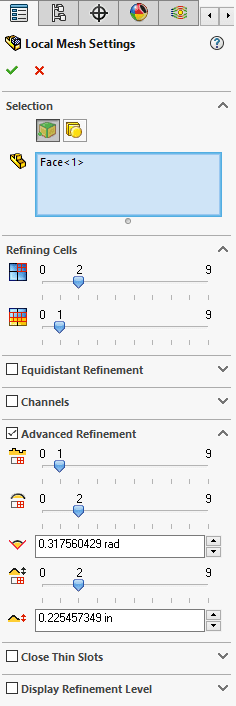
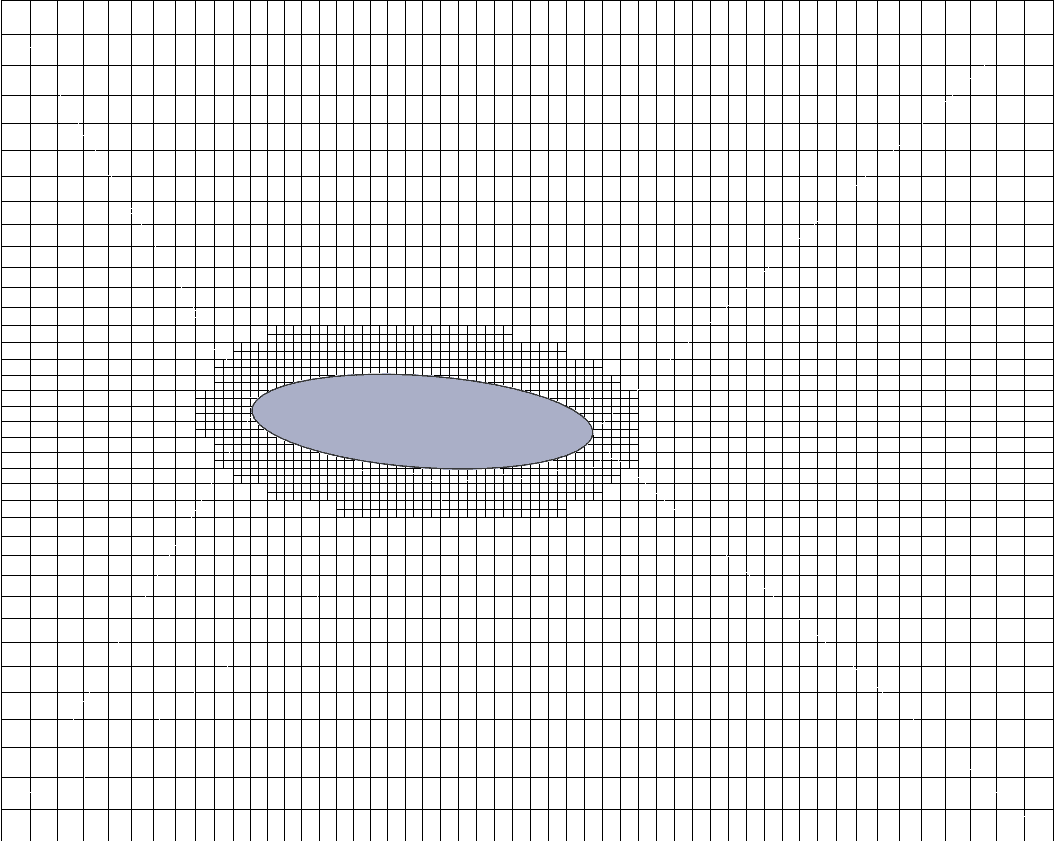
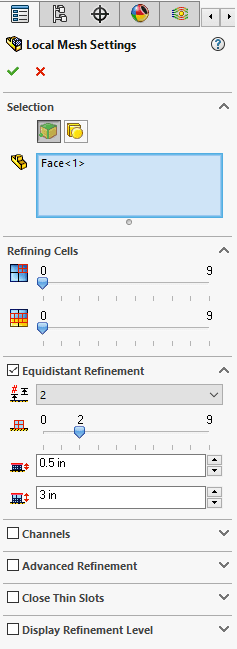
Instead of using just the face or a body as the local refinement the equidistant mesh control gives a better refinement level with the same setup effort. Choose the same local mesh icon in the command manager and check on the Equidistant Refinement option. Choosing the same face I specified the number of offset levels. In this case one offset level at 1/2 an inch distance, and a level 1 refinement. This provided a mesh with uniform density around the ellipse and a total cell count of 76,104. Notice that the leading and training edge regions are well defined in the velocity plot.
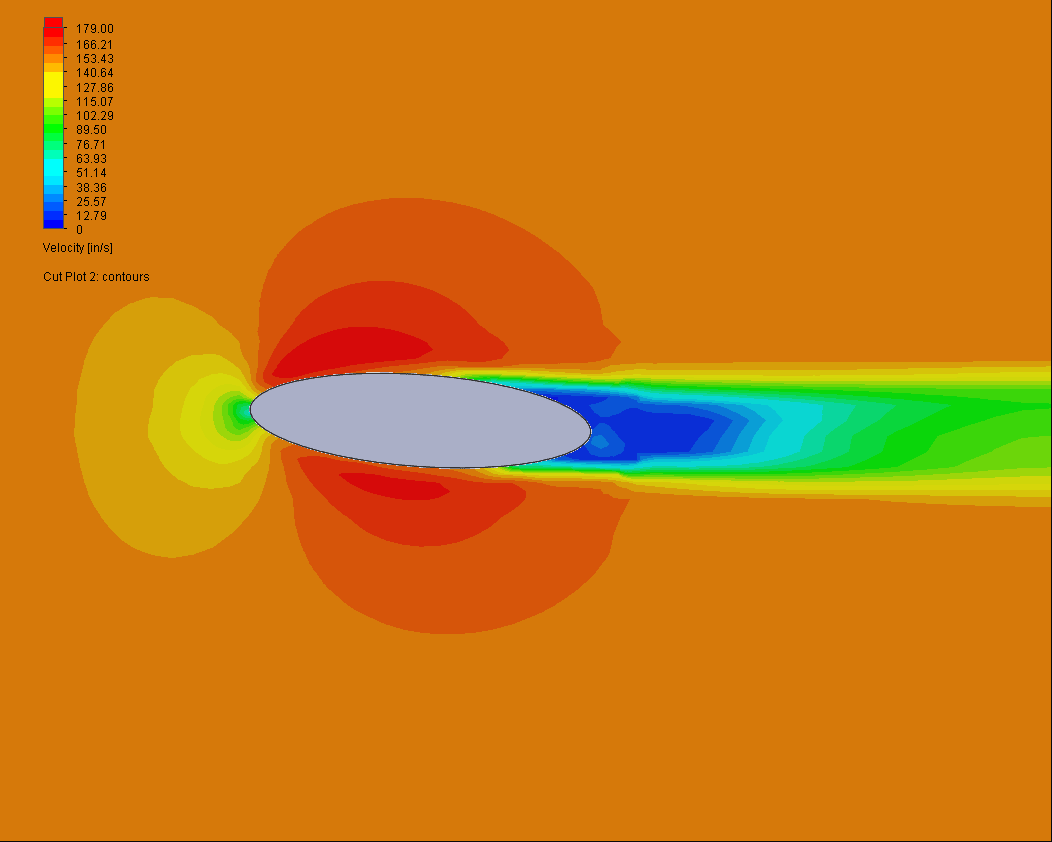
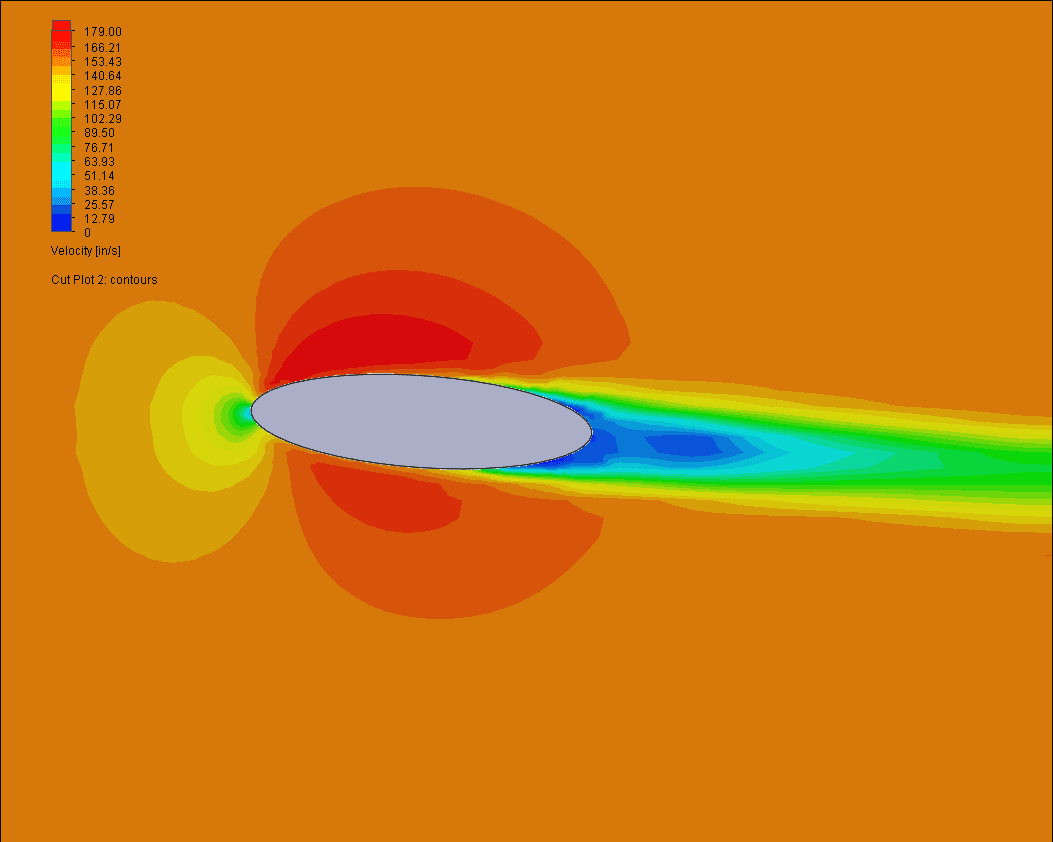
The fourth study uses a two level equidistant control. Editing the mesh control explained above a second level was added at 3 inches away. I also increased the mesh refinement to 2 in order to show the cell count jump and time increase to solve. The new mesh control settings lead to a mesh of 503,604 cells(overkill). A drastic increase but as shown below not only the leading and trailing edge have an increased refinement but the flow areas around the ellipse have better detail as well.
As a comparison the chart below shows the mesh size and solve time.

The Equidistant Refinement option is a fast and easy way to add local mesh control in your Flow Simulation studies. This can be used in many application including internal fans, heat sinks, any geometry that may require a refined mesh. See the below ink for the ellipse file and associated studies. Change the settings in the mesh control and get a feel for how this great additional tool will help you with your Flow Studies.