Creaform 3D Scanning: Level-Up Your 3D Scanning Abilities with a Few Tips & Tricks
Level-Up Your 3D Scanning Abilities with a Few Tips & Tricks
So, you want to improve your Jedi 3D scanning skills and significantly decrease time spent doing post-processing touchups. Well now you can, with these few tips & tricks you can work your way up from Padawan learner to Jedi Master.
Let’s face it, we all have spent an excessive amount of time editing; patch a hole here, remove noise there, improve details and smooth boundaries. All these micro-tasks are necessary in order to achieve our picture-perfect idea of a scan, but the price we pay is precious time and these tasks add up.
On that note, let’s talk about tweaking your scan parameters prior to acquiring your scan data.
Scan Parameters? What’s that you say? Let’s take a look.
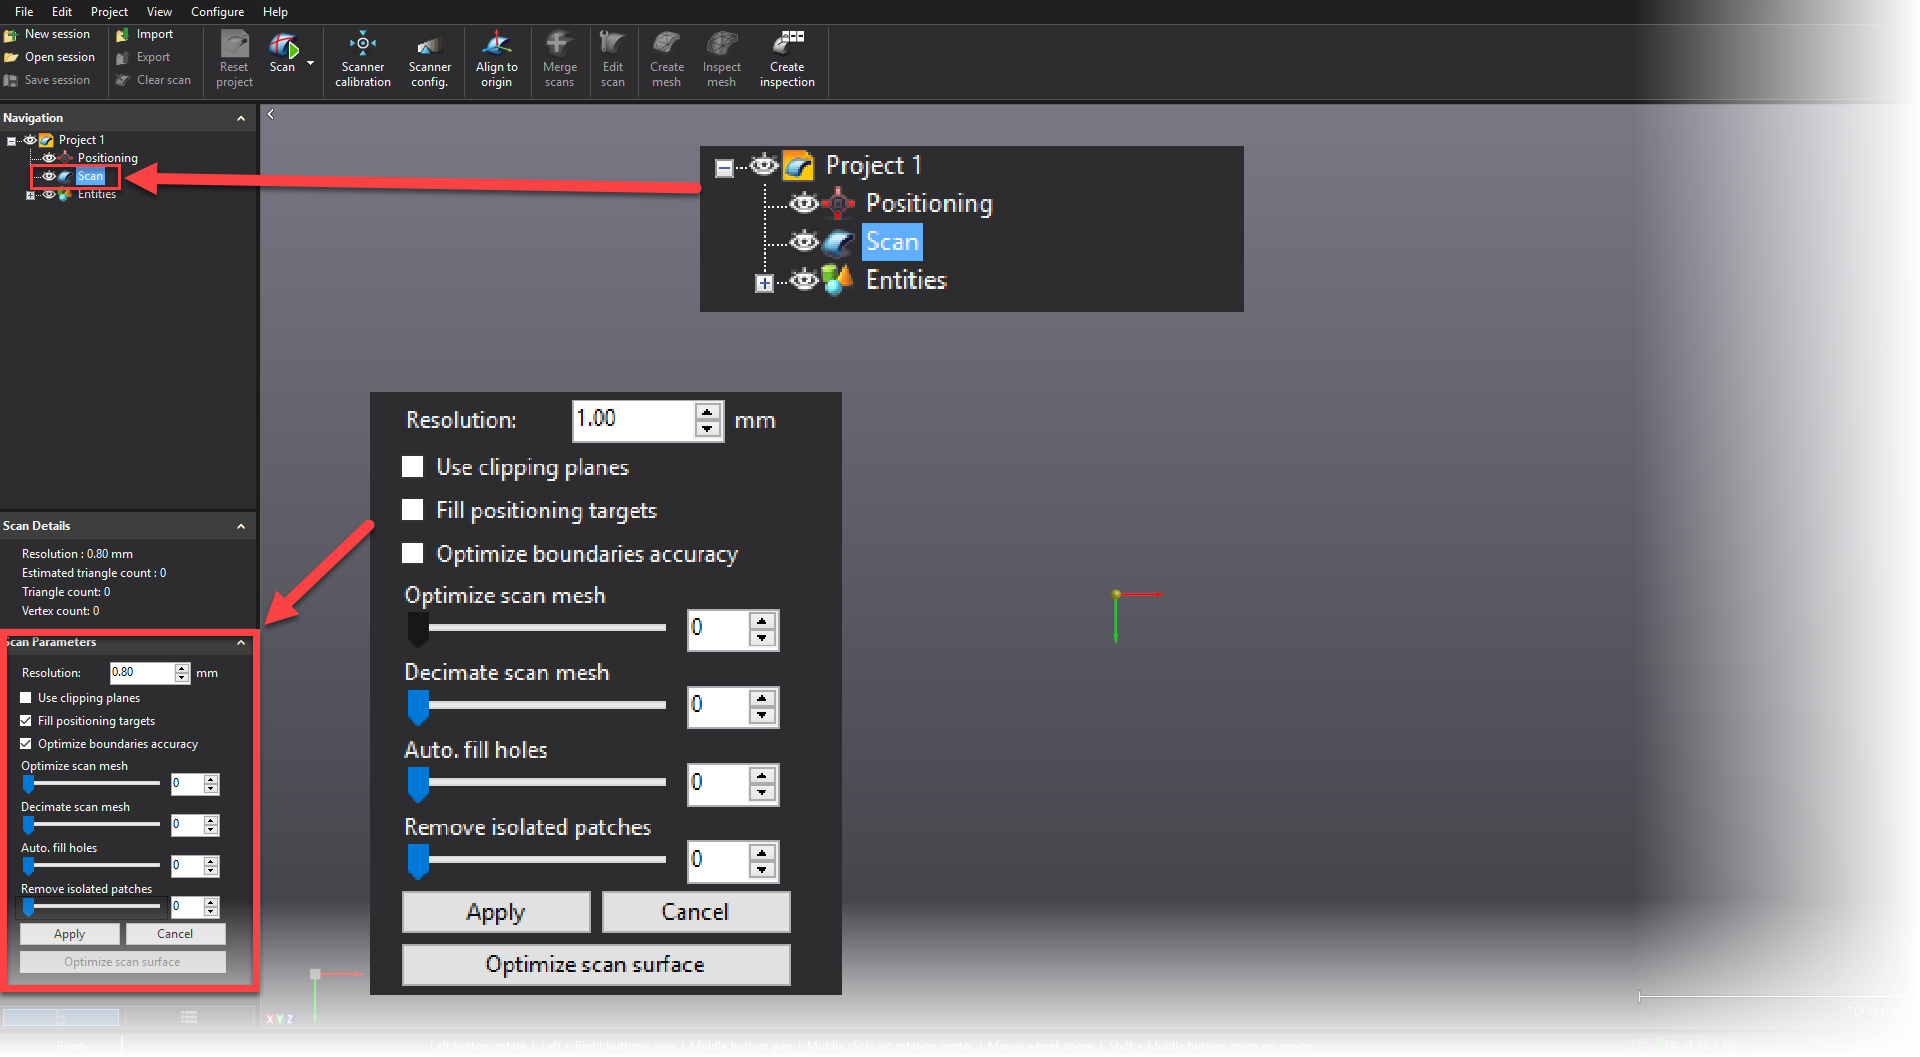
Under your Scan tab in your Navigation tree, you will find a drop down box with a whole bunch of hidden gems to customize called Scan Parameters. By utilizing your scan parameters, you have the ability to fine tune your scanner prior to scanning. This way, when you finish acquiring the scan data, your final product will be that much closer to picture-perfect.
By now you’re probably saying to yourself, “But I have no idea what each of these options actually do.”
Have no fear! The work is already done for you, let’s take a closer look…
Let’s start out by looking at Resolution:
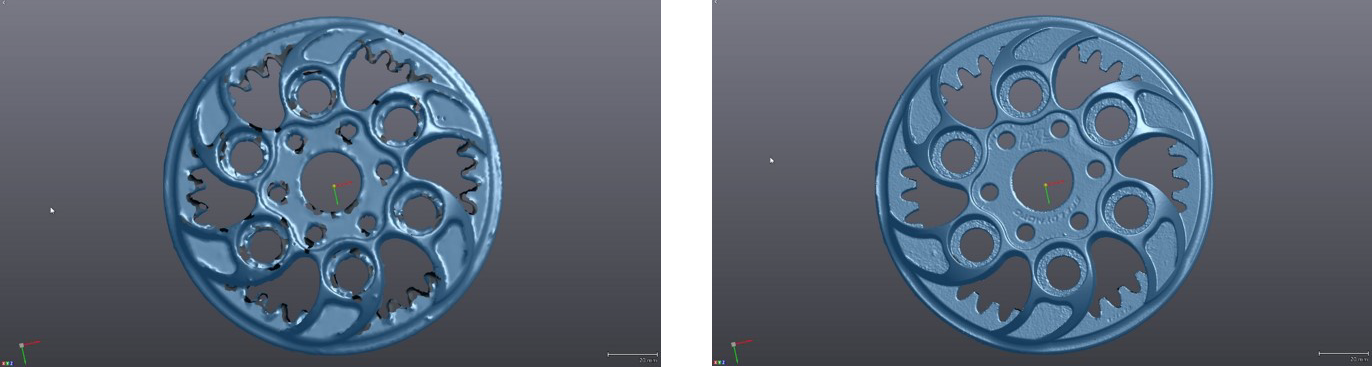
As you can see on resolution alone, most of the imperfections disappeared. This is because the scanner uses only data on the 1mm level to create the mesh, which in turn leads to what appears to be an incomplete mesh, i.e. holes. The downside is that it took 3X longer to scan at a higher resolution and the file size has increased almost 3X as well.
Now let’s look at Optimize scan mesh:

At first glance you will notice subtle differences that almost appear to be an increase in resolution in specific areas. In actuality the mesh file is sub-dividing around sudden changes in the scan to show better definition and the mesh is enlarging around smooth flat surfaces to remain more consistent.
Now the Decimate Scan Mesh option:

Decimate does pretty much what you would expect it to; it reduces the mesh size while trying to maintain the overall design intent. This option does a great job reducing the file size but the price you pay is on small intricacies. It’s mostly noticeable around sharp edges.
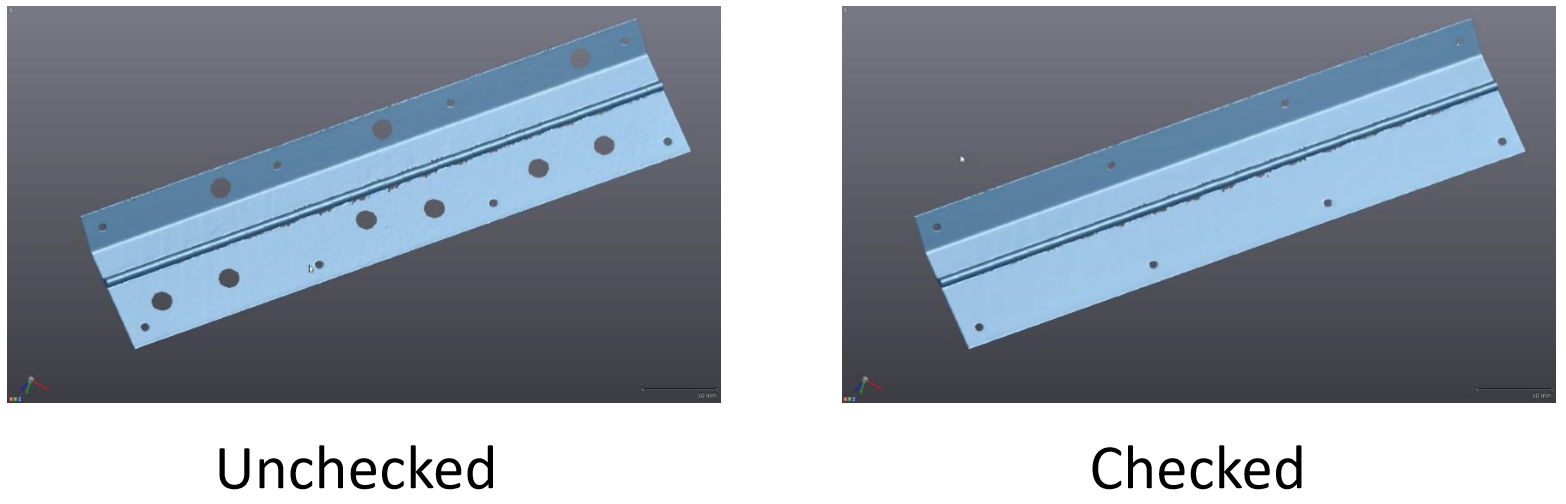
Moving on to Auto Fill holes:
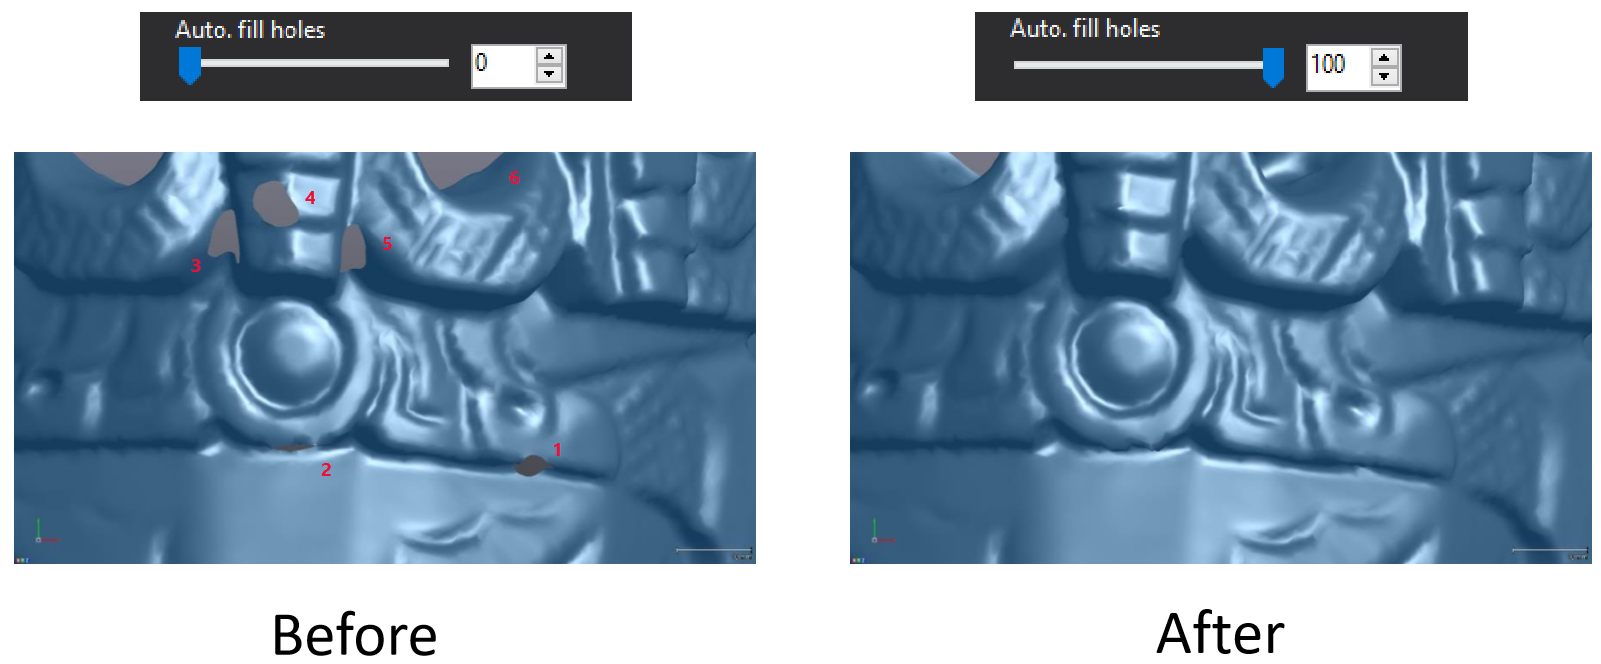
The Auto fill holes is a life saver. This option closes gaps in the mesh by interpolating the curvature of the surrounding areas. The slider bar sets a limit to the size of the hole the program will automatically close. In the example above, holes 1 thru 5 should be closed off but hole 6 was a feature with an open profile therefore the slider should be dialed down to about 90%.
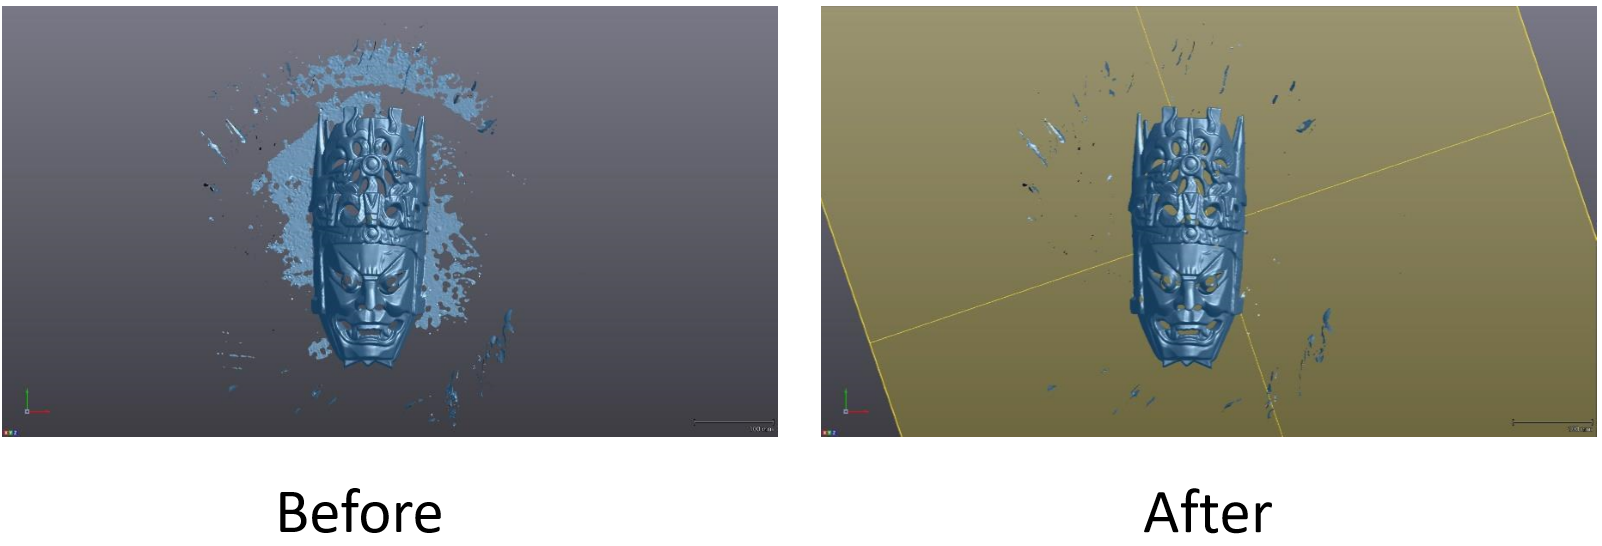
Remove Isolated Patches:
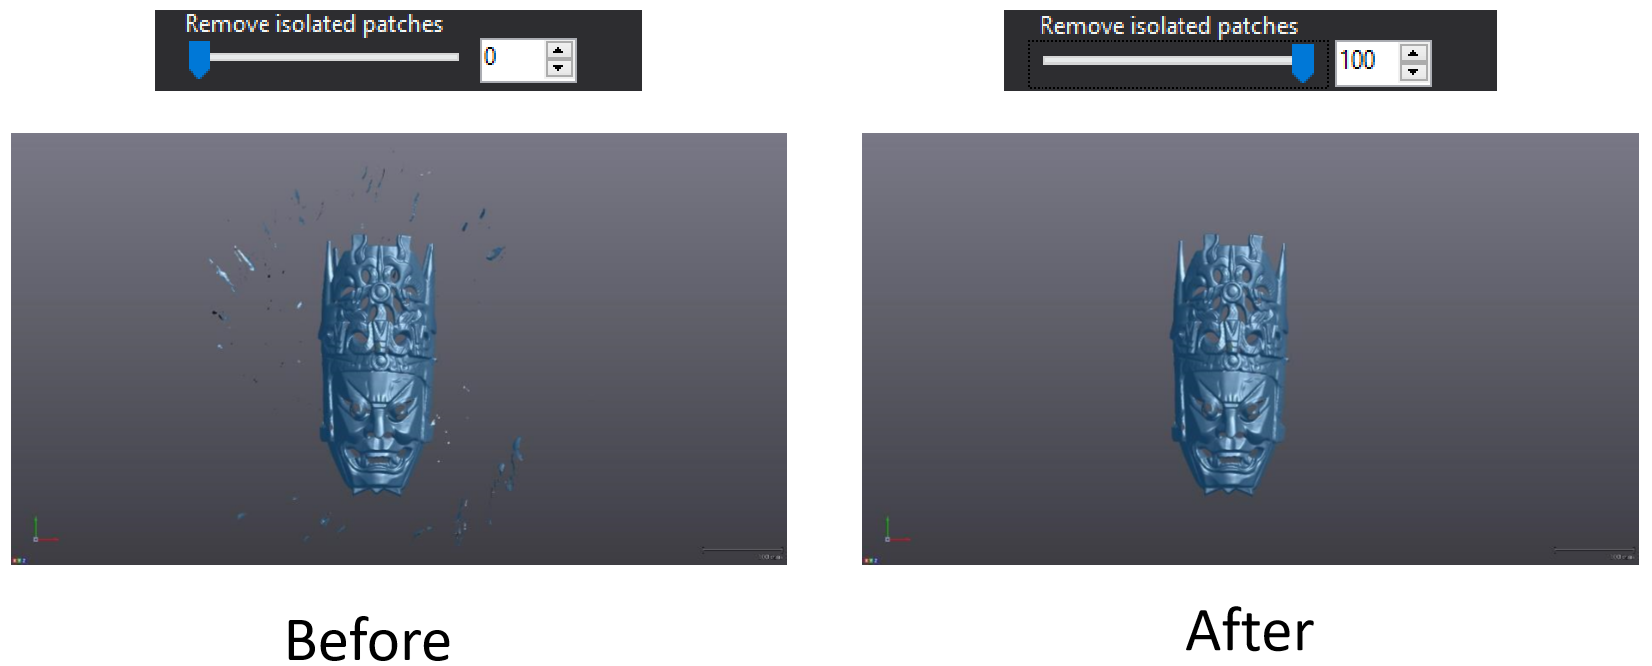
Remove isolated patches is another tool that will save you a few clicks in the long run, by adjusting the slider you have the ability to automatically remove splattered data that is not connected to your scan. The slider bar depicts the size of particles to remove relative to the largest piece of scan data.
Note: this option will slow down your scan time minimally and can cause important data to disappear on smaller parts.
Optimize Boundary Accuracy:
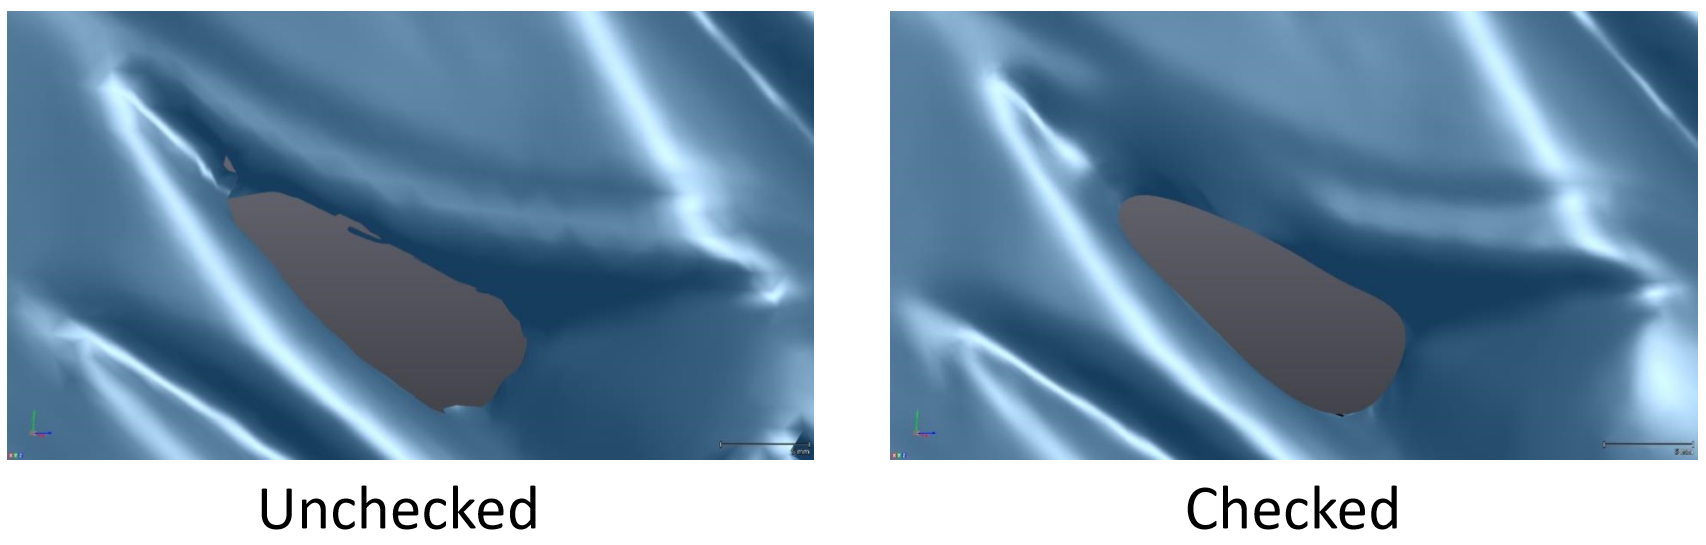
Optimize boundary accuracy is a simple check box option to either activate or deactivate. This option tries to even out the sudden changes along the edges of your scan by interpolating the edge as a spline and then minimize the sharp changes in curvature. In the example above you can notice a decent improvement from checked to unchecked, but from my experience, the determining factor of whether or not this option is useful comes down to what you are scanning. This option does not increase your overall scanning time, so I would recommend testing the waters.
Optimize Scan Surface:
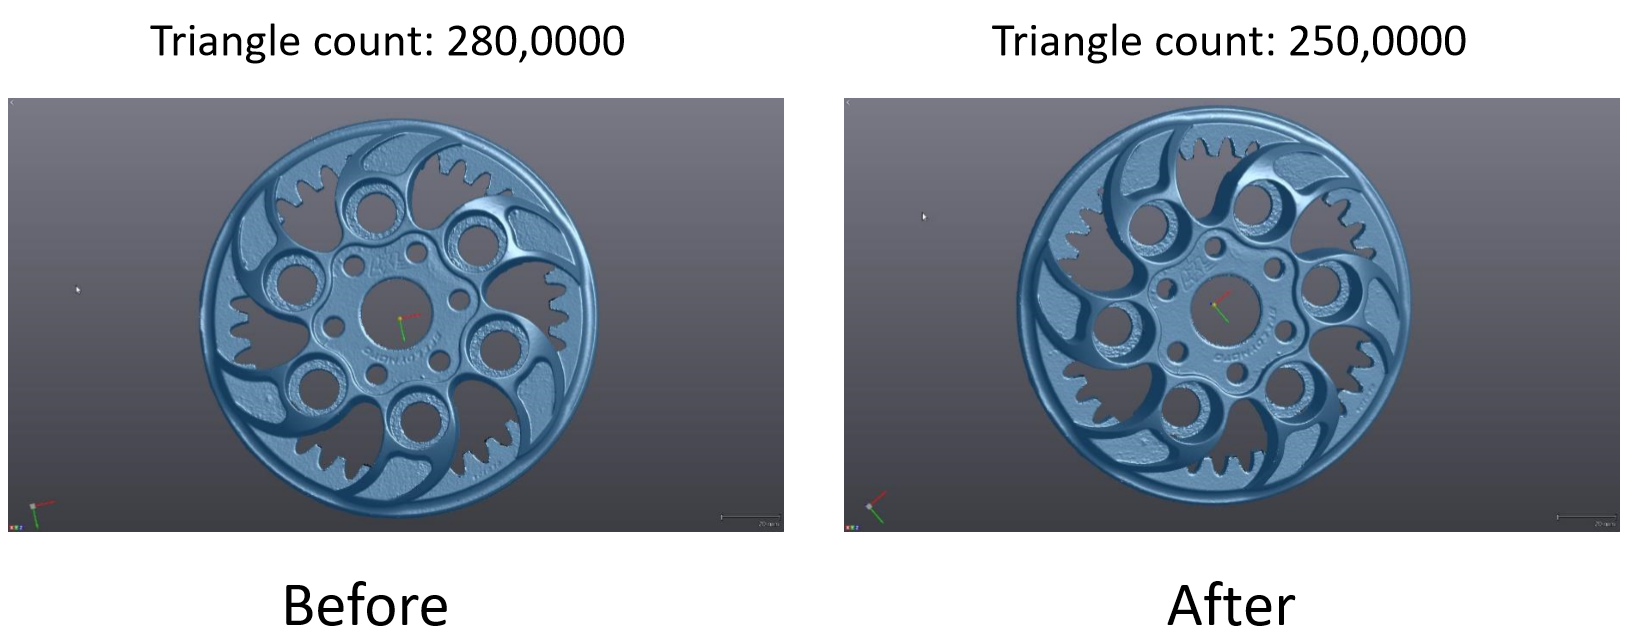
Using the Optimize Scan Surface option is more of a post processing tool. It’s featured in the scan options because it technically is a useful tweak to the scan data prior to post-processing. This tool is used after the scan data is already acquired, giving you the opportunity to minimize the amount of surface triangles needed to create the scan. This option does take a bit of processing time, but the results still hold the design intent and the file size is reduced.
Fill Position Targets
This is just another type of automatic hole filling while scanning, except that the software has a pre-programed diameter and thickness to fill the holes with. There are only a few times where I would suggest leaving this option off one being; if you apply a target to a curved surface and the circular diameter of the target might be interpolated as an ellipse. But for 99% of the time, this option should be activated unless you enjoy tedious, unnecessary efforts.
Finally, we come to Use Clipping Planes:
This is a seriously underutilized option, particularly if you are using a jig station with pre-set positioning targets. Prior to scanning your part, you can acquire the surrounding targets and use them to create a bounding box or cut planes to remove unwanted data while scanning. This option will drastically reduce your scanning and post-processing time plus it will aid visually by allowing you to focus on your part and not be distracted by surrounding splatter.
Thanks for reading and remember:
The engineer’s first problem in any design situation is to discover what the problem really is.
Bob Renella
Application Engineer
Computer Aided Technology