SOLIDWORKS: Task Scheduler for Simulation Runs
Task Scheduler for Simulation Runs
By now, must people know the benefit that the “Run All Studies” and “Run Specified Studies” that SOLIDWORKS Simulation provides. These functions are limited in that they only work for a single part/ assembly file with or without different configurations. However, what happens when there is more than one file with multiple studies that need to be solved overnight? To accomplish this, we can turn to the often underused SOLIDWORKS Task Scheduler. Task scheduler allows users to automate a multitude of repetitive tasks including importing/ exporting files, Updating files, printing, rendering, and of course, updating Simulations in SOLIDWORKS.
In order to run SOLIDWORKS Simulation studies with the Task Scheduler, simply follow the steps listed in this blog.
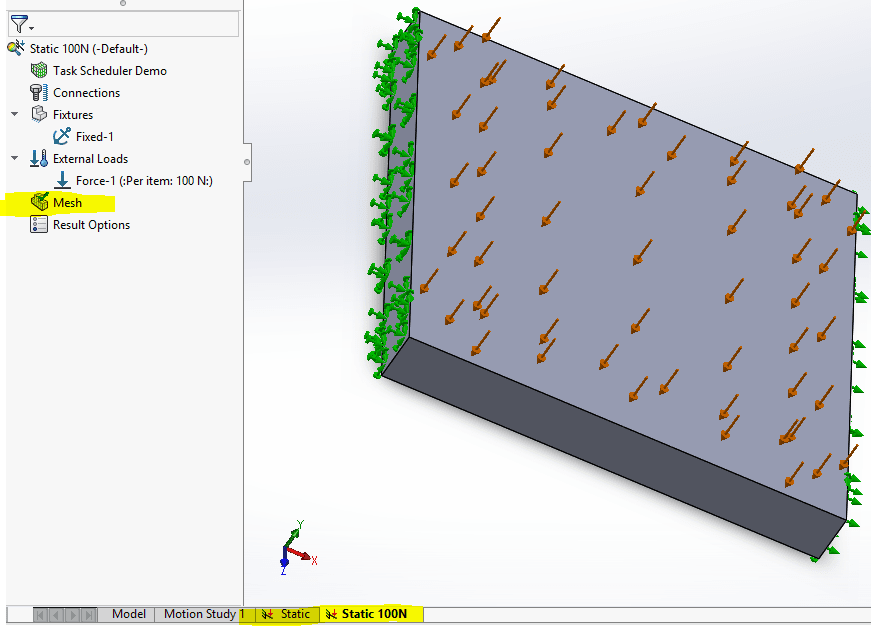
In this case, I have a simple part with 2 studies already defined. Notice that the mesh has been generated beforehand. The Task Scheduler seems to do better if the mesh is pre-generated, otherwise it just uses defaults for the mesh.
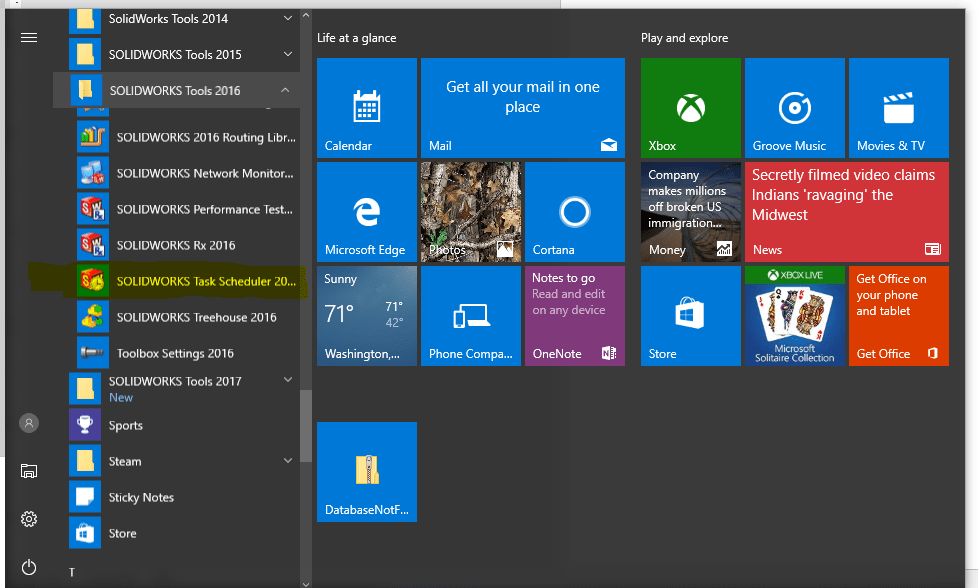
Open Task Scheduler: Search in the start menu for the Task Scheduler that matches the major version of SOLIDWORKS Simulation you would like to solve on. It is under SOLIDWORKS Tools [Major Release Number] -> SOLIDWORKS Task Scheduler [Major Release Number].
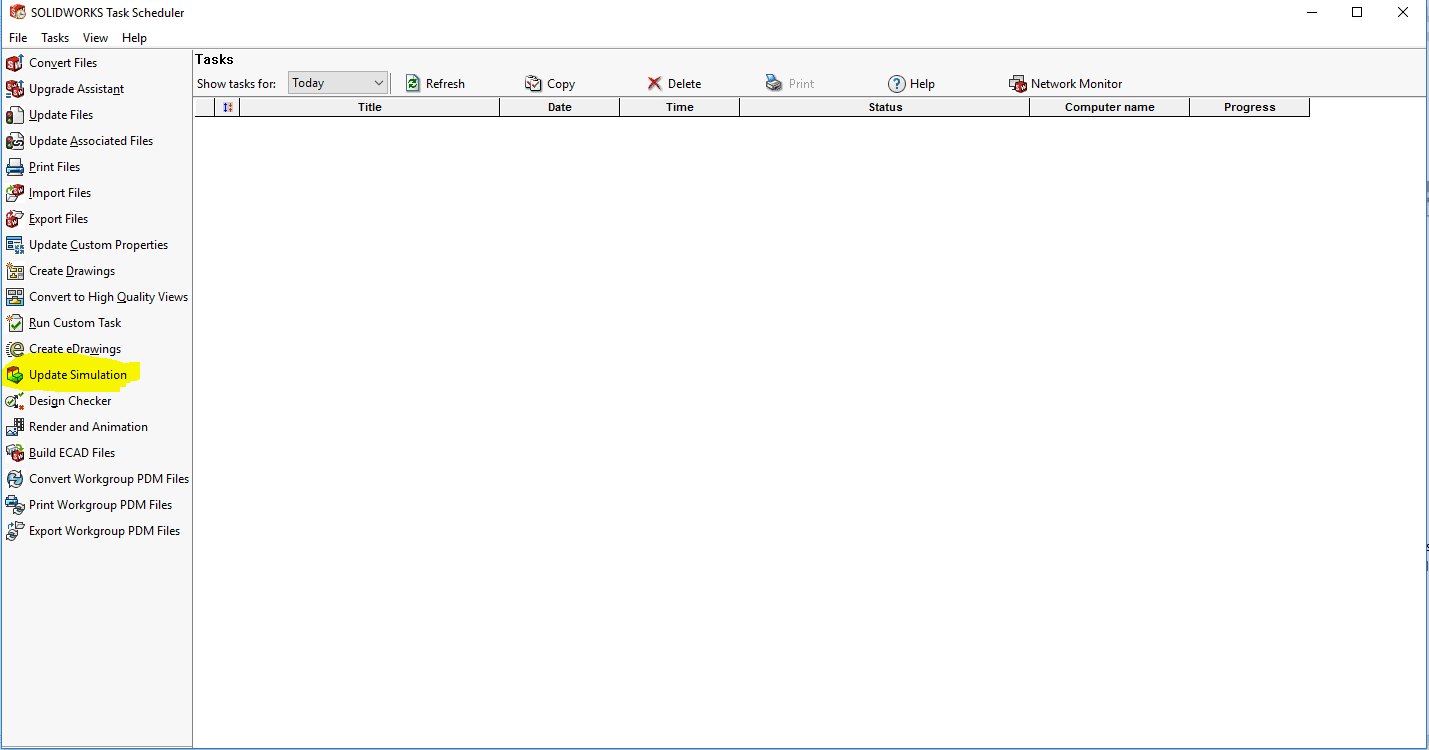
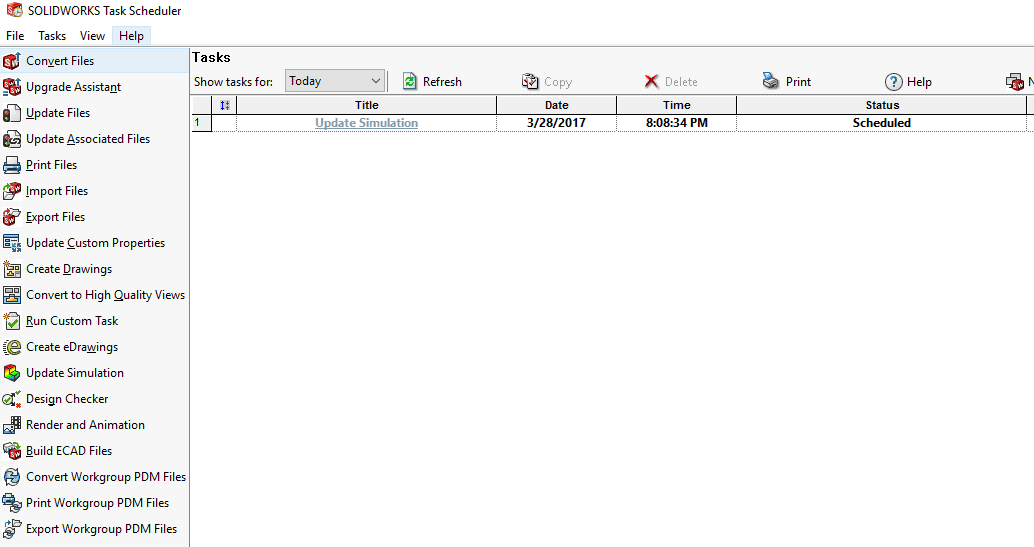
Set up tasks: Click on “Update Simulation” in the Task Scheduler.
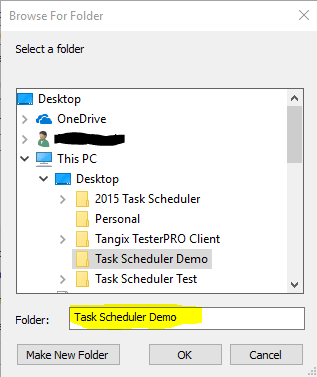
Click Add folder or Add File. Add folder will update previously setup Simulation studies on all parts in the folder, Add File will run it for a specified file. In this case, I will be doing an Add Folder.
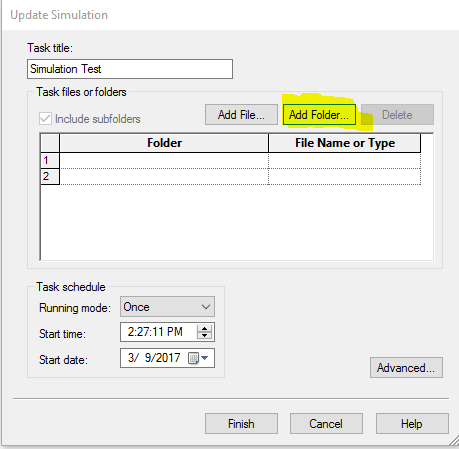
Find the name of the Folder containing the part or assembly you wish to have the studies run on. Again, the studies must be pre-defined.
Once the folder is selected, it will appear in the task queue. Click the “Advanced” button. Make sure that you have given the task adequate time to complete (default is 1 hour, many simulations may take longer than this). Also, in the task working Folder Box, browse to the folder that your Simulation Results points to or you will get a “Database Not Found” error when attempting to view results.

Click “OK” and select “Finish.” The Task Scheduler will perform the task at the time specified in the task schedule dialogue box. Your task will be moved to the Task Scheduler queue.
After you have a study set up, it is just as easy as repeating the above process for other files that need to be solved. Make sure that enough time is allotted for the first file to solve before you task the next to begin.
You may see a small SOLIDWORKS window open and blink a few times, this is normal. It may also request you to re-save your file and include result files. Rename the file and click “yes.” Once complete, you will see the status of the task updated and you can go and see your results!


The Task Scheduler is a great tool provided with any SOLIDWORKS license that helps automate the tasks that may take up valuable time otherwise. Yet another way SOLIDWORKS is out to help YOU be more productive!
Matt Sherak
Simulation Application Engineer
Computer Aided Technology