CREAFORM 3D Scanning: Tips & Tricks - Scan-to-Print on the New Stratasys F123 Series
Scan-to-Print on the New Stratasys F123 Series
As part of our CREAFORM blog blast, I’ll be talking about how to use a HandyScan 700 3D Scanner in conjunction with a new Stratasys F370 to get a printed replica of an existing part in just a few hours!
A lot of times, designers want to take an existing object or mock up, and bring it into a digital environment where they can make modifications. Often times, we aren’t looking for an in-depth reverse engineer, we just simply want to scale it differently, or remove a certain feature. Using CREAFORM’s HandyScan 700 and VXmodel software, we are able to easily capture a physical object, make our modifications, and prepare it for 3D printing.
For today’s example, I scanned in my ergonomic computer mouse. This mouse was designed to reduce strain on the user’s wrist, but was scaled to fit an “average” size. I’m going to use some scaling functions in VXmodel to size up the mouse, then print it out on a Stratasys F370 to see if a larger size has more ergonomic value for me.
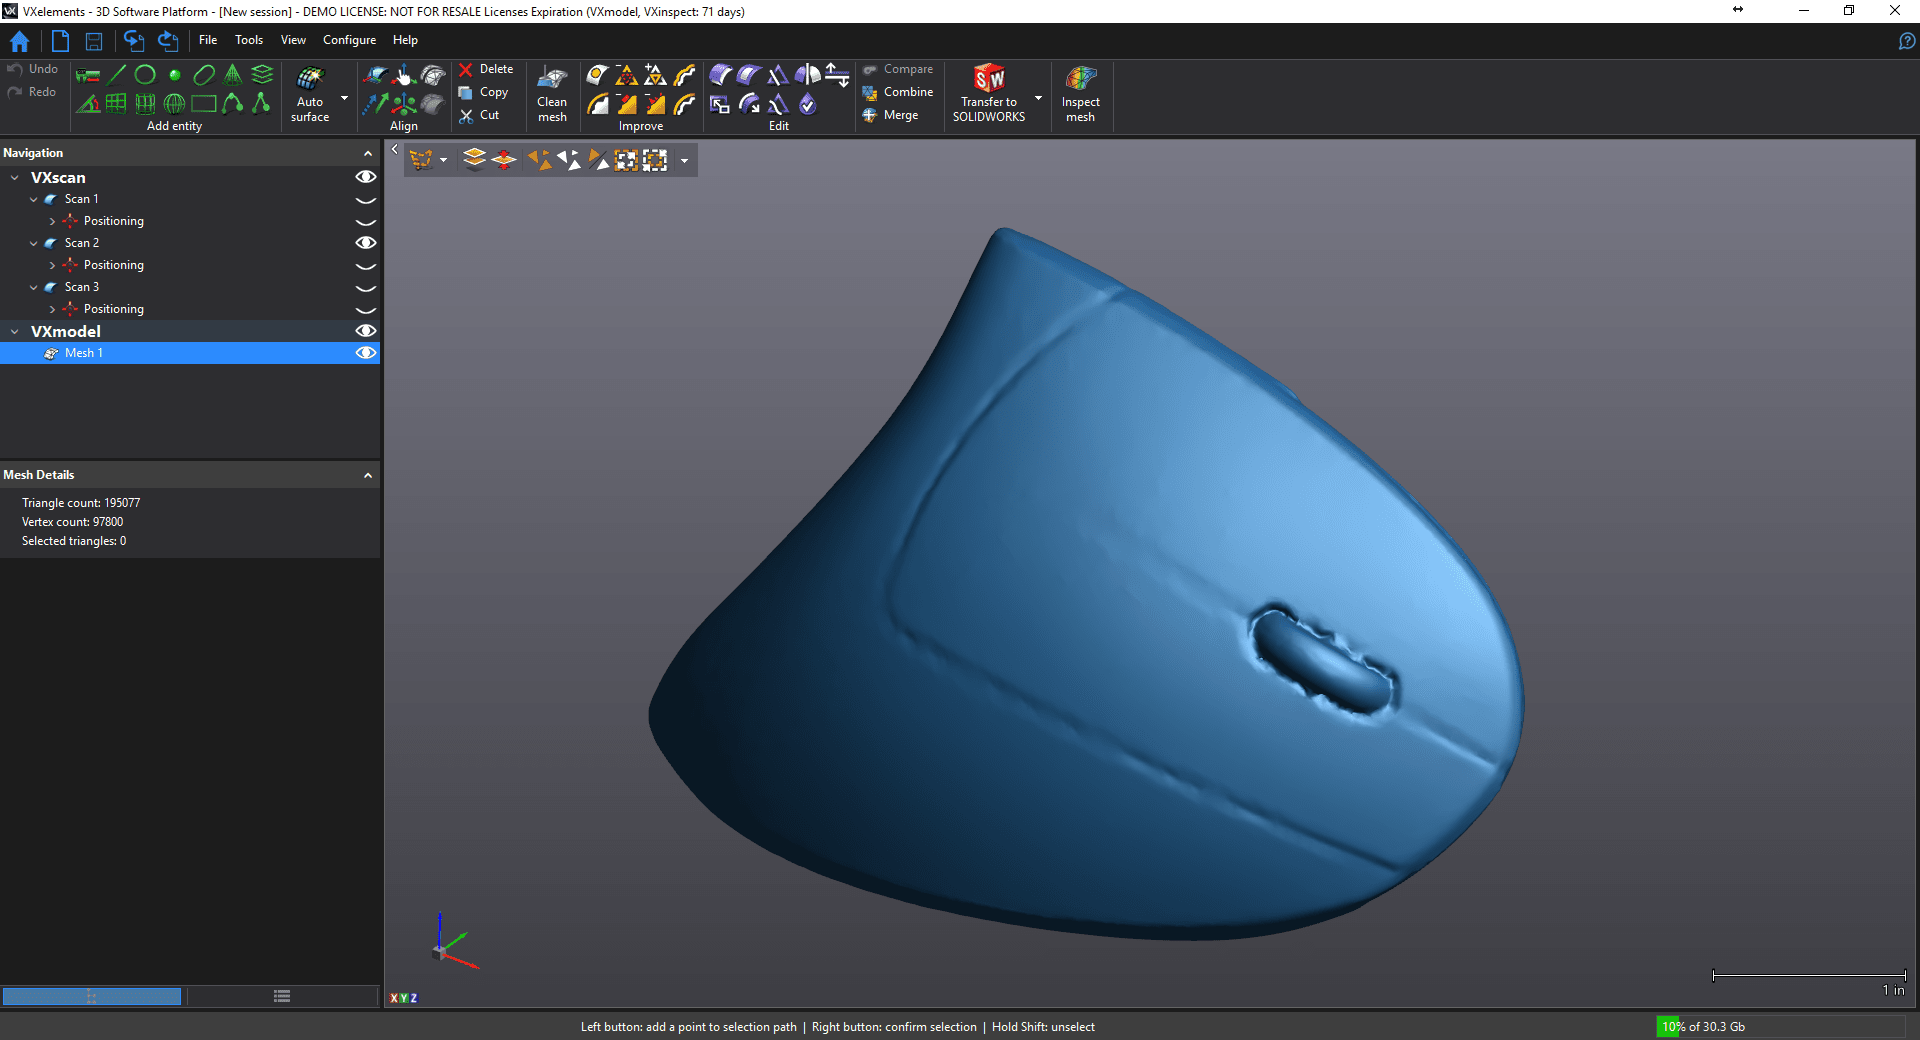
In this first screenshot, you can see my completed scan of the mouse. I merged 3 scans together to make sure I got a complete scan.
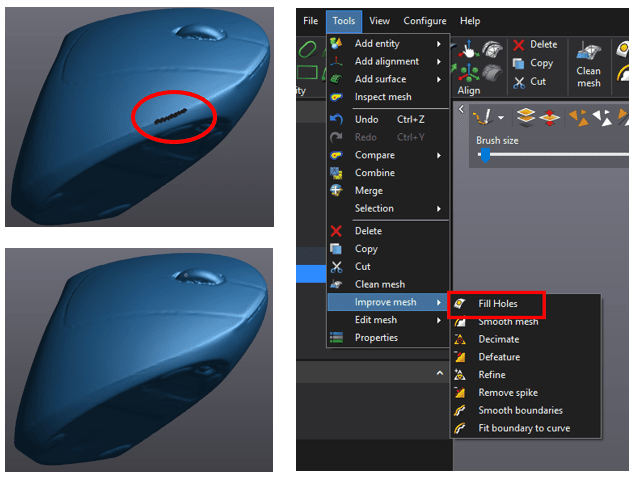
If we look at the bottom face, we see a lot of features that I don’t really want in the printed model. Removing these is very simple using the Defeature tool. We simply highlight the feature we want to remove and click on “Defeature” and the software does the rest of the work for us. As you can see in the images below, VXmodel does a great job of filling in the selected area as if those features were never there.

We can also go through and make sure we fill in any holes on areas where we might have missed scanning by using the Fill Holes tool.
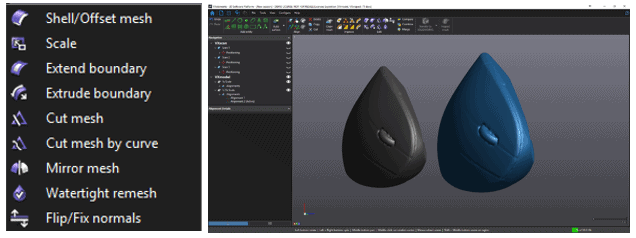
From here, we can make any modifications to the part such as scaling, extruding, or cutting as shown in the menu below. In this example, I’m going to use the scale tool to enlarge the mouse by 15%.
Finally, before we can send this part to a 3D printer, we need to make sure it’s watertight, or that there are no holes, gaps, or flipped triangles. Using the Clean Mesh tool allows us to easily fix many of these common issues. In the left image below, you can see the number of instances of all the listed issues, and on the right is after the mesh cleaning has been performed.

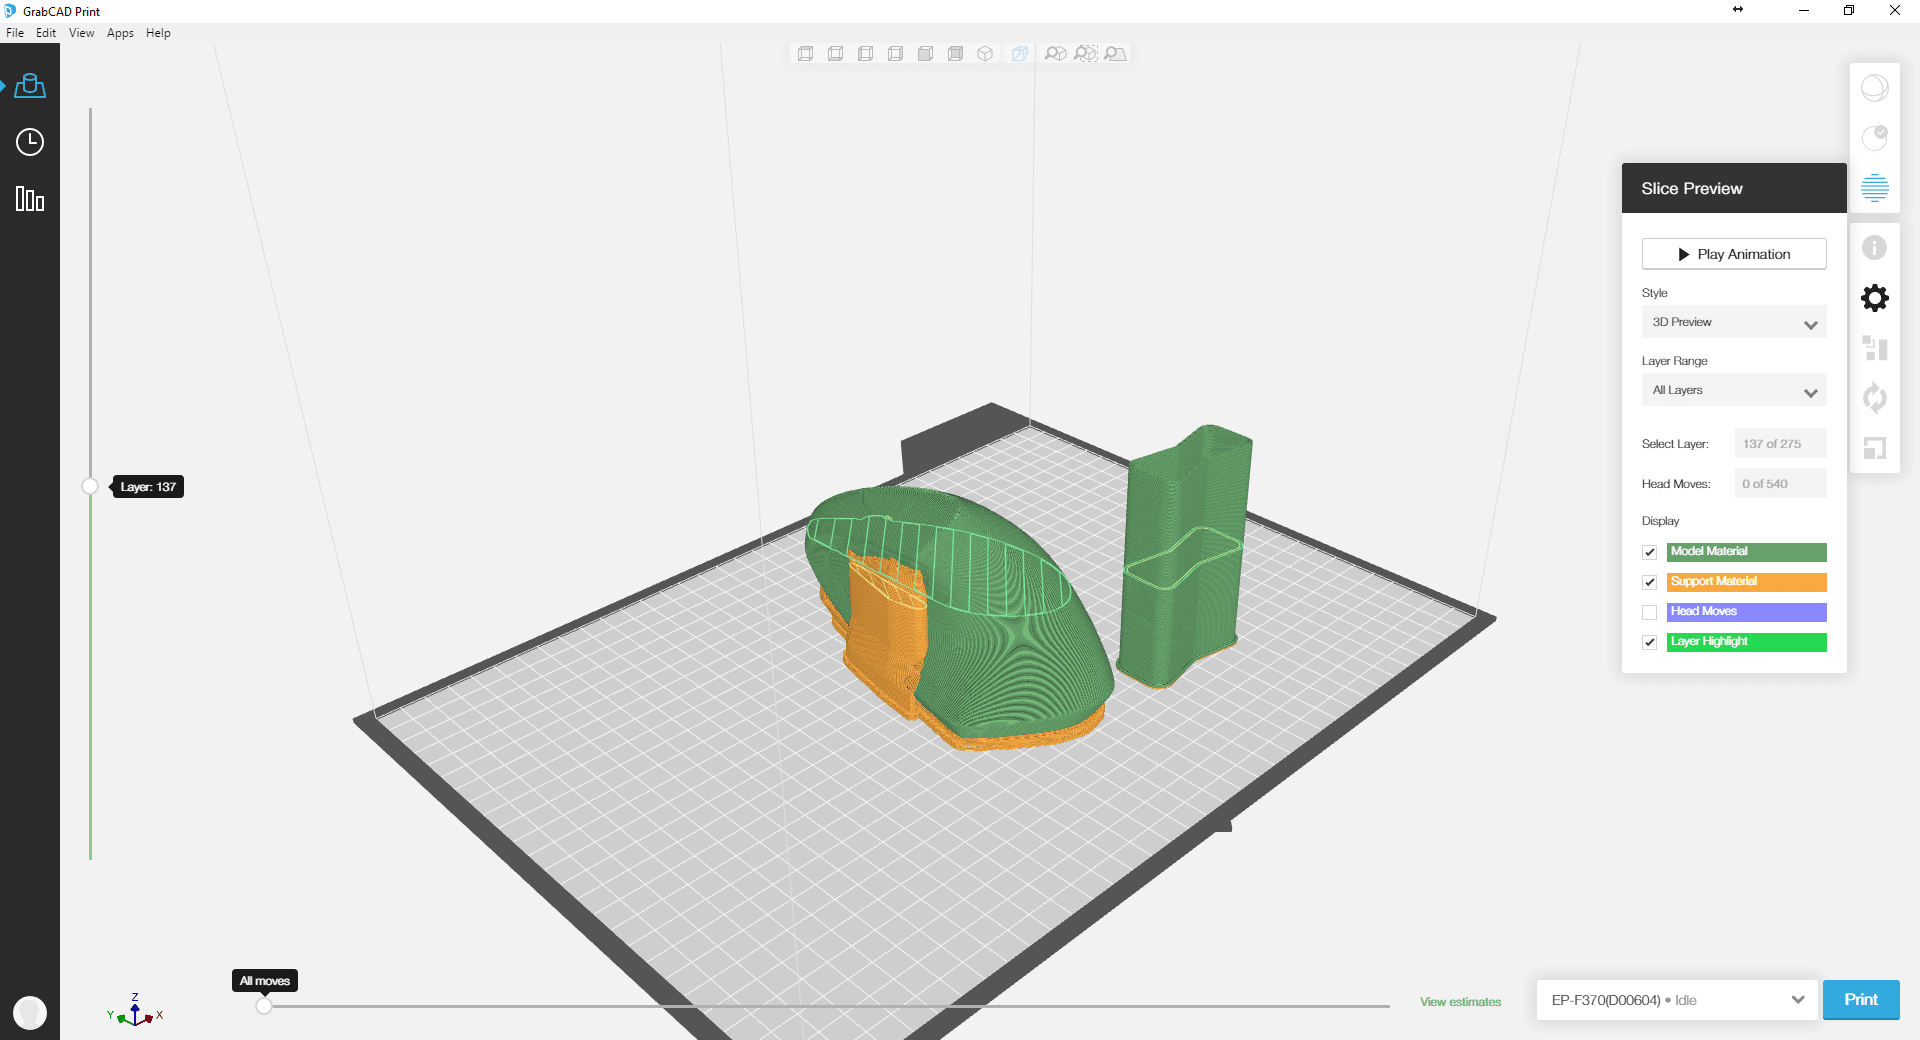
At this point, we are now ready to print! I can export this mesh out as an STL file, open it up in GrabCAD Print, and send it over to my Stratasys F370 printer. By the time I leave the office today, I will have a printed model of my mouse scaled to 115% that I can use to check the ergonomic fit for my hand.

Owen Lu
Application Engineer
Computer Aided Technology