SOLIDWORKS: Renderer Selection in SOLIDWORKS Visualize
Renderer Selection in SOLIDWORKS Visualize
Selecting the best rendering method for the job at hand is one of the most important decisions a user of SOLIDWORKS Visualize can make. The renderers and options that Visualize offers are best suited to different points in a typical workflow and can help the user greatly increase her or his efficiency. This article/case study discusses those renderers and the best times to use them.
Because Visualize leverages both CPU and GPU hardware, the “preview” of the render in the Viewport as you set up the shot is actually a real-time rendering. This means that what you see in the Viewport and what you get when you output the render are one and the same. As such, it is important to consider what renderer you are using not only when you are setting up the shot, but also when you are outputting the final image.
The real-time Viewport Renderer can be selected from the Main Toolbar (the toolbar that appears when hovering the cursor over the top portion of the Viewport).

And the output Renderer can be selected from the Output Tools Dialog (surprise, surprise).

SOLIDWORKS Visualize has four render methods: Preview, Fast, Accurate, and PowerBoost (Note: PowerBoost/Visualize Boost is available only in Visualize Professional and will not be covered in this article. For more information on Boost please read Installing And Configuring A Visualize Boost Machine by the mythical Jordan Puentes and SOLIDWORKS: Setup and Troubleshooting Visualize Boost by the legendary Alex Worsfold).
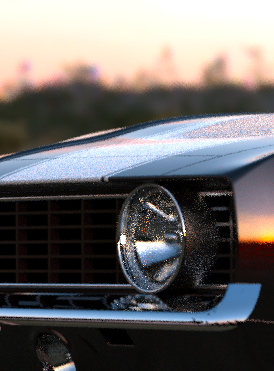
![]() The Preview Renderer allows you to position and manipulate the model, scene, and cameras with little to no noticeable graphics lag. Some of the advanced, resource-intensive features of the software are turned off, but the model retains a rendered appearance (similar to using RealView graphics in SOLIDWORKS).
The Preview Renderer allows you to position and manipulate the model, scene, and cameras with little to no noticeable graphics lag. Some of the advanced, resource-intensive features of the software are turned off, but the model retains a rendered appearance (similar to using RealView graphics in SOLIDWORKS).
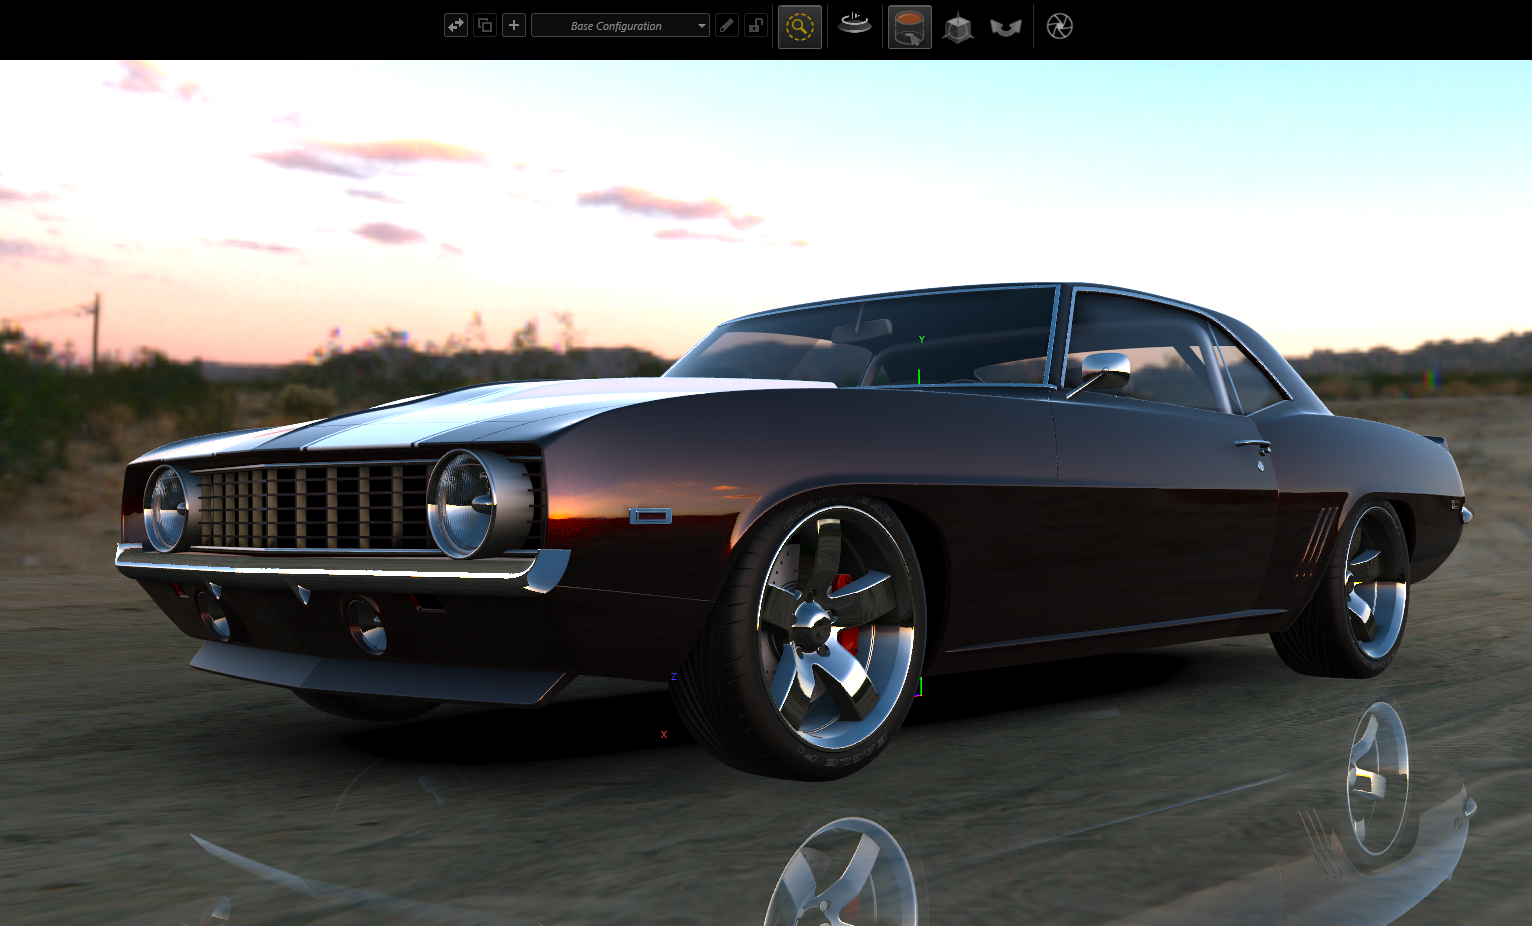
Preview Rendering Mode
The Preview Renderer is great for the initial setup of the shot. Using Preview mode, you can position the model in the environment and move the camera without having to wait for the image in the viewport to catch up. It is particularly useful if you have an especially large or complex model. However, because Preview uses a simplified subset of the software, it is not a visually accurate renderer.
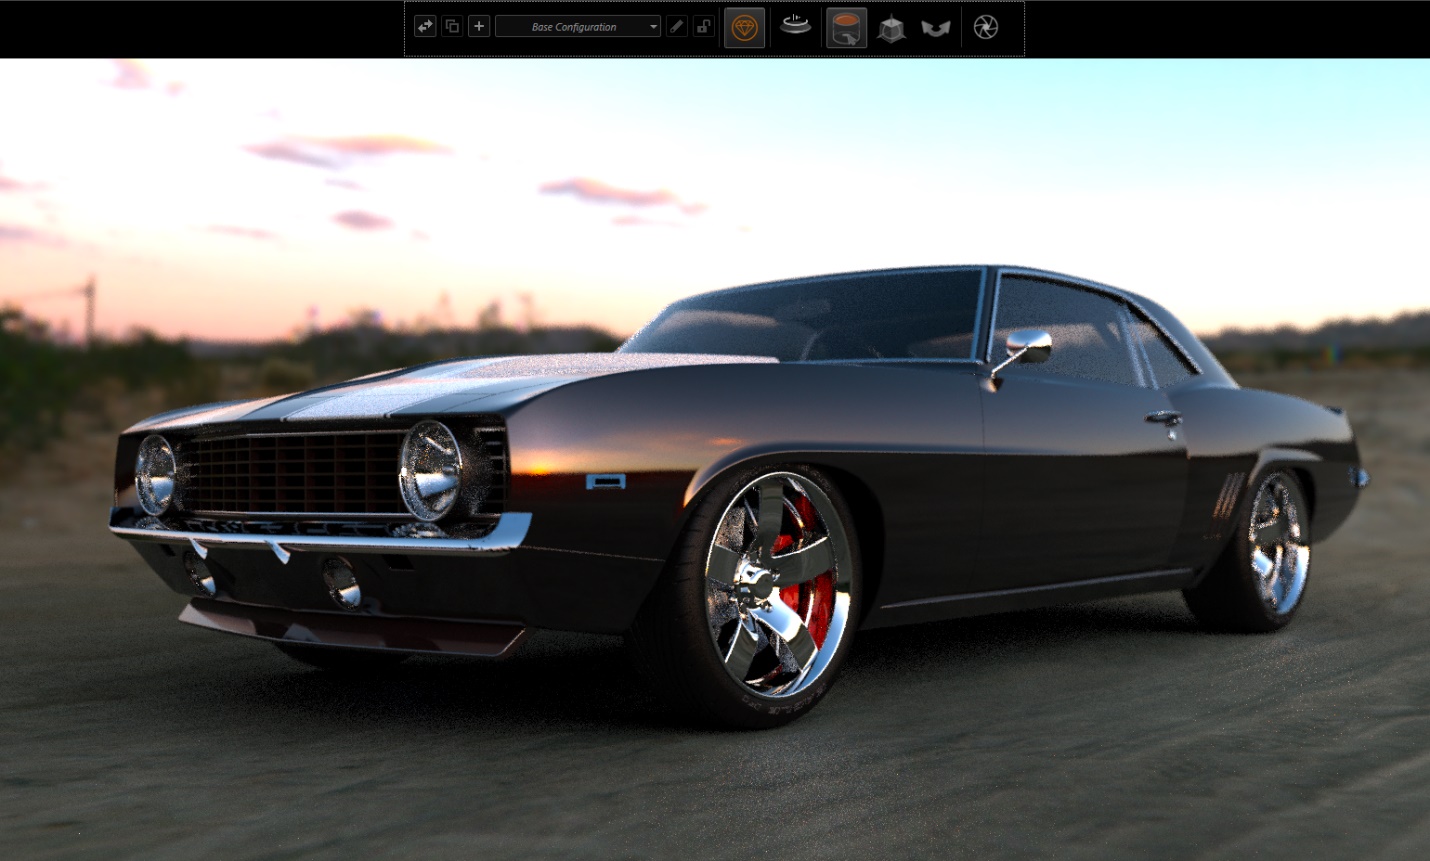
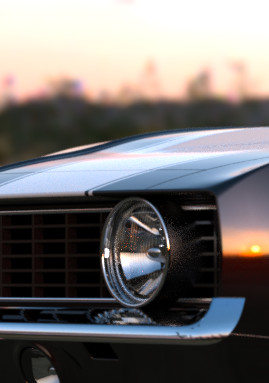
![]() Fast rendering takes the next step towards photorealism by enabling one of SOLIDWORKS Visualize’s core rendering techniques: raytracing. Raytracing works by tracing the path a ray of light takes as it travels from its source to the point where it has no further influence on the scene. With Fast rendering, the image in the Viewport will now be realistically illuminated, but still optimized for low rendering time.
Fast rendering takes the next step towards photorealism by enabling one of SOLIDWORKS Visualize’s core rendering techniques: raytracing. Raytracing works by tracing the path a ray of light takes as it travels from its source to the point where it has no further influence on the scene. With Fast rendering, the image in the Viewport will now be realistically illuminated, but still optimized for low rendering time.

Fast Rendering Mode optimized for Quality (10 seconds of elapsed rendering time)
The Fast renderer showcases Visualize’s ability to excellently balance render speed and quality. Theoretically, the Fast renderer is best suited for making minor adjustments to the lighting, appearances, and effects after having set up the shot. That said, it is so well optimized that if the model and/or environment are sufficiently simple, you can skip the Preview renderer and simply use the Fast renderer to position the model and camera.
The screen capture above was taken in Fast mode after just ten seconds of elapsed rendering time. There is some noise around the headlights and wheels, but it’s such a small amount that I would feel comfortable leaving the Viewport in Fast rendering if I needed to make a change to the shot.
In Visualize 2017 SP2, a new tool was introduced to further optimize the Fast rendering mode for the Viewport. By navigating to the Tools, Options…, ‘3D Viewport’ tab you can access two radio buttons that allow you to prioritize the Fast renderer for render speed or quality.
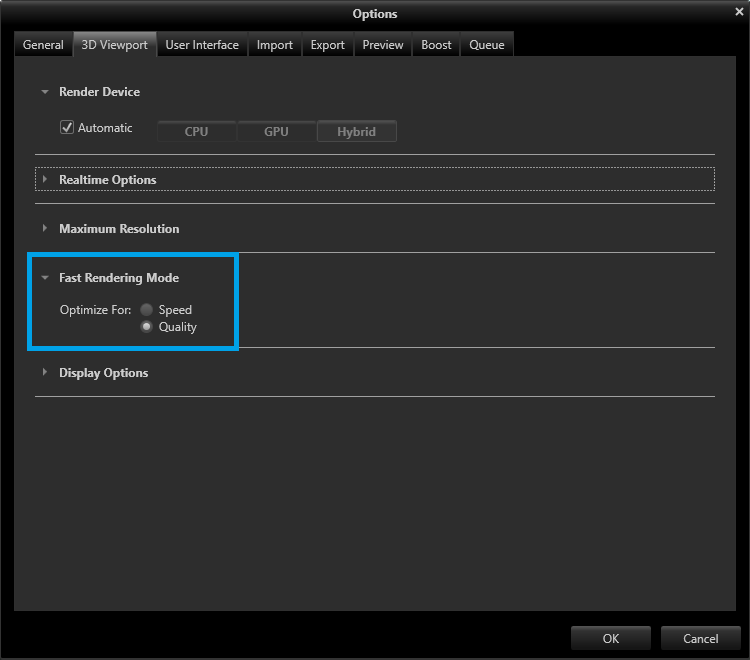
Choosing Optimize For Speed can cut rendering time in half by turning off self-shadowing and transparent reflections, such as glass. This is great if you want to use Fast mode when setting up the shot or if the shot does not include any transparent objects, with the obvious downside being a loss of visual accuracy.
Choosing Quality increases the accuracy of the raytracing, resulting in more realistic representation of light and shadows. This technique is also the difference between the Fast renderer and the Accurate renderer (more on that below) but to a lesser extent. For reference, the screenshot above was taken with Quality selected in Fast mode.
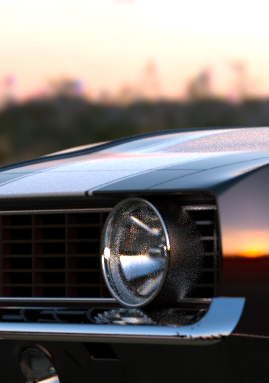
![]() The Accurate renderer also leverages raytracing, but with more stringent calculations of the light paths. This results in the most precise rendering possible with Visualize. Because the Accurate render places so much importance on exactness, it is the most time-intensive mode.
The Accurate renderer also leverages raytracing, but with more stringent calculations of the light paths. This results in the most precise rendering possible with Visualize. Because the Accurate render places so much importance on exactness, it is the most time-intensive mode.
Accurate Rendering Mode (10 seconds of elapsed rendering time)
In this screenshot—taken using the Accurate rendering mode—there is significantly more noise compared to the Fast, Quality image after the same elapsed time. Let’s take a closer look at the details.
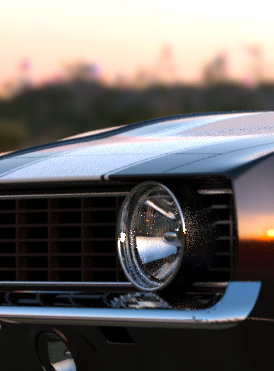
Detail of Fast, Quality (10 seconds of elapsed rendering time)
Detail of Accurate (10 seconds of elapsed rendering time)
As you can see, the Fast renderer optimized for quality has a major advantage over the Accurate renderer after 10 seconds. This is because Accurate is running more calculations and simply can’t keep the same pace as Fast. For this reason, Accurate mode should not be used when setting up the shot, and ideally would only be turned on to compare to Fast, Quality results. Though it is more time consuming, using the Accurate render in the Viewport can help when deciding which renderer to use during output, as is illustrated by this comparison after 60 seconds.
Detail of Fast, Quality (60 seconds of elapsed rendering time)
Detail of Accurate (60 seconds of elapsed rendering time)
After 60 seconds, the Accurate render still has more noise, but the difference is not as drastic. Additionally, notice the reflection from the sun and the highlights around the headlight and its bezel. The Accurate renderer has created a softer, more natural look in both areas. The image is also not as dark overall. These details are subtle but important, and ultimately it is up to you to decide which render method is the best for the job. In this case, both the Fast, Quality renderer and the Accurate renderer are reasonable choices as output render methods (depending on what the final image will be used for).
Appendix A: More Options for Fast and Accurate Rendering
There are several settings available when in Fast or Accurate mode to optimize the Viewport. These options are referred to as Interactivity Acceleration, as they are meant to speed up how the Viewport reacts as you such as move the camera or the model, play an animation, or edit the scene or appearances.
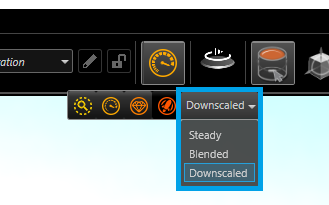
Steady
If Steady is selected, Interactivity Acceleration is turned off.
Blended
Choosing Blended will automatically switch the renderer to Preview whenever you interact with the Viewport. Once the interaction stops, raytracing will be blended back into the rendering method.
Downscaled
Using the Downscaled accelerator will reduce the size of the viewport as you interact with it. This will speed up interaction, but will result in lower image quality during interaction.
Appendix B: System Specs
SOLIDWORKS Visualize 2017 SP3
Windows 10
Intel Core i7-6820HK Quad Core @ 3.6 GHz
NVIDIA Quadro M3000M (with Cuda Core-enabled driver)
16 GB RAM
NVMe Solid State Drive
Aarya Engineer
Application Engineer
Computer Aided Technology