SOLIDWORKS: Do you WRAP? Not like JAY-Z or Lil Wayne
Do you WRAP? Not like JAY-Z or Lil Wayne
The Wrap feature in SOLIDWORKS is great if you are trying to project a sketch without any distortion around a surface and cut or add material to that part. It supports any face which is planar, cylindrical, conical, extruded, or revolved.
Let’s go thru the step to create a Wrap feature.
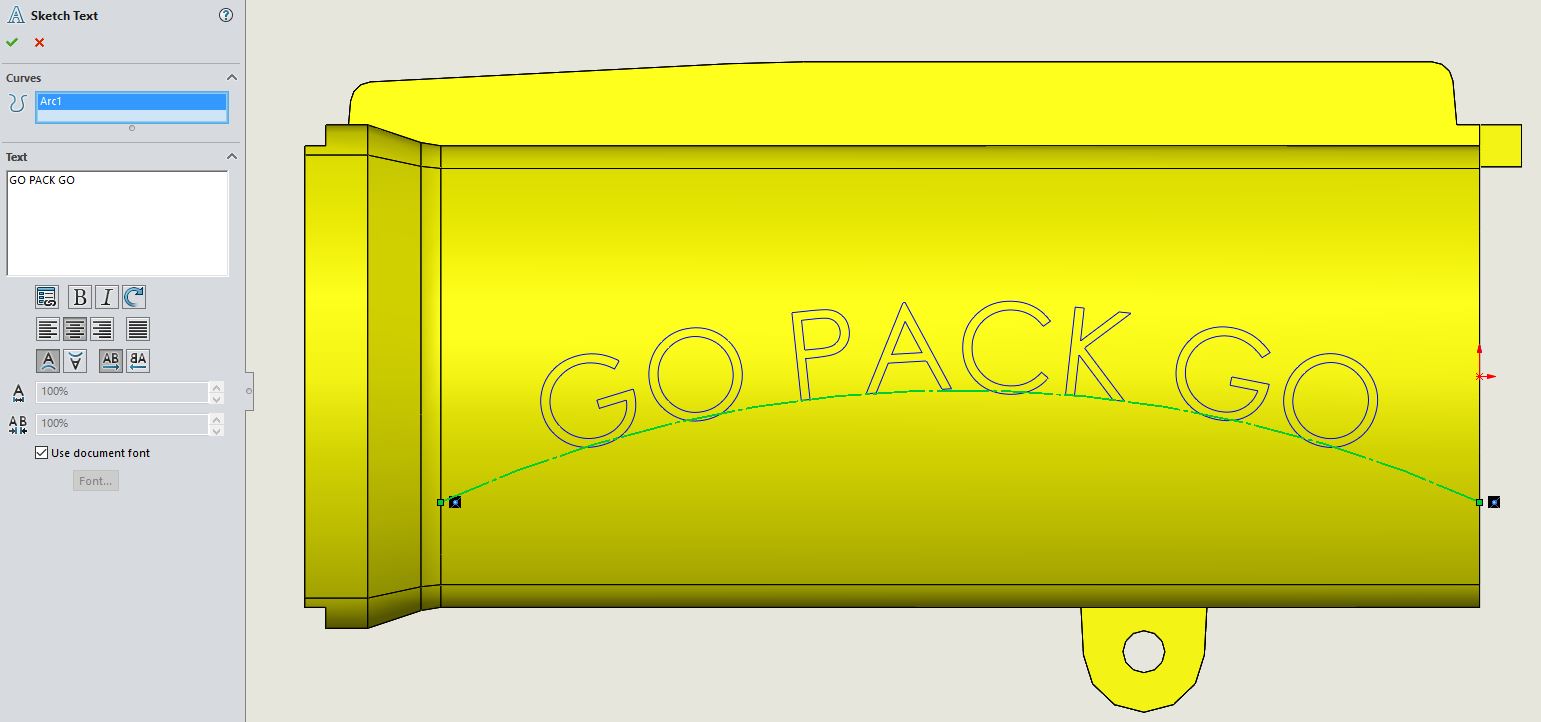
First, let’s create a new sketch and add some text. You cannot create a Wrap feature from an open contour sketch. You must create using closed contour only.
When creating the Sketch Text, you have some options. You can select an edge, curve, sketch or a sketch segment as reference to place the text. I’ll use an arc centerline and add my text. You can align text to the left, right, center and so on. You can also change the font, font size width factor and spacing.
Hit the green check mark and confirm the sketch. We are ready to create the Wrap feature.
From the Features Tab, click Wrap or at the Menu bar click Insert, Features, Wrap.
In the source sketch selection box, pick the sketch. We have some options. For the Wrap Type you can choose:
Emboss, creates a raised feature on the face.
Deboss, creates an indented feature on the face.
Scribe, creates an imprint of the sketch contours on the face.
In SOLIDWORKS, there are two methods to create a Wrap feature.
The Analytical method wraps a sketch onto a planar or non-planar face. You can create a planar face from cylindrical, conical, or extruded models. You can also select a planar profile to add multiple, closed spline sketches.
Spline Surface method wraps a sketch on any face type. A limitation with this method is that it cannot wrap around a model.
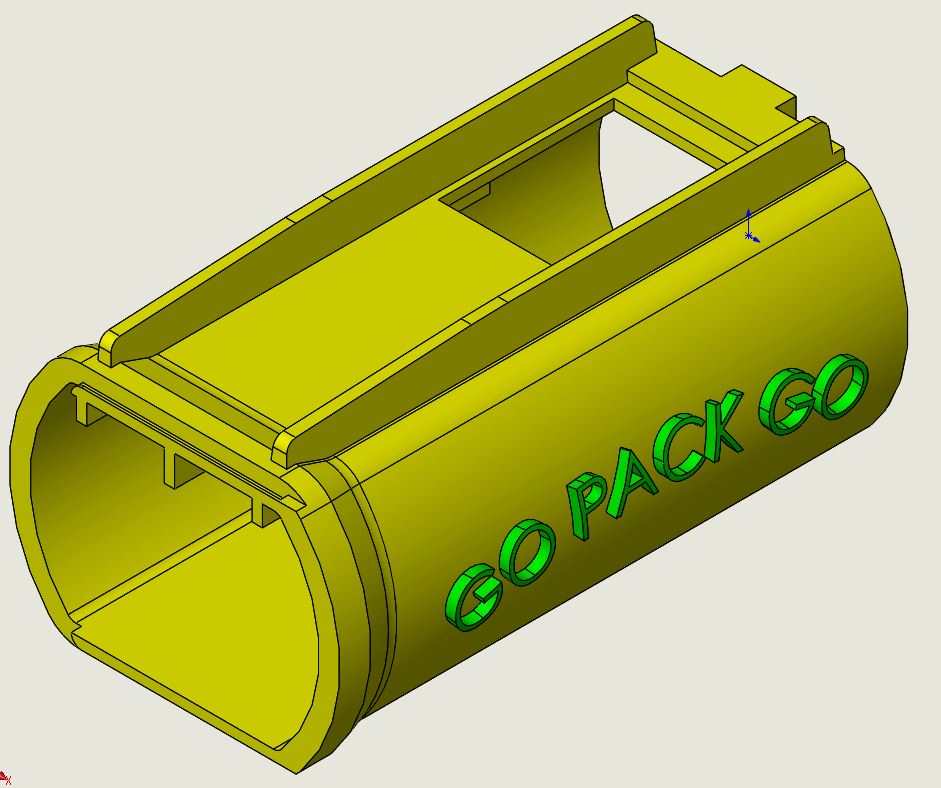
I’ll choose emboss, Analytical, my sketch was selected earlier and I’ll select the face I want it to project on and enter a thickness value.

There you have it. You were just taught how to RAP. I mean Wrap.
Thanks and have a great day.
Roger “THE HUMAN BEAT BOX” Ruffin
Senior Application Engineer
Computer Aided Technology