SOLIDWORKS: Costing a Weldment (MultiBody)
If there was a way for you to get a more accurate cost out of your weldments, you would like to hear about it, right?
Well, SOLIDWORKS Costing is the way to go.
Weldments include multi body and single body structural members, and the Costing tool will calculate the members as extruded parts. If a multi body template is used, weld bead and fillet bead cost information can be accounted for as well.
Keep in mind that the Costing tool is only as accurate as the data provided in the templates. SOLIDWORKS does provide some default templates, but it is best to create custom templates based on your manufacturing process/costs.
Just like any other type of design, whenever you make changes of any kind, you will see the updated cost along with a detailed cost breakdown of the Weldment design.
With a multi-body part, you will use a Multi-body template by default.
When applying Costing to multi-body parts, to improve performance, you can perform a cost estimate on one body, or you can cost the entire multi-body part.
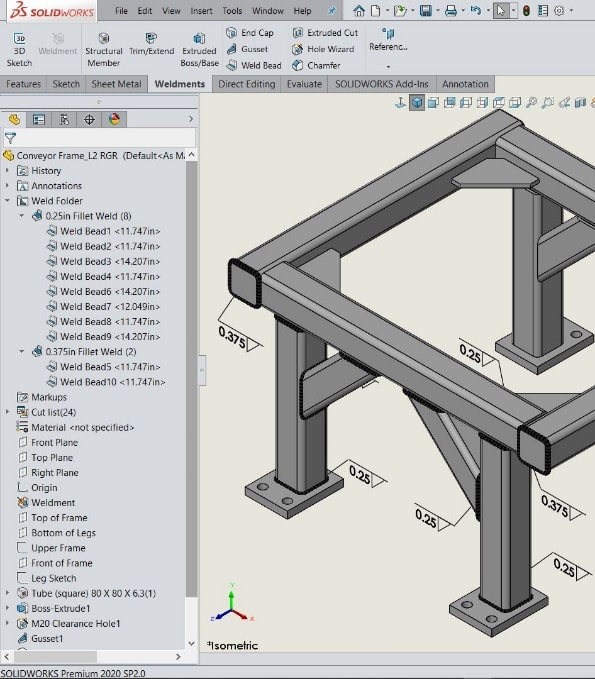
Let’s cost a simple Conveyor Frame.
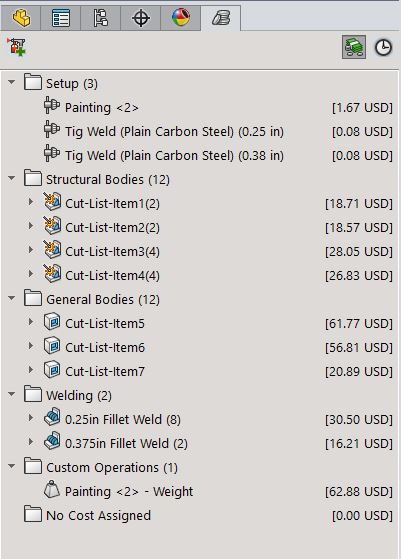
I used the Weld Bead command, so this will be included in the cost. That is right, it will automatically cost welds.
Notice the weld callout. I have two weld bead sizes. We will see later how the sizes will be identified.
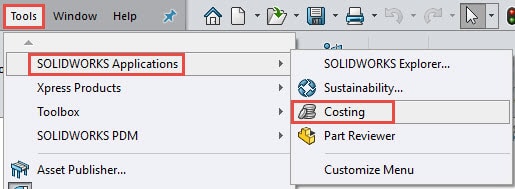
Let us start the costing by clicking Evaluate tab and clicking Costing icon. You can also get there this way.
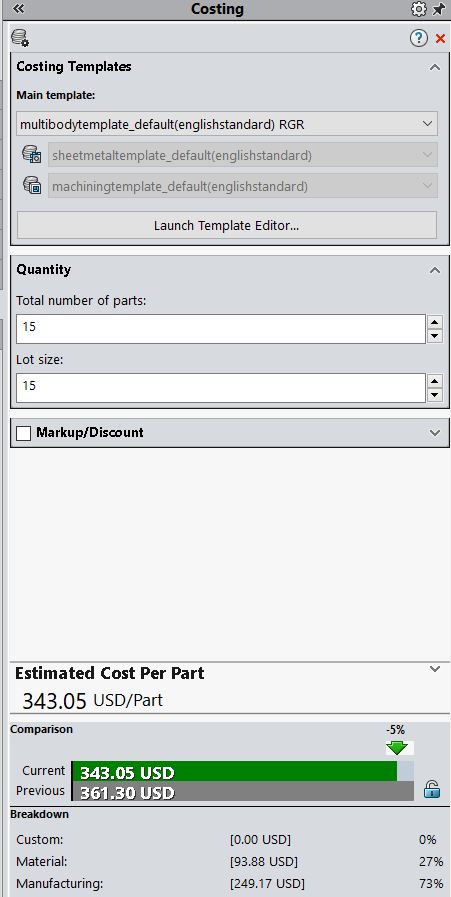
Once Costing is started, the Costing tab in the Task Pane will be active. From here there are several options to customize the cost or let the templates do all the work.
The most important thing here is the Template Editor. This will control what and how Costing will break down your manufacturing process.
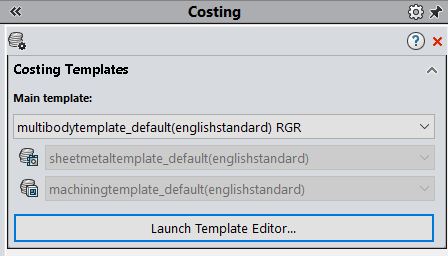
When the Template Editor is launched, you can modify existing templates or customize your own. I will use the default template and settings.
For the weld cost calculation, Tig Weld method will be used for Carbon Steel. It will also identify the two weld bead sizes.
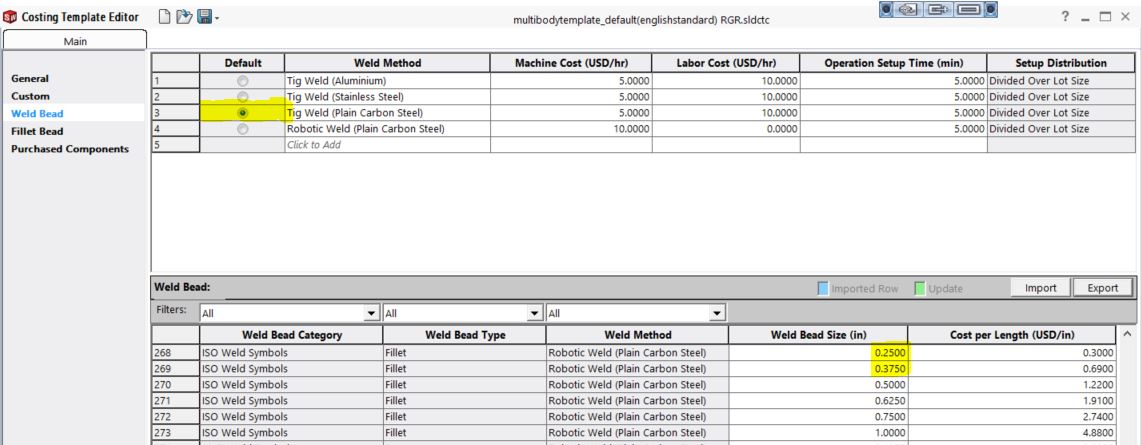
If you want, you can change Type of Body from the Body List, Method and even Operation.
Type of Bodies are:
-
- General: General is anybody that is not sheet metal or a structural member.
- Sheet Metal: Specifies a sheet metal body. Sheet metal parts are recognized automatically.
- Structural Member: Specifies a structural member. Structural members are recognized automatically.
- Custom/Removed Material: Specifies a custom cost for the selected body. Type the custom cost in Custom Cost under Operation Options. The Costing tool does not compute the cost of custom bodies.

After choosing your template (default or customized) and making some minor changes.
Click Begin Cost Estimation.
Your Estimated Cost Per Part will be generated in the Task Pane and a breakdown of the operations and it’s cost will be in the Property Manager on the Costing tab.
Notice the setup cost for the Tig welding and the cost breakdown for each weld size.
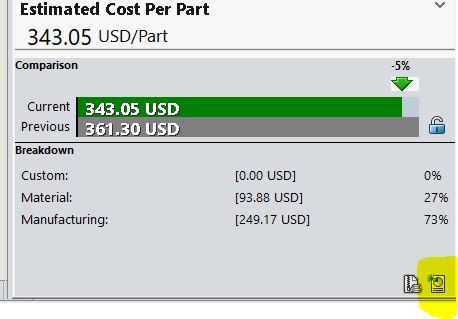
Once we have calculated the cost, all we have to do is go to the bottom of the Costing Task Pane and click the Generate Report button.
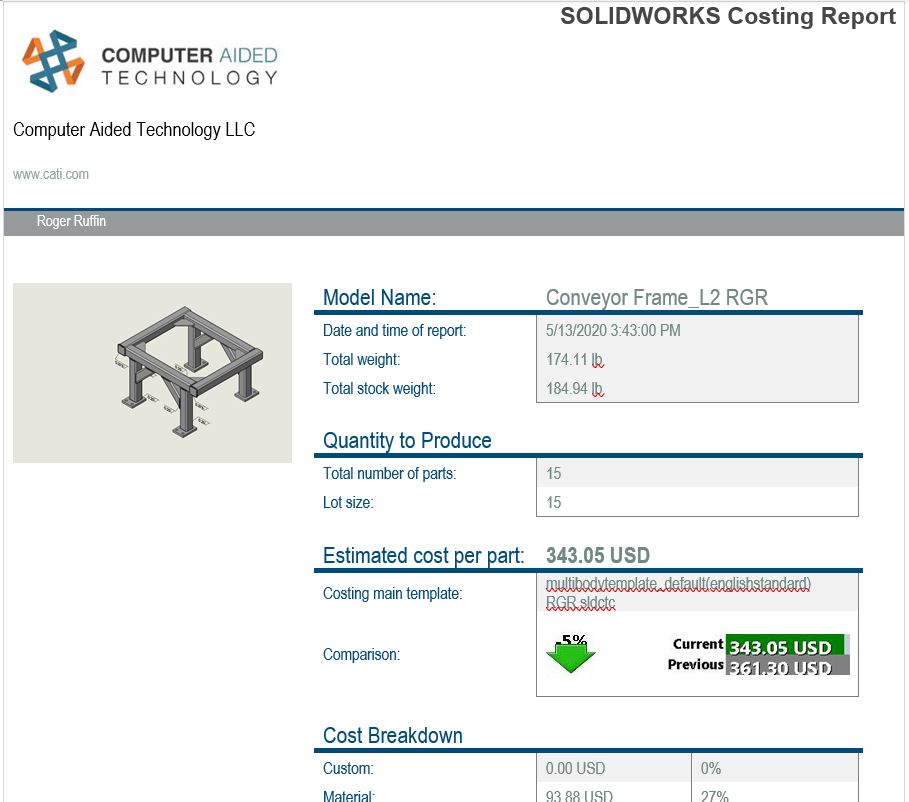
Here you go, a detailed Costing Report.
By utilizing SOLIDWORKS Costing, you will generate more accurate cost to your customer.
Stay safe and have blessed day.
Roger G. Ruffin
Senior Application Engineer
Computer Aided Technology, Inc.