SOLIDWORKS Visualize Standard – Emissive Appearances
SOLIDWORKS Visualize is a rendering tool that generates professional, photo-quality images, animations, 3D interactive and VR content. It is available in two packages: Visualize Standard and Visualize Professional.
In Visualize Standard, the Environment is the source of light in the scenes. There may be times where an additional light is needed to take the rendered image from stunning to life-like. However, adding lights is a capability offered in Visualize Professional.
Emissive Appearances emit light into the scene. It is applied to an object just like any other appearance, however, that object will now radiate light. It is perfect for illuminating an LED, adding a highlight, or lighting a dark area of your model, and is available in both Visualize Standard and Professional.
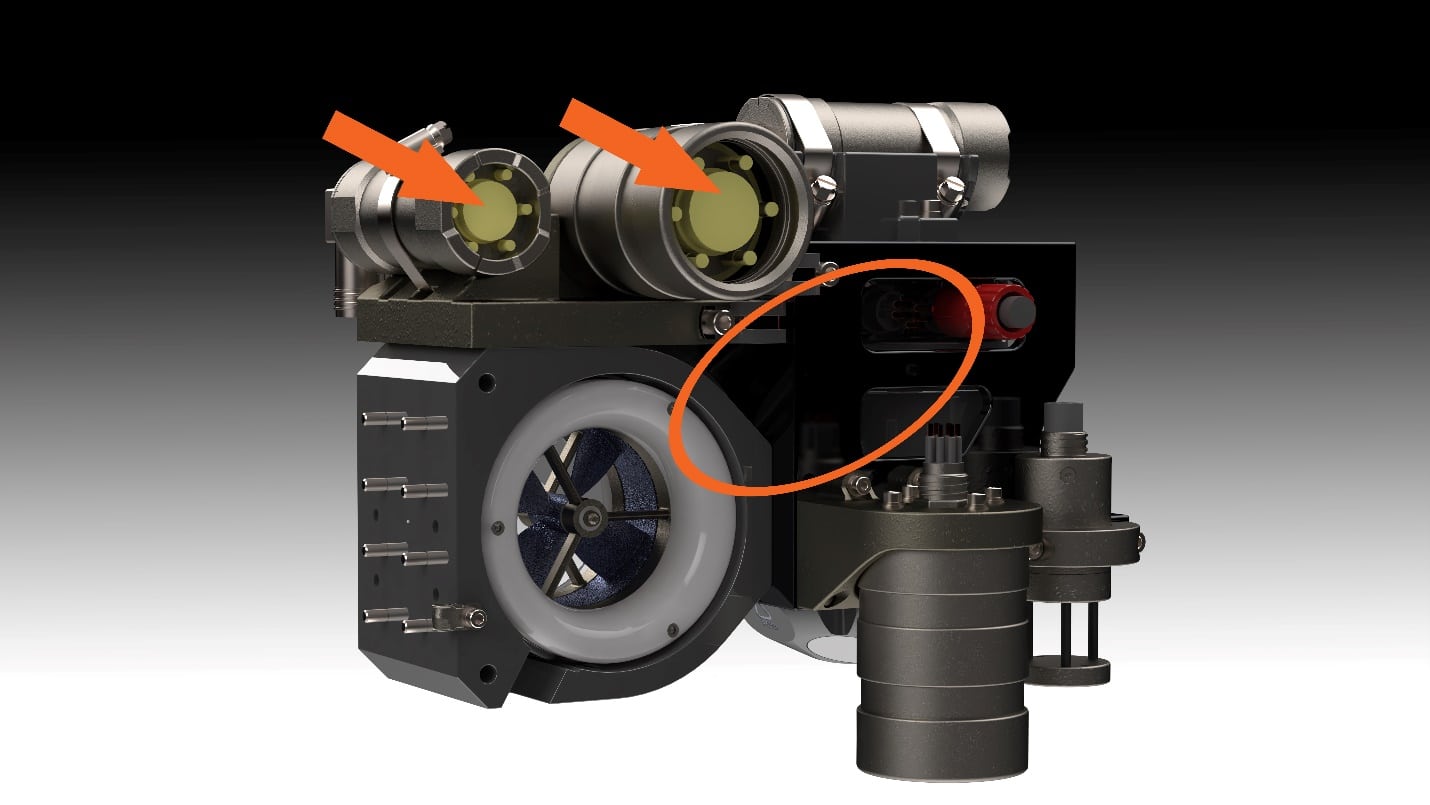
In the initial rendering, the bulbs in the camera housings should be illuminated and there is a dark area in the center of the product that requires some light.
To create the Emissive Appearance:
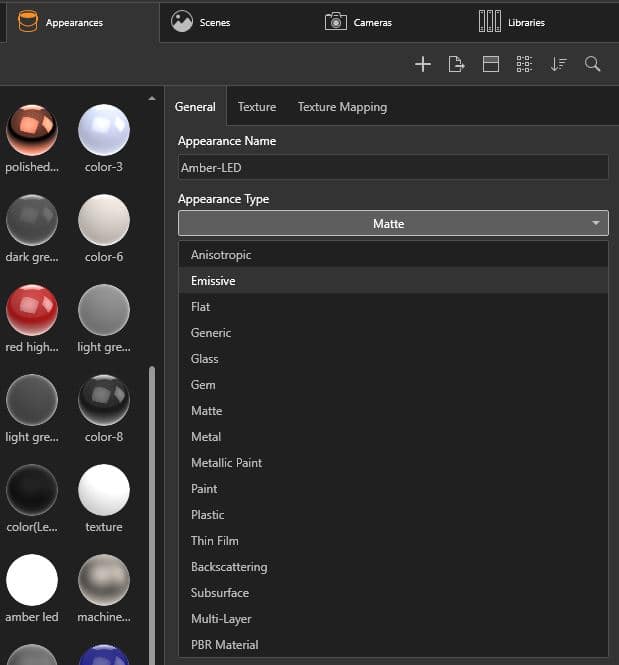
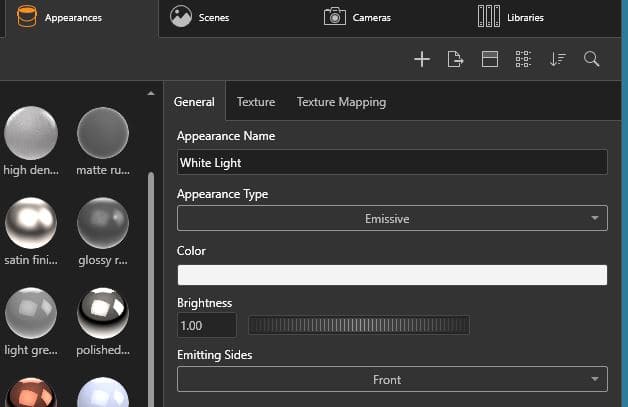
In the Appearances Tab, Click the ‘+’ (plus sign) at the top to add a New Appearance.
Provide an Appearance Name. Under Appearance Type, use the dropdown arrow to select Emissive.

Set the color of the light in the Color Picker dialog box and click the ‘x’ to close the Color Picker dialog box.
The Brightness option increases the light emitted by the appearance. As the light increases, the color loses intensity. Thus, as the brightness increases, the color should increase in saturation.
The option Emitting Sides controls which direction to emit the light from: Front or Both. ‘Front’ emits light from the same side as the surface that the normal is facing. ‘Both’ emits light from both sides of the geometry normal.
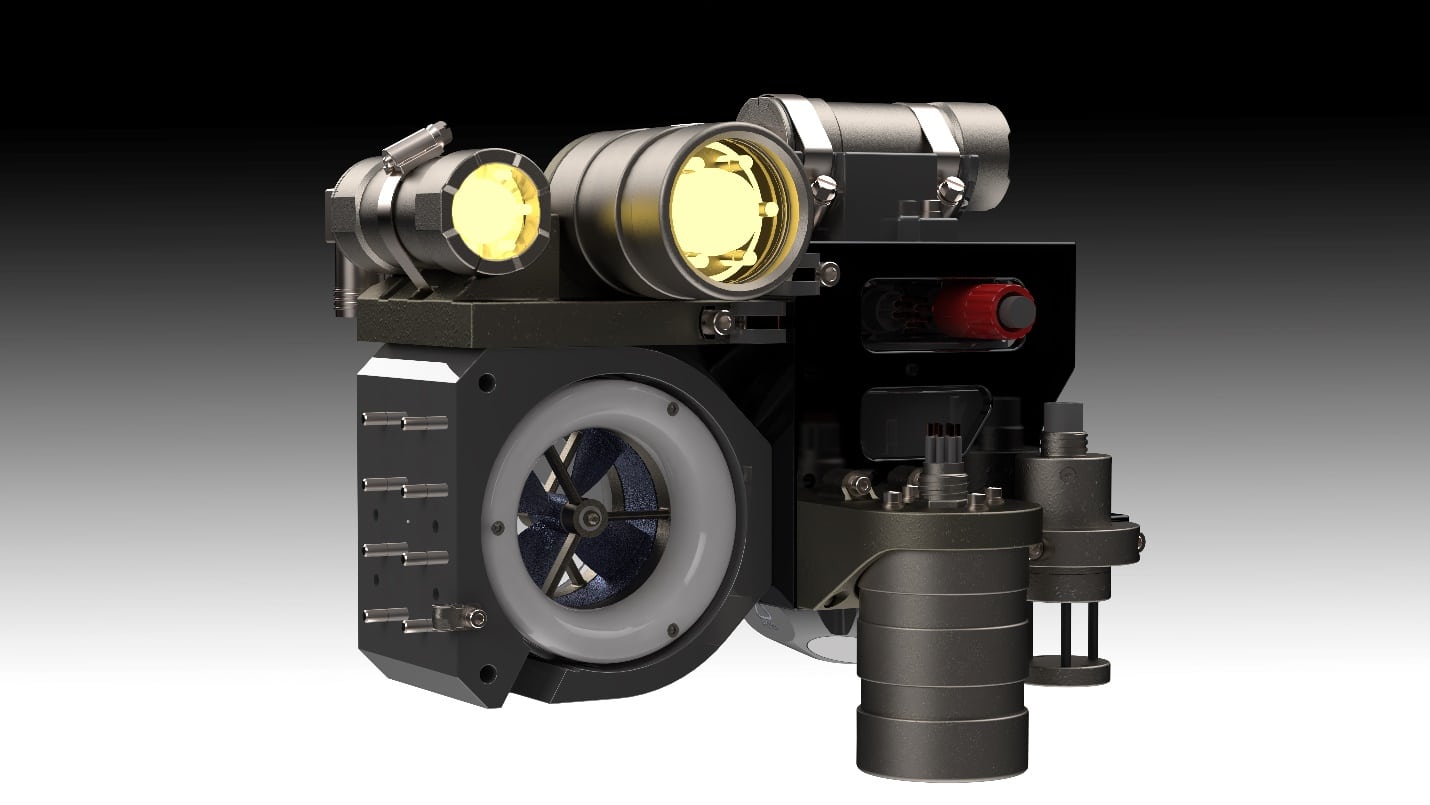
With the new Appearance created, simply drag and drop the Emissive appearance onto the objects that will radiate light. In this case, the bulbs within the camera housings.
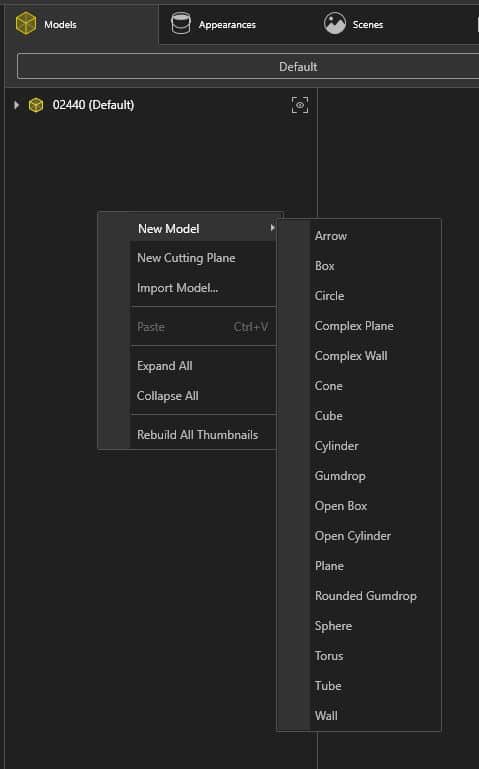
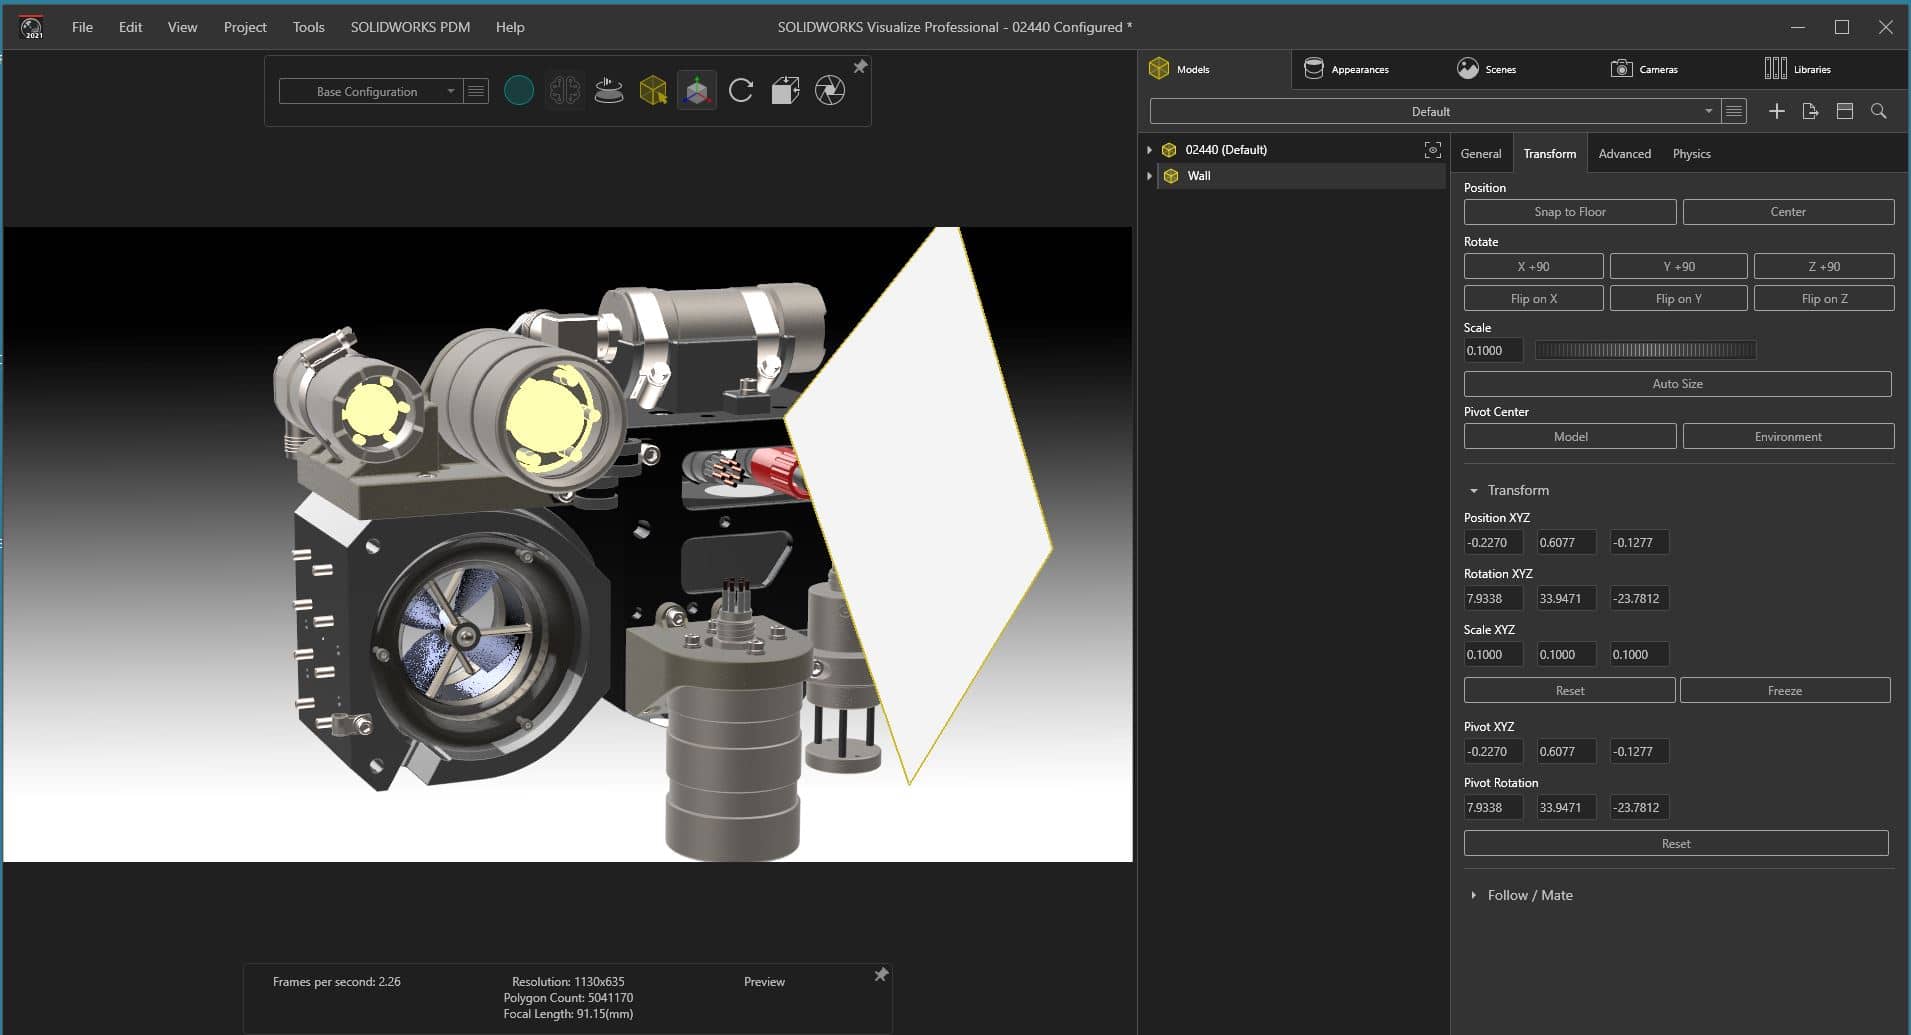
The next step is to brighten up the dark area in center of the product. A new object is needed in which to apply the Emissive Appearance and cast light onto the model. Visualize provides several models that can be added to scenes. In the Models Tab, right click in empty space > New Model > select an object.
The Wall model is generally a plane that can be resized. It is very versatile – it can be used as a background or a floor by applying a specific appearance to it. Here, the Wall will be used as a source of light. (All the models found in the New Model list can be moved, rotated or scaled from the Transform tab or the Object Manipulation tool just like an object that is imported from SOLIDWORKS.) The Wall is scaled down and repositioned to cast light on just a portion of the product.
A new Emissive Appearance is created and applied (drag and drop) to the Wall to illuminate the product.
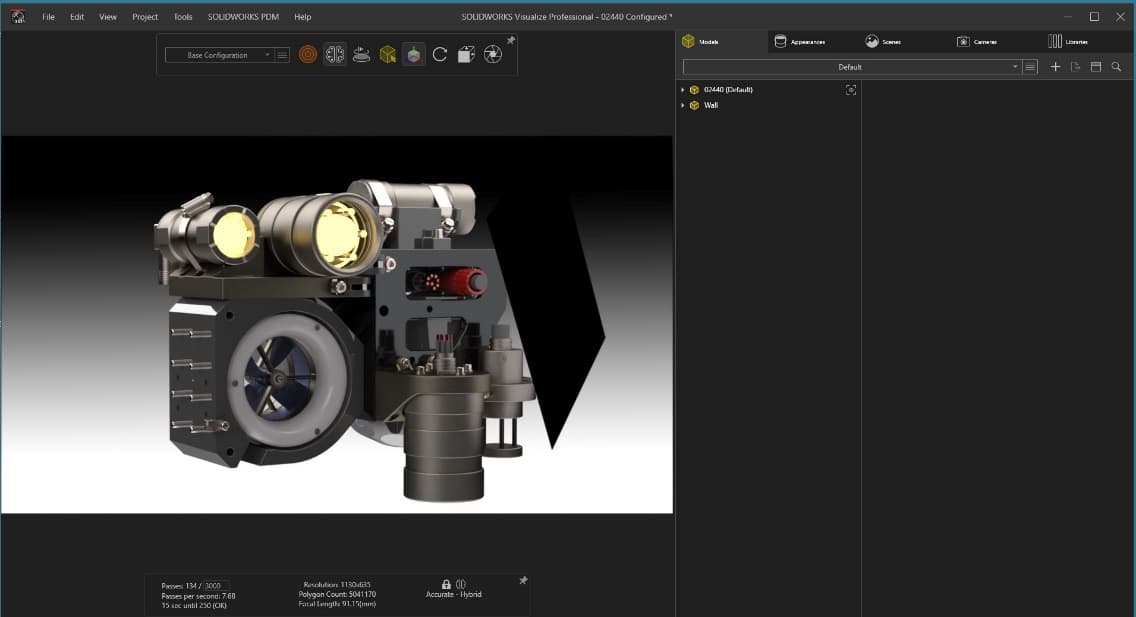
The model is illuminated nicely, however, the Wall is visible in the scene.
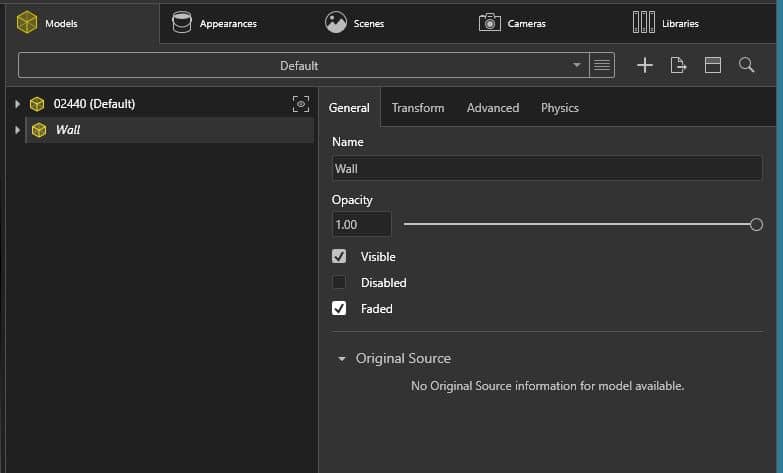
With the Wall selected, in the Models tab, General tab, select the Faded option.
The Faded option hides the Wall model from the camera’s view, but leaves it in the scene for lighting.
The final rendering looks great!

Hope this ‘sheds some light’ (ha ha!) on Emissive Appearances in Visualize.
Laura Nickerson, CSWE
Application Engineer
Computer Aided Technology