Introduction to Basic 3D Shapes in DraftSight
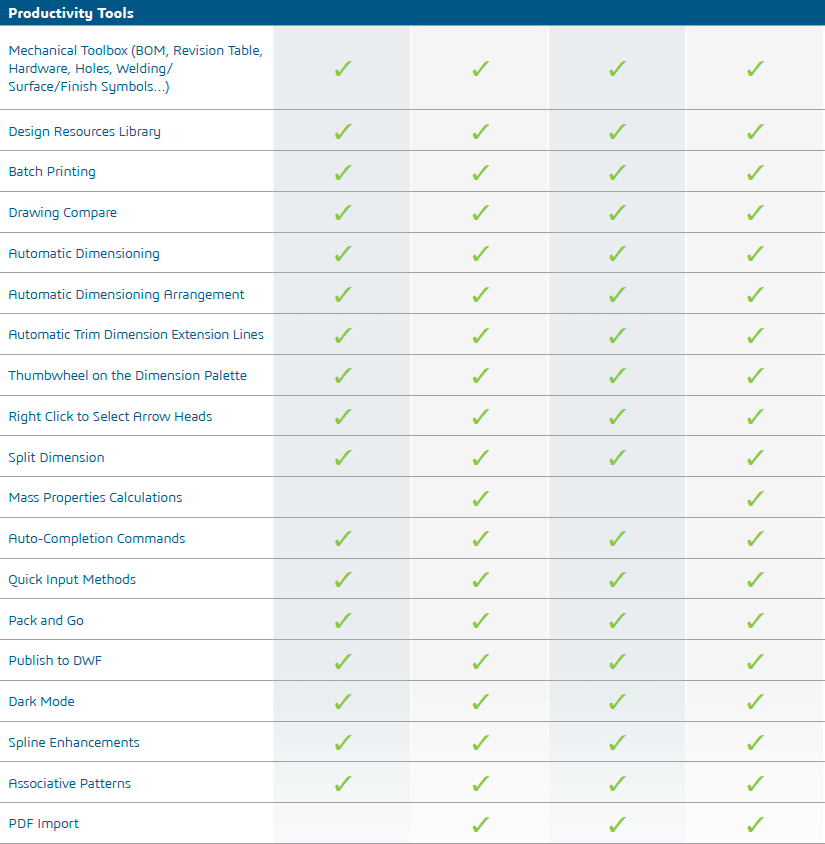
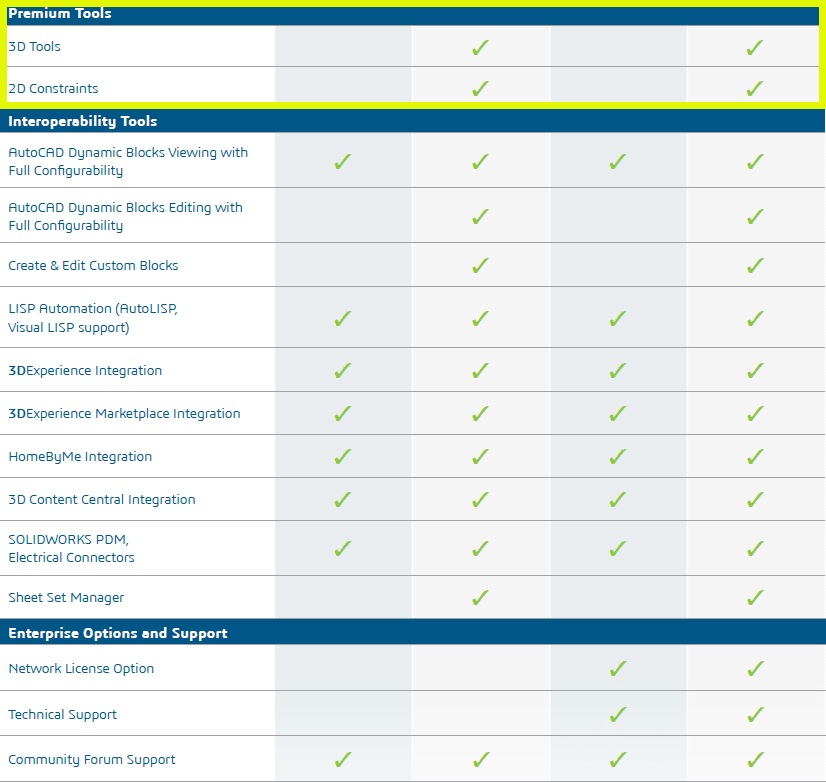
Being able to create 3D objects with DraftSight will require the Premium version of DraftSight, either the stand-alone Premium or Enterprise Plus version. Below I have included the DraftSight Features Matrix with the Premium tools highlighted:

![]()
Now, let’s look at how you can access the tools required to create basic 3D shapes. Here is the standard DraftSight interface. Notice in the upper right corner that the “Drafting and Annotations Workspace is active and the ribbon tools and tabs are available.
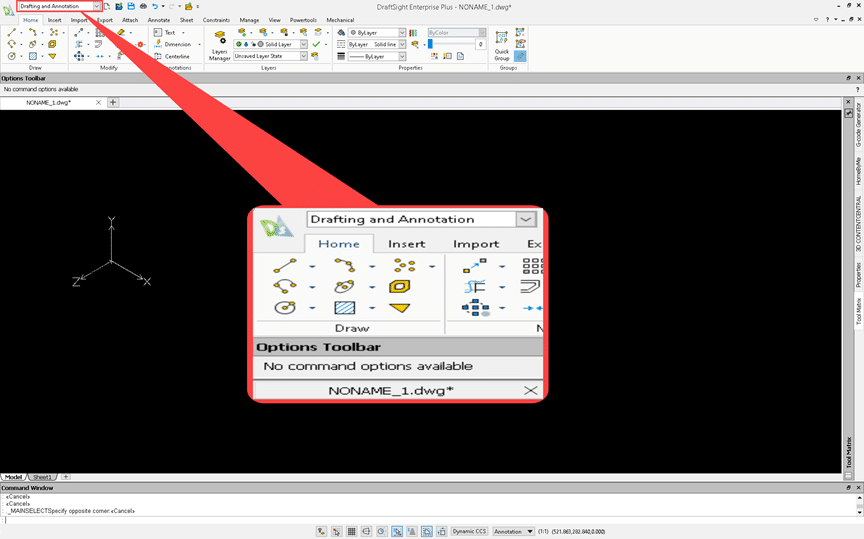
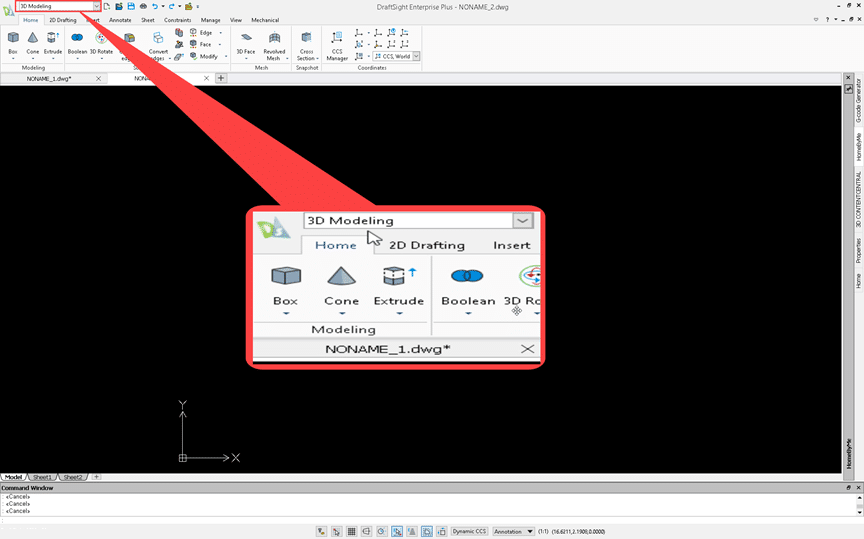
The Workspace will need to be changed to 3D Modeling to access the tools you will need.
The first thing you should do is select the View tab – Views – SE-Isometric and change your view to Isometric, so you can see all three axis.
Create a Box
Go back to the home tab and select “Box”. The first input will be the first corner. Enter 0,0,0 in the Command Window. Either move your cursor to 10,10 or enter 10,10.Lastly click in the positive Z-axis to set the height or enter 10. Your shape should look like this.
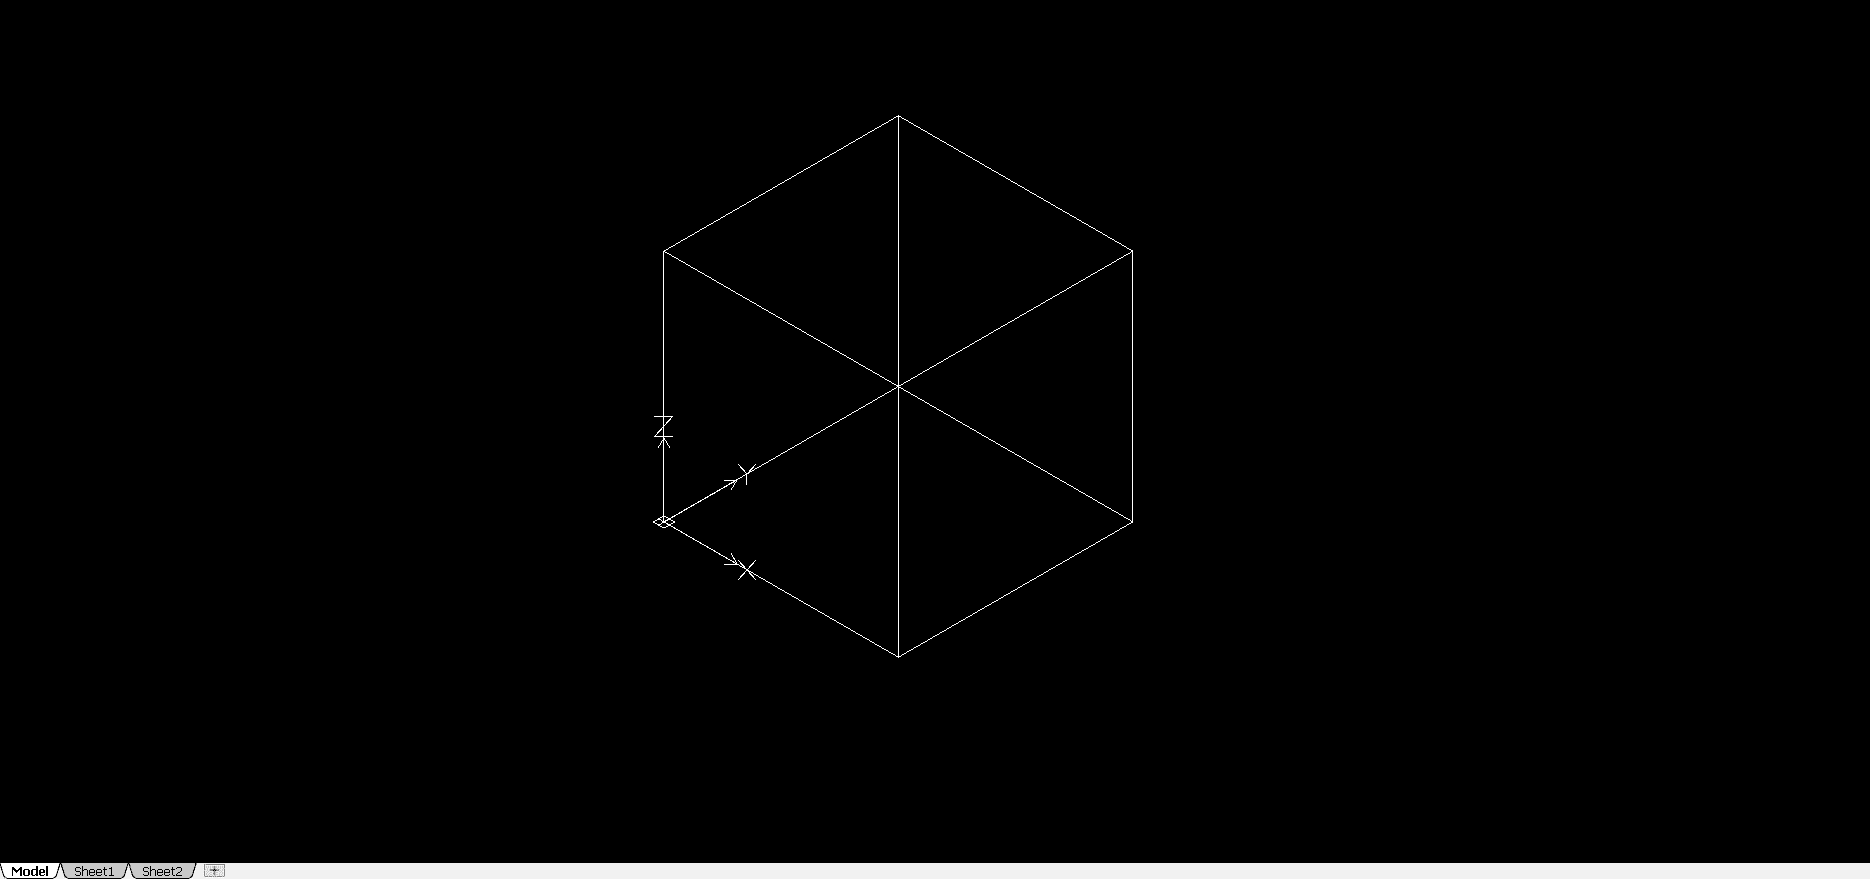
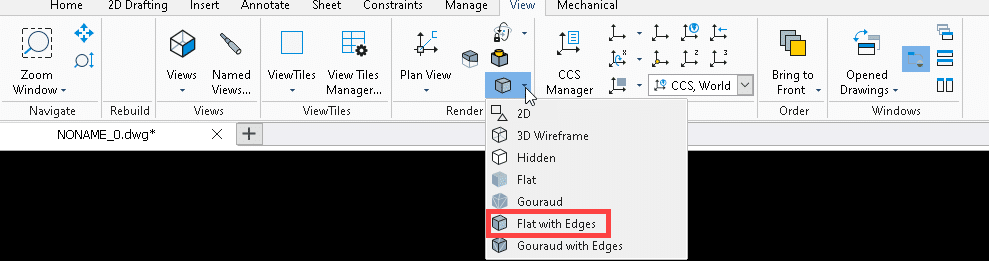
To view the box as a solid, open the View tab an select the Shade view button dropdown and select “Flat with Edges”.
The result will look like this:
![]()
Select the solid and hit the delete key.
Create a Pyramid
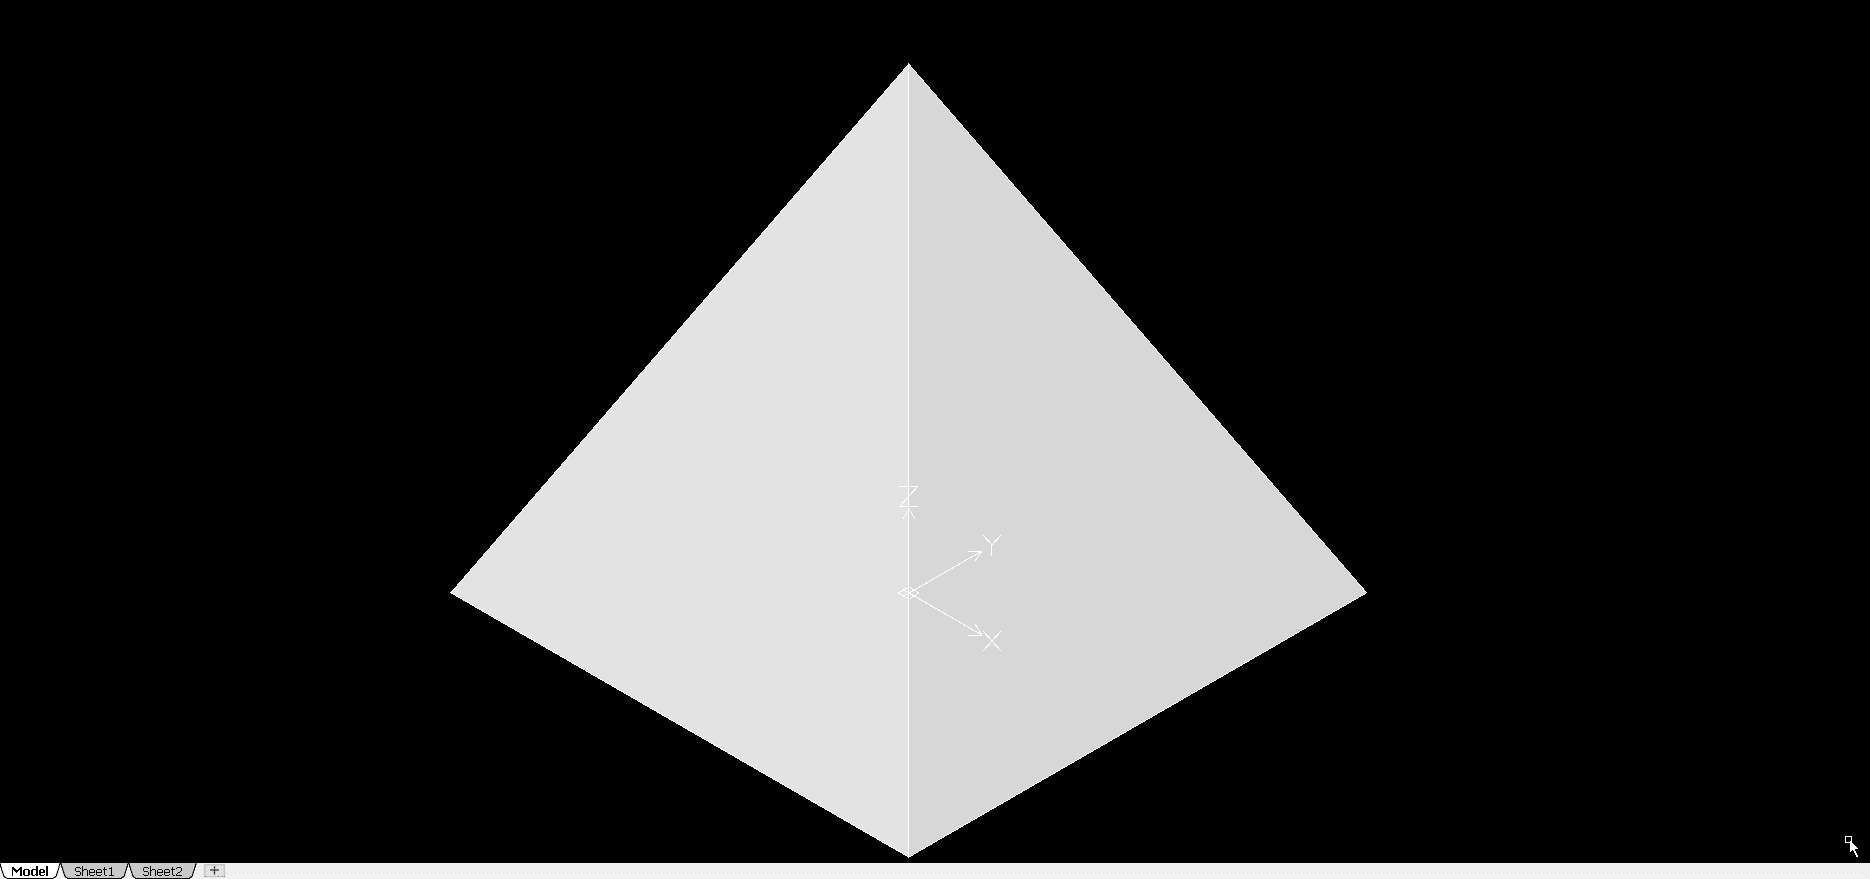
Go to the home tab and select the “Box” dropdown and the Pyramid tool. The first input will be the center of the base. Enter 0,0,0 in the Command Window. Either move your cursor to 10,0 or enter 10.Lastly click in the positive Z-axis to set the height or enter 20. Since the shaded view was already on your shape should look like this.
Select the solid and hit the delete key.
Create a Wedge
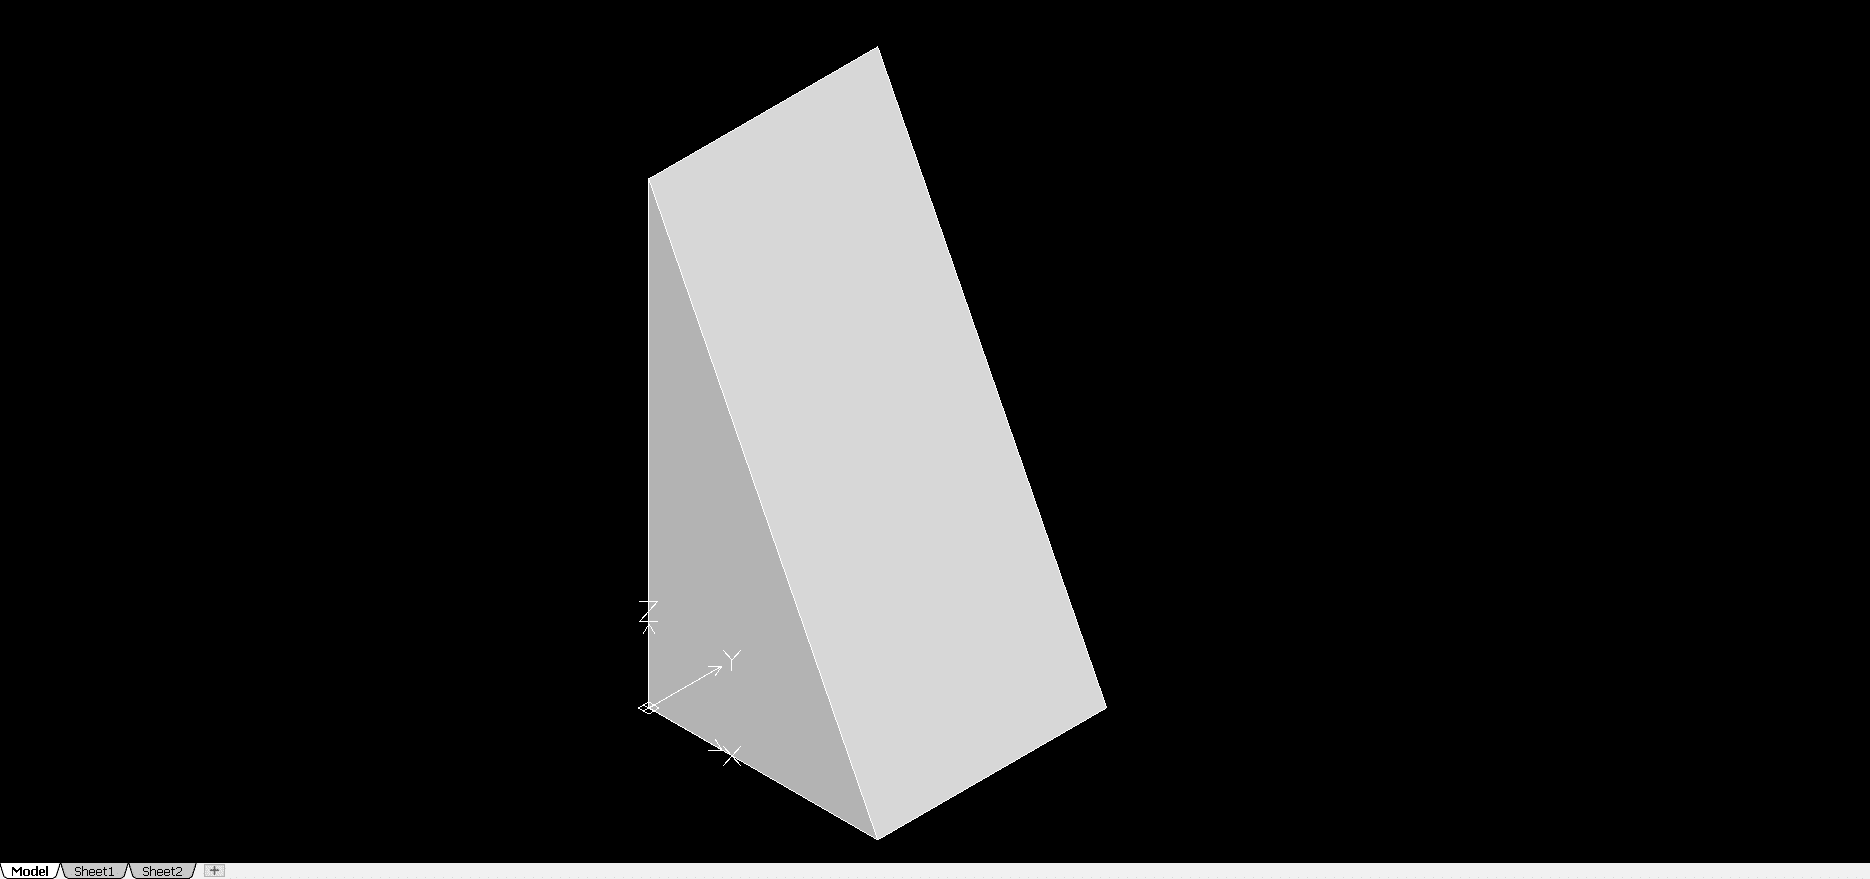
Go to the home tab and select the “Box” dropdown and the Wedge tool. The first input will be the corner of the base. Enter 0,0,0 in the Command Window. Either move your cursor to 10,10 or enter 10,10. Lastly click in the positive Z-axis to set the height or enter 20. Since the shaded view was already on your shape should look like this.
Select the solid and hit the delete key.
Create a Cone
Go to the home tab and select the “Cone” button. The first input will be the corner of the base. Enter 0,0,0 in the Command Window. Next will be the radius. Either move your cursor to 10,0 or enter 10. Lastly click in the positive Z-axis to set the height or enter 20. Since the shaded view was already on your shape should look like this.
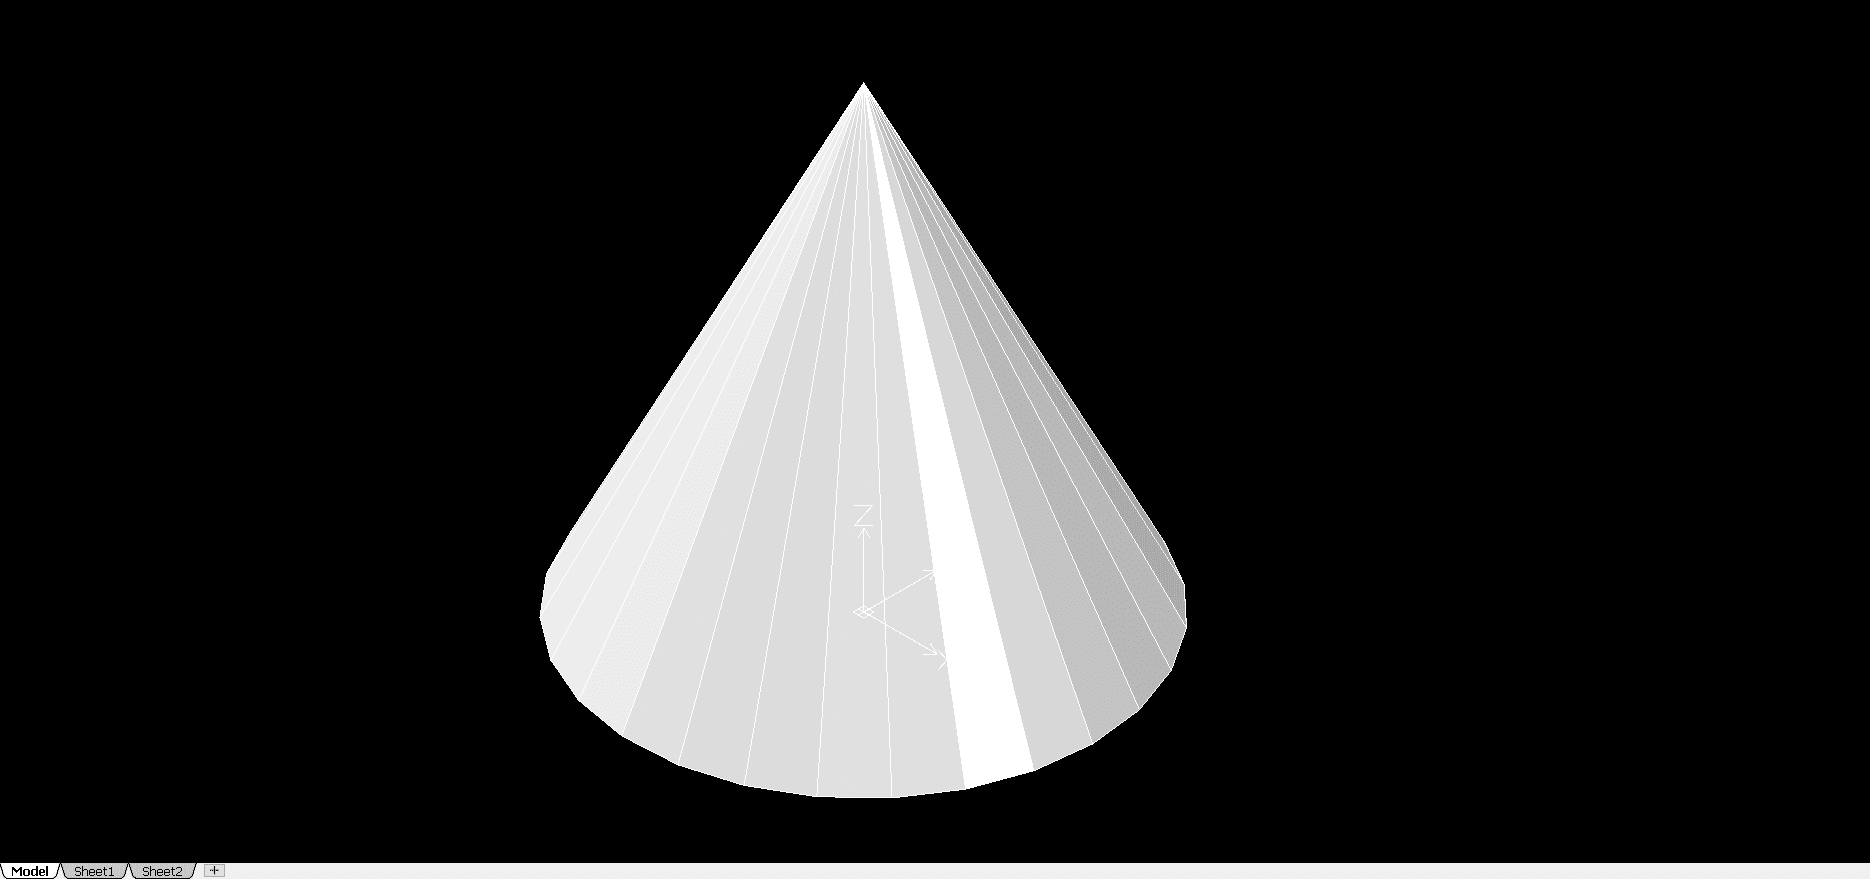
Select the solid and hit the delete key.
Create a Cylinder
Go to the home tab and select the “Cone” dropdown and then the Cylinder button. The first input will be the center point of the base. Enter 0,0,0 in the Command Window. Next will be the radius. Either move your cursor to 10,0 or enter 10. Lastly click in the positive Z-axis to set the height or enter 20. Since the shaded view was already on your shape should look like this.
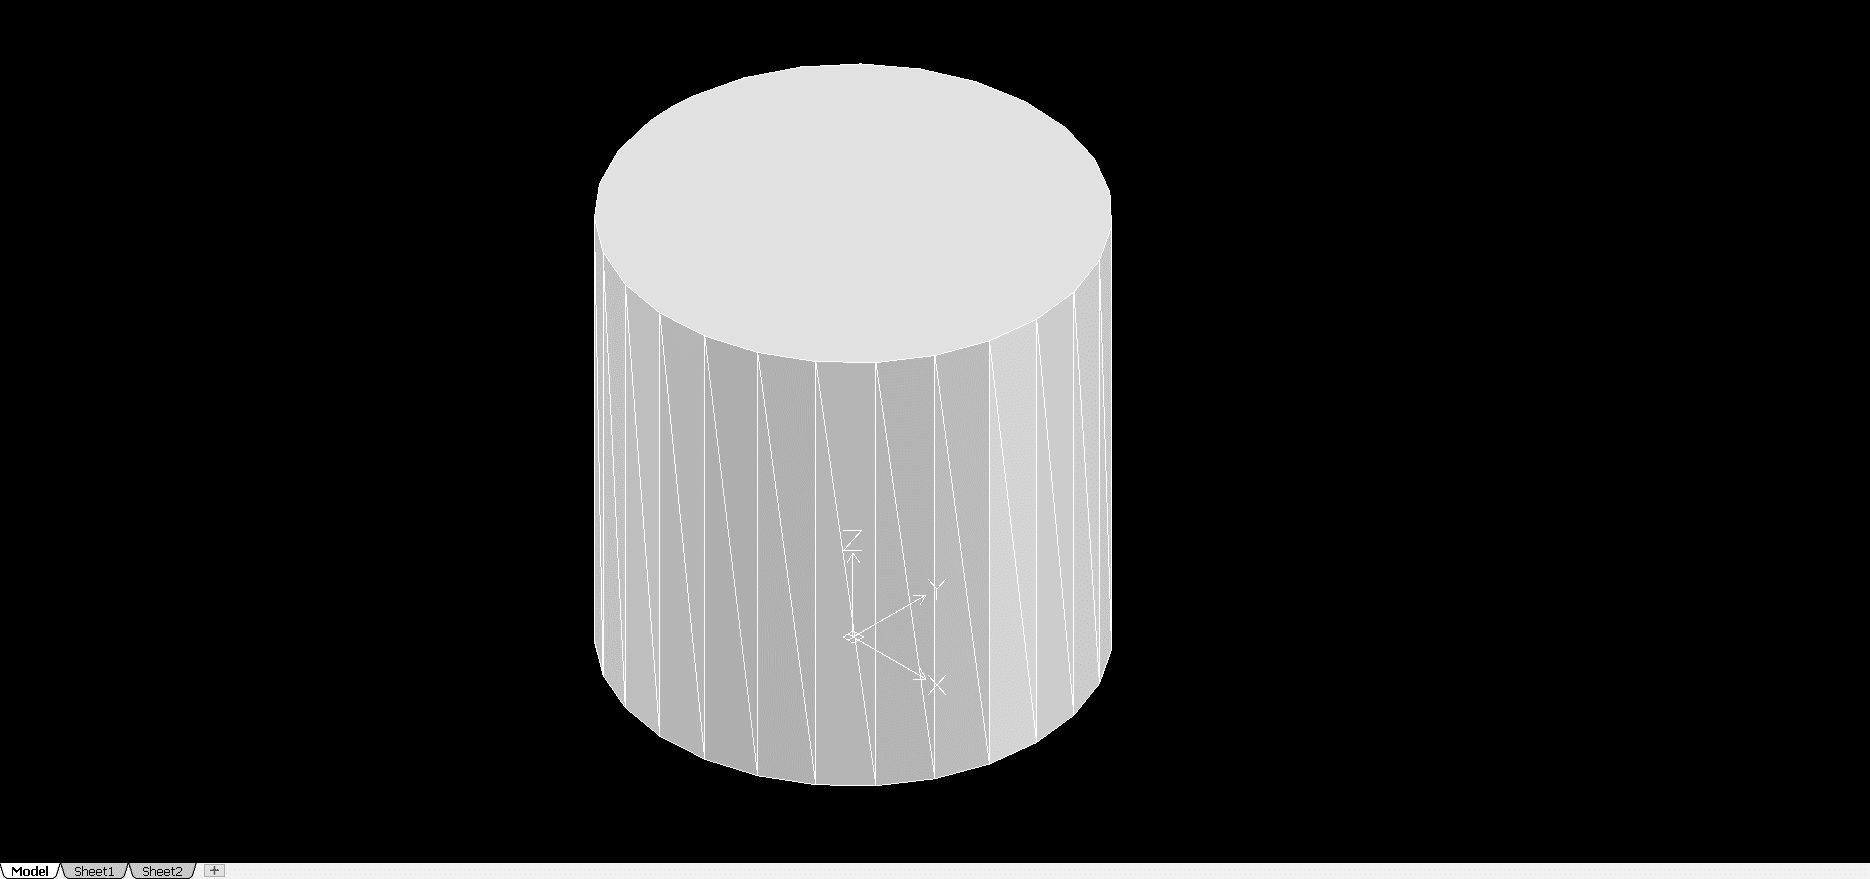
Select the solid and hit the delete key.

Maximize Your ROI with DraftSight
Create a Sphere
Go to the home tab and select the “Cone” dropdown and then the Sphere button. The first input will be the center point of the sphere. Enter 0,0,0 in the Command Window. Next will be the radius. Either move your cursor to 10,0 or enter 10. Since the shaded view was already on your shape should look like this.
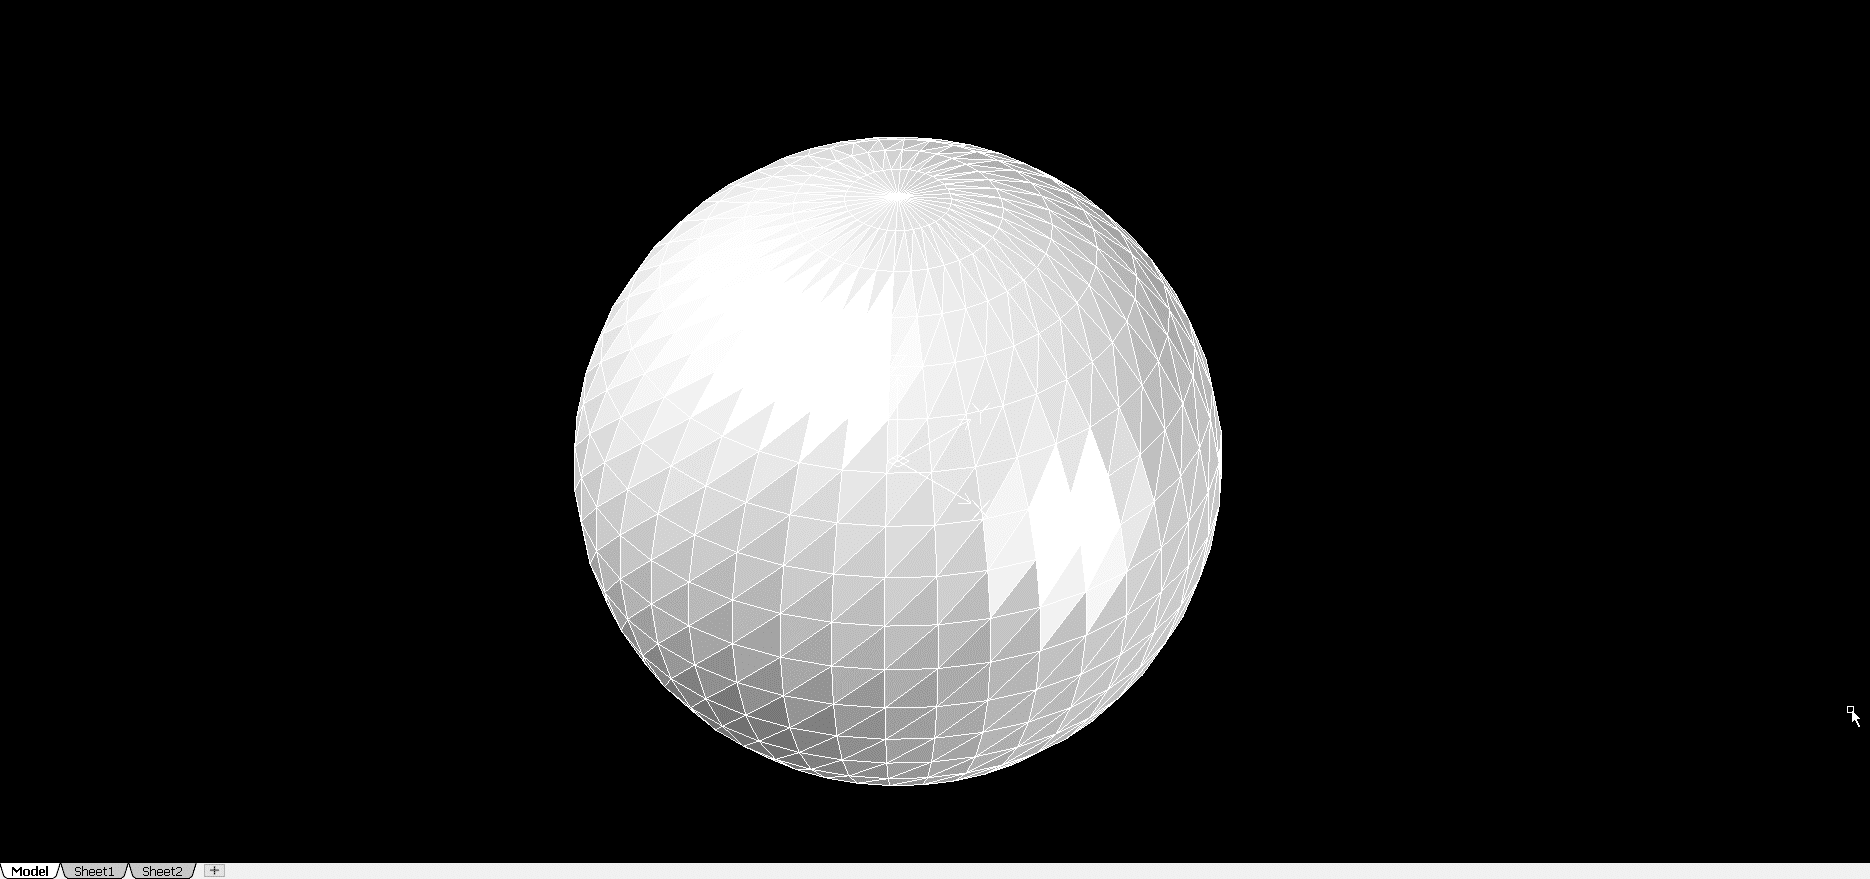
Select the solid and hit the delete key.
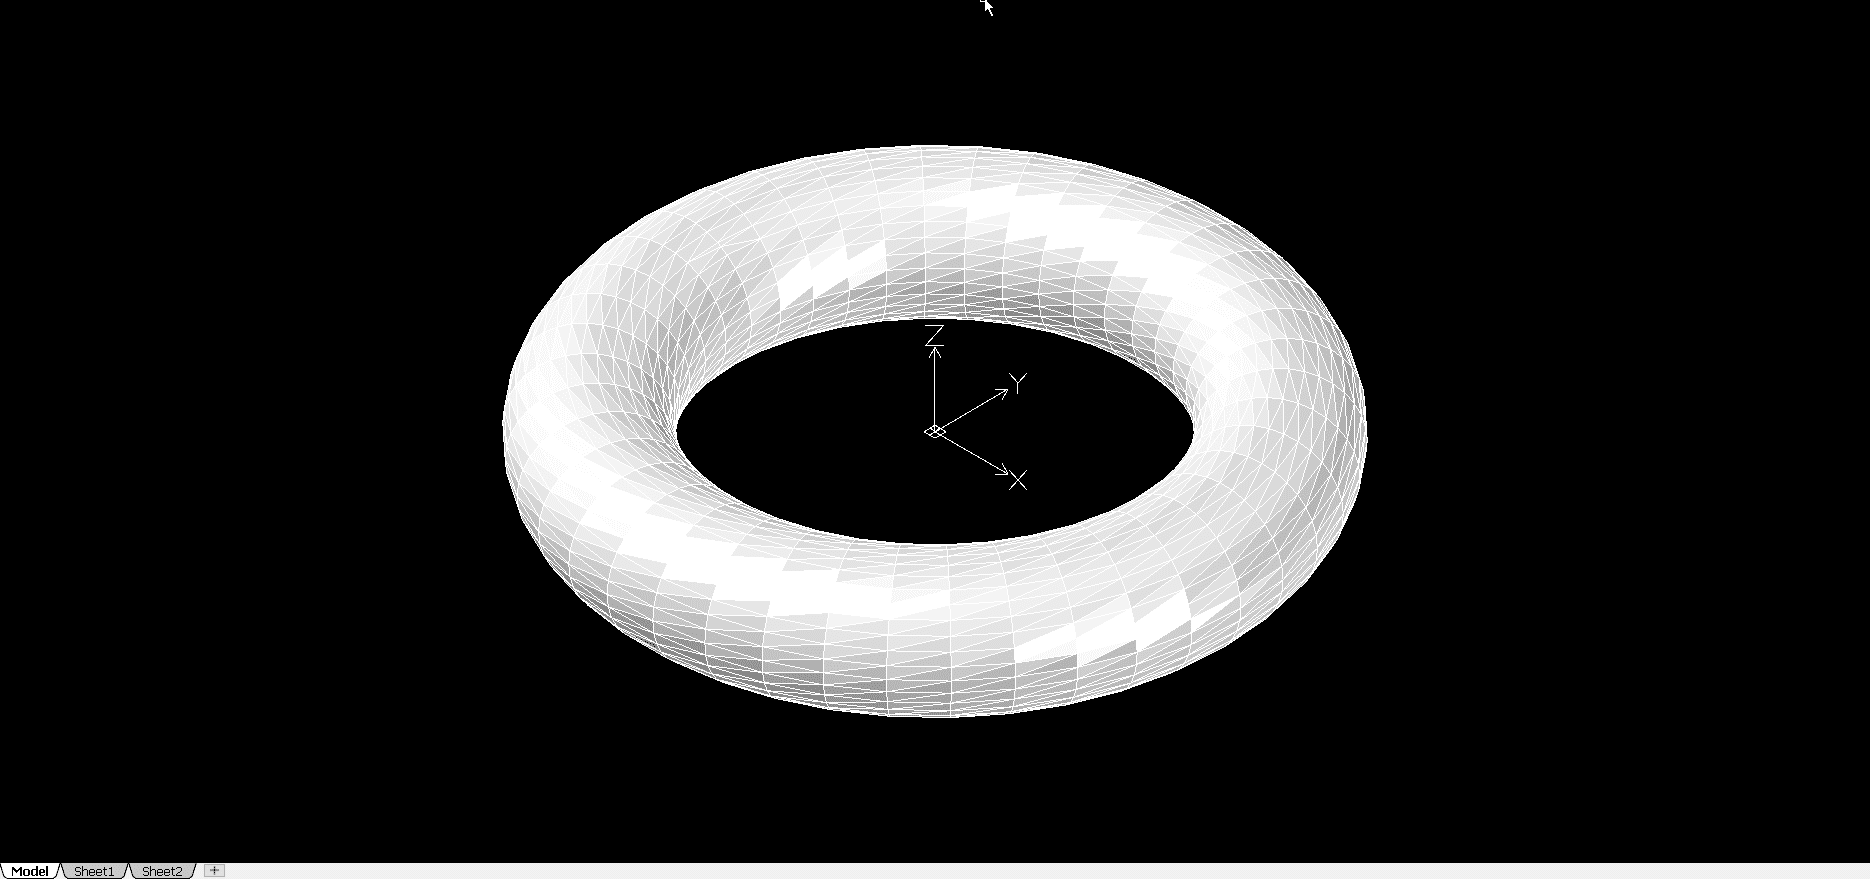
Create a Torus
Go to the home tab and select the “Cone” dropdown and then the Torus button. The first input will be the center point of the sphere. Enter 0,0,0 in the Command Window. Next will be the radius. Either move your cursor to 20,0 or enter 20. The last input is for the radius of the tube. Move your cursor to 25,0,0 or enter 5. Since the shaded view was already on your shape should look like this.
That covers the basic SOLIDWORKS shapes in DraftSight Premium and Enterprise Plus.
Keep your eyes out for more blogs about creating solids in DraftSight
Also please visit CATI.com for our other blog articles pertaining to DraftSight:
DraftSight for the AutoCAD User – Laura Nickerson
Master Layers in DraftSight with Layer States Manager – Dennis Barnes
Collaborative Designer for DraftSight Enhancements – Todd Myers
DraftSight Electrical Symbol Library Free Download – Judy Marlo
Inserting Blocks in DraftSight is SO Easy. Read on to Learn How! – Judy Marlo
Using Image Tracer in DraftSight – Dennis Barnes
DraftSight Network License Timeout – Kris Dubuque
![]()
Dennis Barnes CSWE | Applications Engineer II
Computer Aided Technology (CATI)
Main: 888-308-2284 | Support: 888-285-2284
support@cati.com | www.cati.com