Using SOLIDWORKS Profile Center Mates Command
The SOLIDWORKS Profile Center Mates command is useful for mating parts that need to be centered with each other.
Profile Center Mate automatically center-aligns geometric profiles to each other and fully defines the components.
Using this command is very easy. The only restriction is the mating features need to be flat surfaces. In this example, I have three parts. The mate is located in the Advanced Mates section.
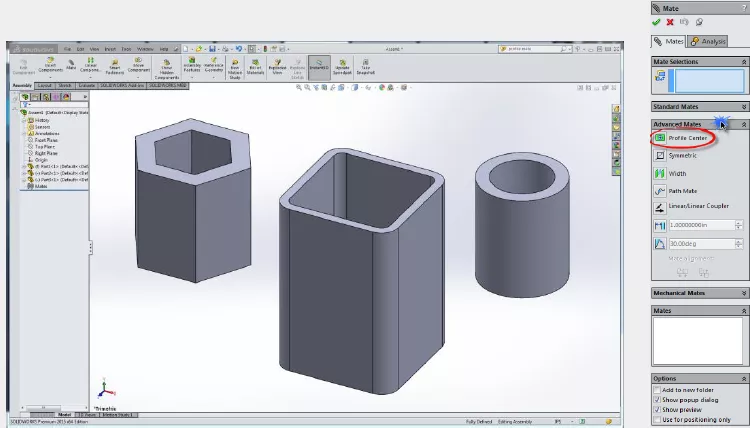
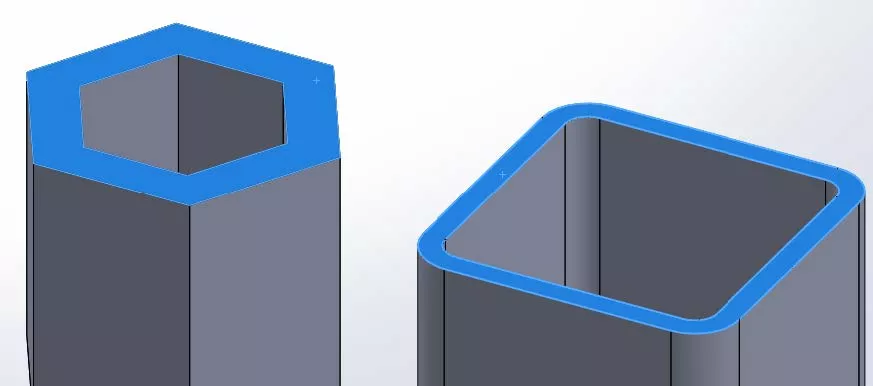
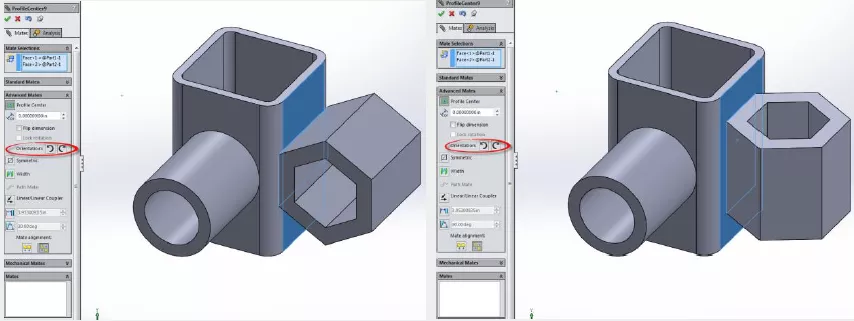
Select the features that are to be mated.
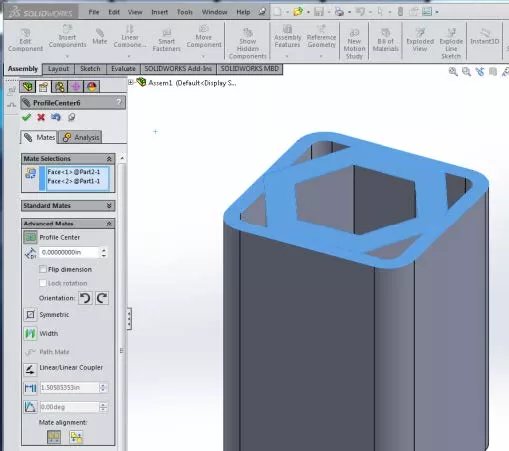
Select the Profile Center option on the Advanced Mates and the parts are automatically oriented together based on their centers.
There are also plenty of options for the way the parts are mated. The features don’t have to be the end of the parts. As long as it is a flat, rectangular, or circular surface, it can be used.
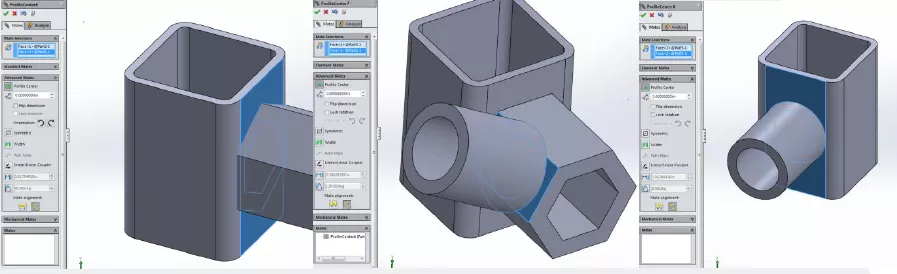
The Orientation option is very functional as well. You can rotate the second item of the mate in 90° increments in either direction.
In summary, take a look and play with this functionality. It is very unique in the way it works and can become very handy when you need it.
More SOLIDWORKS Tutorials
Top 10 SOLIDWORKS Tutorials of 2021
SOLIDWORKS Convert to Sheet Metal Command Explained
Using the Move/Copy Body Feature in SOLIDWORKS
Creating a Non-circular Helix in SOLIDWORKS with Surfacing Commands
![]()
About GoEngineer
GoEngineer delivers software, technology, and expertise that enable companies to unlock design innovation and deliver better products faster. With more than 40 years of experience and tens of thousands of customers in high tech, medical, machine design, energy and other industries, GoEngineer provides best-in-class design solutions from SOLIDWORKS CAD, Stratasys 3D printing, Creaform & Artec 3D scanning, CAMWorks, PLM, and more
Get our wide array of technical resources delivered right to your inbox.
Unsubscribe at any time.