How to Use Layers in SOLIDWORKS Drawings
In this guide, we explain how to use layers in SOLIDWORKS drawings. In general, layers are used to control visibility, line color, thickness, and type for any of your annotations.
Layers can also be used when importing or exporting .dwgs/.dxfs. When importing a .dwg, you can see all of the custom layers used in SOLIDWORKS or another 2D application.
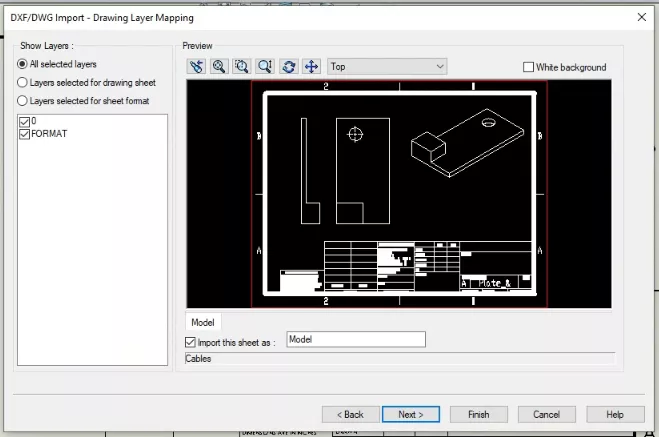
Figure 1: Import layer options
Layers in SOLIDWORKS have more functionality than that. If you right-click your CommandManager and select the Layers option, it will turn on the Layers toolbar. You will see this in the bottom left-hand side of the screen.
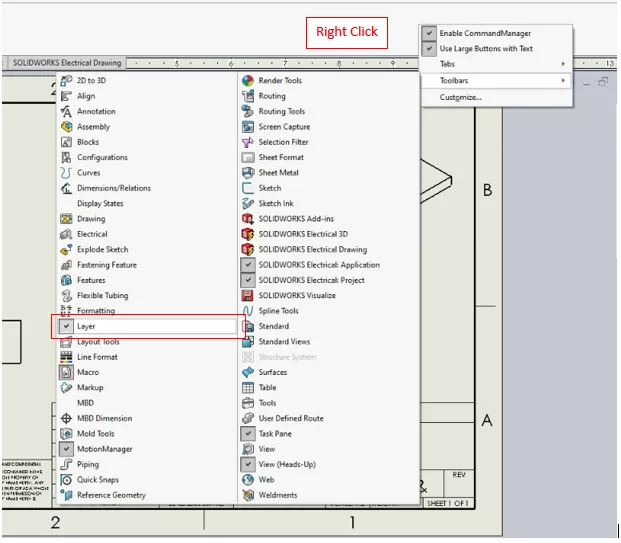
Figure 2: Activating Layer menu
By default, you will have three choices:
- -Per standard- will reference the document properties.
- -None- is general and references the system options.
- FORMAT is everything on the sheet format.
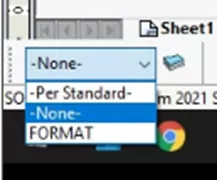
Figure 3: Default layer options
Layers can be used in SOLIDWORKS to create specific types of annotations. In this example, we are making one for center marks. To do this, click the Layers button to display the Layers menu.
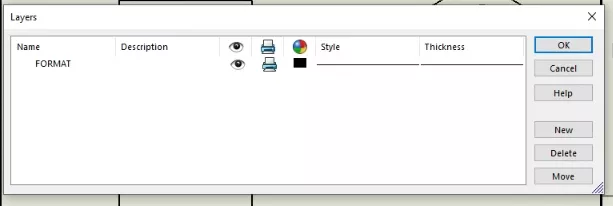
Figure 4 : Layers menu
Click New to add a new layer and give it a name. You can change different options for the items on this layer, such as color, style, and thickness. You can also turn layers on and off to show only the ones you want. For this example, we are going to change the color to red. Click OK when finished to accept this new layer.
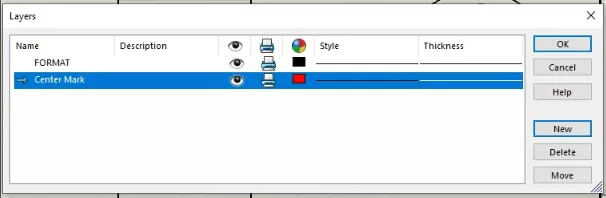
Figure 5: Center Mark layer
In the bottom left-hand side of SOLIDWORKS, you can see the active layer is the newly created layer. This means that after making a new layer, every new annotation you add to this sheet will be on this layer.
If this is not what you intended, you can change it back to -None-. To add annotations to a layer, right-click on the annotation and select Change Layer.
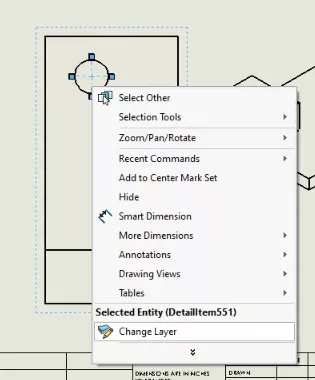
Figure 6 : Change Layer
A drop-down will appear allowing you to choose the layer you want it to be moved to. In this example, the center marks are now red, matching the layer they are on.
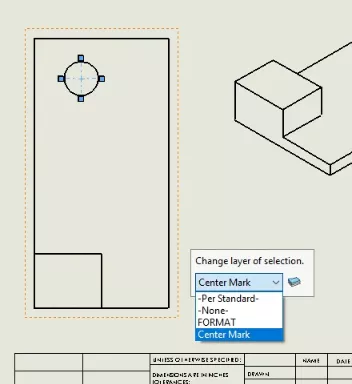
Figure 7: Center Mark layer

Figure 8 : Red Center Mark
This workflow is manual and a bit tedious. Another option is a bit more automated, and that is the -per standard- option; you will never have to do it again after the initial setup.
To do so, go to Tools > Option > Document Properties .
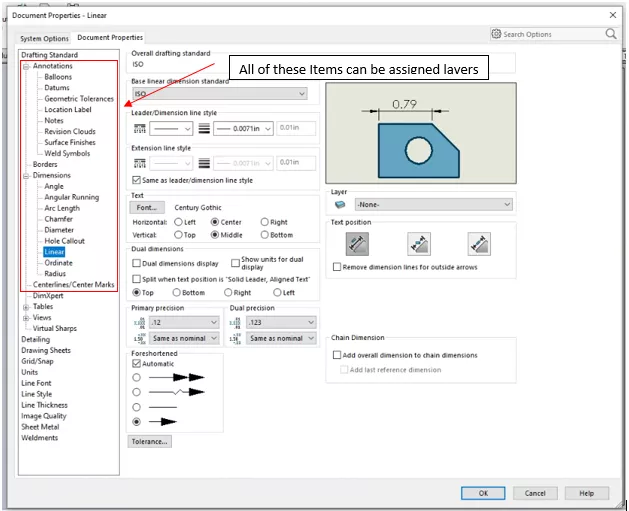
Figure 9 : Document Properties
There is a list of annotation types and, in each tab of that list, you can link that dimension type to the corresponding layer.
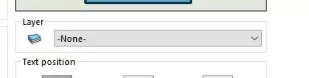
Figure 10 : Dimension layer assignment
After setting these up, save as a document template that you can use with future SOLIDWORKS drawings.
Now to reference these settings once again, in the bottom left-hand side, set the current layer to -Per Standard-.
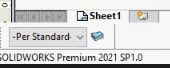
Figure11: -Per Standard-
To see using layers in SOLIDWORKS drawings in action, check out the video demonstration below.
Want to learn more? Check out more SOLIDWORKS tips and tricks below.

SOLIDWORKS CAD Cheat Sheet
Our SOLIDWORKS CAD Cheat Sheet, featuring over 90 tips and tricks, will help speed up your process.
More SOLIDWORKS Tutorials
Customizing Colors in SOLIDWORKS Drawings
SOLIDWORKS Pipe Route Overview
Why and how to Use Display States in Drawings: SOLIDWORKS Tutorials
Applying a New SOLIDWORKS Drawing Sheet Format to Existing and Future Drawings
SOLIDWORKS Mold Tools - Shut Off Surfaces, Parting Surfaces, and Tooling Split
About Nathen Blas
Nathen Blas is a SOLIDWORKS Technical Support Engineer based out of our Headquarters in Salt Lake City, Utah. He earned his Bachelor’s degree in Mechanical Engineering at the University of Utah in 2018 and joined the GoEngineer family that same year.
Get our wide array of technical resources delivered right to your inbox.
Unsubscribe at any time.