Inserting Logos Into SOLIDWORKS Parts and Drawings
When designing parts in SOLIDWORKS and documenting them in drawings, it is often necessary to display a company logo. Perhaps you need to put together some product reviews for marketing, maybe your drawing will be used to determine the position of screen printing on a part, or, maybe, you're just looking to spruce up your drawings with your company logo. In this article, learn three different methods for adding images and inserting logos into SOLIDWORKS parts and drawings.
#1. Add a decal
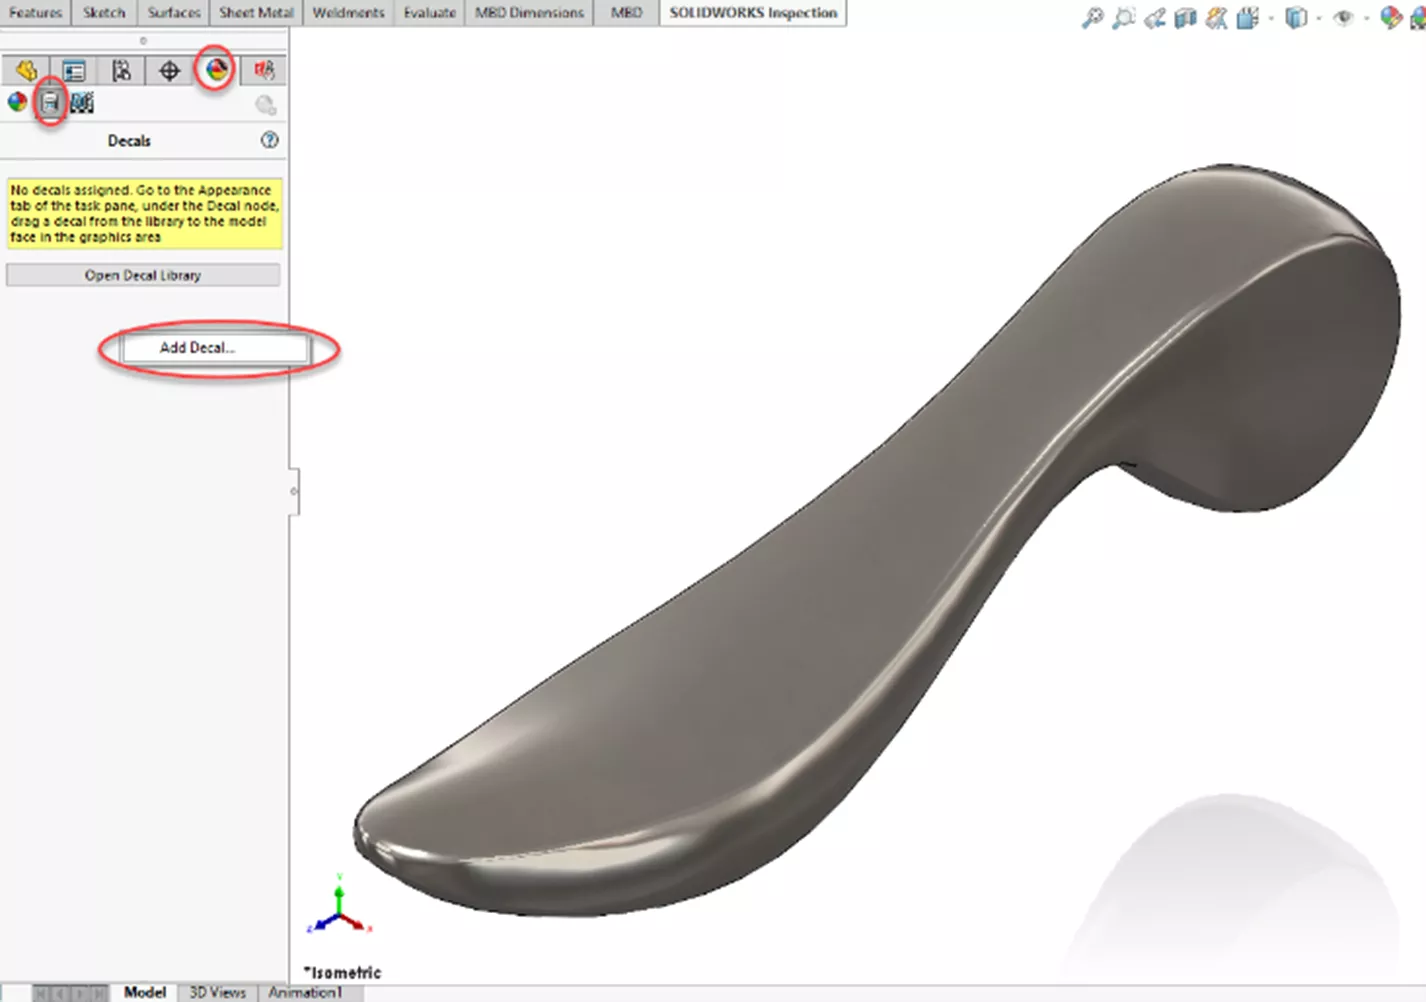
A picture speaks volumes, so Marketing has asked you for a render of the final design, including branding, that they can use for various projects. Let’s insert a logo into the model so that it will show in screen captures and renders. First, right-click in the decal area of the appearance tab and select Add Decal…
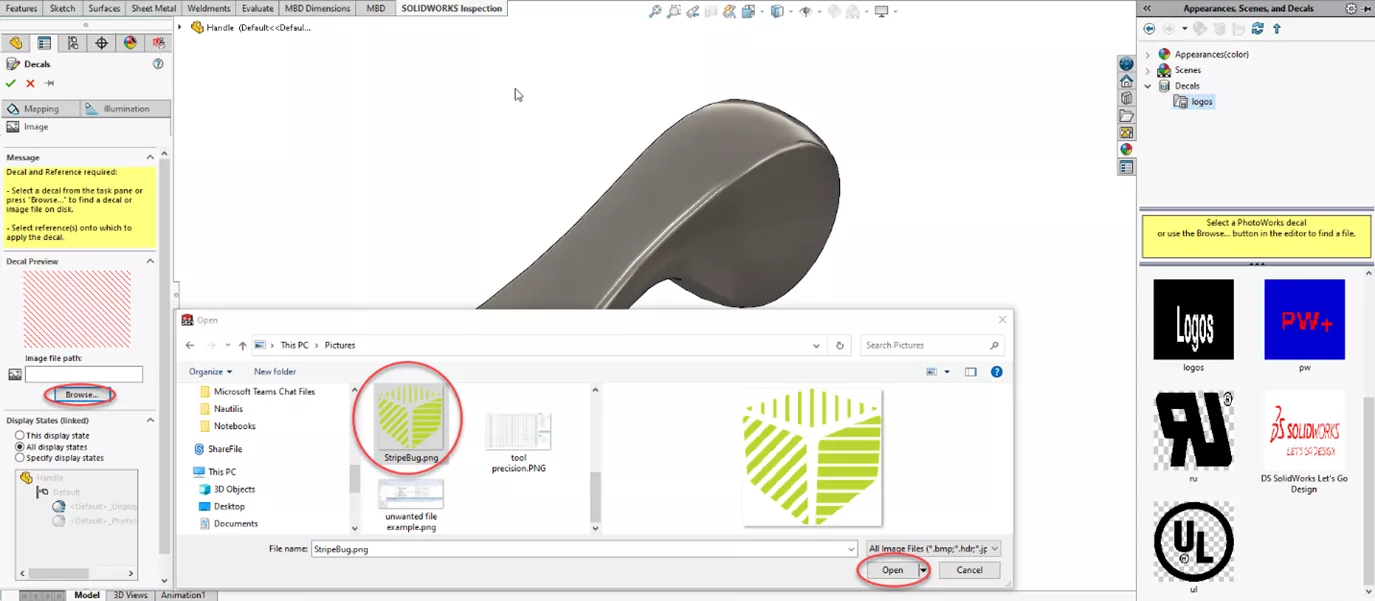
Next, click Browse and select the desired art.
Click on the face on which you wish to place the image and use the available controls to size and position it as desired. In the example below, I’ve also applied transparency which is present in the .png file.
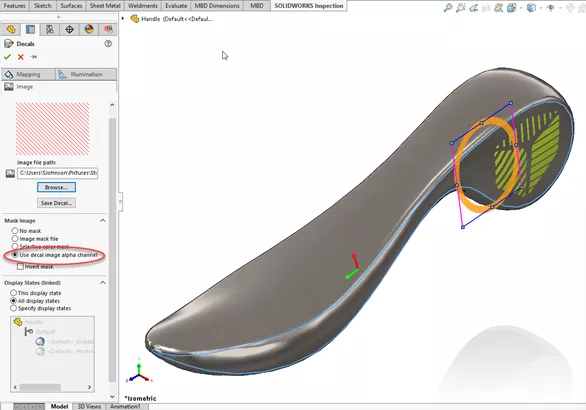
Now you have a nice-looking model – complete with your company logo.

Just drop that in a drawing, and you’re done, right?
Well, it’s not always that easy. The only way for decals applied in this way to be visible in your drawing is to set the view display to Shaded or Shaded With Edges that can result in a less than stellar appearance.

To show a logo in hidden lines removed view on your drawing, it needs to be inserted into a sketch on the part.
#2. Add an image to a sketch
Start a new sketch on an appropriate plane and select Tools > Sketch Tools > Sketch Picture and browse for your art file.
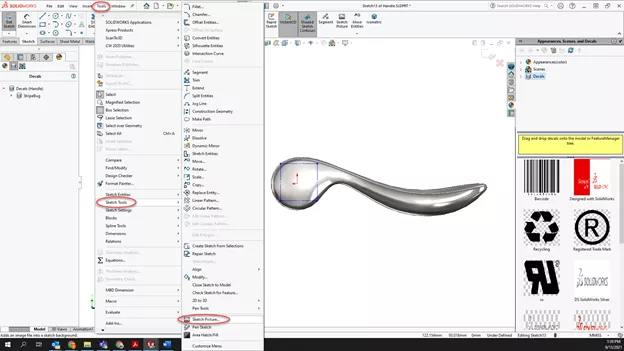
Set the image’s scale and positioning with the available controls and then click the green check.
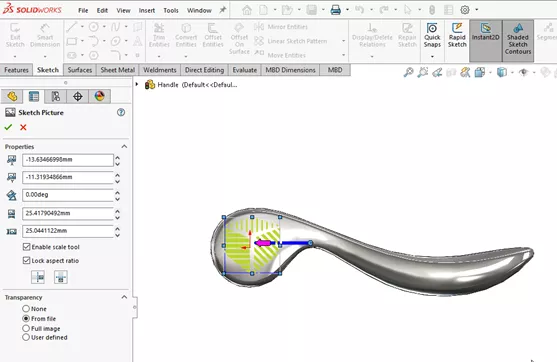
The last step is to make sure that sketches are set to visible in your drawing views and place your view. You should end up with something like the example below.

#3. Branding a Title block
If all you need to do is update your drawing title block with your company logo, the steps are even easier.
With your drawing open, click on Insert > Picture and browse for your art file. Then, use the dialog to position and scale the image appropriately, just like you did with the Sketch Picture tool. Then click the green checkmark and you’re all set.
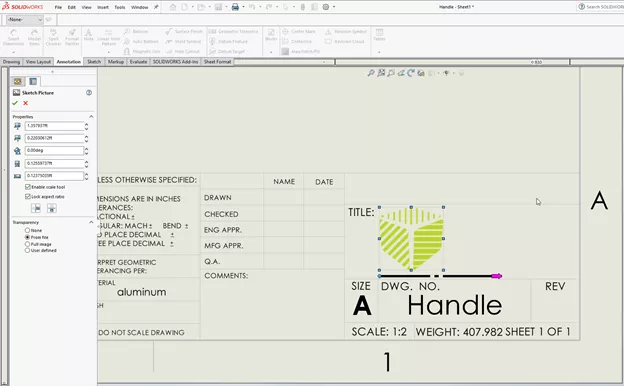
I hope you found this tutorial helpful. Check out more SOLIDWORKS tips and tricks below.

SOLIDWORKS CAD Cheat Sheet
Our SOLIDWORKS CAD Cheat Sheet, featuring over 90 tips and tricks, will help speed up your process.
More SOLIDWORKS Tutorials
SOLIDWORKS Display Scaling Solutions
SOLIDWORKS Mold Tools - Draft Analysis and Scale
SOLIDWORKS Copy and Paste Features: Same or Different Parts
SOLIDWORKS Convert to Sheet Metal Command Explained

About Shaun Johnson
Shaun has been using and supporting SOLIDWORKS since 2000. After spending five years in a support role, he went on to develop products and solutions in industries ranging from consumer electronics to military aviation ground support equipment. Once again in a support role, Shaun enjoys leveraging this experience to help others realize their designs and transform pixels into parts. Whenever he can, Shaun fires up his coal forge and takes a more ‘hands on’ approach to creating parts from raw steel.
Get our wide array of technical resources delivered right to your inbox.
Unsubscribe at any time.
