Master Layers in DraftSight with Layer States Manager
If you've ever been to a theater or a Broadway show, you might have noticed how the lighting, scenery, and backdrops change in sync with the performance. To achieve this precise coordination, lighting engineers and prop setters define each lighting, prop, and backdrop queue for the entire performance. By organizing the elements in a DraftSight drawing into layers, your designs can flow smoothly, just like scenes in a play. To do this, we'll use the Layers Manager and the Layer States Manager.
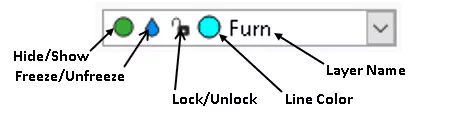
Once you have created the layers for your drawing, a set of properties is available in the Drafting and Annotations workspace on the Home Tab > Layers section. It will show the active layer and look like this:
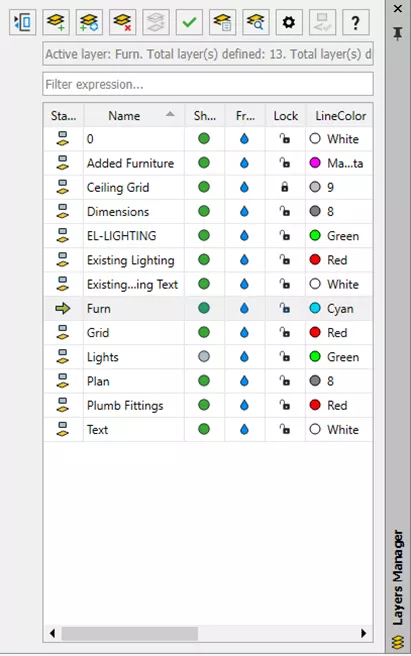
To modify layer properties, use the Layers Manager.

The Layer Manager dialog box will appear.

The active layer is highlighted by default. If any properties are changed, click OK to confirm the changes.
Alternatively, depending on the settings, it may be a panel.
The active layer is highlighted by default. If any properties are changed in this panel, they will be applied automatically.
Layer States (located in the upper right corner of the dialog) is a powerful feature for quickly setting up multiple layers.

By clicking on this button, another dialog will open on top of the Layer Manage.
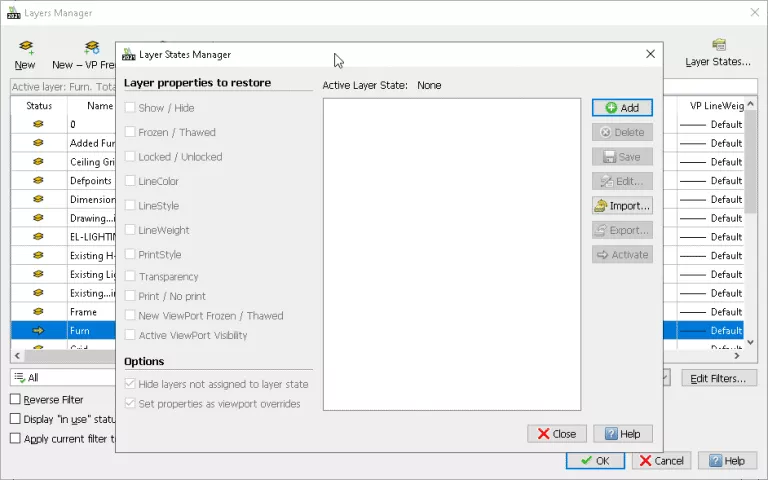
The idea with this screen is that it will allow you to take a snapshot of the current layer properties to be reused later.
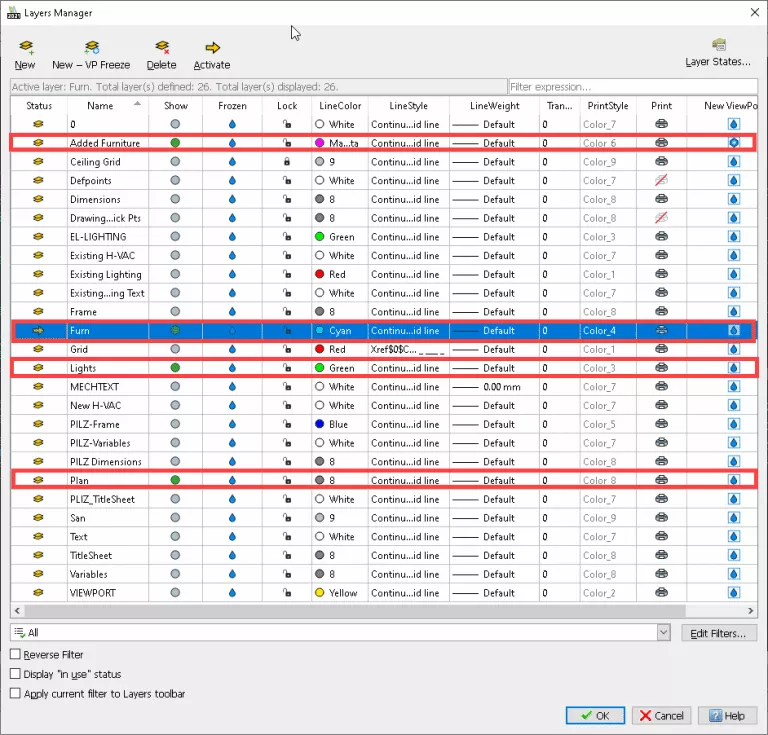
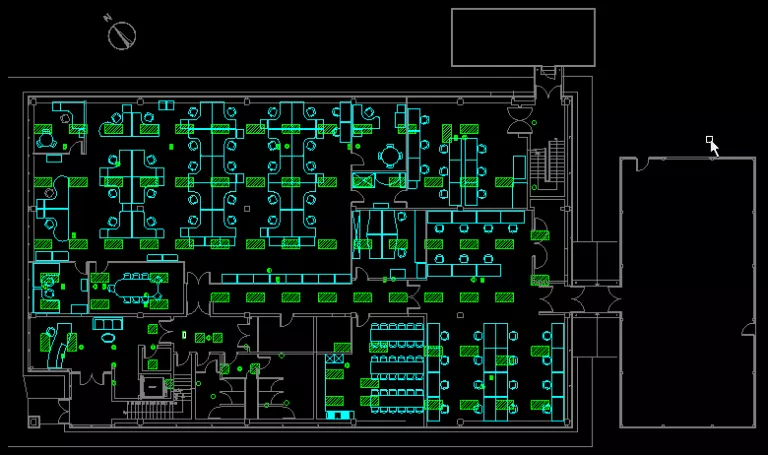
Here, only the layers Furn, Lights, and Plan are visible.
To save this snapshot, click the Layer States button and then the Add button to name it Lights & Furn. Click Save. Click Close and change the properties of the layers so that only the Plan and Ceiling Grid are visible, and the Ceiling Grid is locked. Click the Layer State button again, then New, and name the new layer state Plan & Ceiling Grid. Click Save.
Create another saved state with all layers visible and unlocked and name it “Default”.
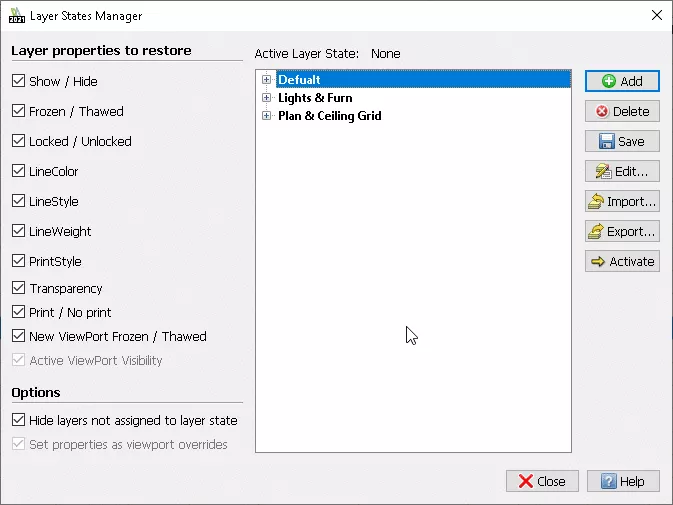
Now you’re ready to cycle through these Layer states by opening the Layer States Manager, selecting a named state, and clicking Activate.
By creating these named states you will be able to quickly and easily move from scene to scene to work on details, isolate items or groups, and create a smoother workflow.
If you would like to learn more about this feature, follow this link to online DraftSight Help: DraftSight Layer States Manager.
I hope you found this DraftSight tutorial helpful. Check out more tips and tricks listed below. Additionally, join the GoEngineer Community to participate in the conversation, create forum posts, and answer questions from other DraftSight users.
Want to take your DraftSight skills to the next level? Enroll in the official DraftSight Essentials training course. This course teaches designers how to make coordinates, create drawings, and modify entities, properties, and layers.
Editor's Note: This article was originally published in August 2023 and has been updated for accuracy and comprehensiveness.
More DraftSight Tutorials
DraftSight Performance Troubleshooting Tips
Using the DraftSight Image Tracer
Using the DraftSight Split Tool

About Dennis Barnes
Dennis Barnes is a CSWE, CSWI and a Sr. Applications Engineer based out of the Albuquerque, NM office since 2012. He has a BS in Computer Science from Chapman University and has been using SOLIDWORKS since 2005.
Get our wide array of technical resources delivered right to your inbox.
Unsubscribe at any time.