What's New SOLIDWORKS 2022: Routing, Structure Systems, Parts & Features
SOLIDWORKS 2022 is loaded with exciting new features and enhancements to help streamline your design process. In this sneak peek, check out what's new for routing, structure systems, parts and features. To see everything new in SOLIDWORKS 2022, view our what's new page here.
Routing
SOLIDWORKS 2022 offers some great new enhancements to Routing - from UI to long-requested features.
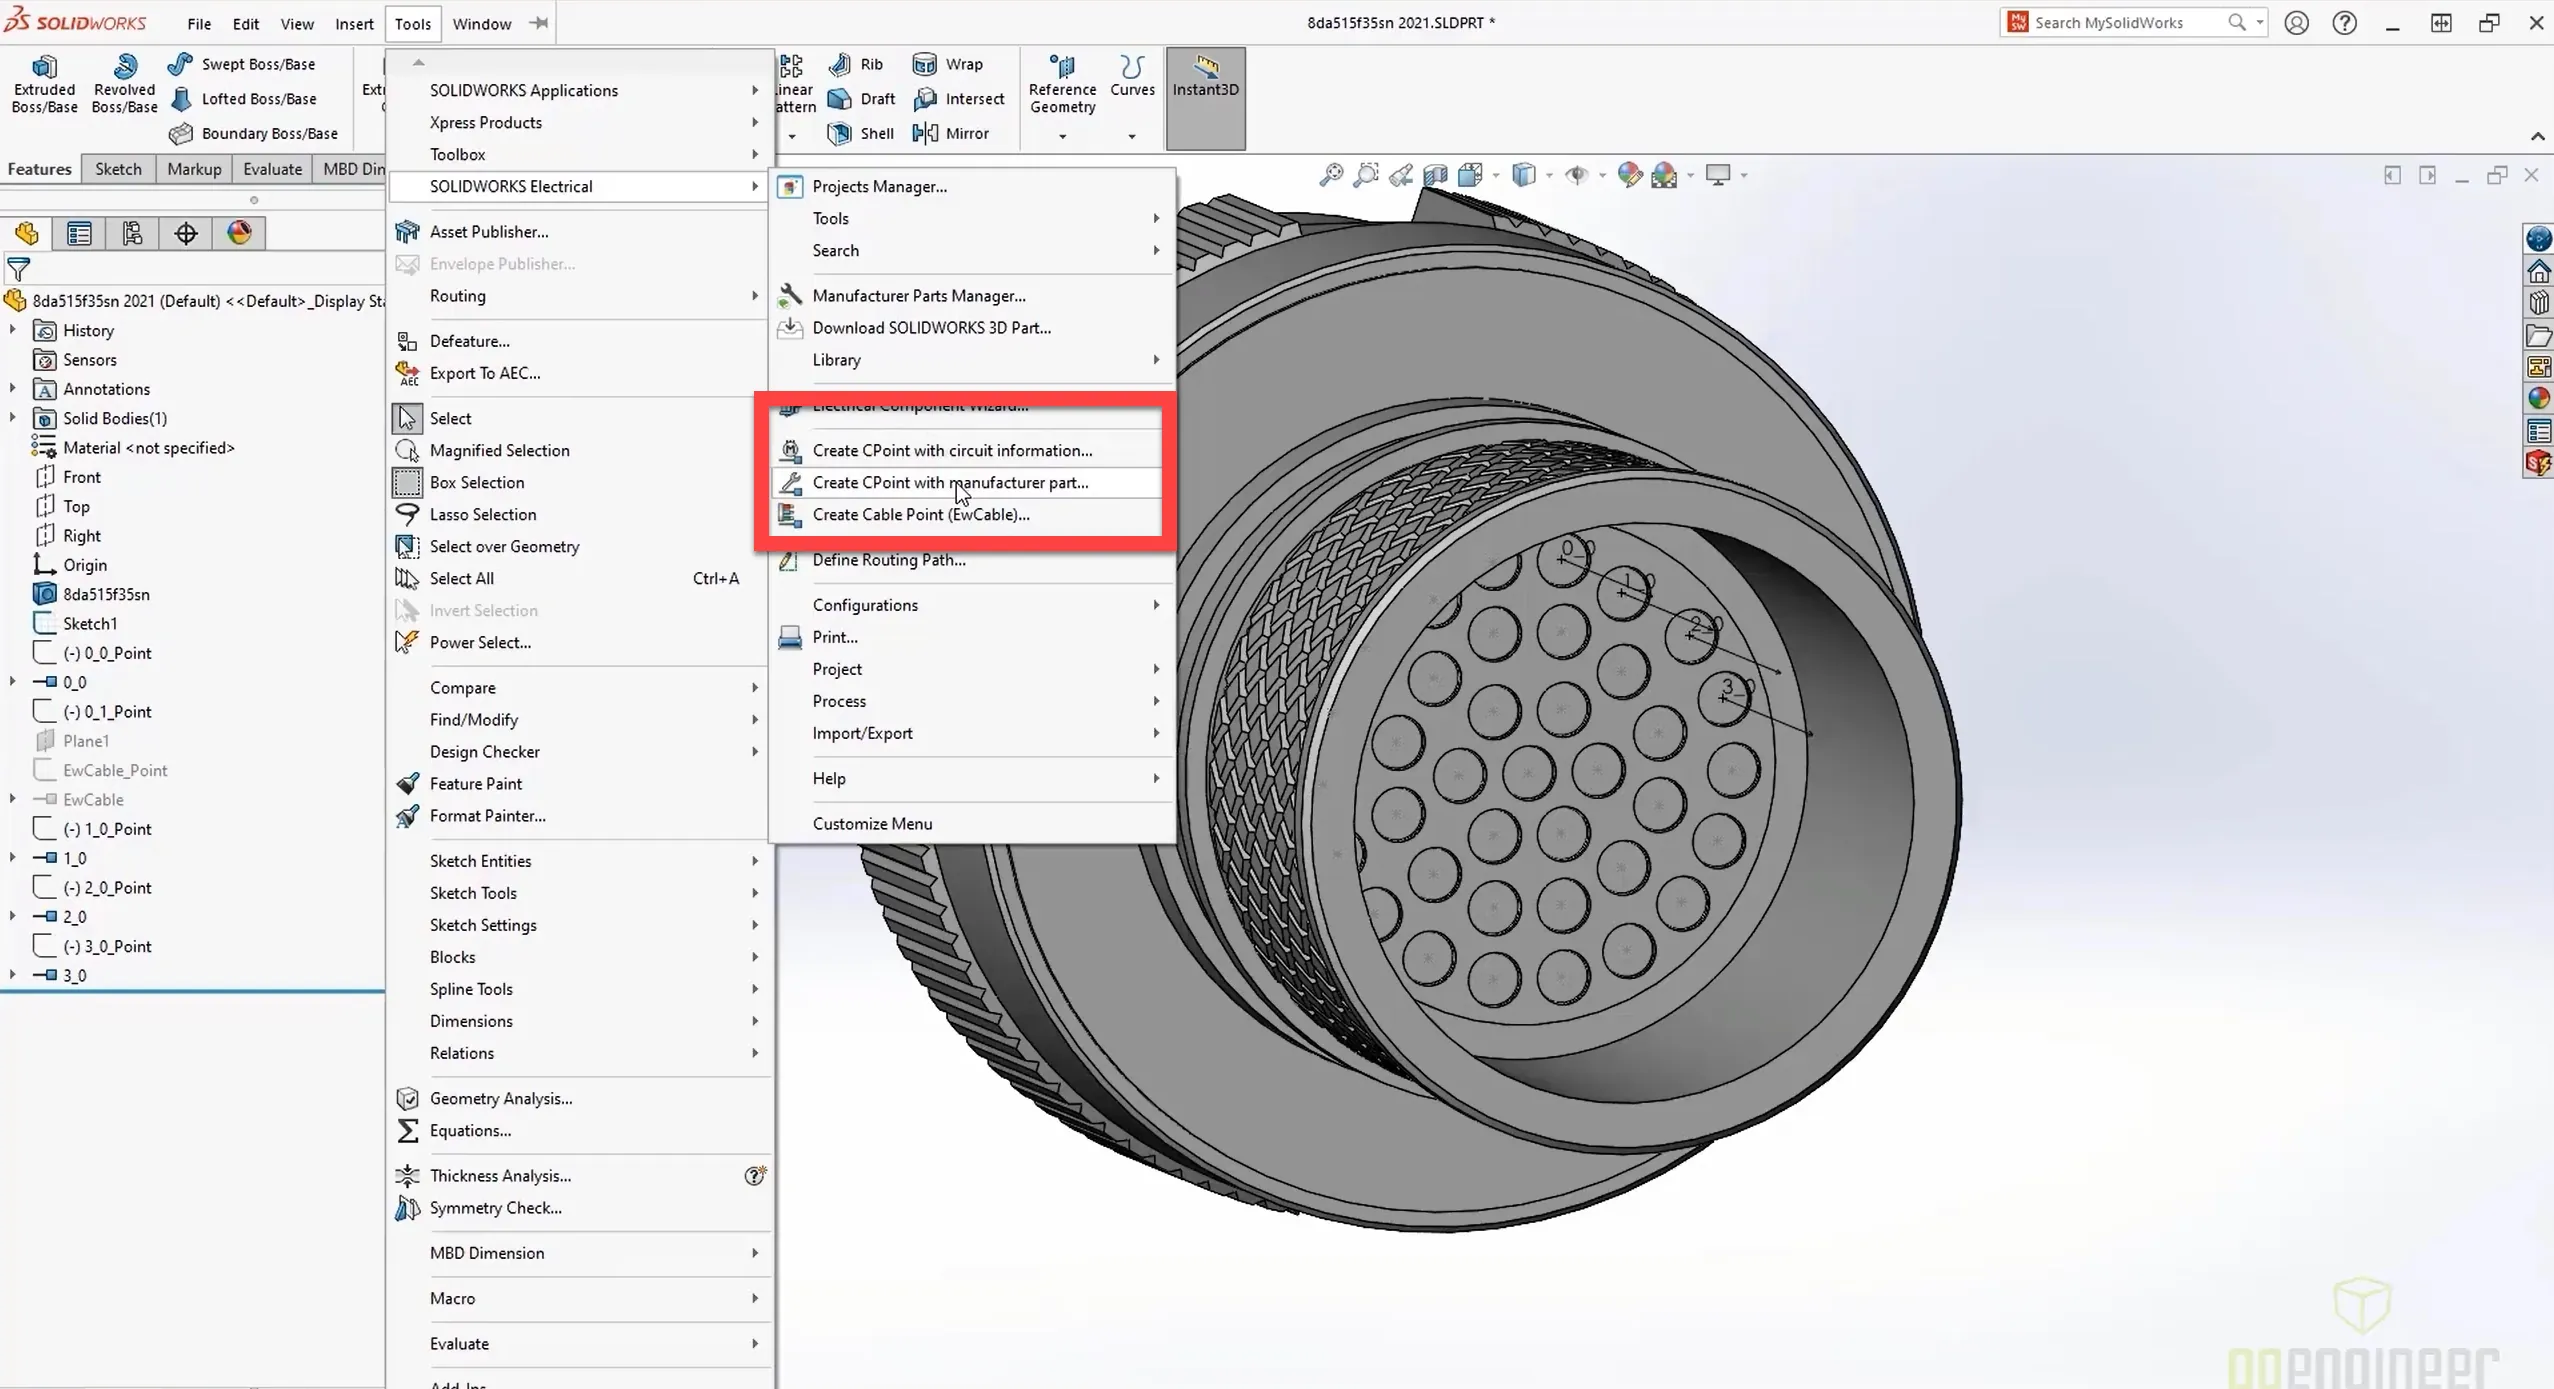
With the updates to SOLIDWORKS Electrical 2022, designers can now use the Create CPoint with manufacturer part to select edges and points and updating tables of CPoints; creating electrical components right within the SOLIDWORKS program.
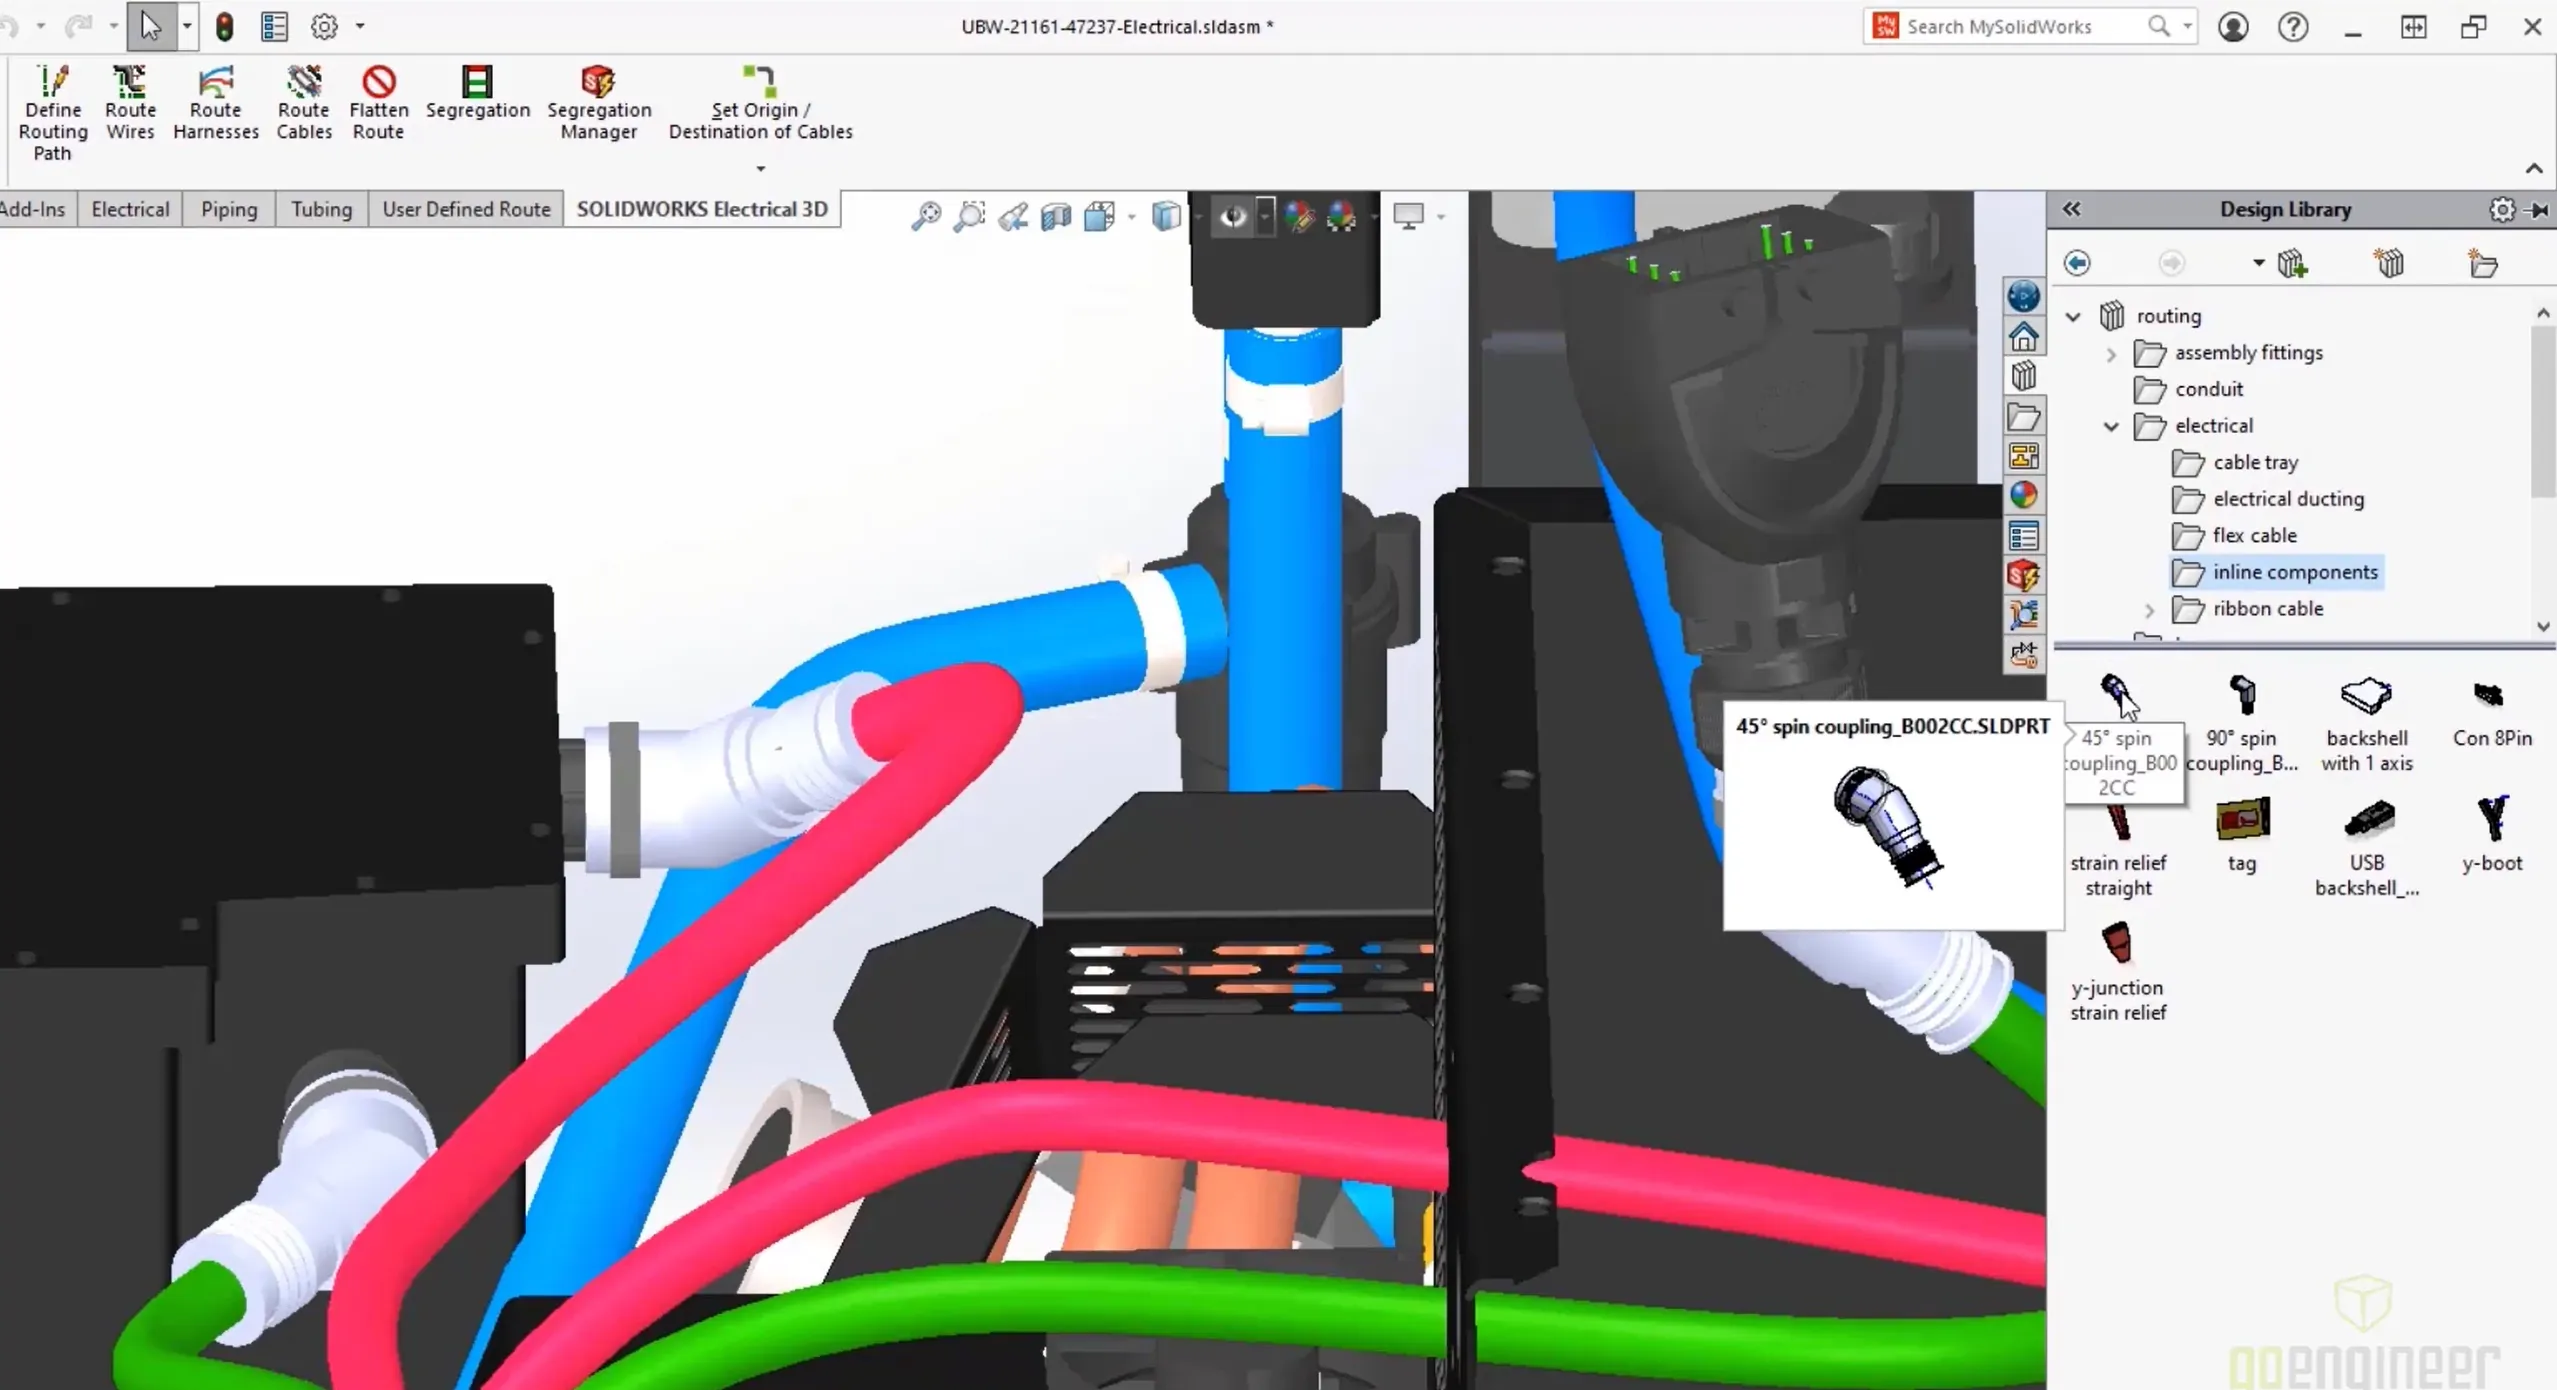
Backshells are now supported in SOLIDWORKS 2022 to provide better protection for your wire harness. Within the Design Library, various backshell options are available to be added to your assembly and can be included in your harness route alignment.
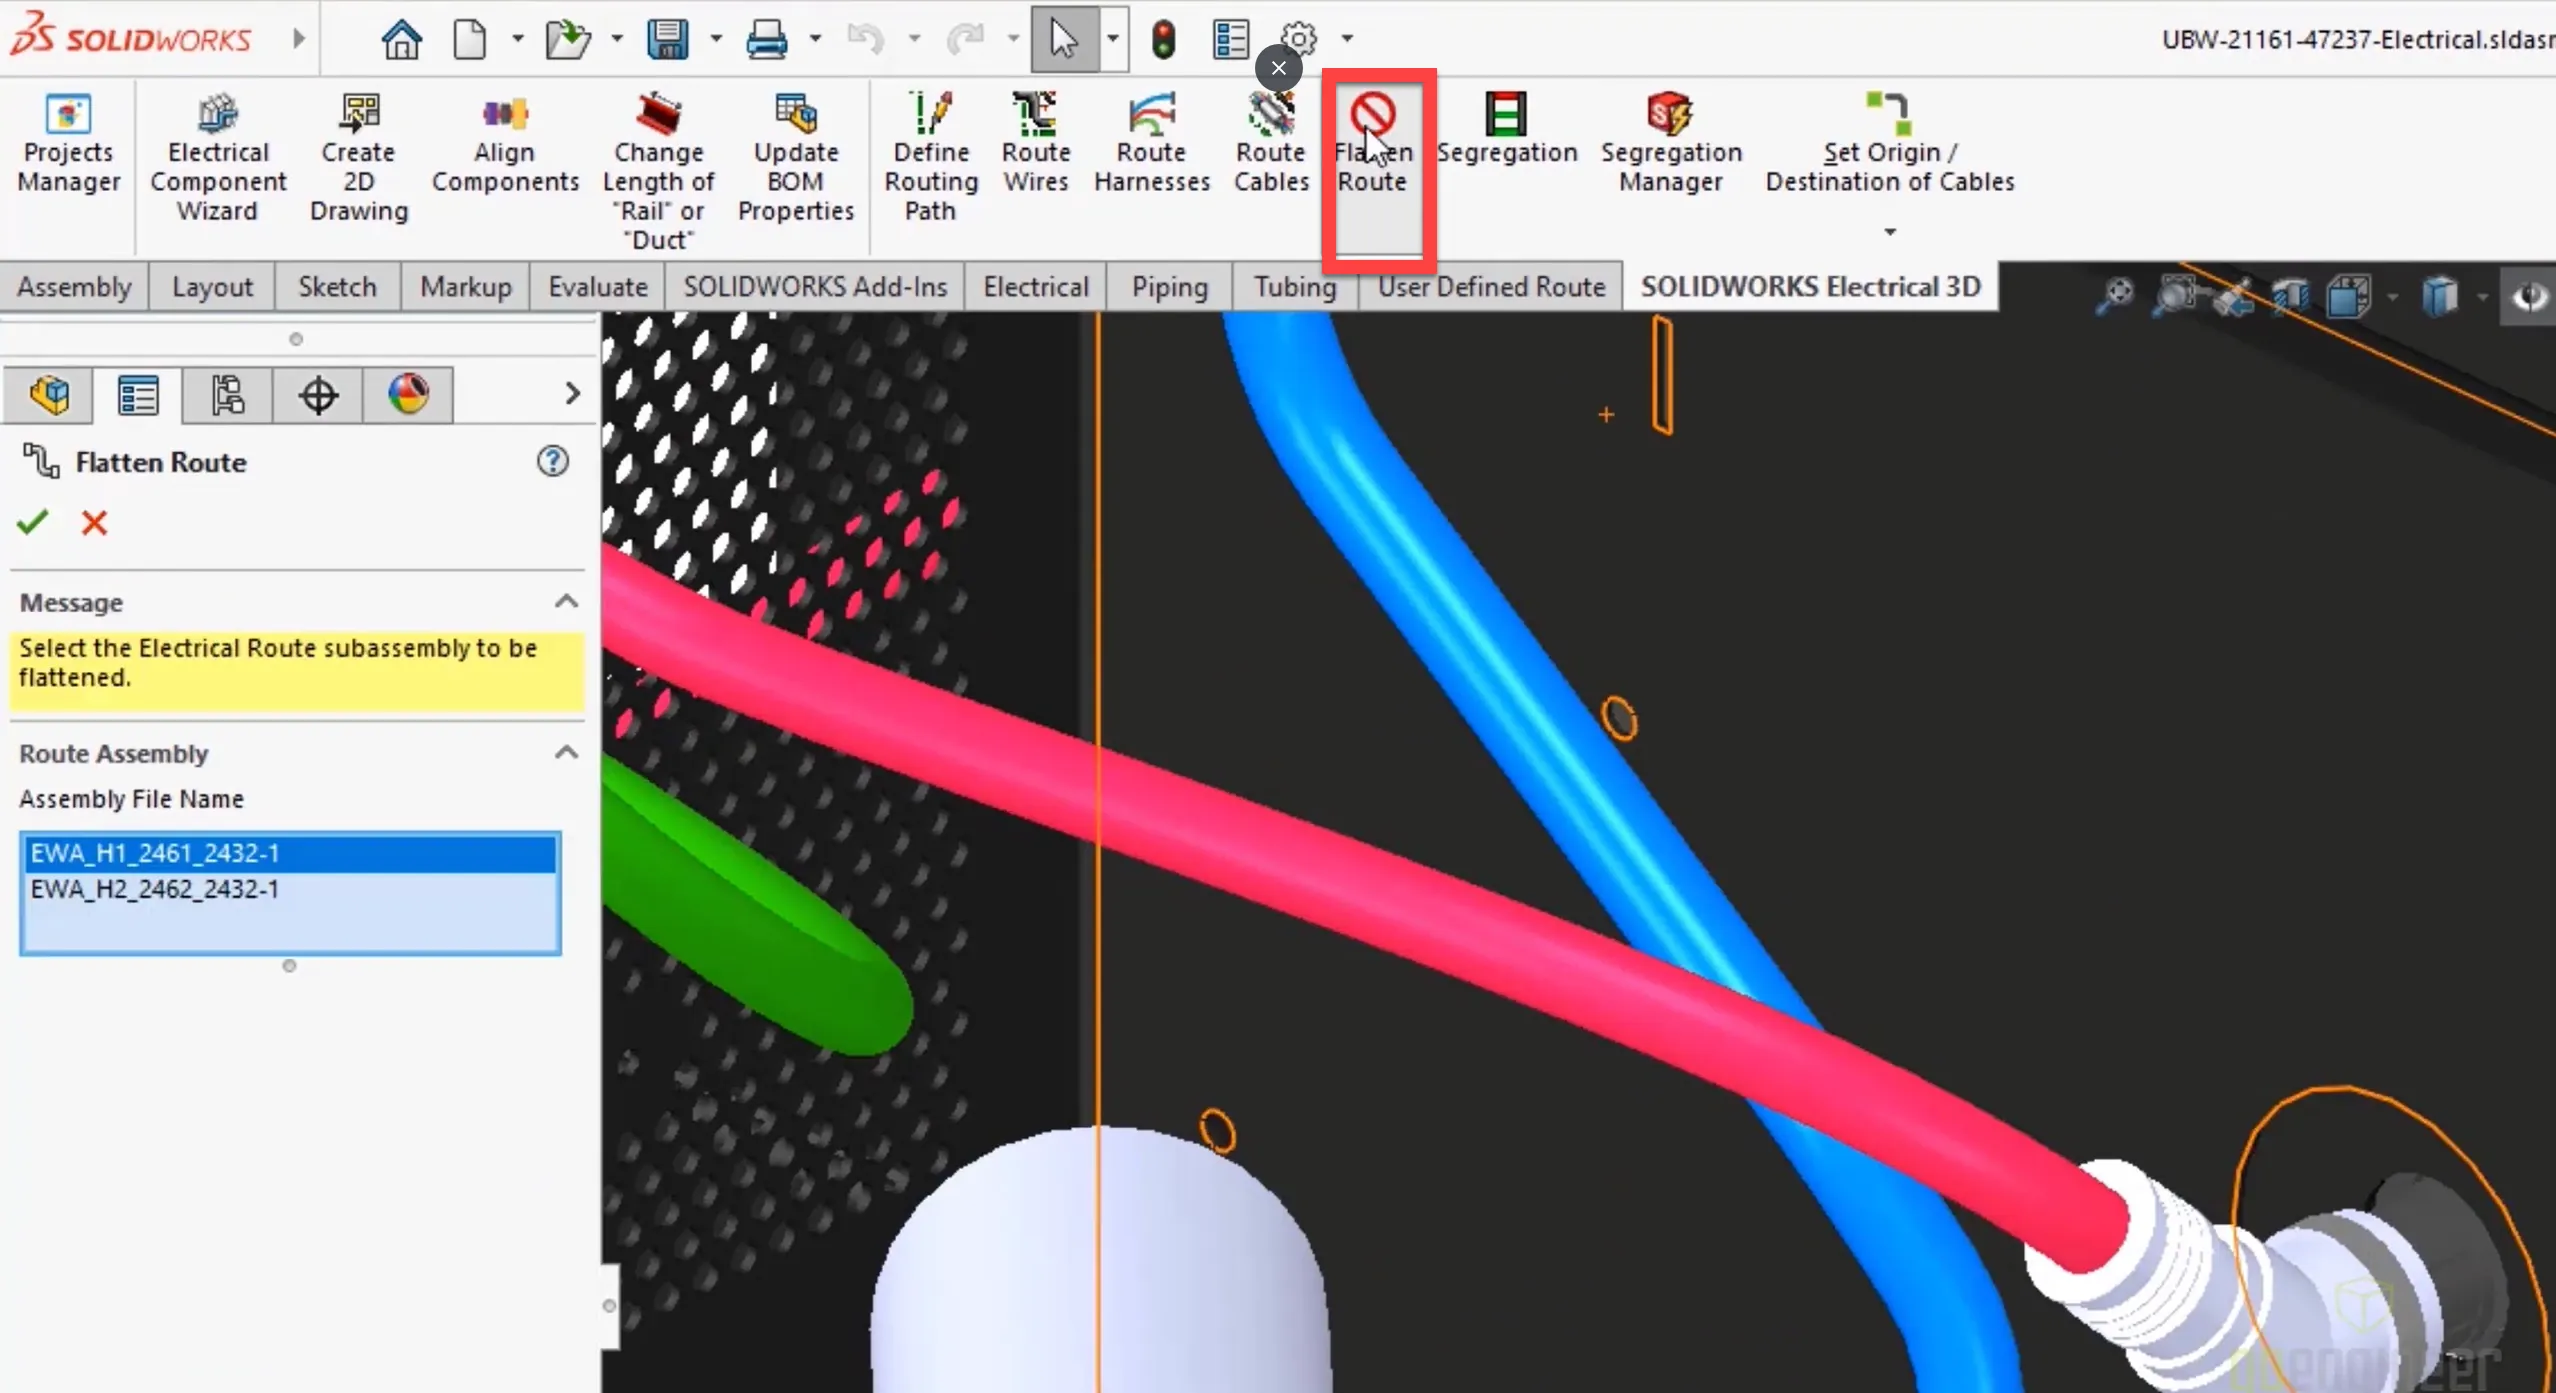
With the addition of backshell support, Flatten Route also supports backshells in SOLIDWORKS 2022. This command creates the drawing, tables, backshells, and more automatically so that the designer can focus on other areas.
Structure Systems
SOLIDWORKS 2022 introduces new enhancements to the Structure System functionality - tools designed to boost your time to market and simplify your process.
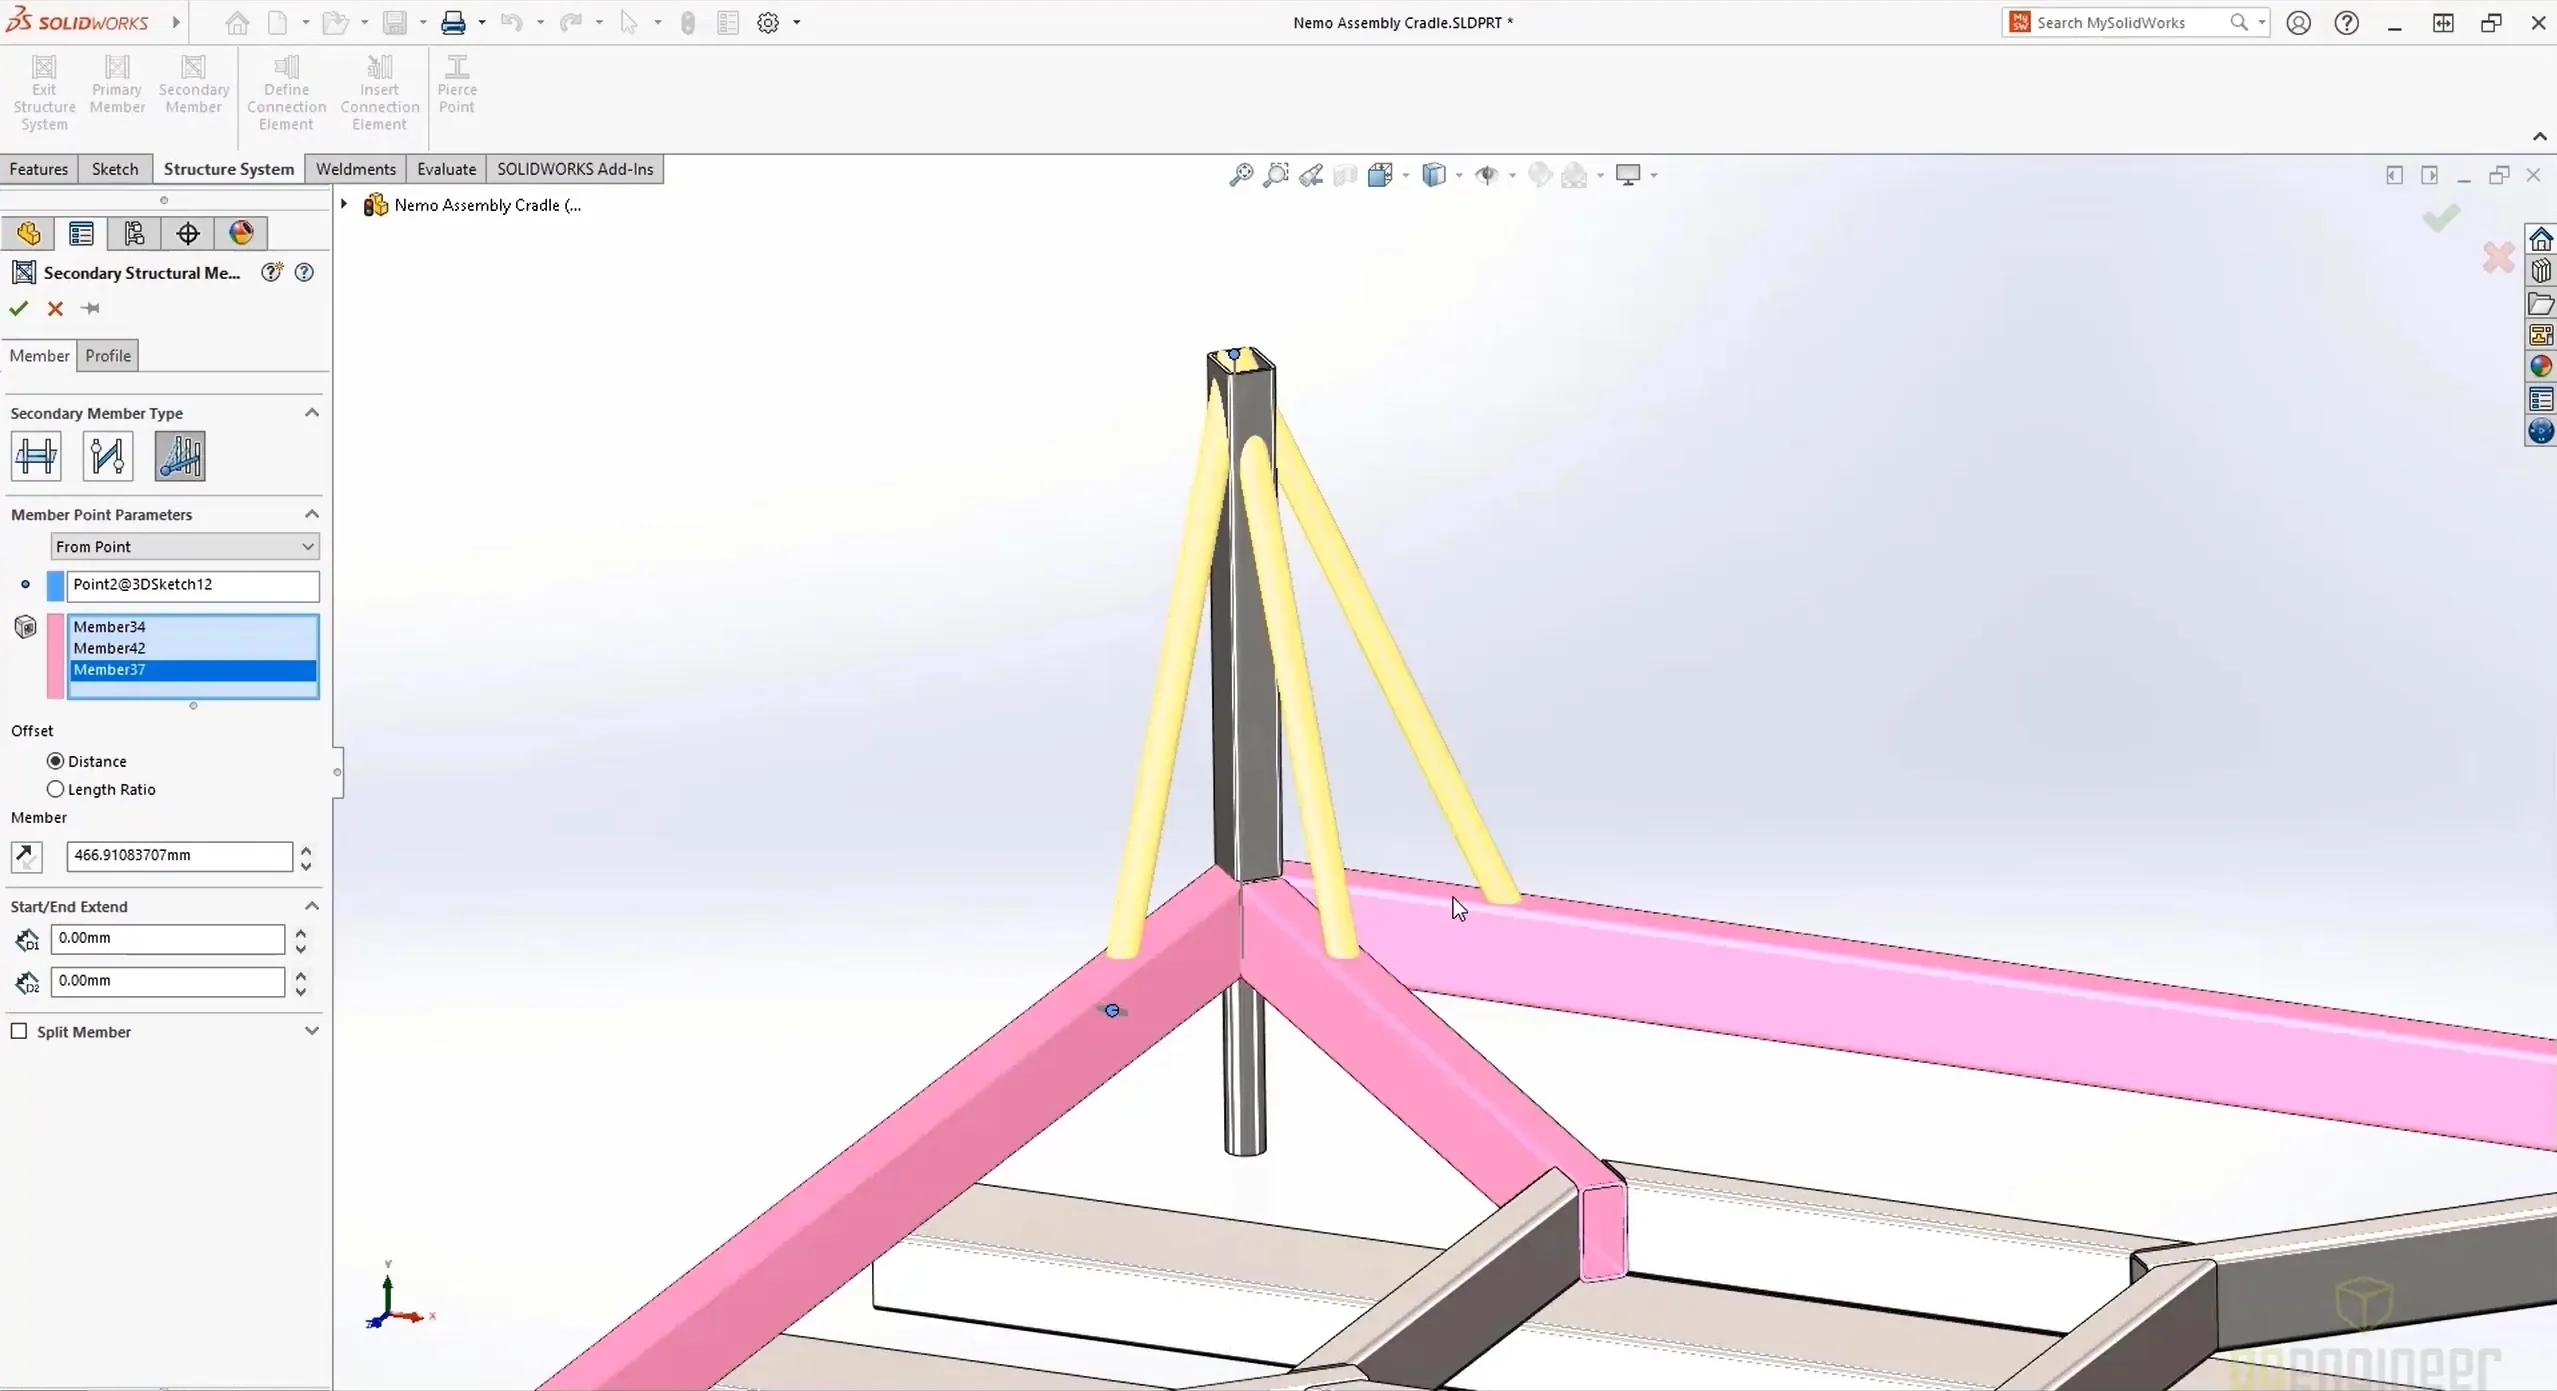
Secondary Members have been enhanced to improve the process of adding new members. One method for adding structural supports is to use the Point-Member selection.
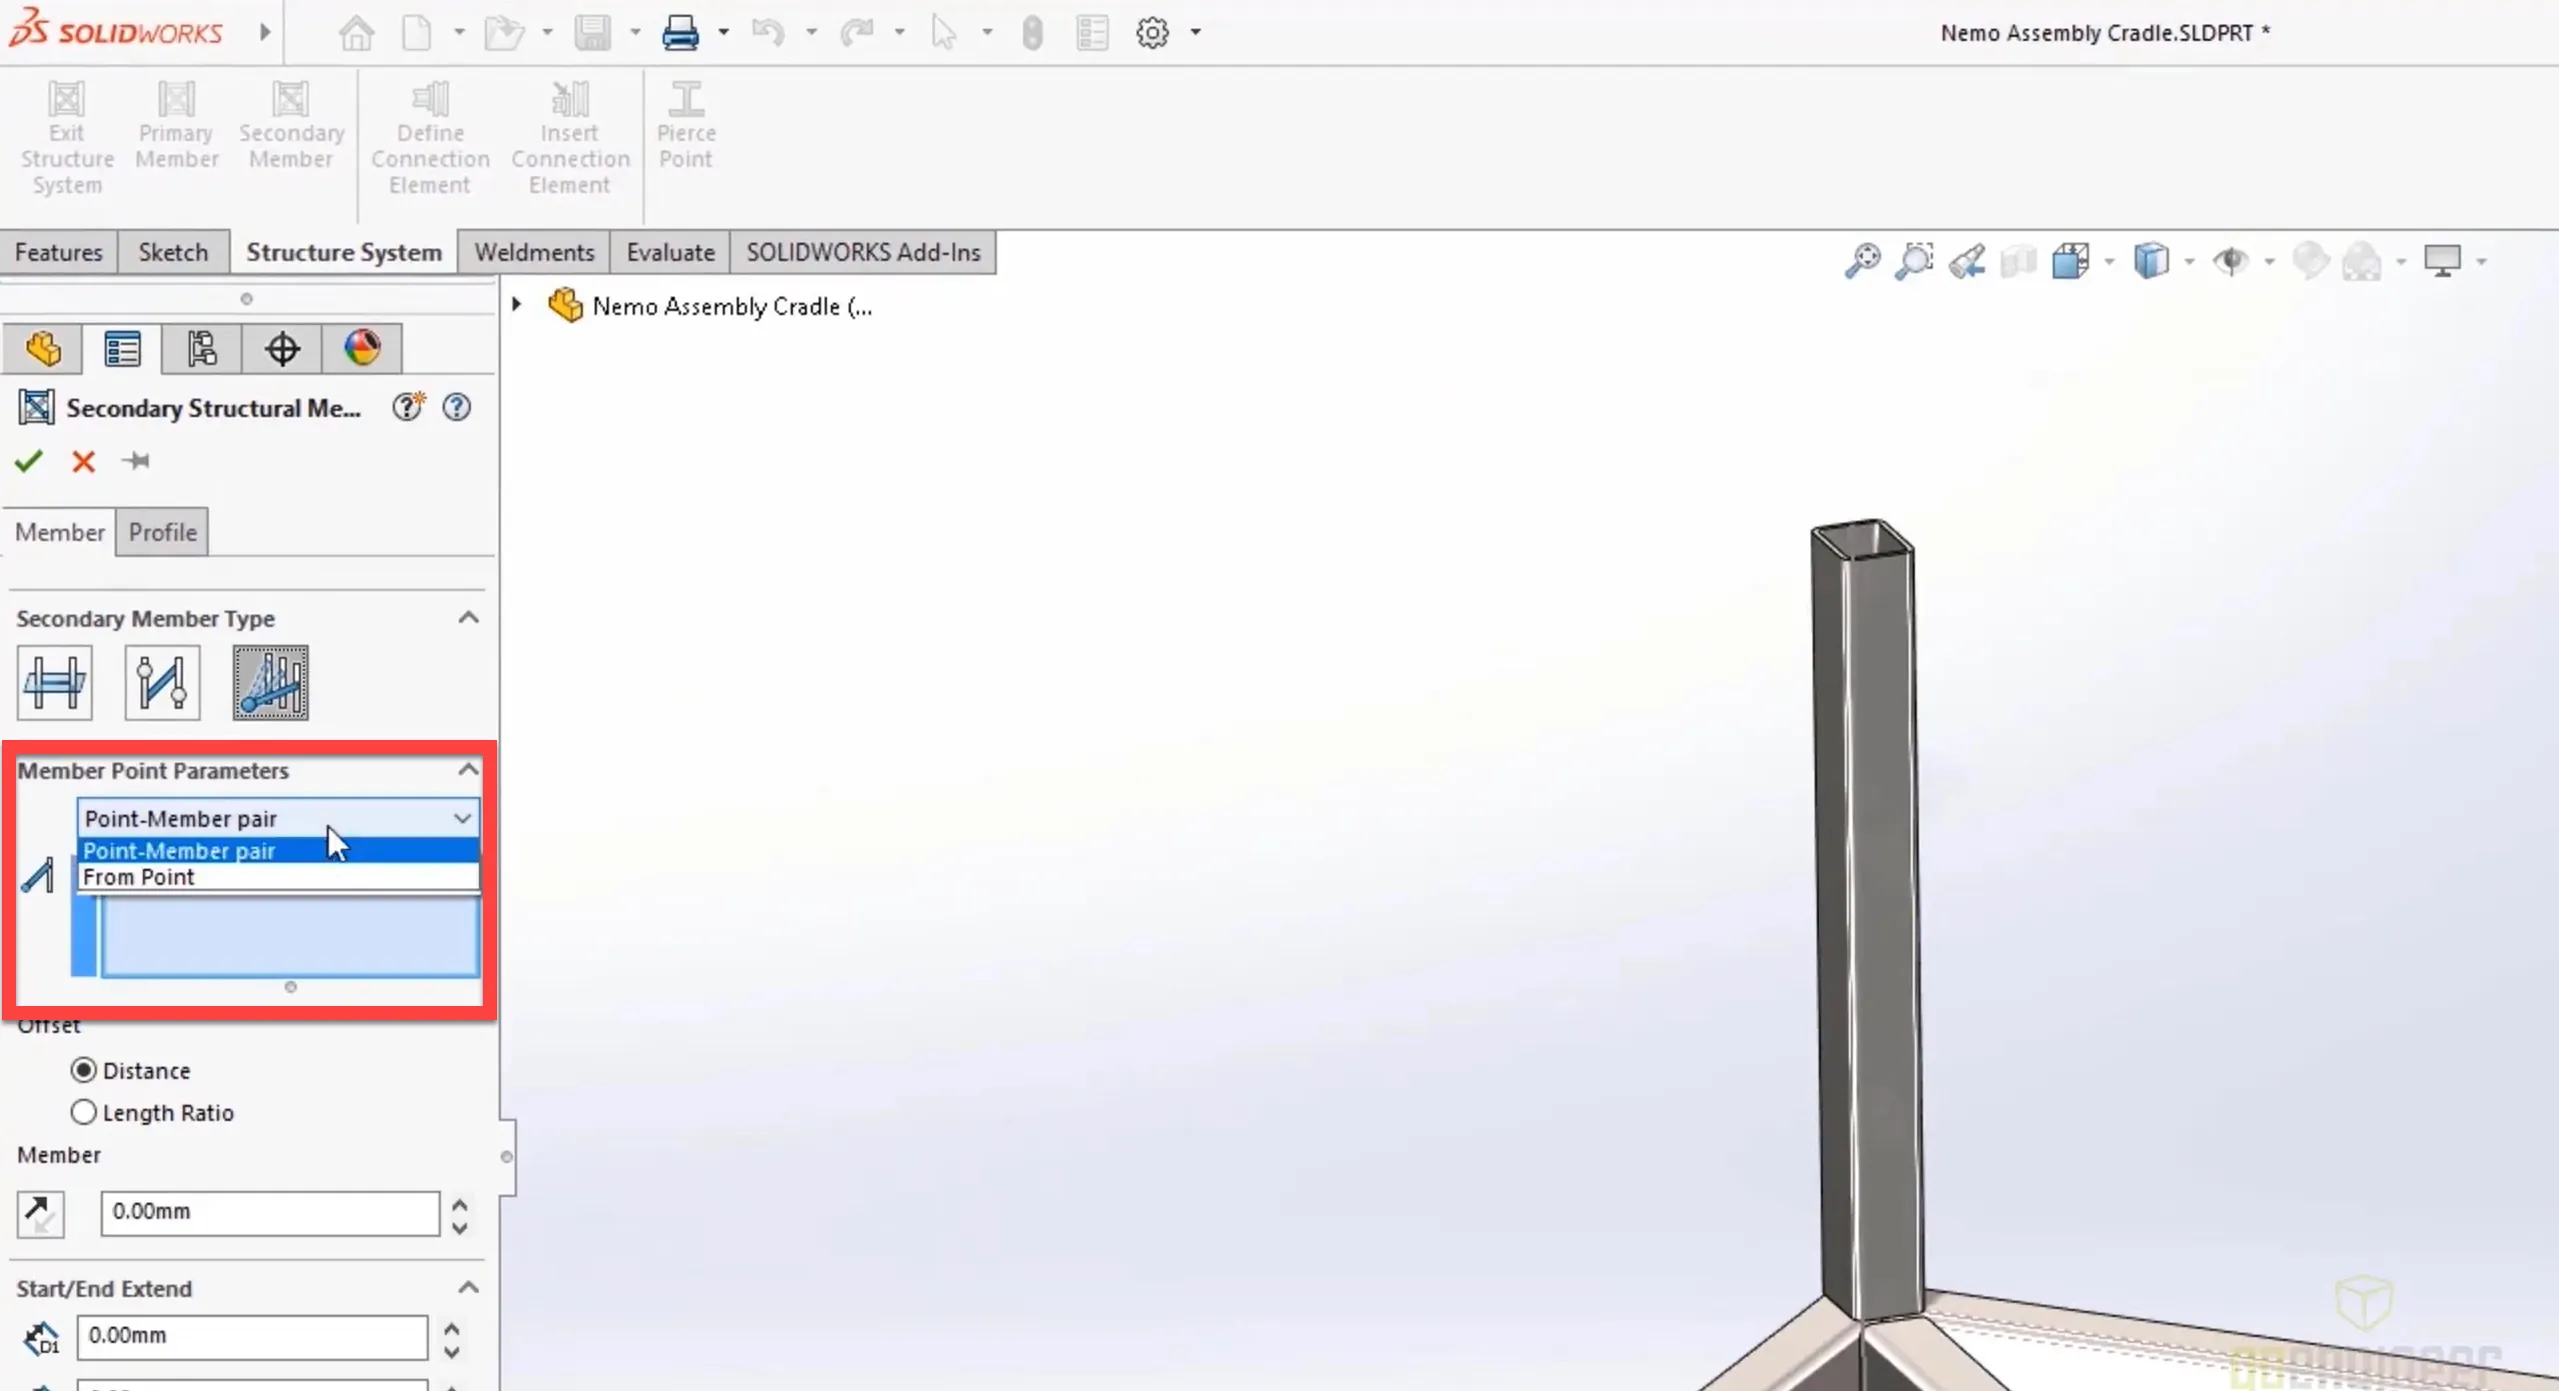
With SOLIDWORKS 2022, creating multiple Secondary Members is fast, by selecting a point and multiple bodies.
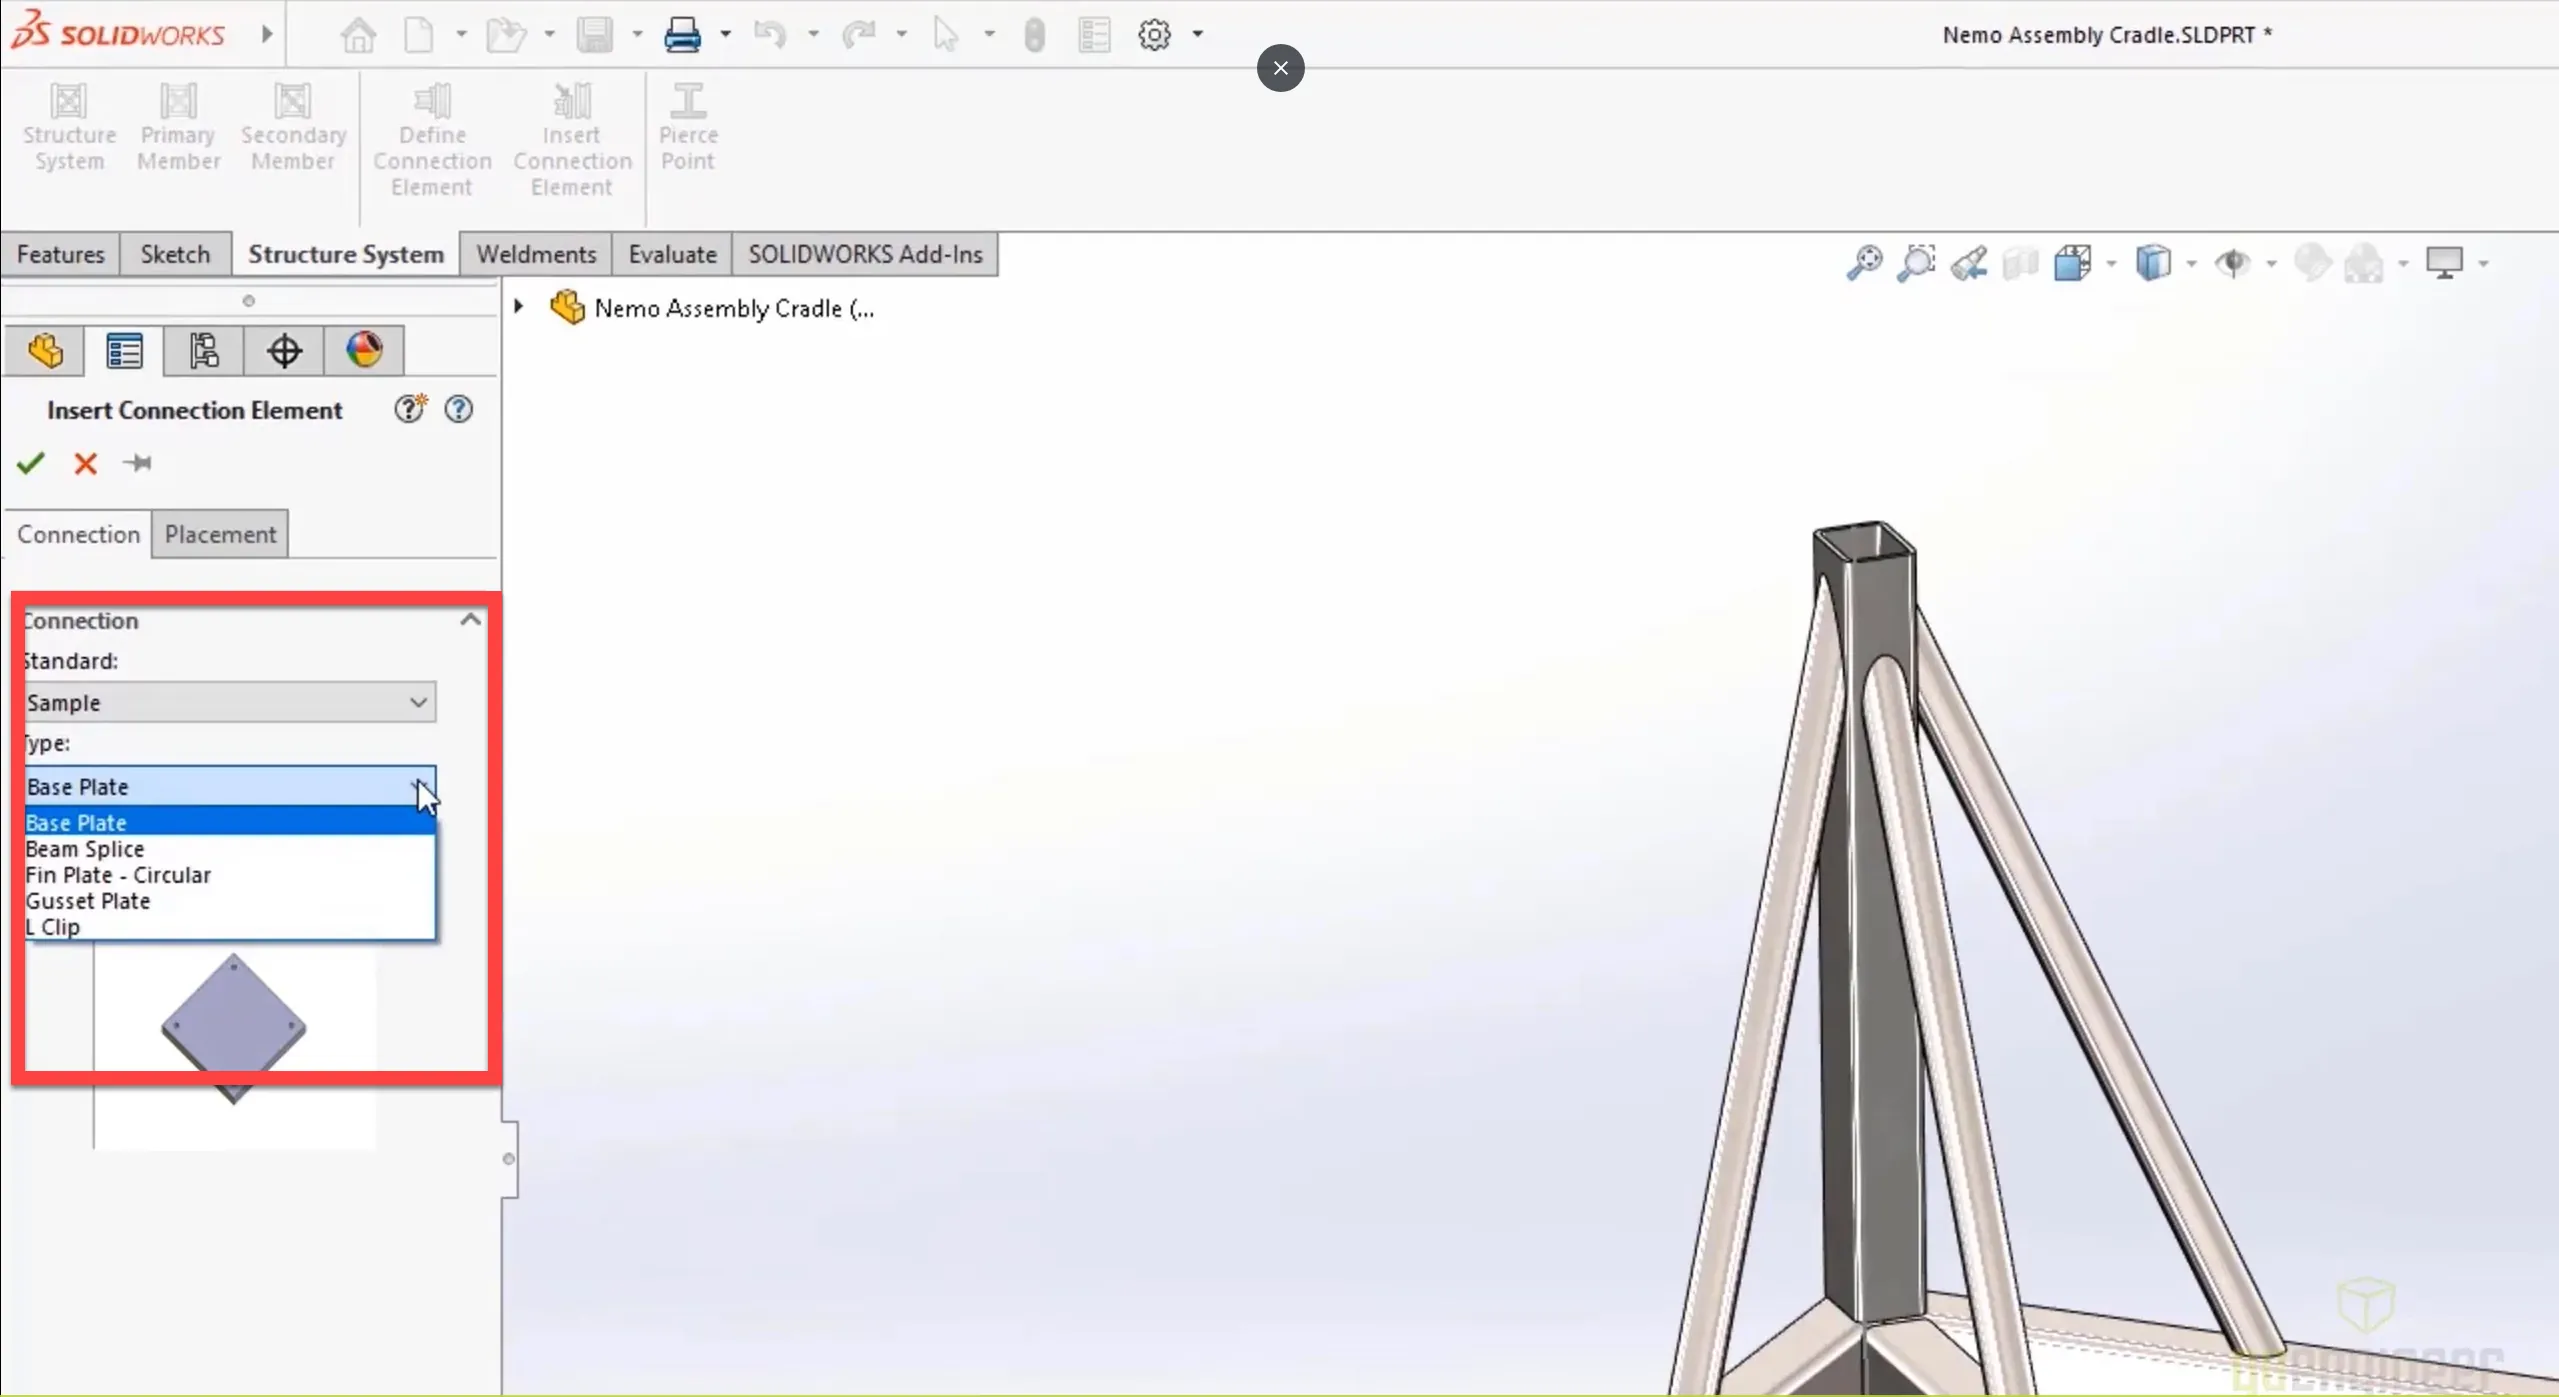
A new feature in 2022, is the ability to add and define Connection Elements like Base Plates and L brackets. Placement is simple and elements are smart; able to cut predefined holes in structural members.
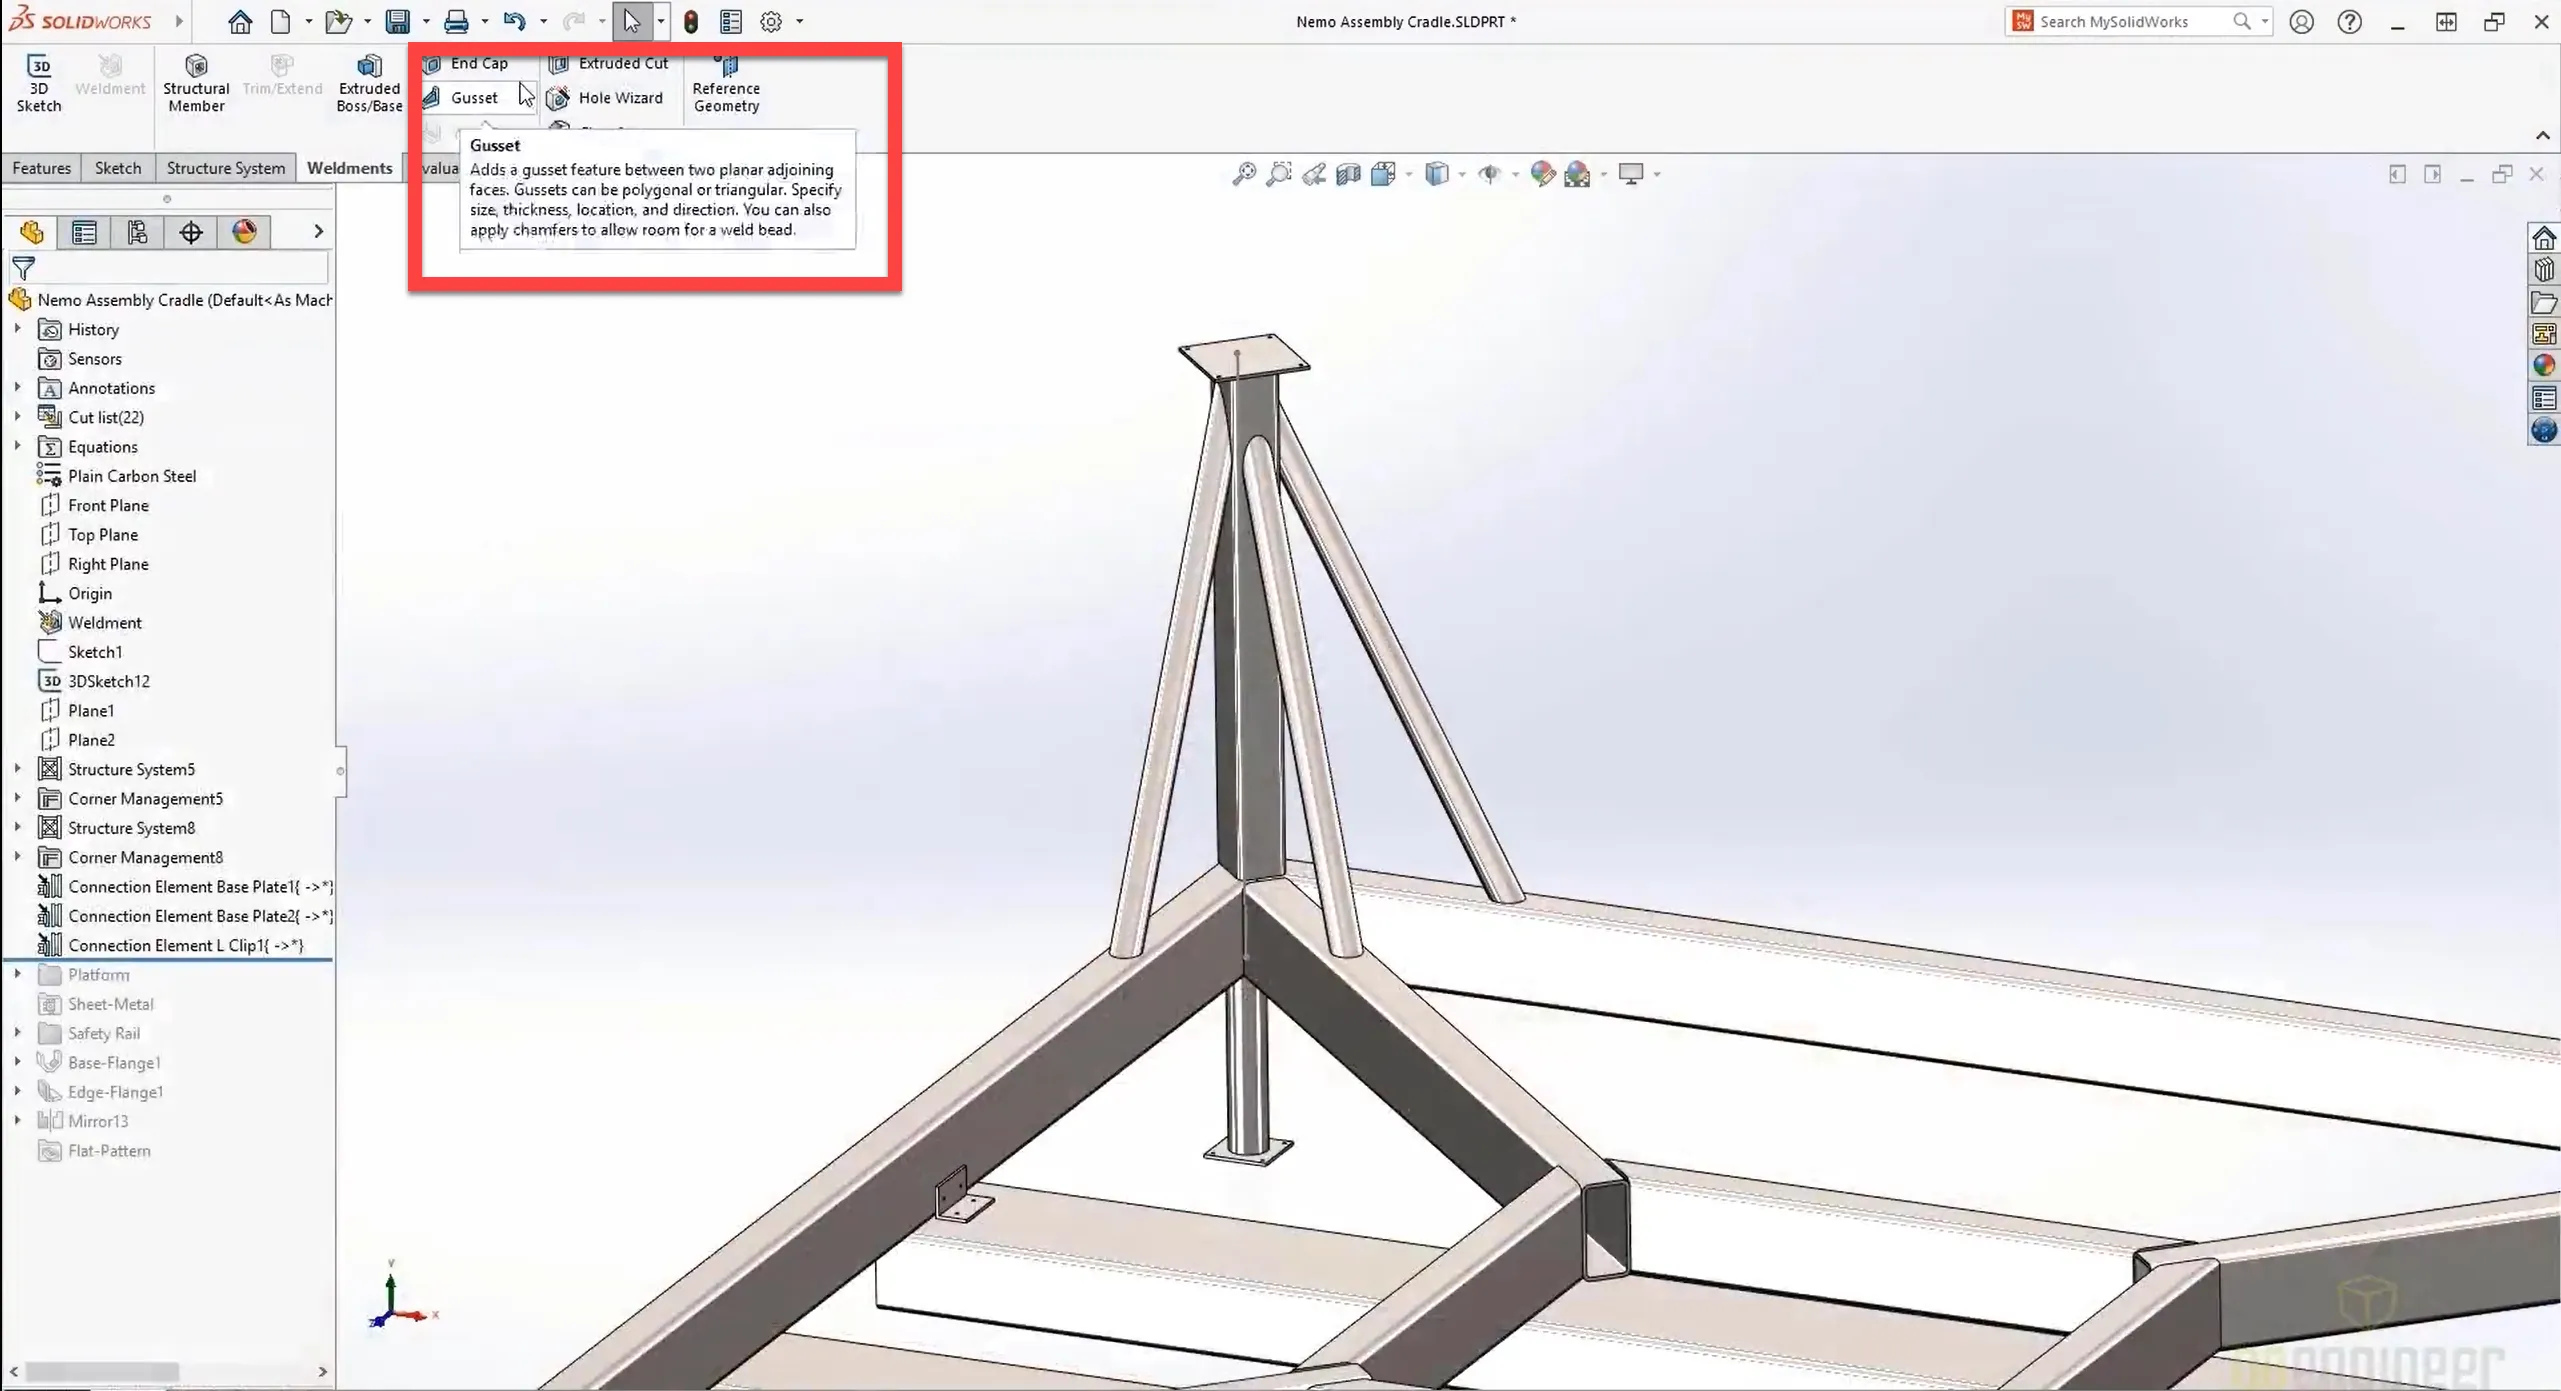
End caps and gussets are also supported and are just as easy to place in your design.
Mirroring features and components is a typical workflow in many designs. In SOLIDWORKS 2022, designers have the ability to select two reference planes to mirror, simplifying the design process and the number of features previously required.

With these new enhancements to SOLIDWORKS 2022 structure systems creating confident structures is a piece of cake.
Parts and Features
Working with Mesh Bodies in SOLIDWORKS 2022 is just like working with SOLIDWORKS native geometry.
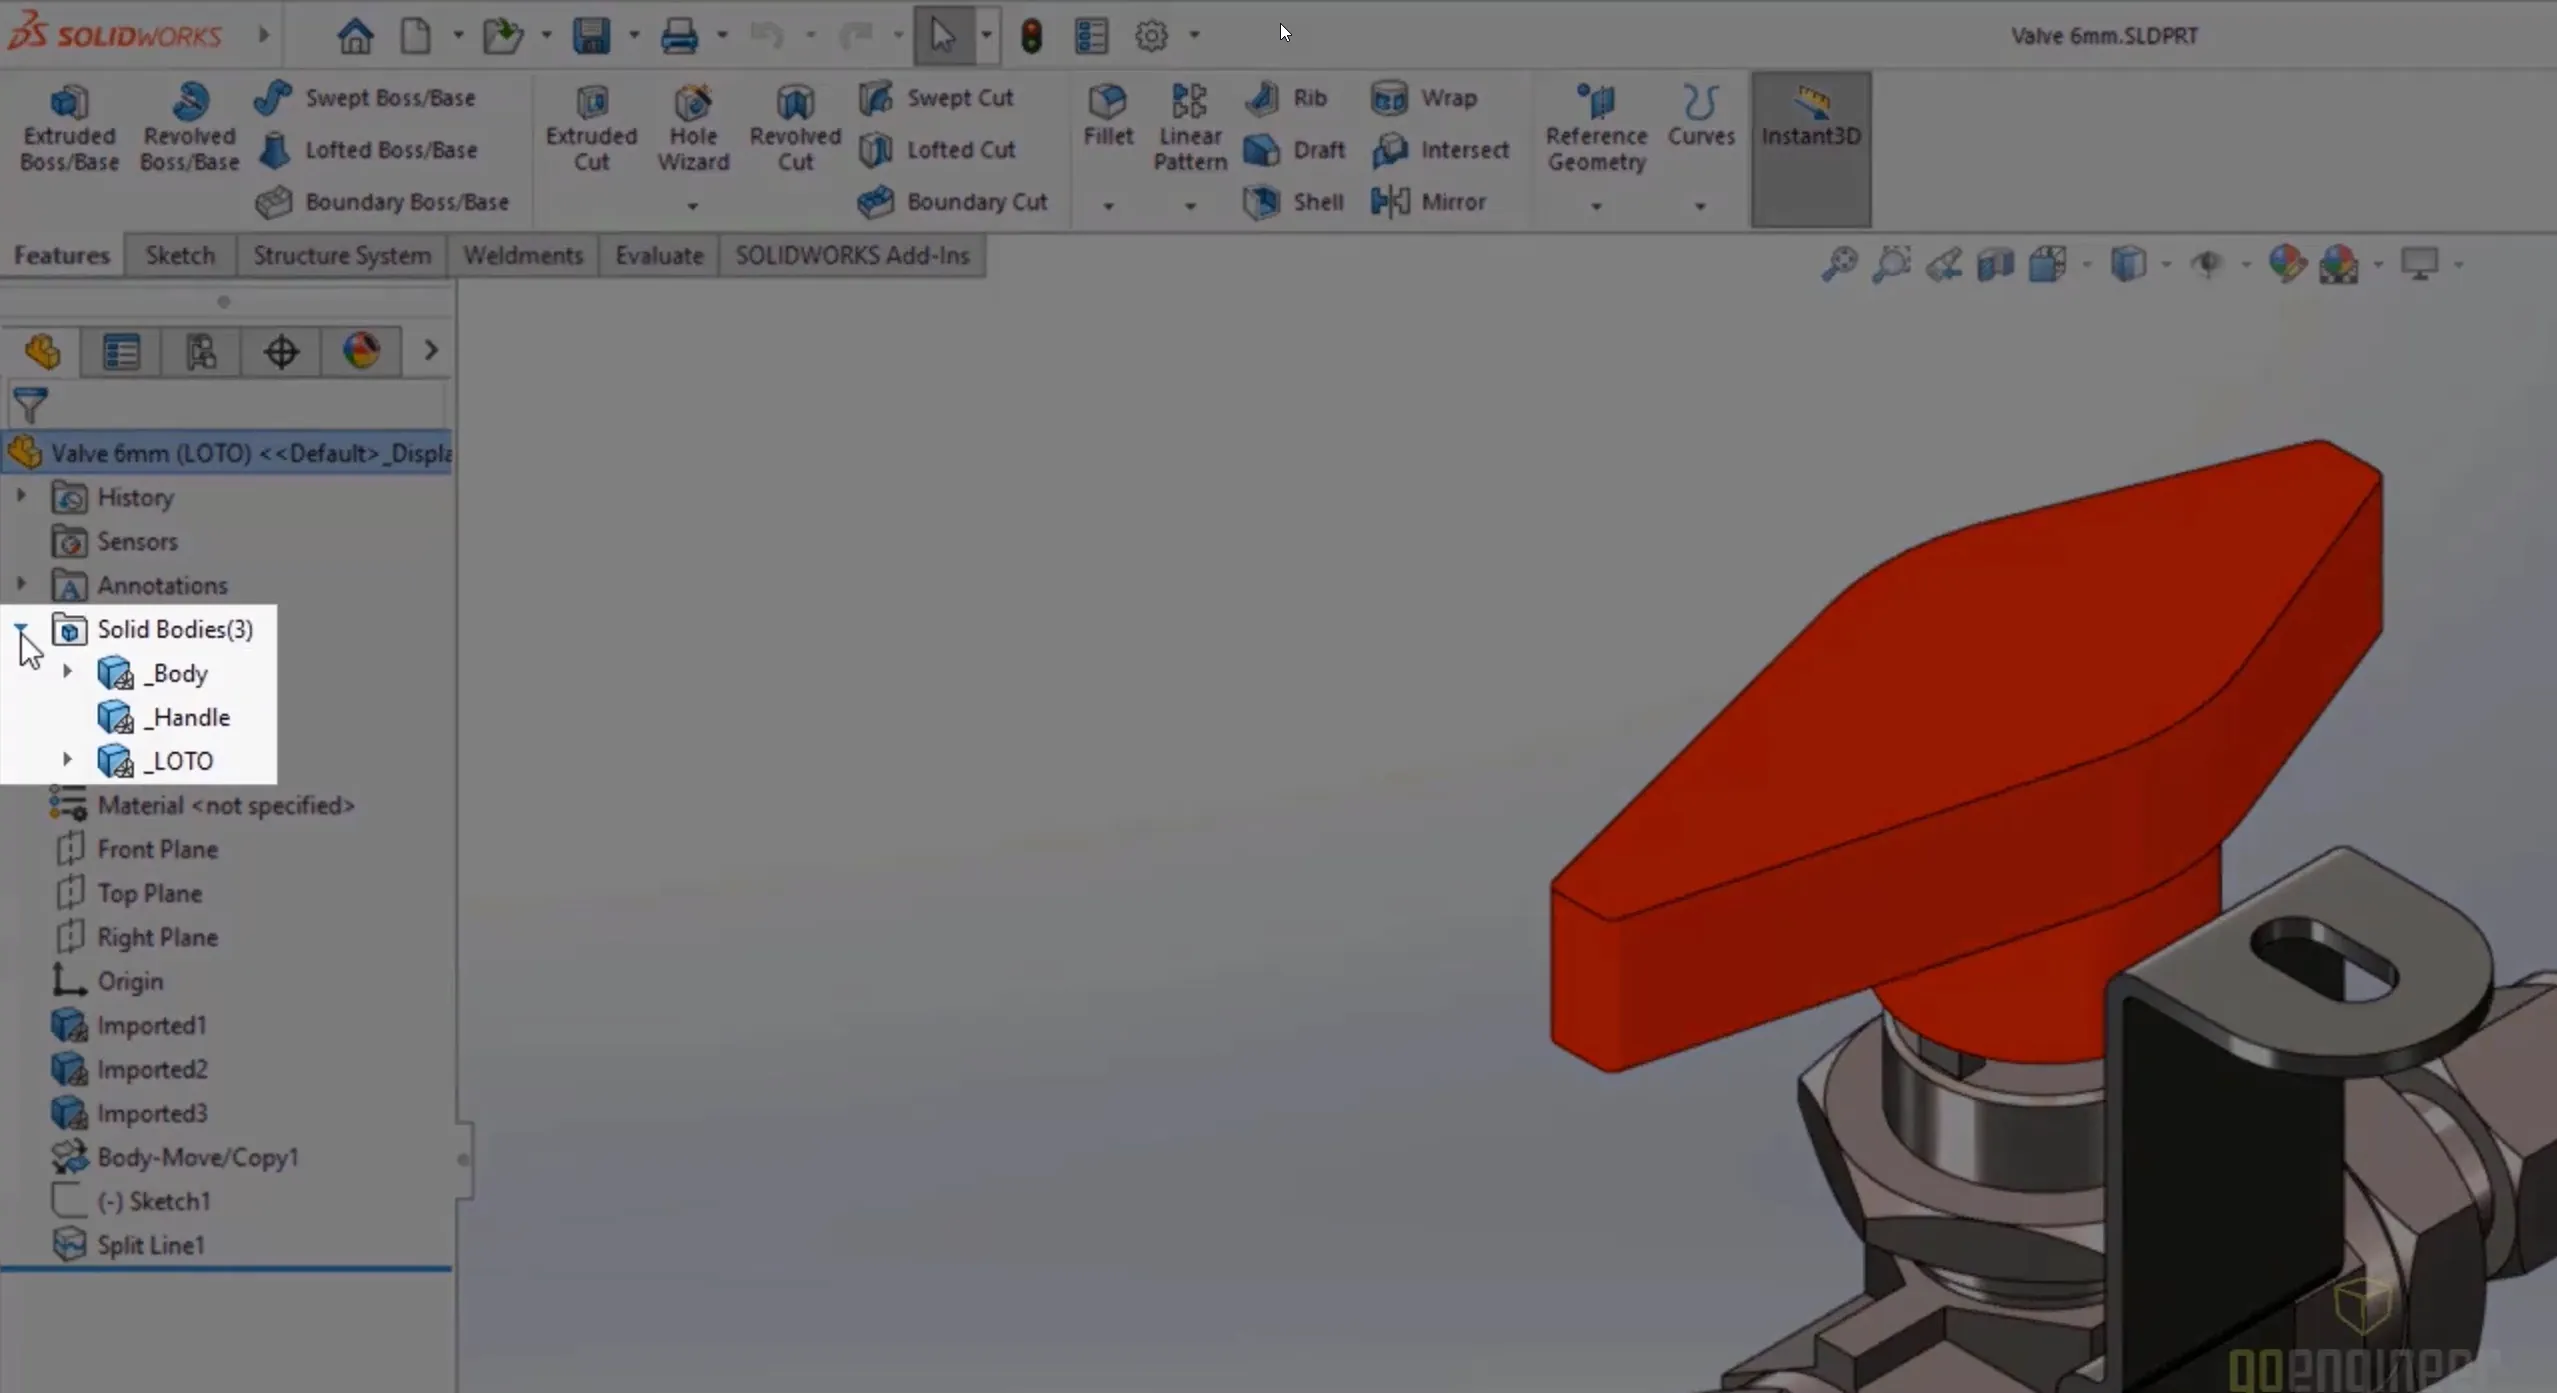
Using convenient hybrid modeling, users can create Chamfers, Extrusions, Cuts, and Reference Geometry just like you would on native files.
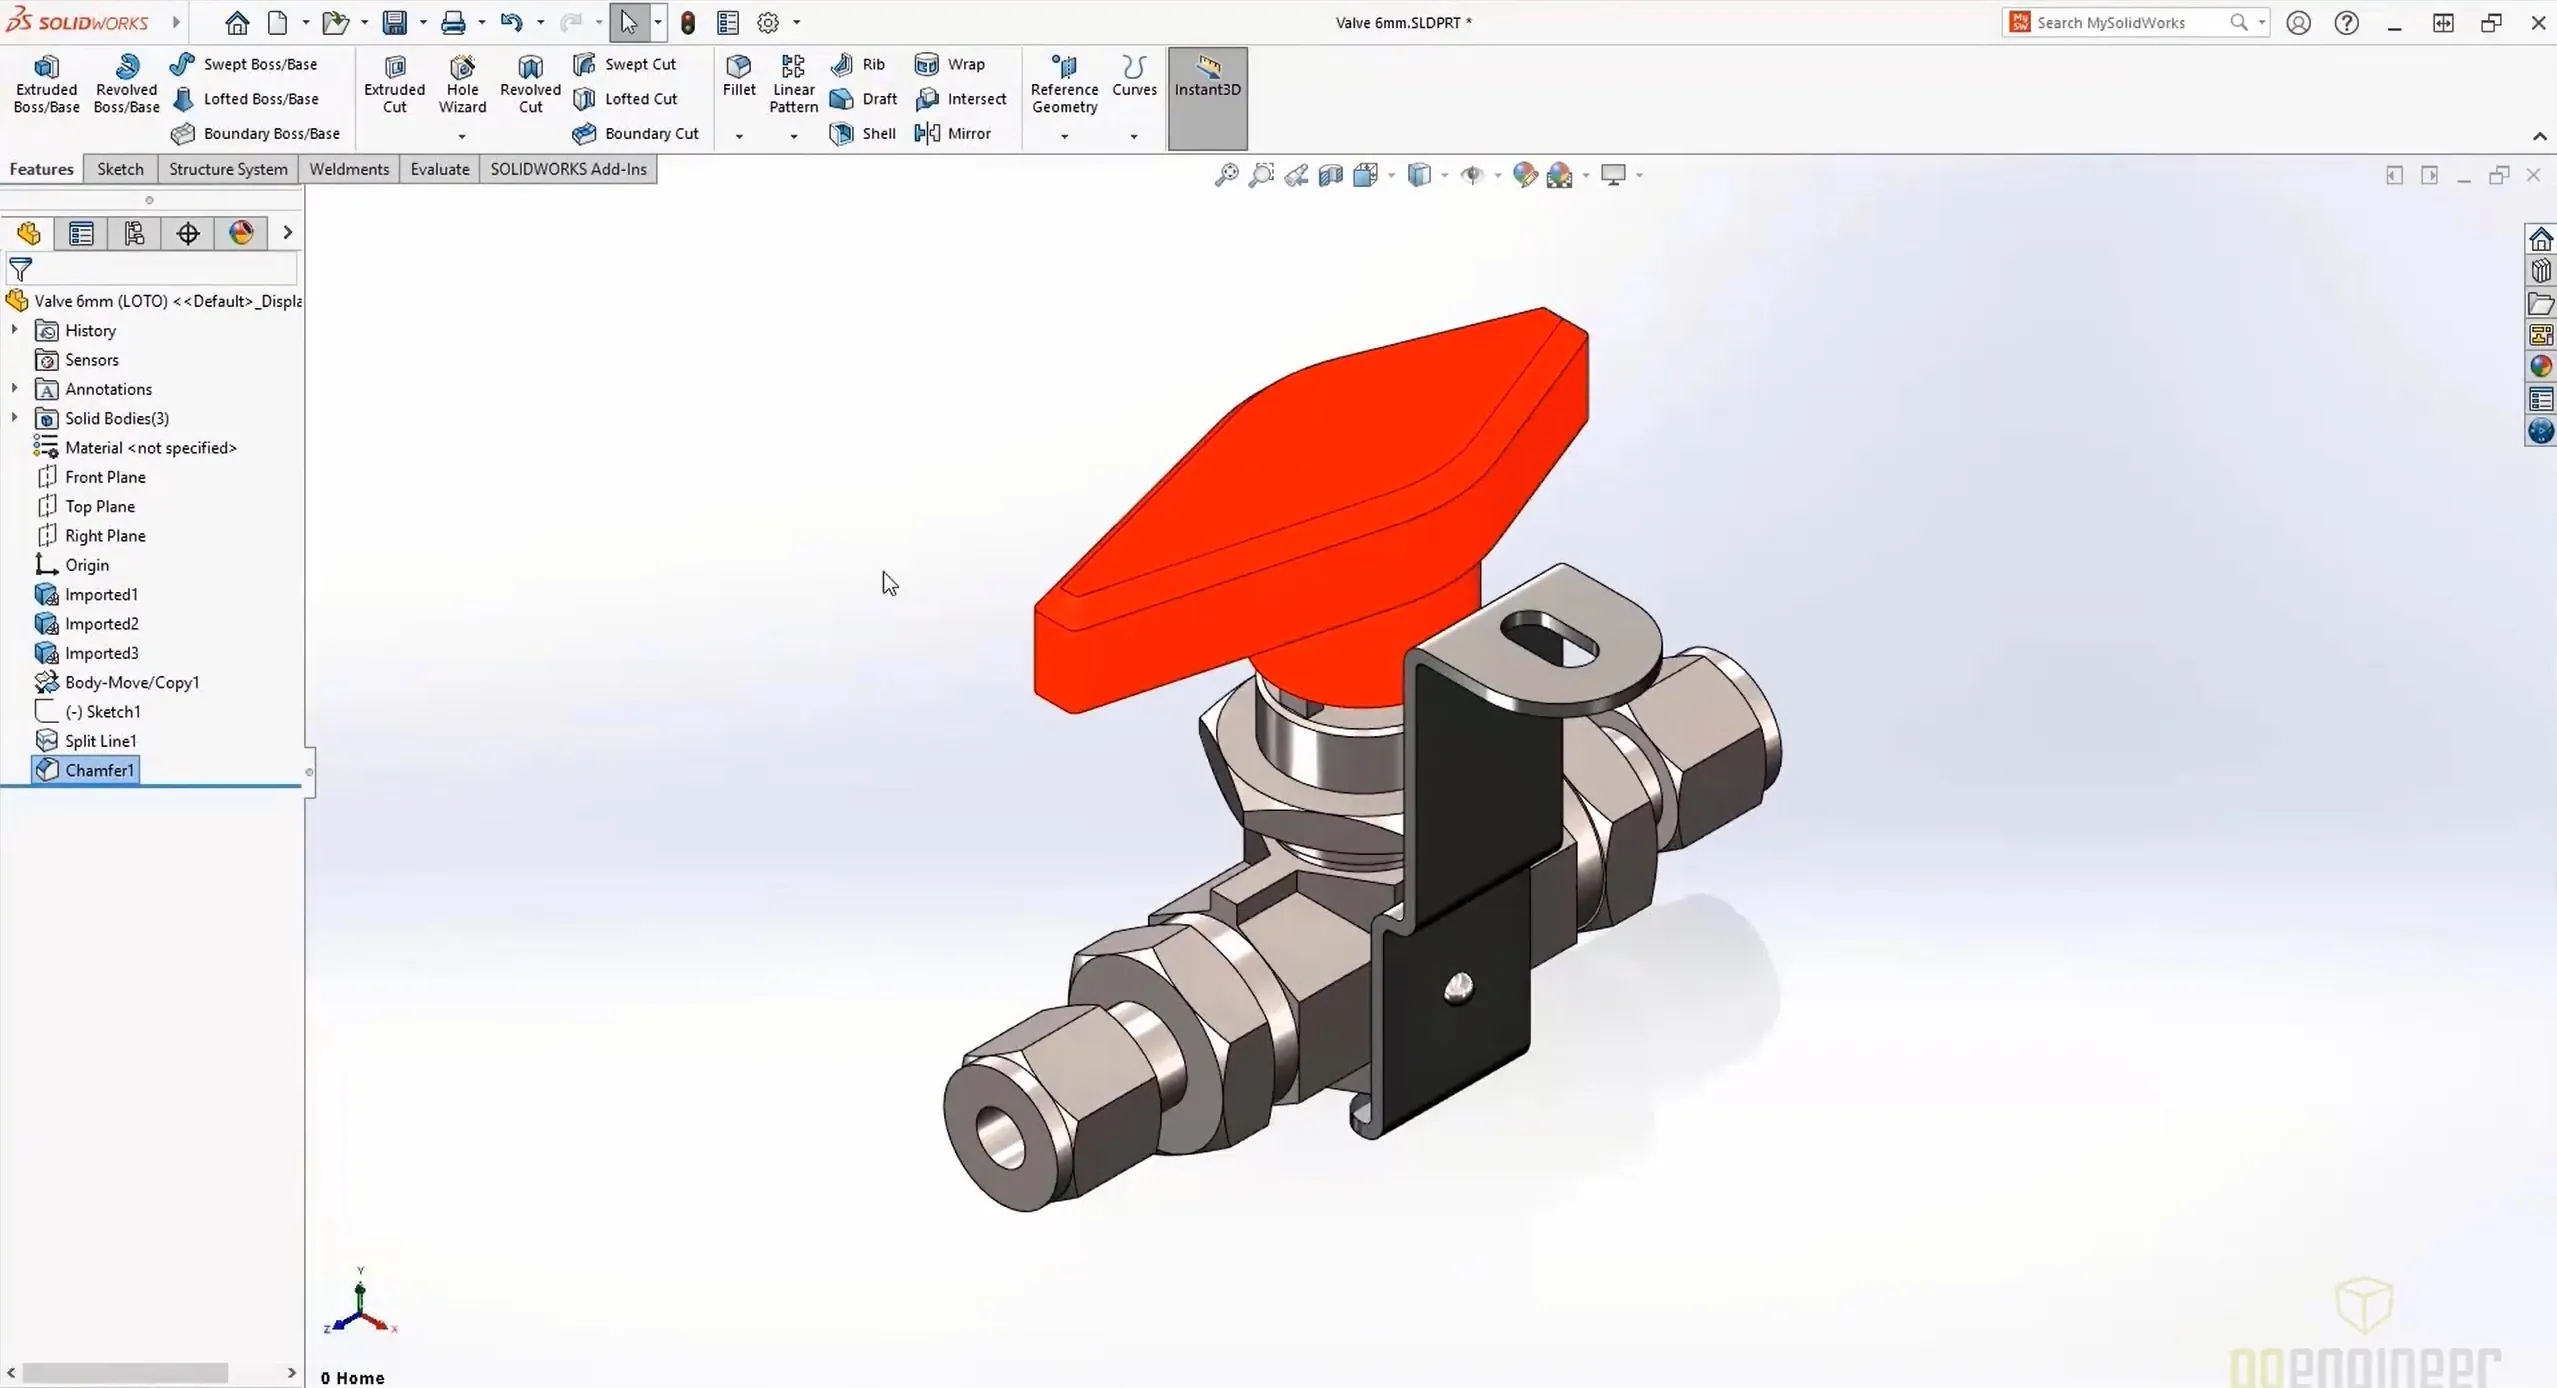
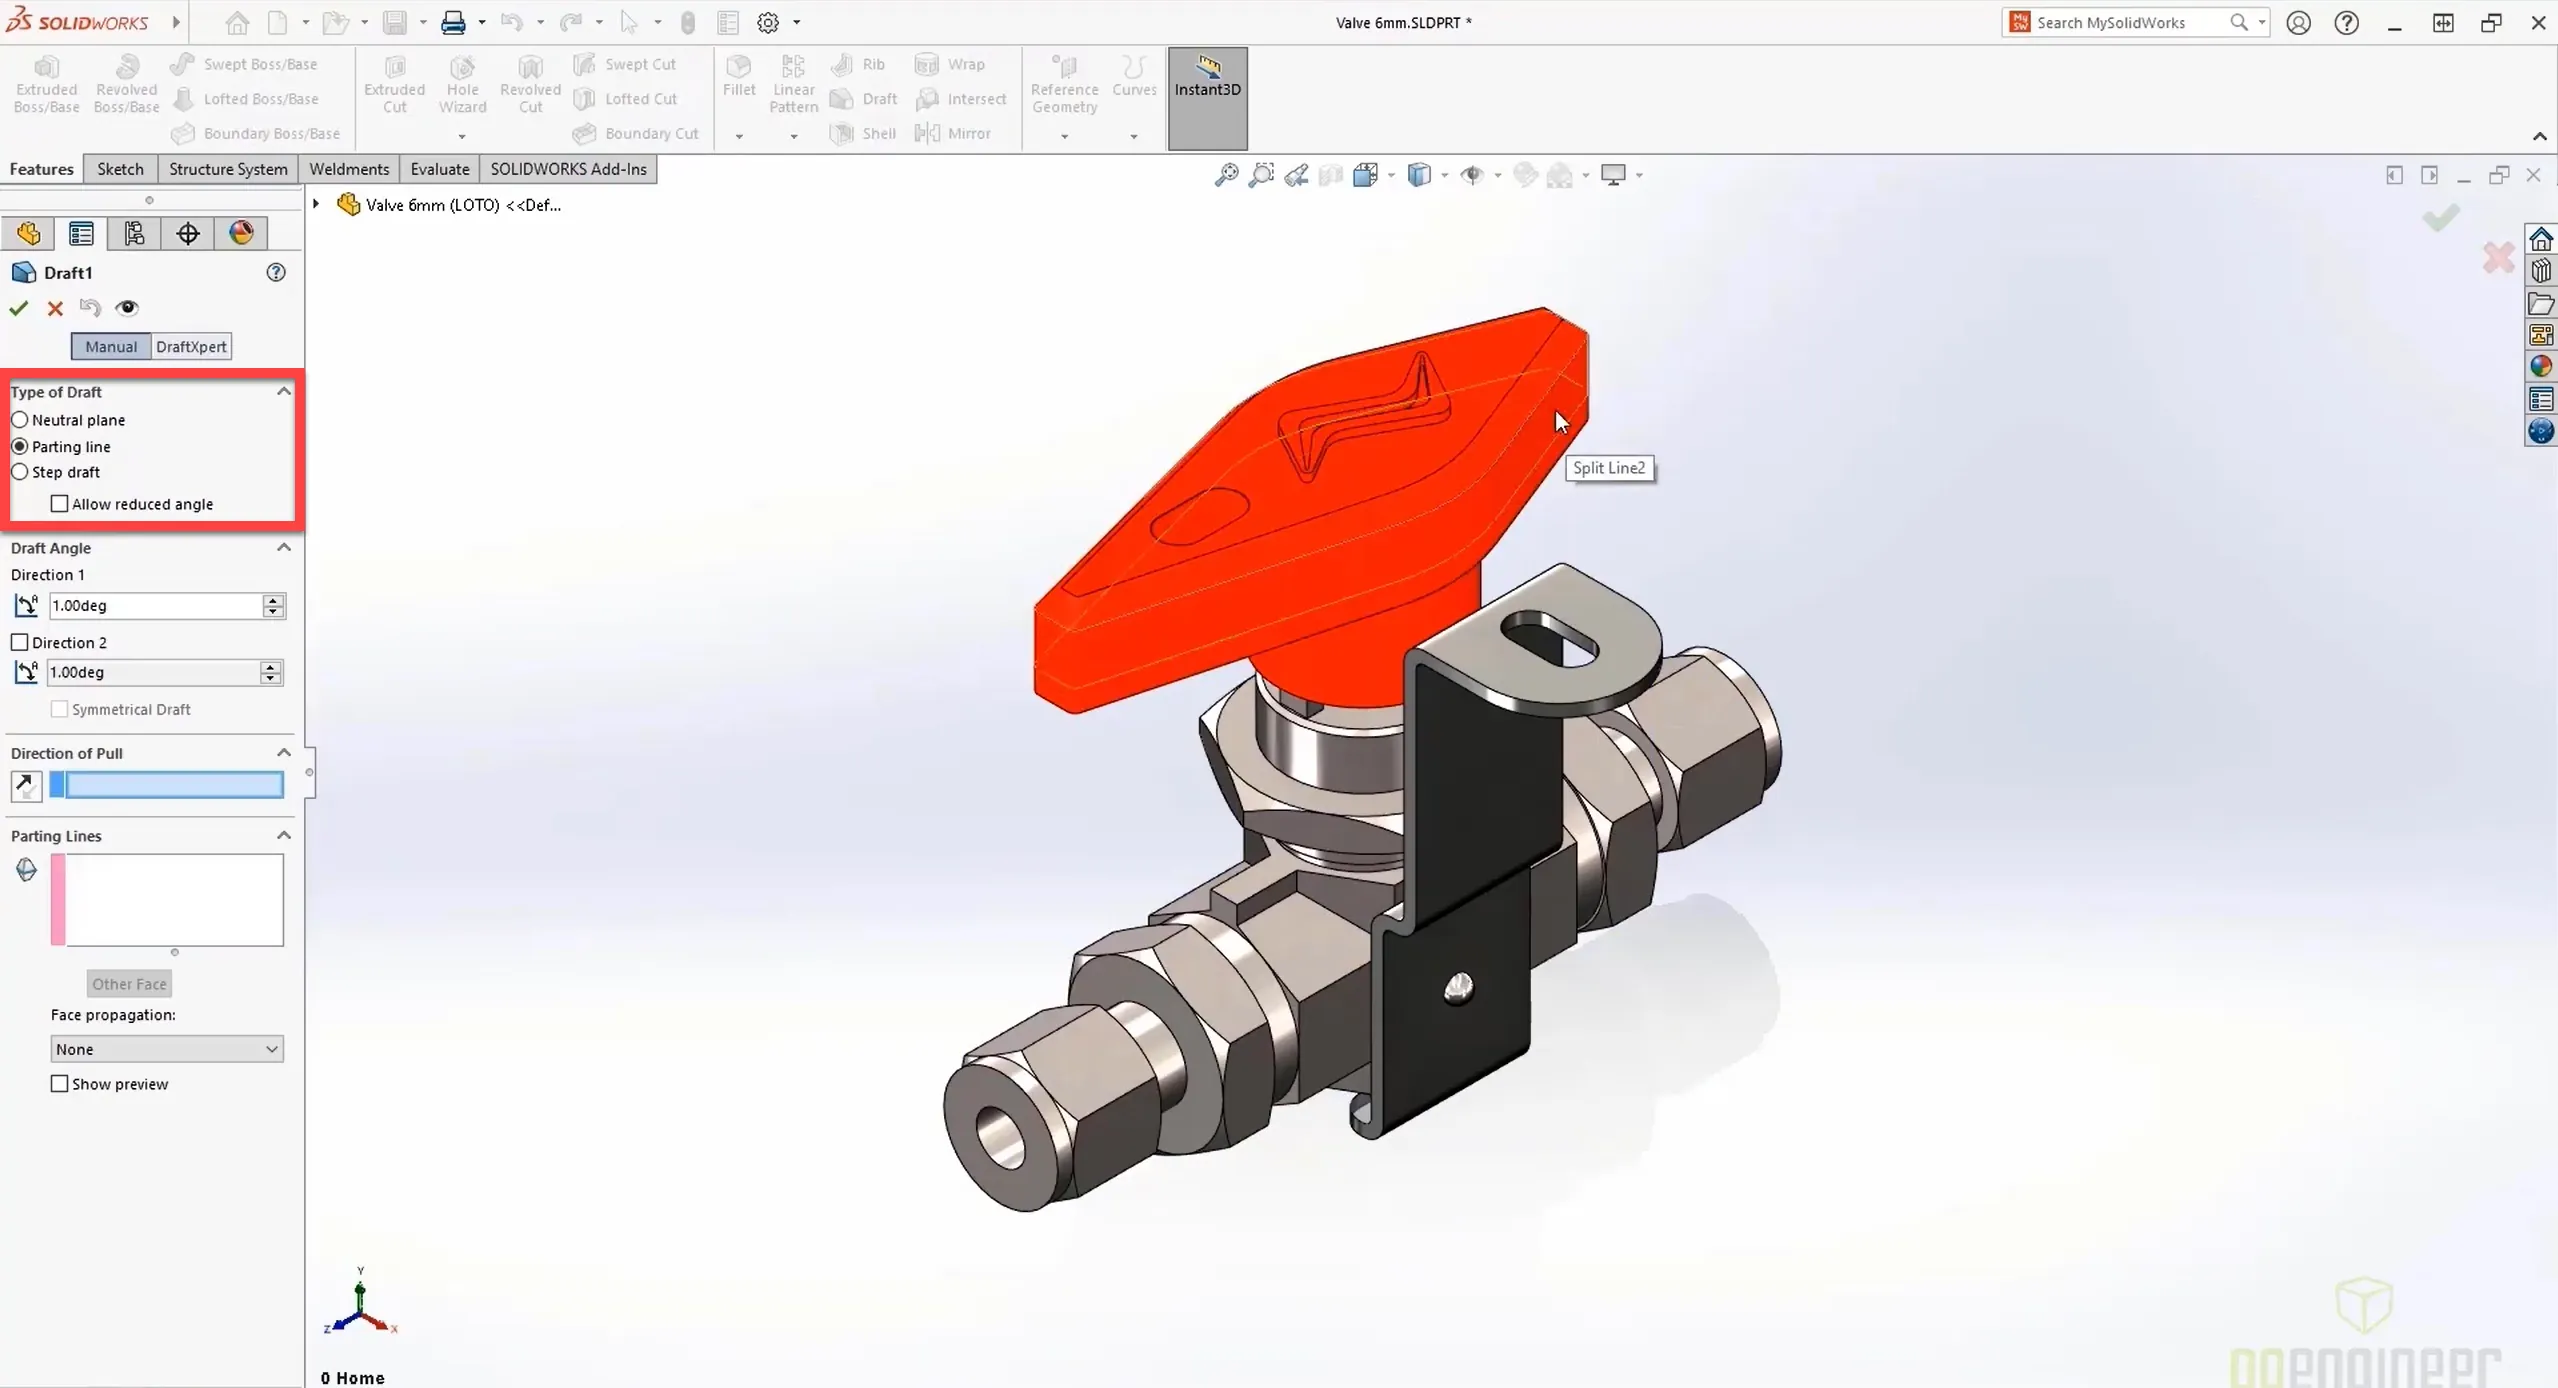
Creating bi-directional draft has always been a multi-step process. In SOLIDWORKS 2022, when using the Parting line options, it’s now possible to create bi-directional draft within a single feature.
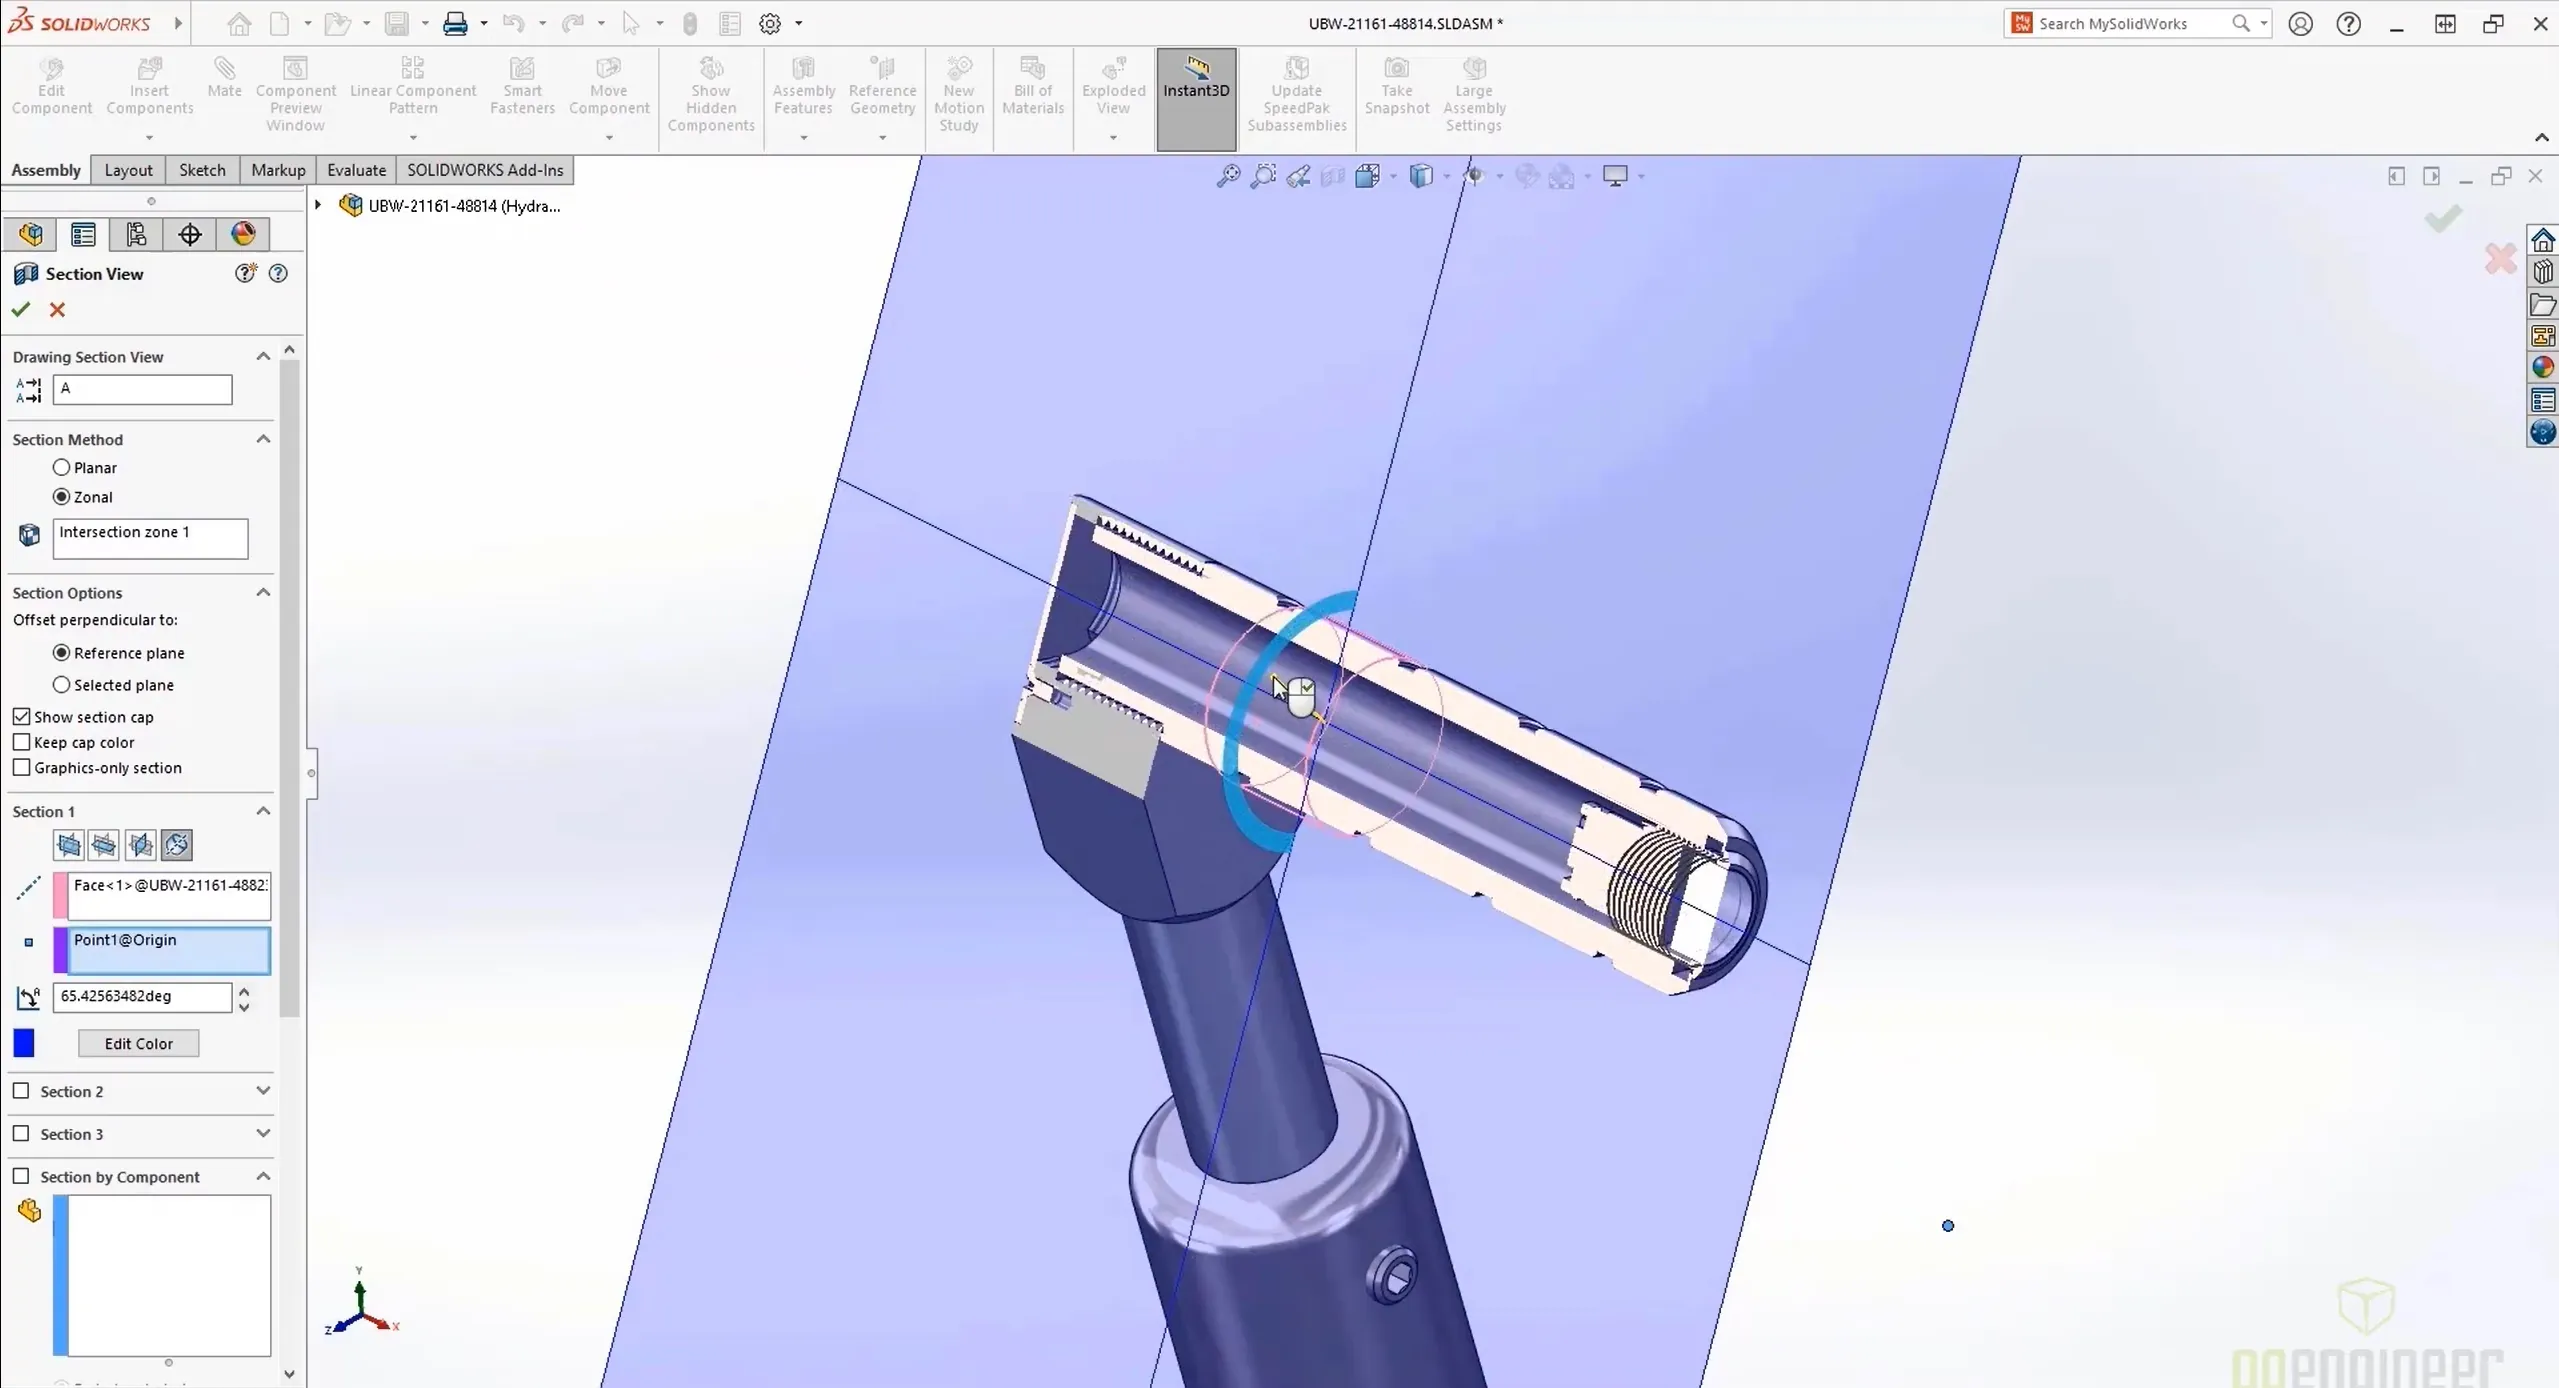
Also new are enhancements to Section View options. Users can specify a section view by using the cylindrical geometry to get greater control over what our views should look like.
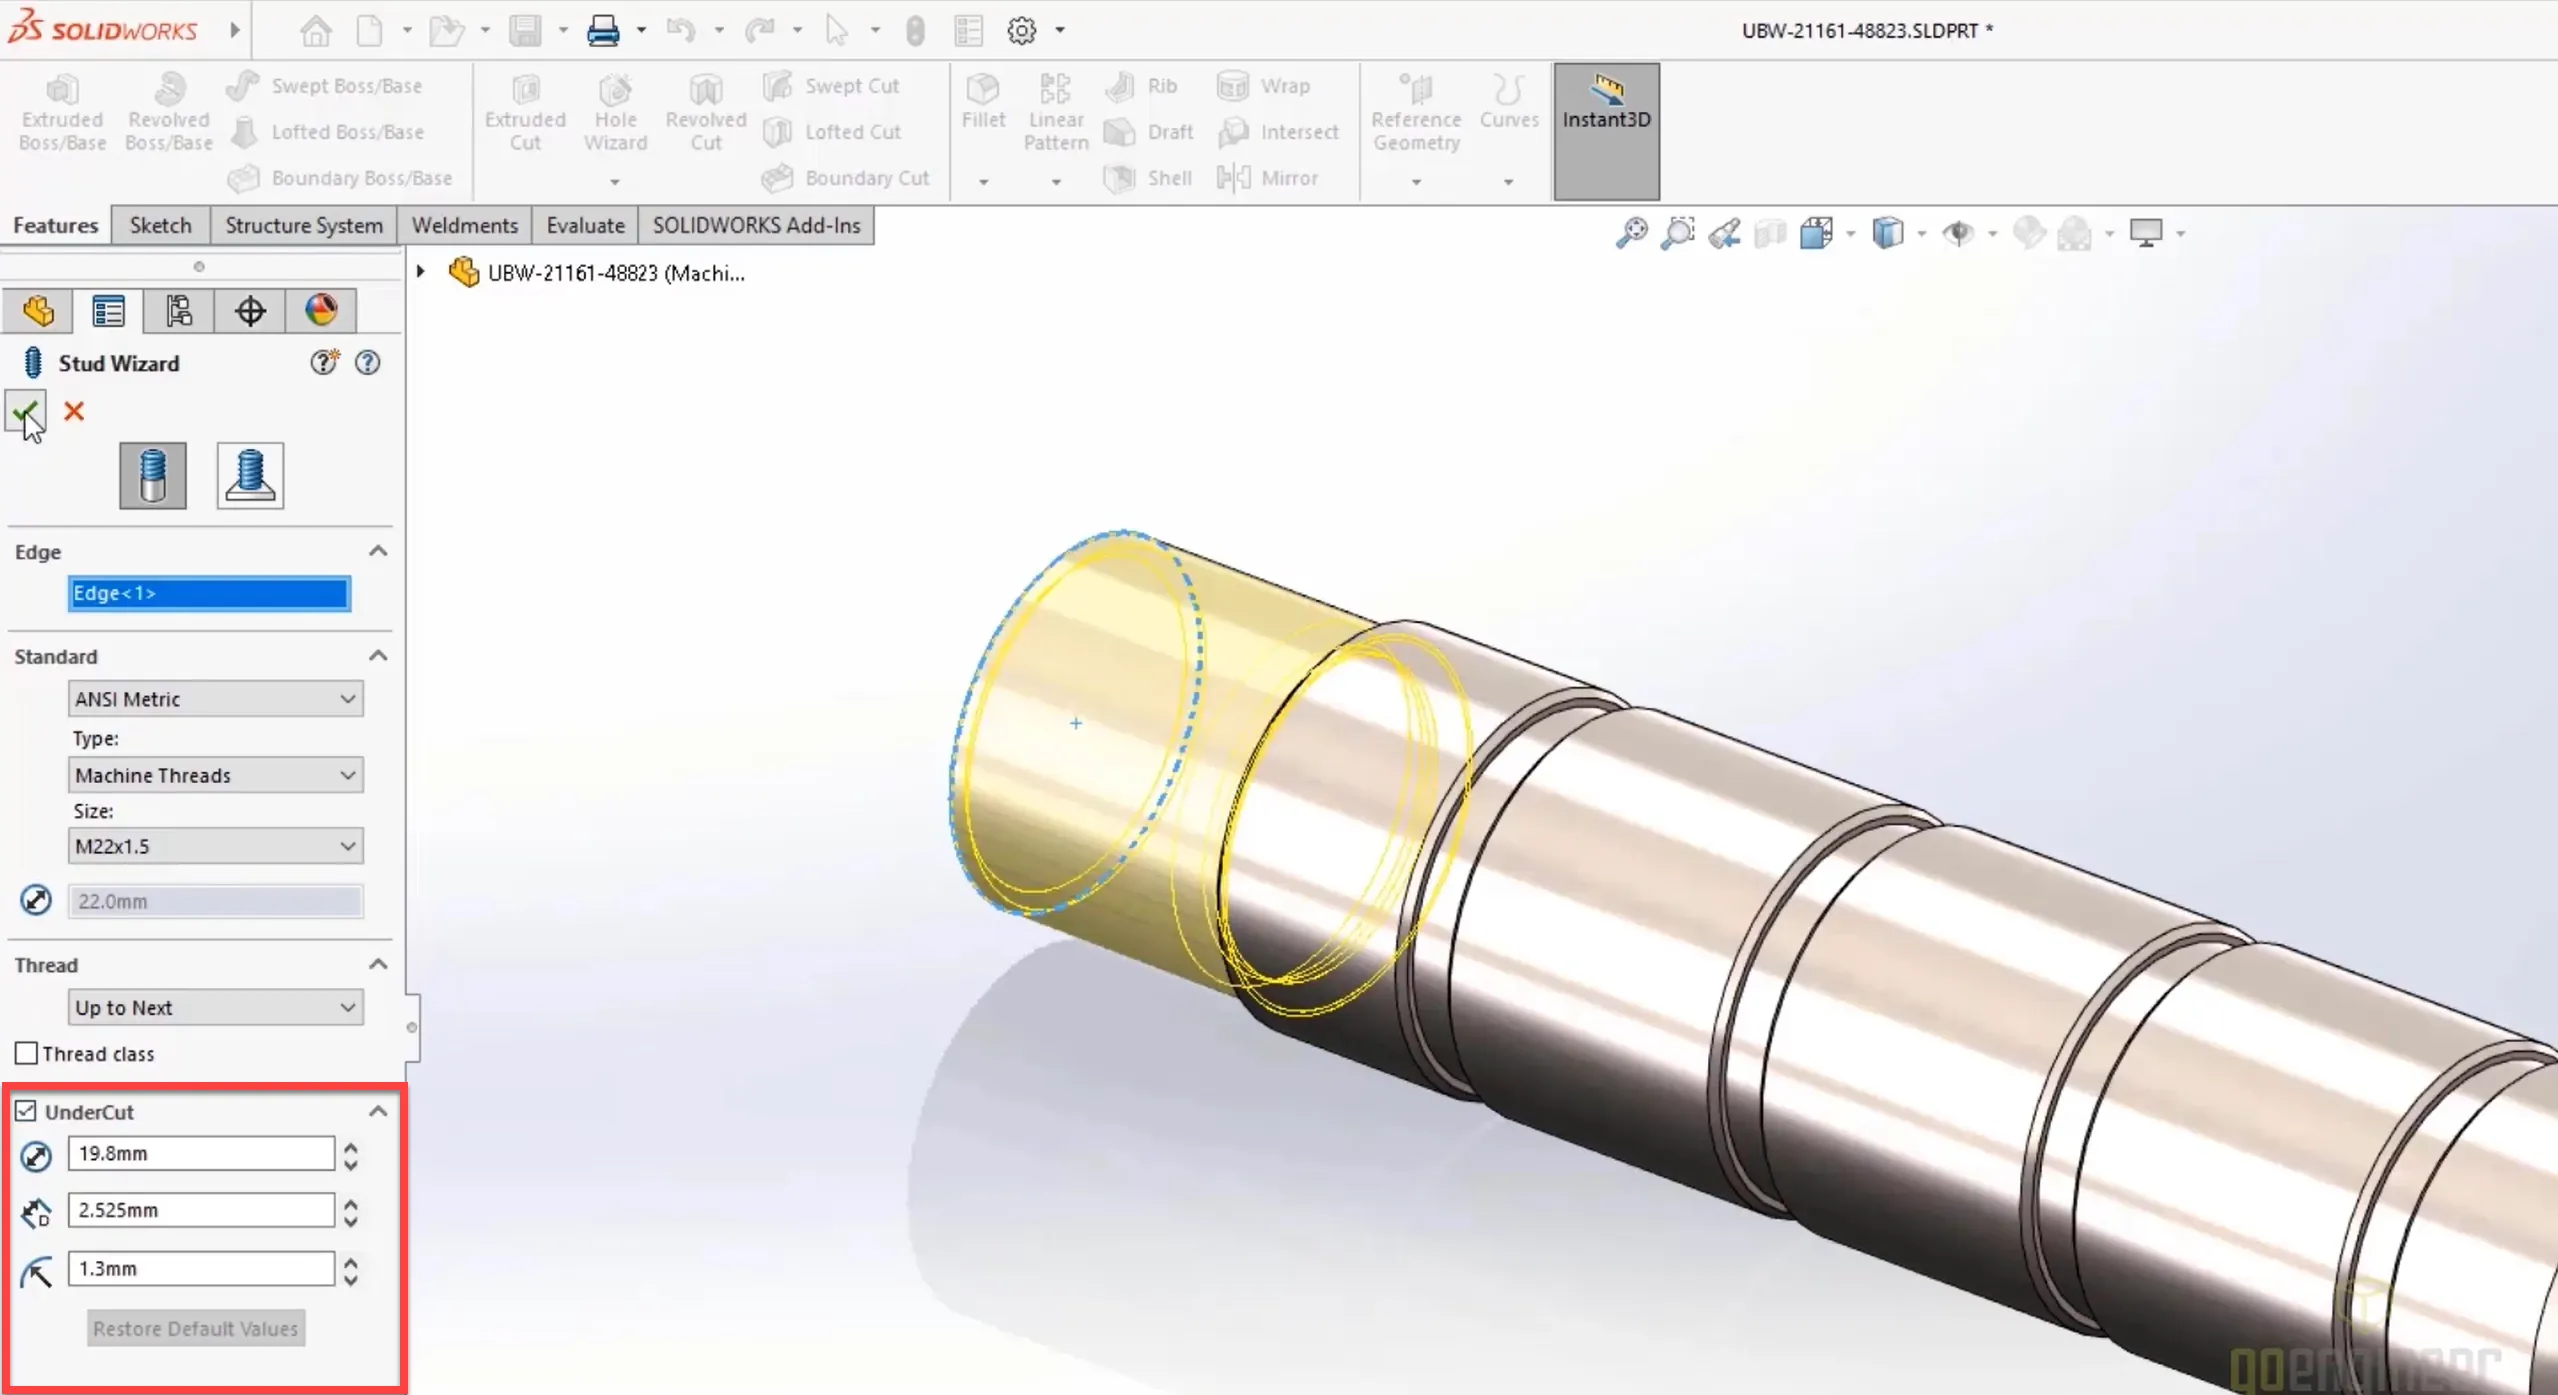
When creating external threads, these can produce incredibly complex geometry and in SOLIDWORKS 2022, there is a new Stud Wizard feature that provides a list of standard thread sizes and pitches for use on our part.
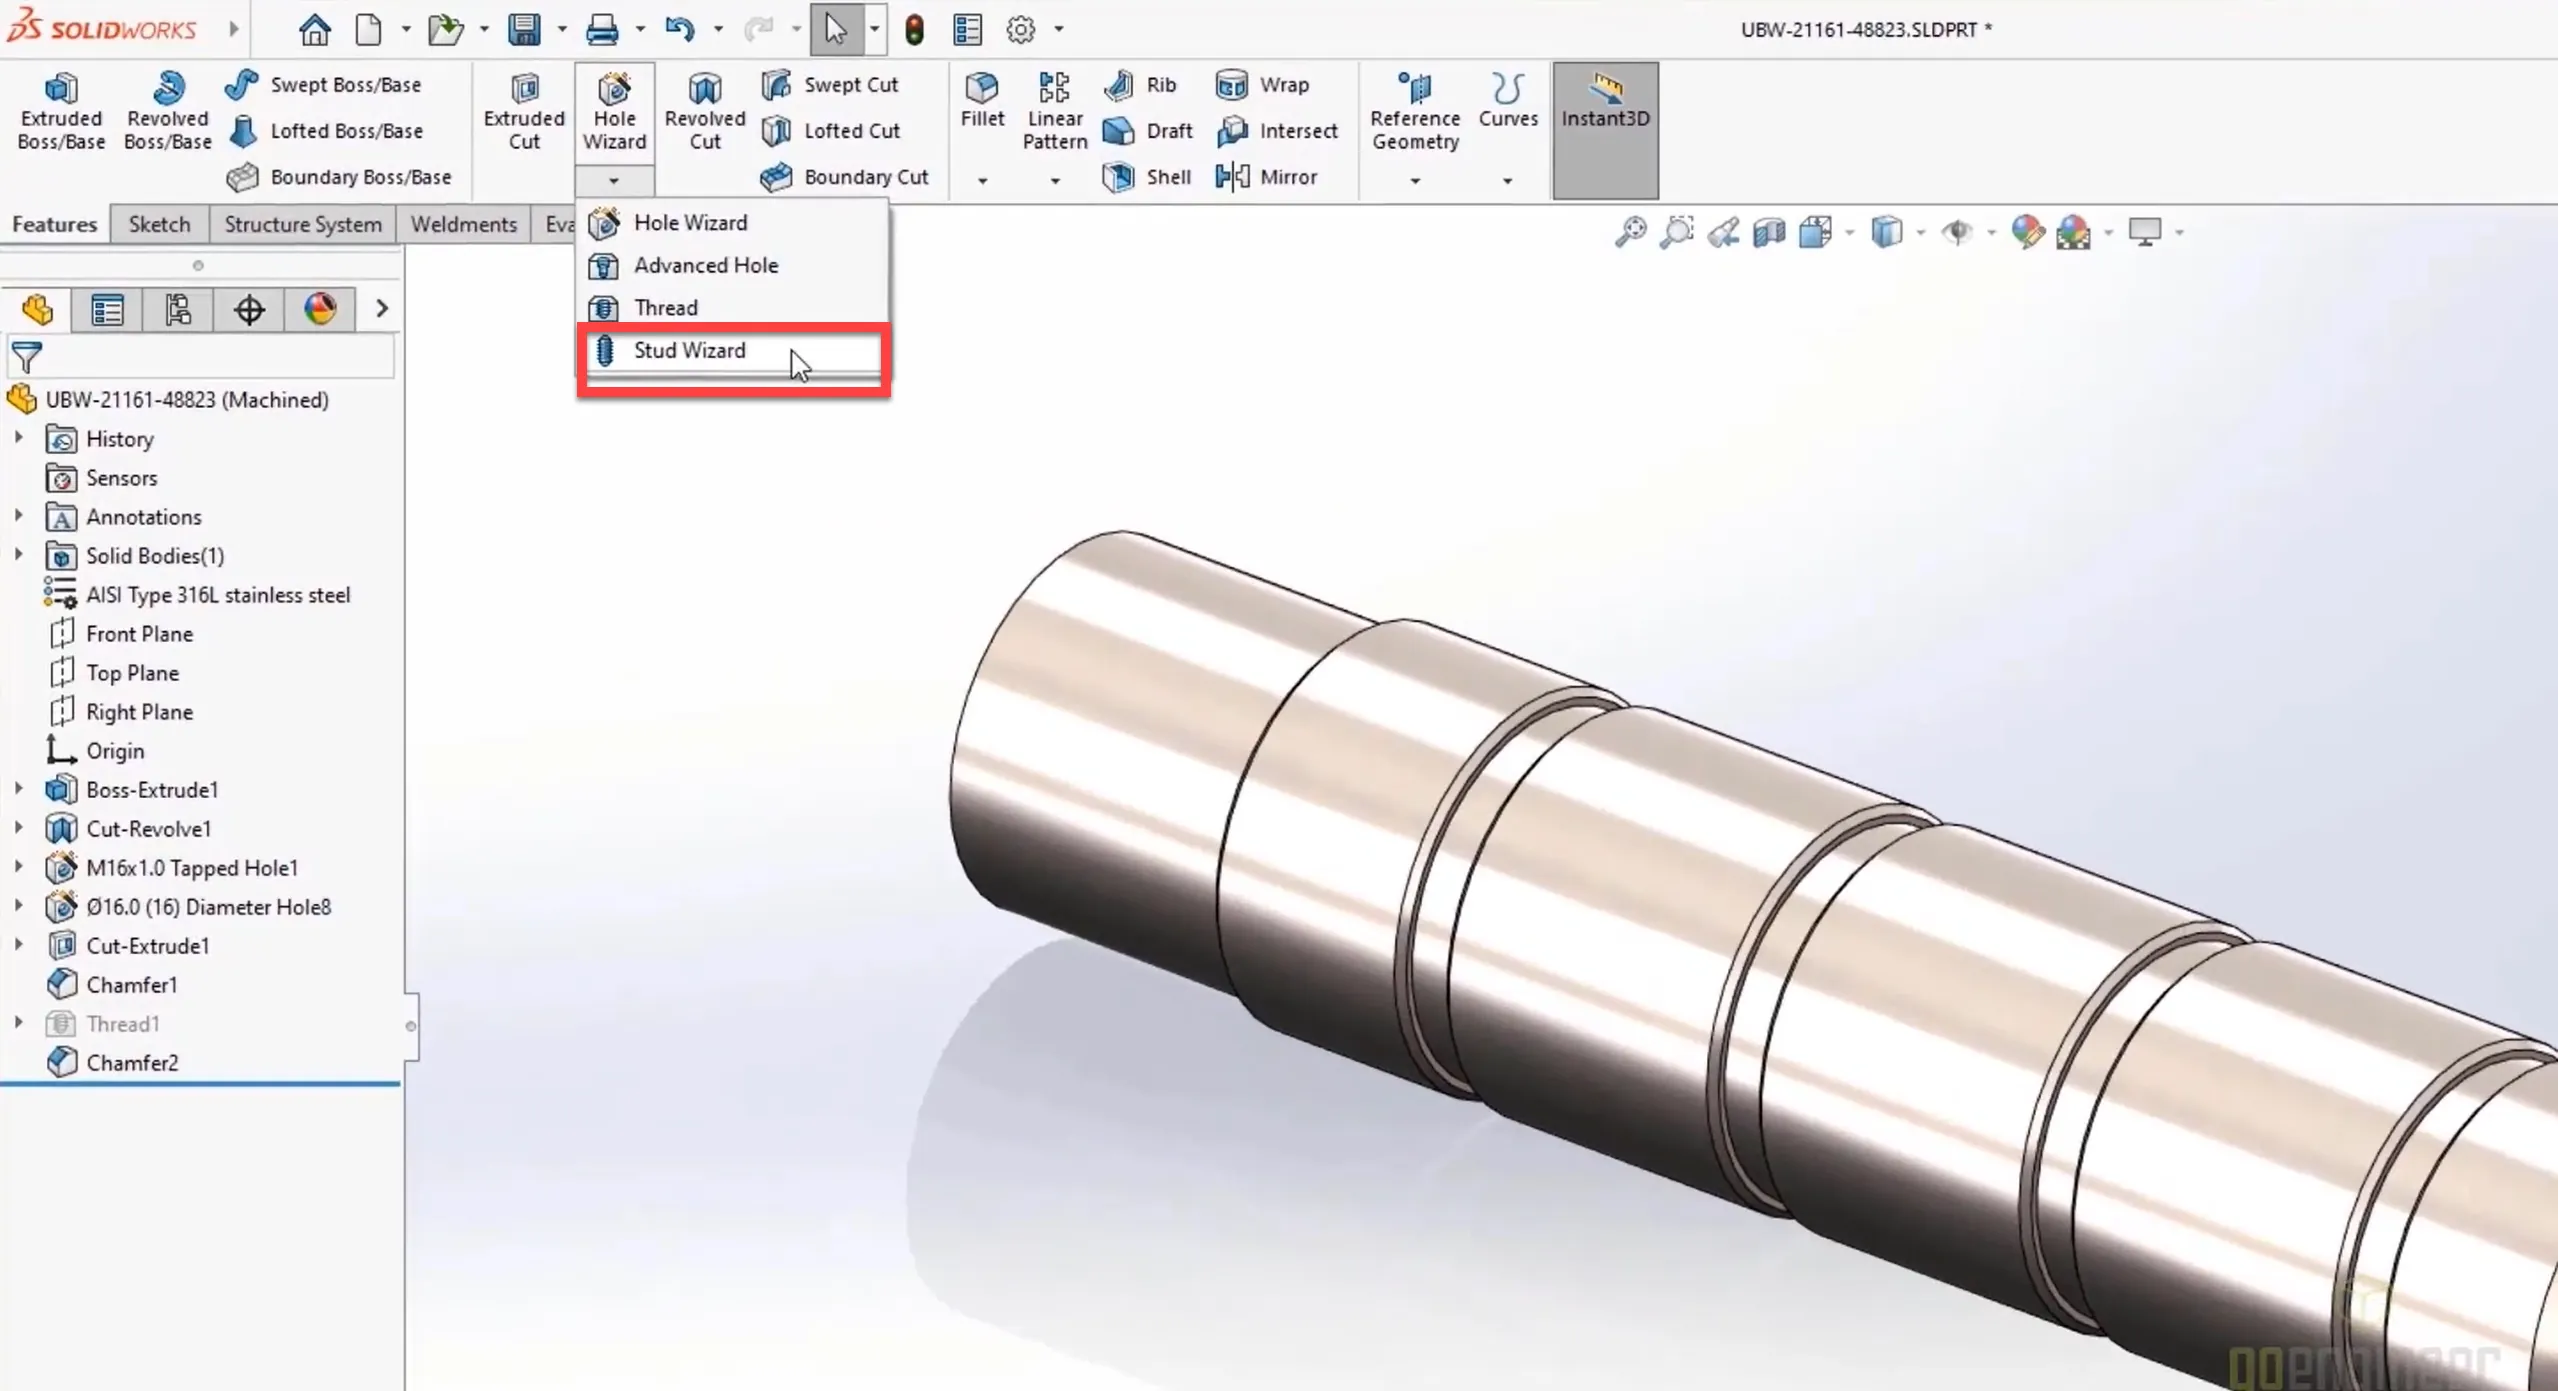
In addition, we have the option to create an UnderCut with full control over feature parameters.
We hope you enjoyed this sneak peek!
Latest SOLIDWORKS News
What's New in SOLIDWORKS 2022: Assemblies & Drawings
SOLIDWORKS Path Mate Explained
How to Mirror Parts in SOLIDWORKS Two Different Ways
![]()
About GoEngineer
GoEngineer delivers software, technology, and expertise that enable companies to unlock design innovation and deliver better products faster. With more than 40 years of experience and tens of thousands of customers in high tech, medical, machine design, energy and other industries, GoEngineer provides best-in-class design solutions from SOLIDWORKS CAD, Stratasys 3D printing, Creaform & Artec 3D scanning, CAMWorks, PLM, and more
Get our wide array of technical resources delivered right to your inbox.
Unsubscribe at any time.