How to Create Design Library Features in SOLIDWORKS
The Design Library, located on the SOLIDWORKS Task Pane, is a set of folders populated with reusable entities, such as annotations, assemblies, forming tools, routing components, and features. In this article we will look at how to create a Library Feature; a set of features added to the Design Library for re-use in other models.
Getting Started
- Create a Boss-Extrude feature that will represent a dummy solid.
- Create features that will be added to the library on the dummy solid
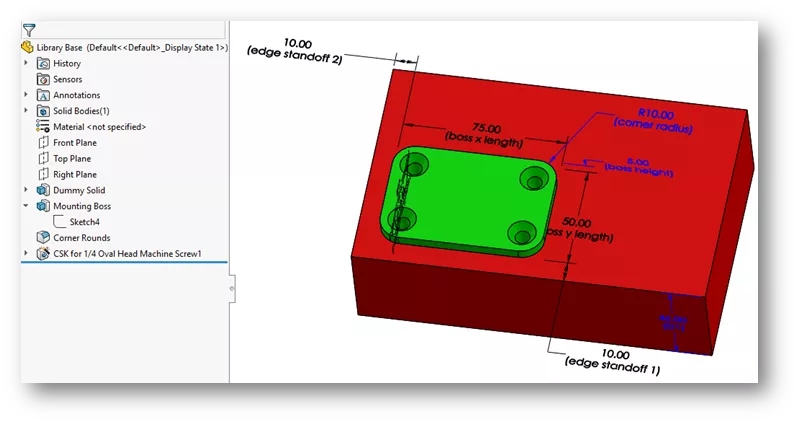
In this example, the part has been color-coded to help visualize the features that will be added to the library.
Green features will be added to the Design Library, while the features in red will not.
The dimensions have been shown and given descriptive names for use in the Library Feature.
How to Add Features to the Design Library
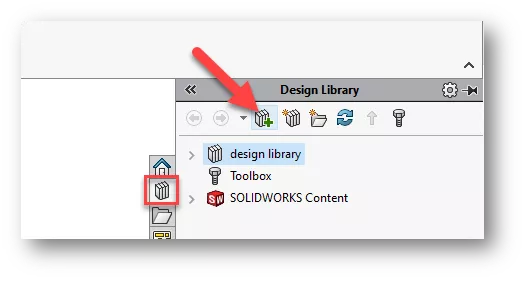
In the SOLIDWORKS Task Pane, click the Design Library tab, then click Add to library.
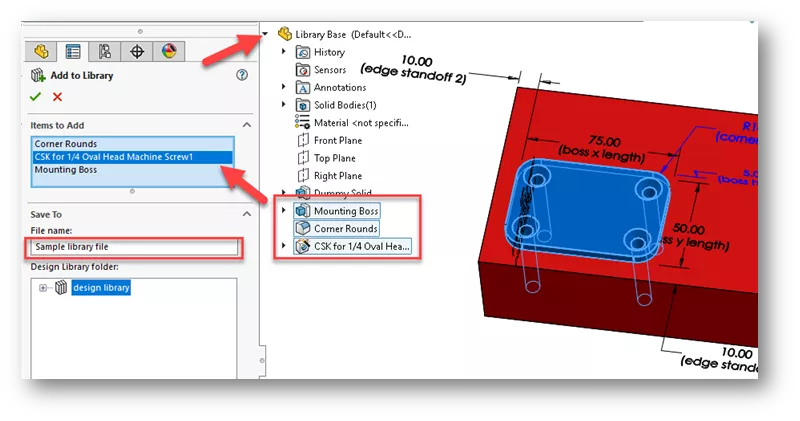
In the Add to Library PropertyManager, select the Design Tree Flyout, and choose the features you want to include. This will create a new file, so we will also give it a new name.
You can also choose which subfolder the Library Feature will be added to. In this example, we will leave it in the top-level Design Library folder. Click OK.
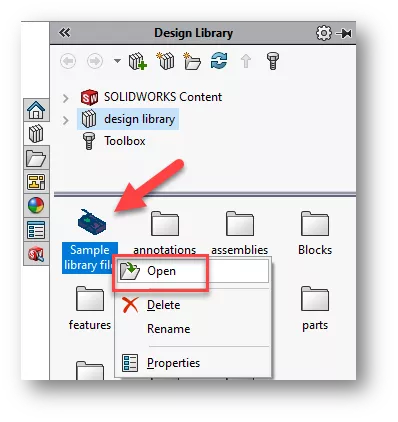
The new Library Feature has been added to the Design Library however, this file needs to be modified further. Right-click on the file and choose Open.
After the file opens, switch to the FeatureManager DesignTree. Notice that the added Dimensions folder including all the dimensions we renamed earlier.
Expand the Dimensions folder and notice there are two subfolders: Locating Dimensions and Internal Dimensions.
We will drag the two edge standoff dimensions to the Locating Dimensions folder. Hold down left mouse button and drag each dimension over the folder.
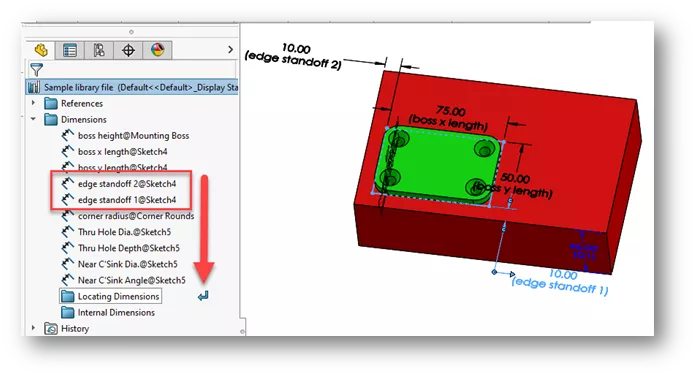
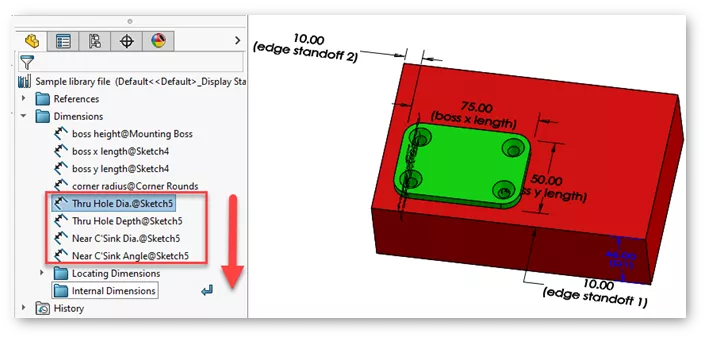
Locating Dimensions will help locate the feature after it has been added to a new model. The Internal Dimensions will not be controlled once the feature is inserted. We will designate the Hole Wizard dimensions as internal by dragging them into the folder.
We will leave the boss and corner radius dimensions where they are. This will allow the dimensions to be controlled after the feature is inserted in a part.
Save the changes and close the files.
Using the SOLIDWORKS Design Library Feature
Now that we have created a feature, we will look at how to use the Design Library Feature in another model.
In this example, we will insert the Sample Library Feature onto a model of a simple block, proceed through locating the feature, and adjust its size.
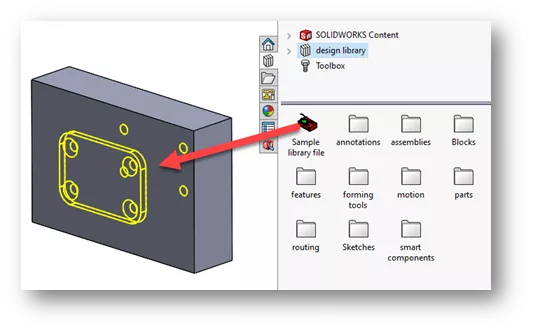
Start by dragging the Design Library Feature we created onto the face of the new sample block.
A preview of the Library Feature is displayed as the feature is dragged.
Once the feature has been placed on the face, the Library Feature PropertyManager will appear along with a graphic window of the Library Feature.
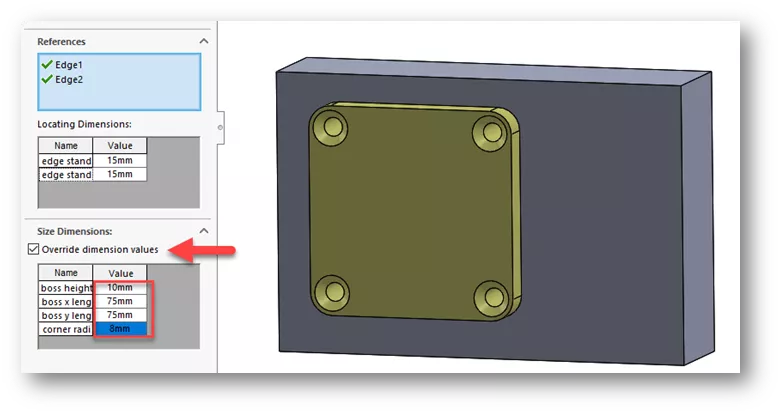
Under References, select Edge1.
In the graphic window, an edge is highlighted on the red block indicating where to select on the model. Select the corresponding edge to assign Edge1. Repeat steps for Edge2.

Under Locating Dimensions, we can change the values for the two edge standoff dimensions.
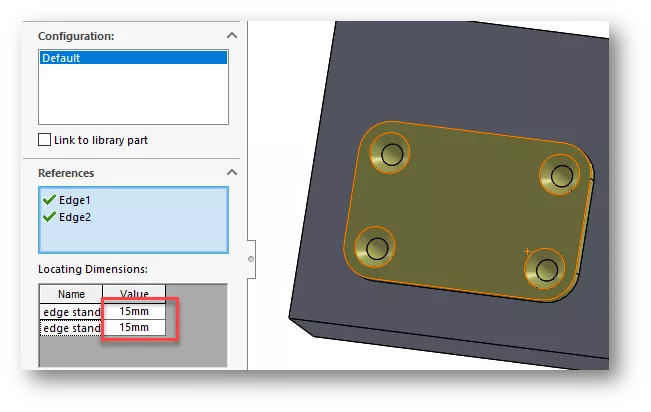
Finally, under Size Dimensions, choose Override dimension values, then adjust the boss extrude and corner radius dimensions as desired.
After the changes have been made, click OK.
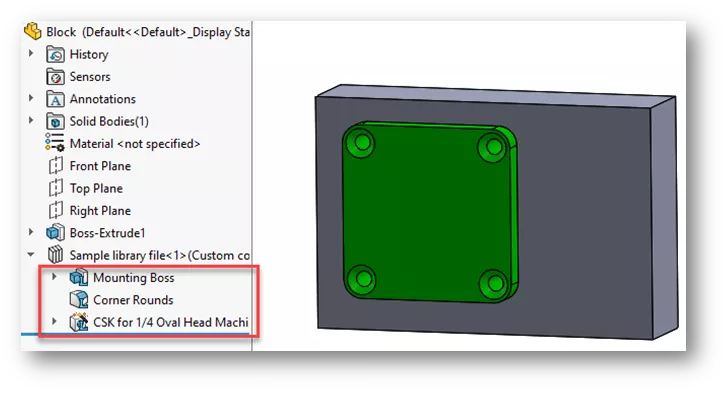
A Library Feature is added to the Feature Tree. Expand the Library Feature to see the list of features added.
You can right-click on the Library Feature and choose Edit Feature to make necessary changes.
More SOLIDWORKS Tutorials
SOLIDWORKS Content: Download Additional routing Libraries
How to Download SOLIDWORKS Block Libraries
SOLIDWORKS Wrap Feature Tutorial
Using the Move/Copy Body Feature in SOLIDWORKS

About Zach Brown
Zach Brown is a certified SOLIDWORKS Expert and a Technical Support Engineer. Prior to working at GoEngineer, he spent 15 years as a mechanical designer, CAD support tech, and instructor using SOLIDWORKS. His hobbies include playing guitar, riding motorcycles, and skiing.
Get our wide array of technical resources delivered right to your inbox.
Unsubscribe at any time.