Using a DWG or DXF for SOLIDWORKS Drawing Borders
Would you like to reuse your title block and border information from an already completed .DWG or .DXF file? You can easily import the .DWG or .DXF into SOLIDWORKS and create your new SOLIDWORKS Drawing taking only the information you need copied over.
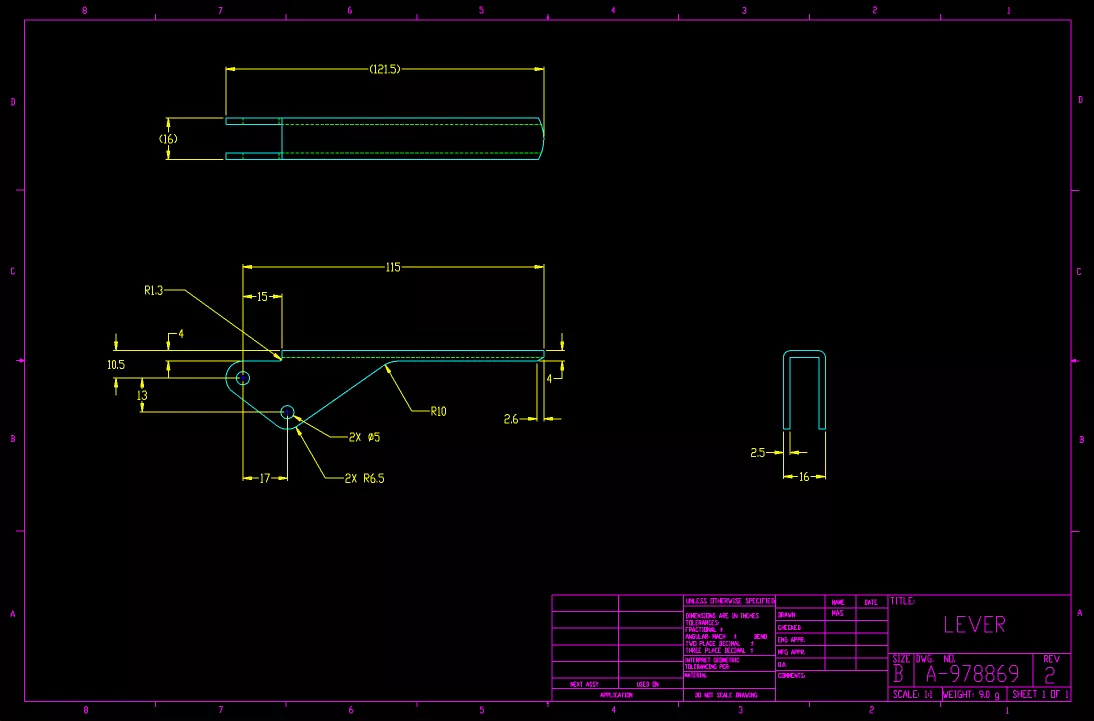
First, we’ll start with a .DWG with a border and title block included.
The goal is to get this imported into SOLIDWORKS. To import a .DWG or .DXF file, simply open SOLIDWORKS and go to File > Open and locate the .DWG or .DXF file.
When you open a .DWG or .DXF from the File > Open menu, the following import prompt will appear.
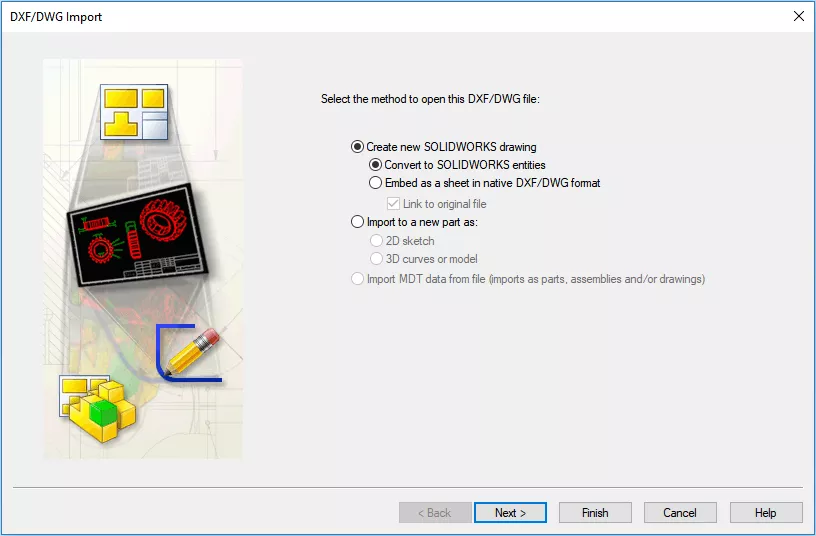
The method to choose is to Create a new SOLIDWORKS drawing and Convert to SOLIDWORKS entities.
Note: You can also import your .DWG or .DXF files as a new part file in either a 2D or 3D Sketch.
Hitting Next will present you with the ability to choose which layers and where they will be imported into your SOLIDWORKS Drawing.
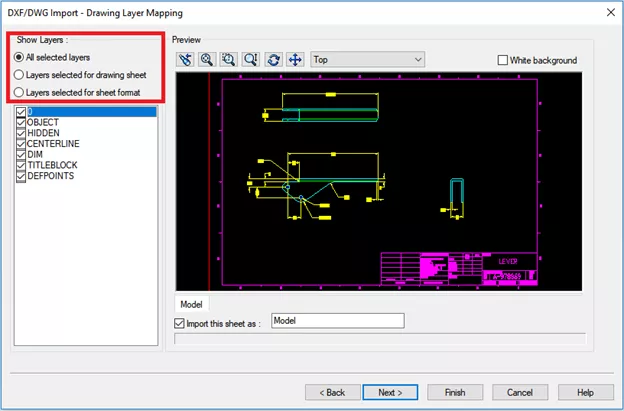
By default, all layers will be turned on. However, in this instance, we are only interested in the border and title block information, so we will deselect everything, otherwise, it will all be imported. In addition, we would like this information to be automatically placed on the Sheet Format, so we can save and reuse this title block information in other Drawings.
Note: You can save and reuse the Sheet Format separately from your Drawing by going to File > Save Sheet Format from the File dropdown in your SOLIDWORKS Drawing file.
To choose which layers to import directly onto the Sheet Format, select Layers selected for sheet format and toggle each layer until you see your title block and border information.
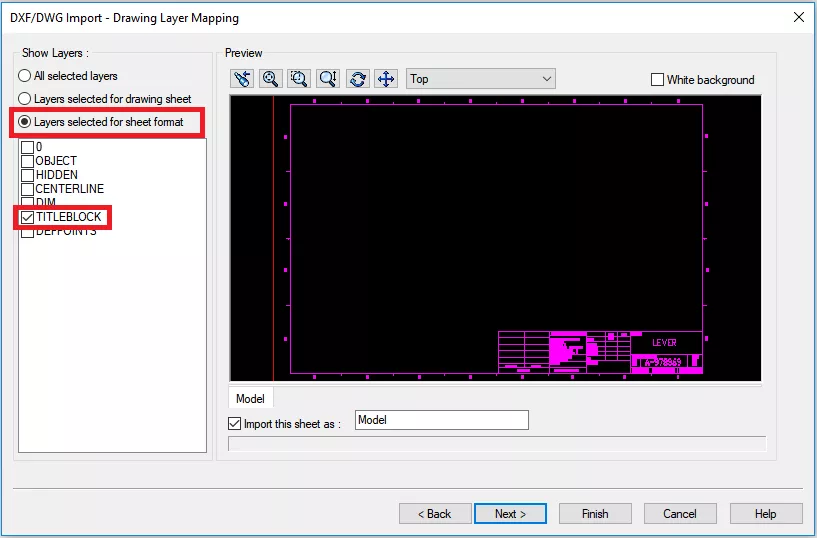
Now that we’ve selected the layer which contains our title block and border information as well as specifying that they will be on the sheet format, we can hit Next.
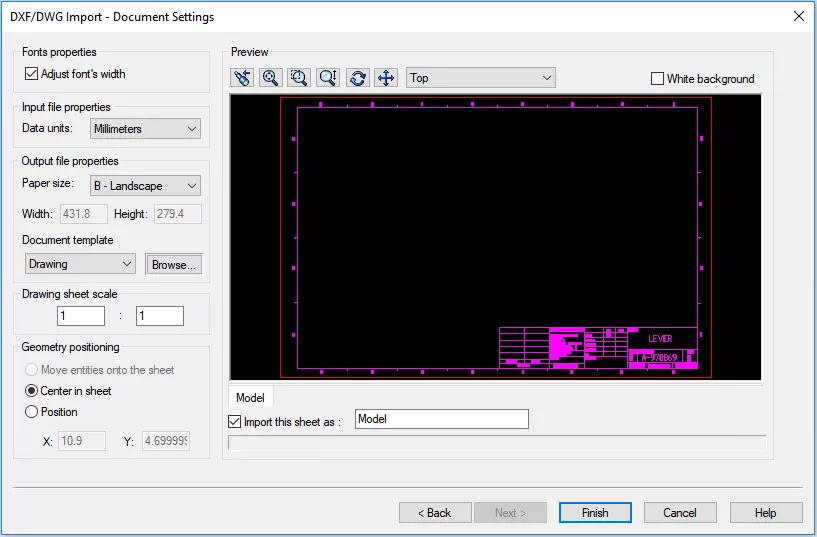
On this screen, make sure to select the correct units, paper size, and template if you have one you’d like to use.
Select the correct scale. I recommend using the Center in sheet geometry position, however, you can always select the Position radio button and manually type in the offsets for placement.
Note: You can also name the sheet from this screen under the Import this sheet as: prompt. You can always rename your sheet after you create it.
Once the preview shows your drawing contained in the sheet size bounds (the red lines in the picture) hit Finish.
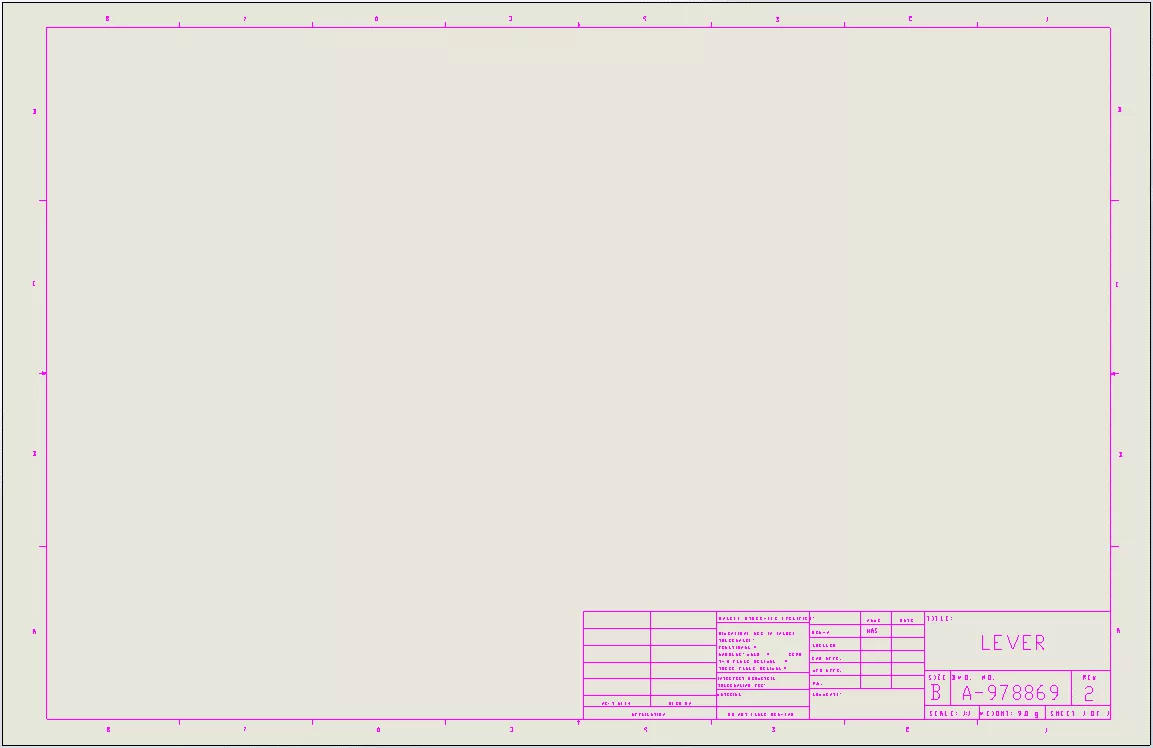
And now you have a new SOLIDWORKS Drawing with all your .DWG or .DXF title block and border information already in your Drawing!
To edit your new title block or border, right-click on the sheet and go to Edit Sheet Format. You can then edit this information using your Sketch and Annotation commands.
I hope this helps save you some time in recreating your legacy drawing information.
Want to learn more? Check out more SOLIDWORKS tips and tricks below.
More SOLIDWORKS Tutorials
Convert 2D DWG Data into a 3D SOLIDWORKS Part File
Exporting Curved Surfaces in SOLIDWORKS to a DWG/DXF in 2 Steps
2 Ways to Reference a Cross-Section in SOLIDWORKS
SOLIDWORKS Tutorial: Edit, Create, & Convert Style Splines
![]()
About GoEngineer
GoEngineer delivers software, technology, and expertise that enable companies to unlock design innovation and deliver better products faster. With more than 40 years of experience and tens of thousands of customers in high tech, medical, machine design, energy and other industries, GoEngineer provides best-in-class design solutions from SOLIDWORKS CAD, Stratasys 3D printing, Creaform & Artec 3D scanning, CAMWorks, PLM, and more
Get our wide array of technical resources delivered right to your inbox.
Unsubscribe at any time.