Unlock Arrangement Options on your J55
With the latest update to GrabCAD Print (version 1.51), the template for the new Stratasys J5 DentaJet was added to the software. The J5 DentaJet brings many improvements to the Stratasys Dental lineup and takes advantage of the revolutionary benefits of the J55 platform, including its rotating build tray. With a little workaround, some of these improvements can be used on the J55 to increase print efficiency.
Most Polyjet printers simply have an “arrange this tray” option that forces parts toward the inner diameter of the build tray. This is better than nothing, but is not always the most useful organizing method, especially with the nuances that come with a circular build tray. The J5 DentaJet includes 4 different arrangement algorithms, each with a specific purpose.
- Default
- Full Tray
- Shortest Tray Print Time
- Optimize Time Per Part
Before getting into details on these options, here is a quick explanation of how the J55 platform prints.
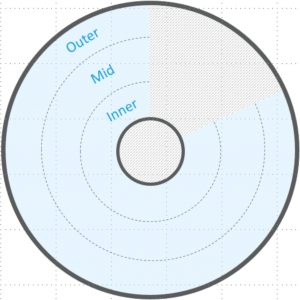
Swaths
The printer has 3 swaths: Inner, middle, and outer. Since the build tray spins at a constant rate, parts on the inner swaths will print faster than parts on the outer swaths. Below is an image of the swaths on the J55 build tray.
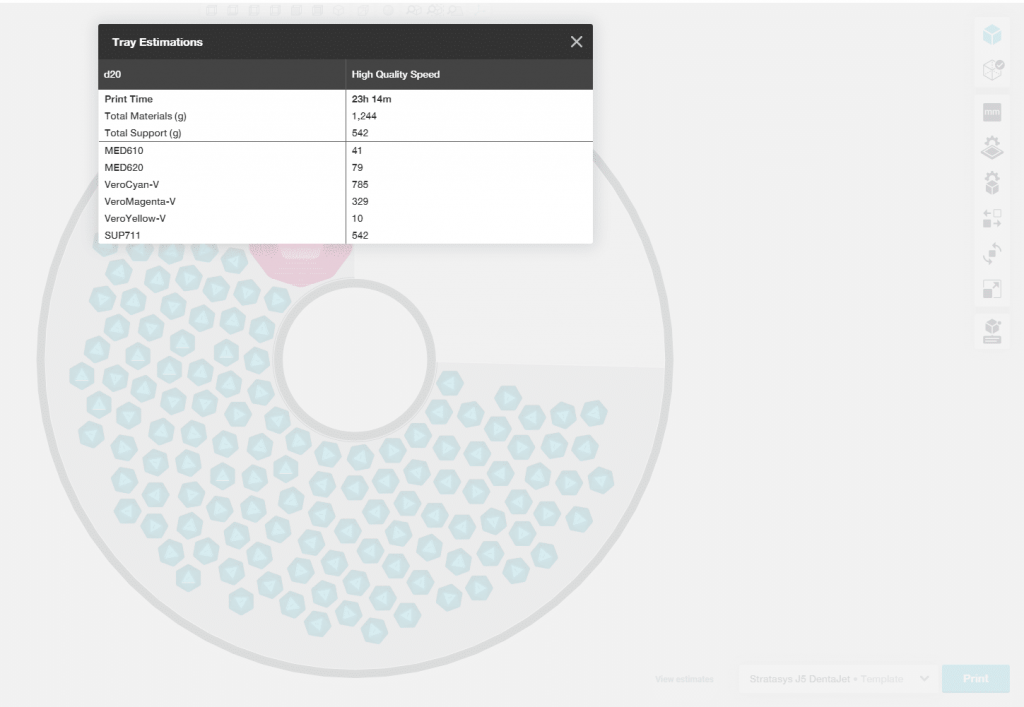
With this information the details of the arrangement types will be easier to understand. Along with a description of each arrangement option there are example print trays and print estimates for each of the arrangement options. The parts in the print job consist of 149 20-sided dice and a giant 12-sided dice.
Default
This is the normal automatic arrangement algorithm used on the J55. It forces the parts toward the inner swaths of the build tray. This results in a fast print job, but since the printer doesn’t delineate between the swaths in this arrangement mode the user doesn’t know whether removing one part would save hours of print time.

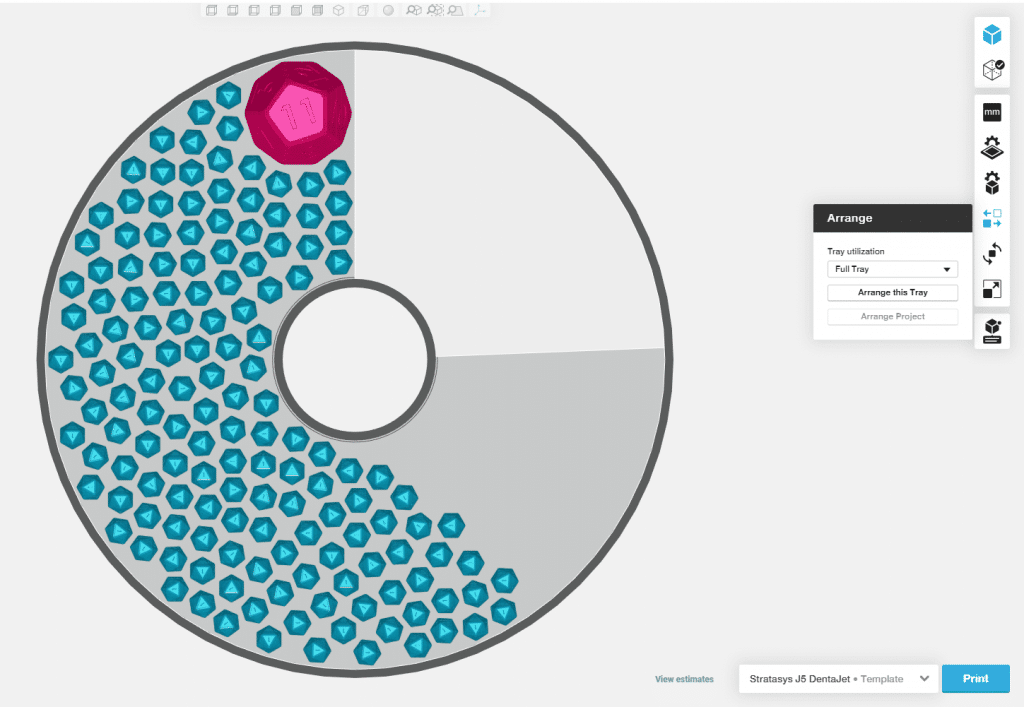
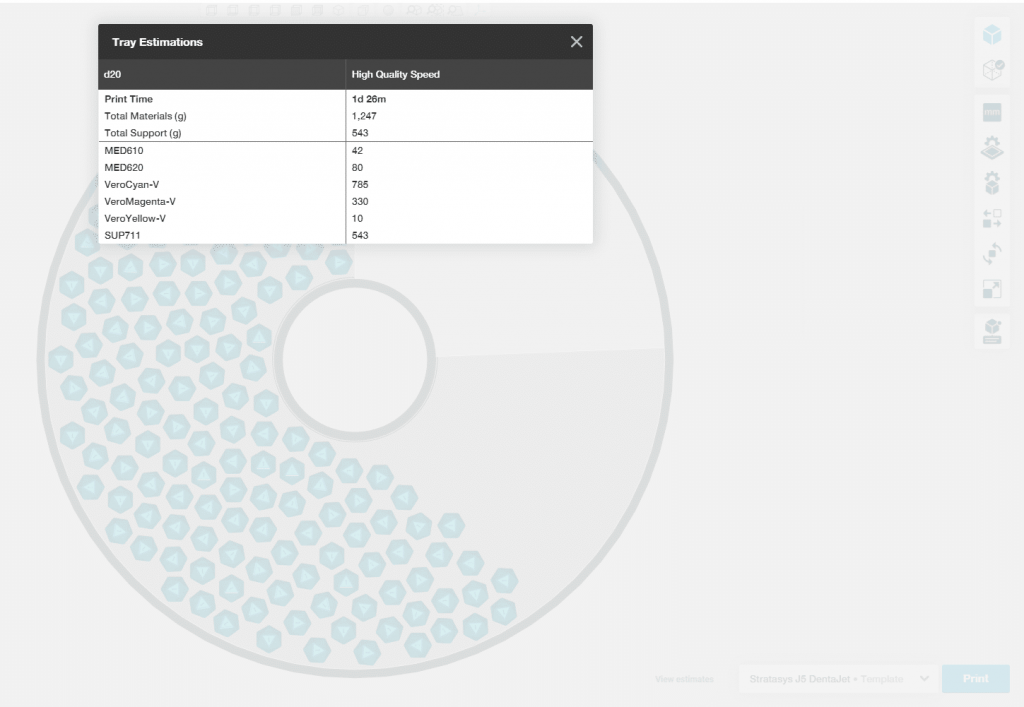
Full Tray
This forces the parts to the closest to the left edge of the build tray. The parts end up in all 3 swaths of the print tray. This increases the total time, but displays the remaining empty space on the right edge of the tray. This can be very useful if you have a large part you are trying to fit onto a loaded tray.
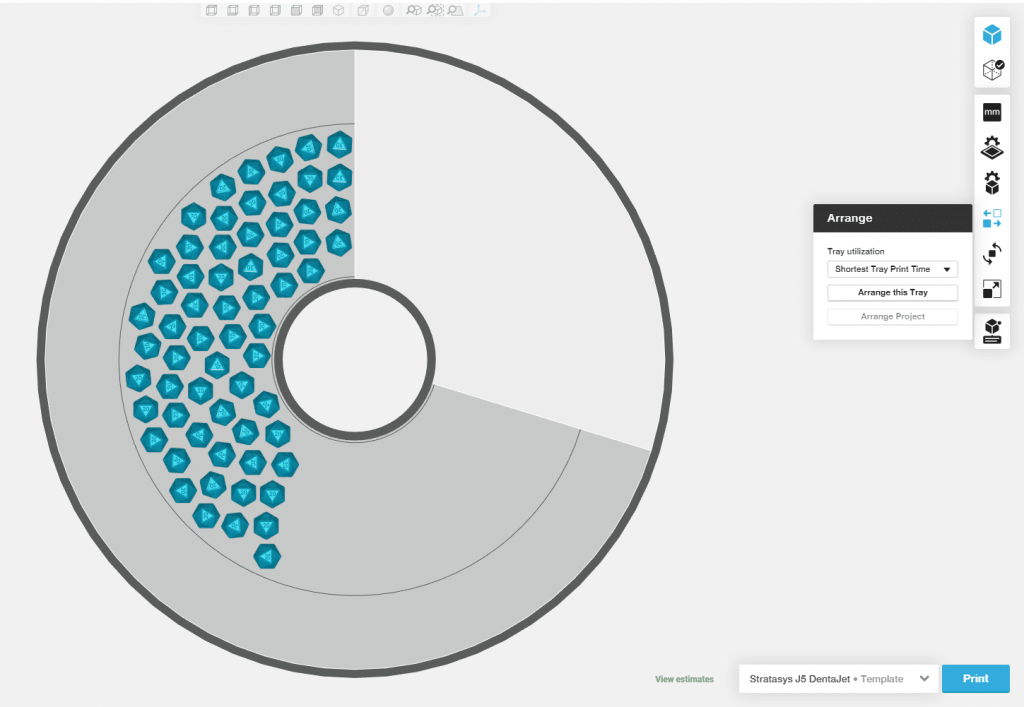
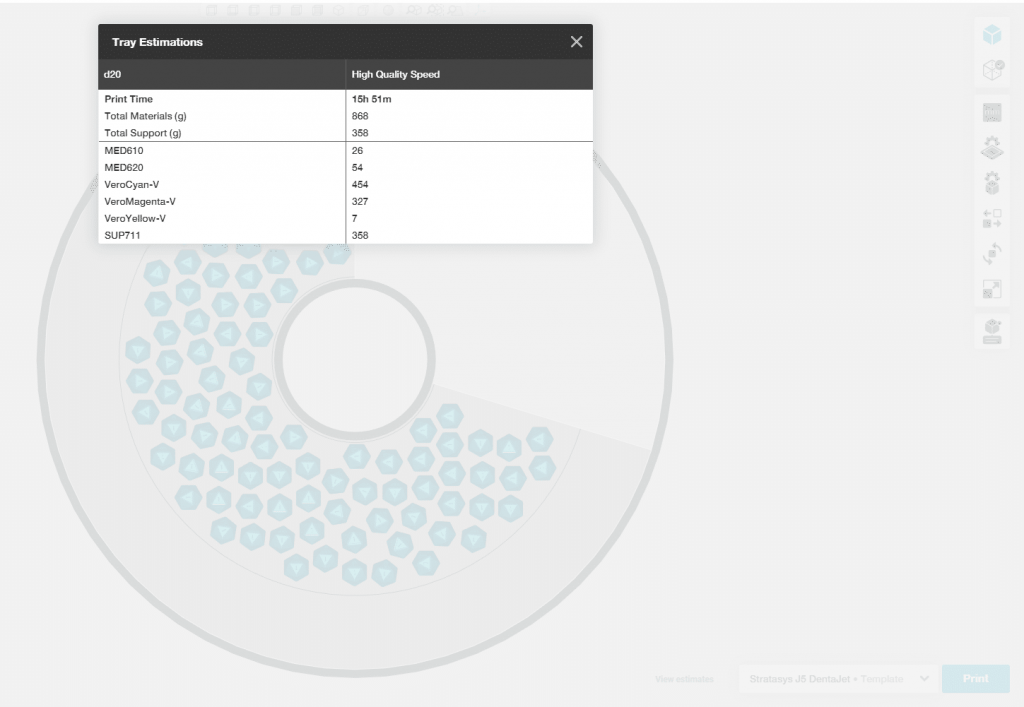
Shortest Tray Print Time
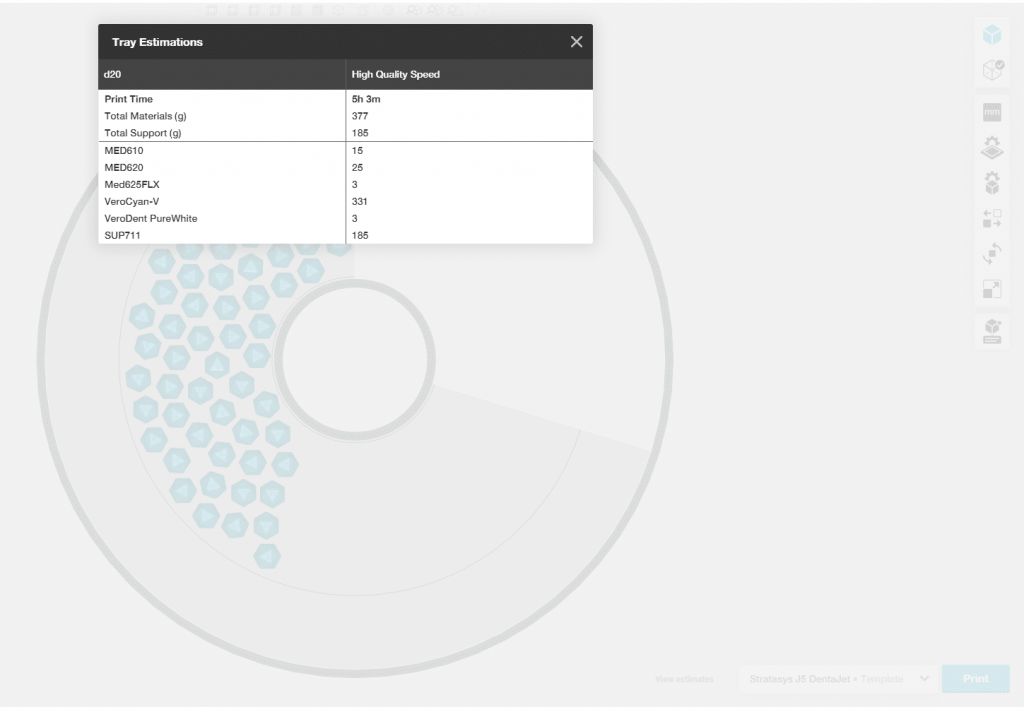
This forces the parts to exist only within the inner and middle swaths, which are the faster printing swath. Parts that don’t fit within those swaths end up outside the build volume and can be moved to another tray within the .Print file. This is useful when printing parts that require a fast turnaround. To print the same number of parts as the other arrangements, a second tray had to be made.

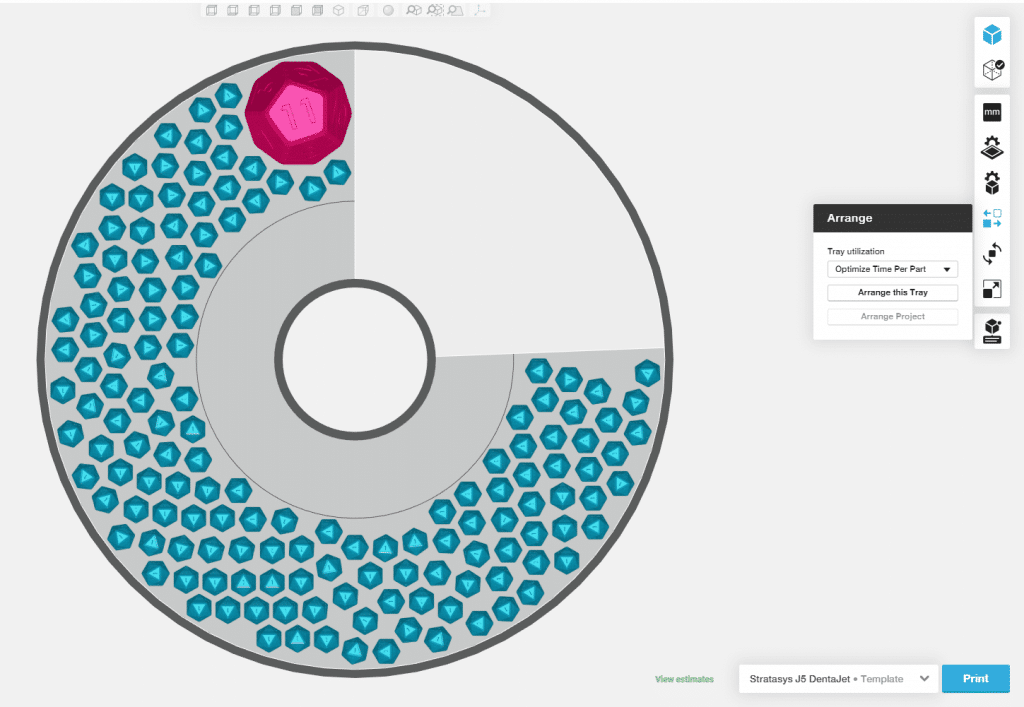
Optimize Time Per Part
This forces the parts within the middle and outer swaths, removing the extra time it would take printing in the inner swath. Parts that do not fit end up outside the build volume. These parts can be moved to another tray within the .Print file. This is useful for printing parts at the end of the day to have the ready the following morning.
Comparing the Arrangements
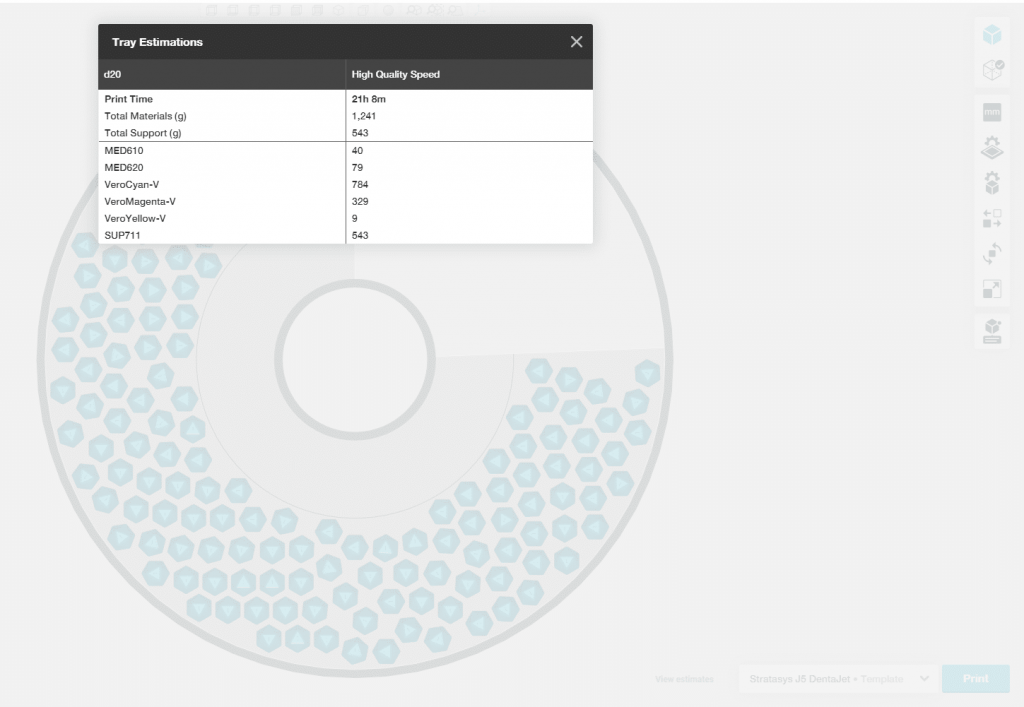
Comparting the estimated print times and material usage, the materials used are very similar. However, the time estimates vary by 4 hours. It should be noted that the print estimates for “Shortest Tray Print Time” are simply the sum of the two different print jobs and the print time would be more due to the need to take the first set of parts off before the second set could be printed.
| Type of arrangement | Hours | Minutes | Total Hours | Model Materials (g) | Support Materials (g) |
| Default | 23 | 14 | 23.23 | 1244 | 542 |
| Full Tray | 24 | 26 | 24.43 | 1247 | 543 |
| Shortest Tray Print Time | 20 | 54 | 20.90 | 1245 | 543 |
| Optimized Time Per Part | 21 | 8 | 21.13 | 1241 | 543 |
Implementing Arrangement Options on the J55
To take advantage of these new arrangement techniques, follow these steps:
- Load the parts you want to print on the J55 as you normally would. You can call out the materials at this point, but don’t worry about arranging them.
- Switch from the J55 to the “J5 DentaJet” template listed in the Polyjet Printer Templates section of the printer selection.

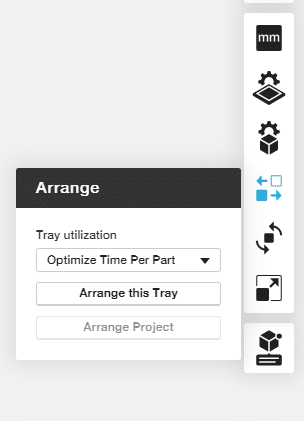
- Arrange the parts using the arrangement options available on the J5 DentaJet. The arrangement options are found in the “Arrange” tab.
- Once the parts are arranged, switch back to your J55 printer.
- Voilà! The parts have kept their arrangement and can now be printed on the J55!
Computer Aided Technology exists so our customers can focus on what they do best. If you have questions about our products or want us to cover a specific topic in a future blog send an email to tipsandtricks@CATI.com.
Until next time,
Kelsey Gabel
Application Engineer, Manufacturing Solutions
Computer Aided Technology, Inc.