SOLIDWORKS Admin Image Creation and Deployment
SOLIDWORKS Admin Image Creation and Deployment
Start by logging into the SOLIDWORKS Customer Portal. If you do not have an account, create one.
Once logged in go to Download -> Download and Updates.
Select the Version from the drop-down and then select the Product.
Accept End User License Agreement (EULA).
Select Download (Note: Recommend using the default location; this is just the Installation Manager and can be removed after install files are downloaded).
Once Downloaded the Installation Manager will launch, Select the last option Download and Share. This will give you the complete file set to upgrade any Server Products as well as creating the Admin Image.
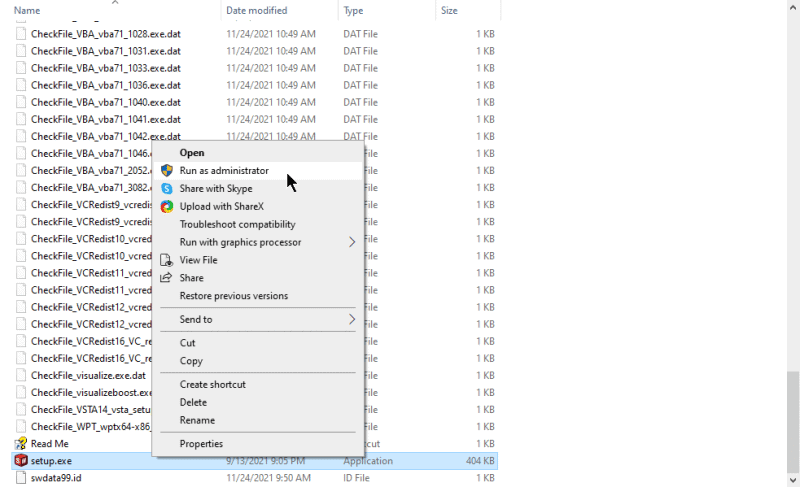
Browse to the download location (by default Documents\SOLIDWORKS Downloads\SOLIDWORKS 20XX SPX). Go to Setup.exe and right-click and Run as administrator.
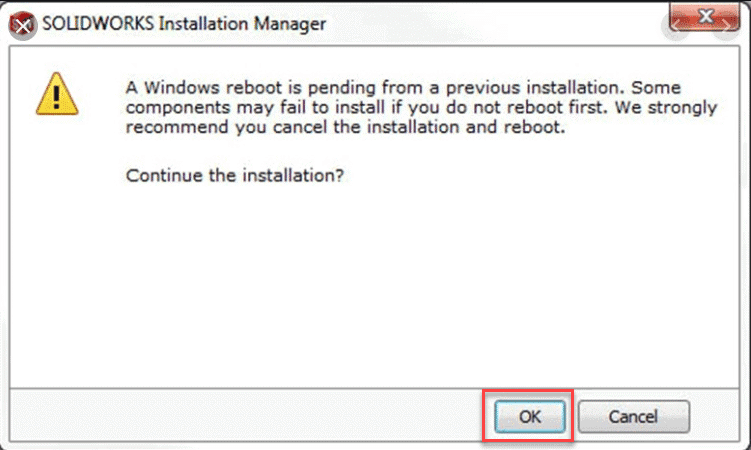
When the Installation Manager (IM) launches you will get a warning about a Windows reboot pending. It is always recommended that a reboot is done prior to any installation, however in most cases, it is appropriate to just hit OK.
Verify the Download Options are correct; select Change to modify them.
Select Accept Terms and Download Now.
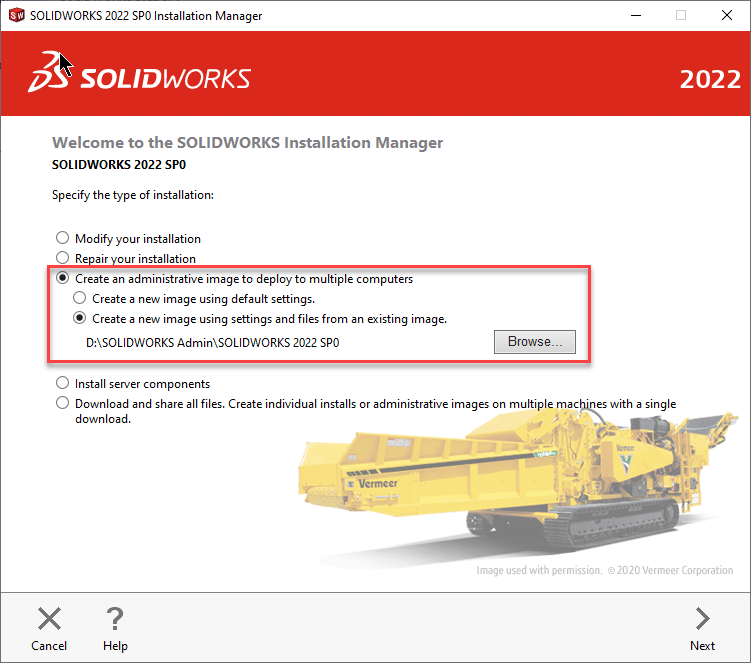
Creating the Administrative Image
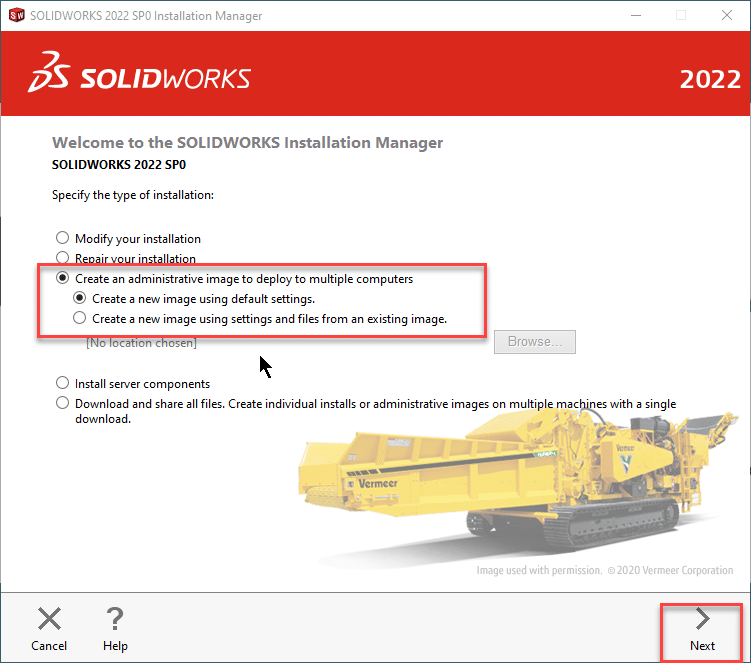
In the Installation Manager choose Create an administrative image…
You can then choose to create a new image with default settings or create a new image from an existing image. In this case, we are going to concentrate on a new image.
Select Create a new image using default settings and click Next.
Enter Product Serial Number(s). You can only enter one serial number per product here; if you have multiple serial numbers per product, this can be changed while editing the Admin Image once it is created. Click Next.
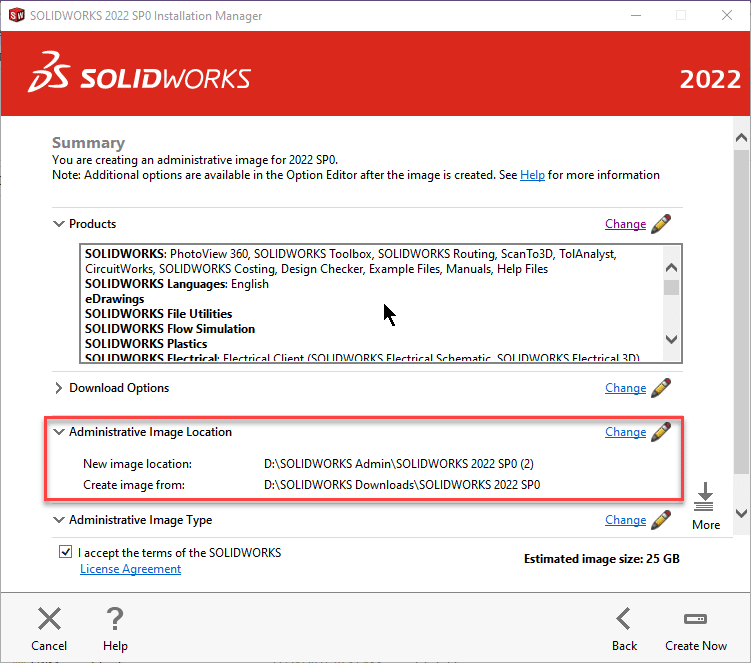
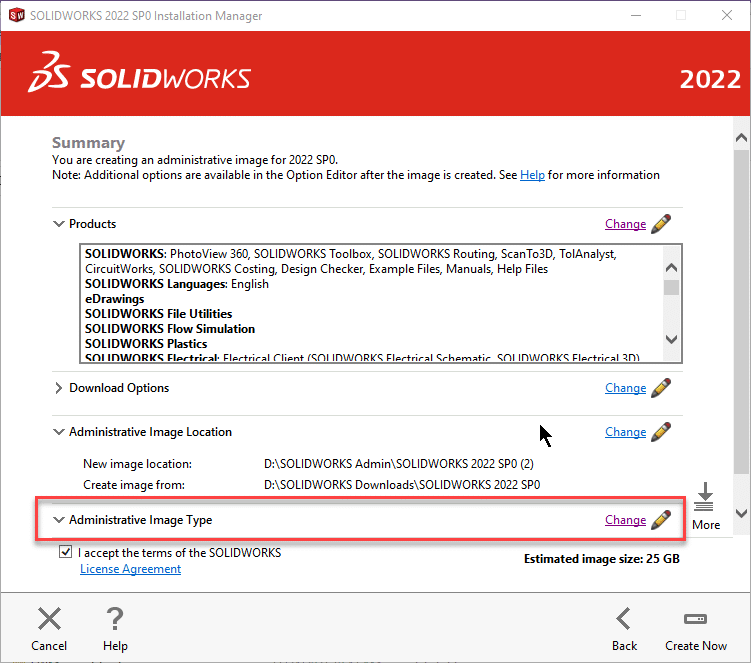
Define a location to save the Admin Image, if desired. By default, the image will be saved to C:\SOLIDWORKS Admin\SOLIDWORKS 20XX SPX; click Change to browse to a different location.
Note: Your ‘Create image from location’ may vary from this image.
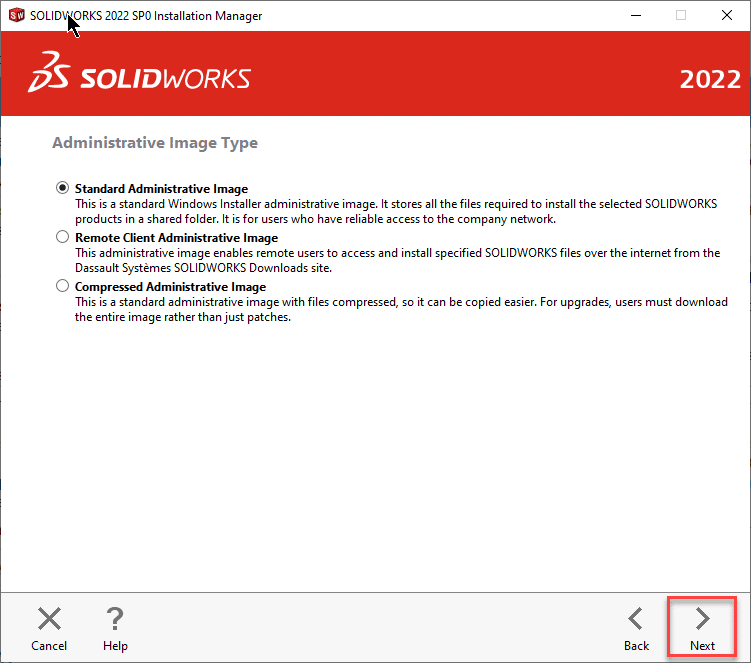
New in 2022 is the Administrative Image Type – Click Change to modify.
Select Standard, Remote or Compressed Admin Images.
For a more complete explanation of these options from the SOLIDWORKS 2022 What’s New guide, click here.
After selecting, click Next to return to the previous window.
Once all adjustments are made, click Create Now.

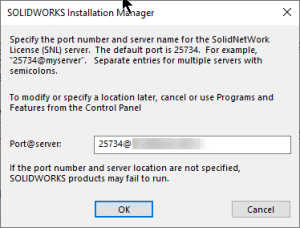
If using a SolidNetWork License (SNL) Manager Serial Number (Typically starting with 9010 or 0010); you will be prompted to enter the server name where the SNL is installed and activated, enter 25734@yourservername; Click OK.
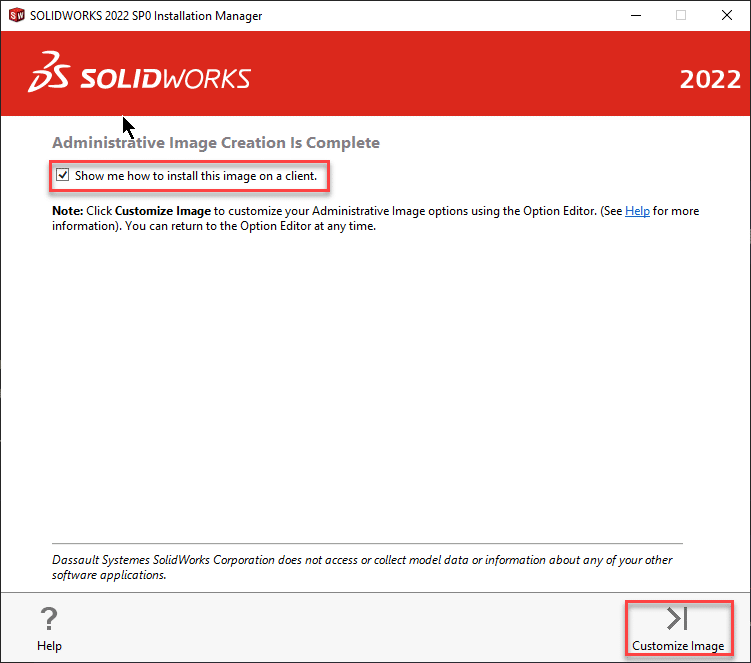
Launching the Administrative Image Editor
Select Customize Image to begin editing the Admin Image. Also, if you are new to creating an Admin Image; check the box for Show me how to install this image on a Client.
You can also launch the Admin Image editor by browsing to the folder where the Admin Image was saved.
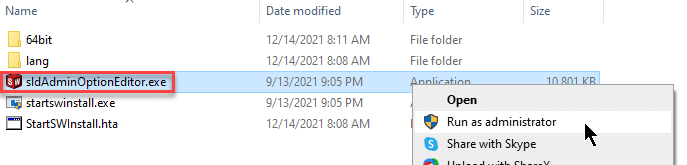
To customize, right-click sldAdminOptionEditor.exe and Run as administrator.
Administrative Image Editor Setup
Global Settings
Once launched, you will be on the Setup tab. Click Change to make any adjustments.
Note: The initial launch is for Global Settings. Any changes here would apply to all Installations.
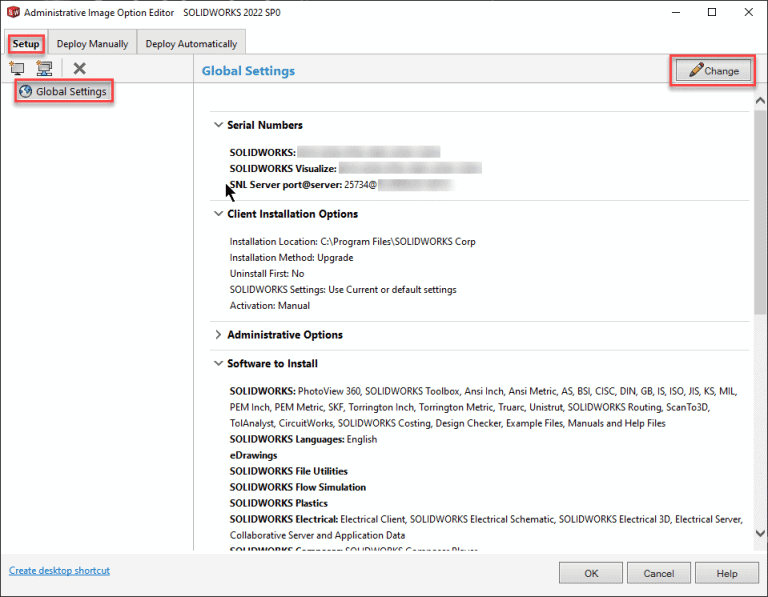
Use the scroll bar on the right to continue to look at other options.
Client Install Options
Please review the Options on how you want SOLIDWORKS Products to Install on the Client Machine:
Choose whether to Upgrade an existing major version or Create a new major version.
Browse if you wish to change the default installation location.
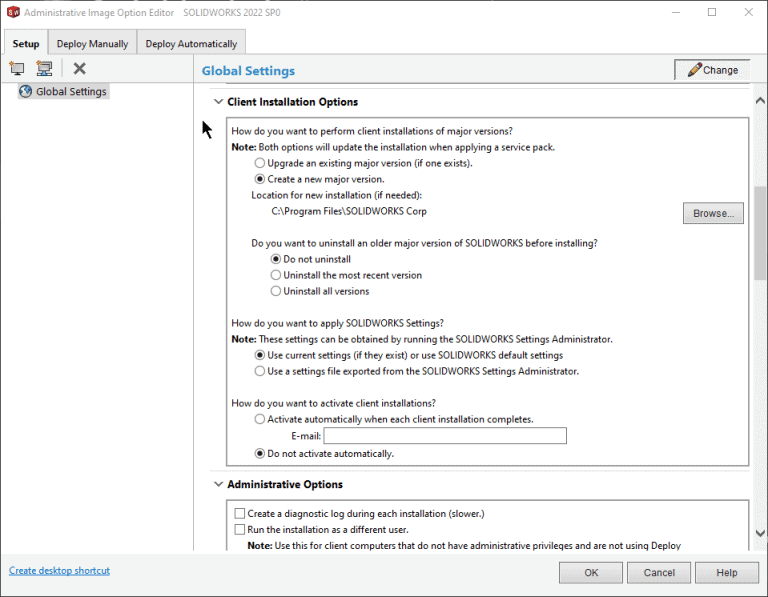
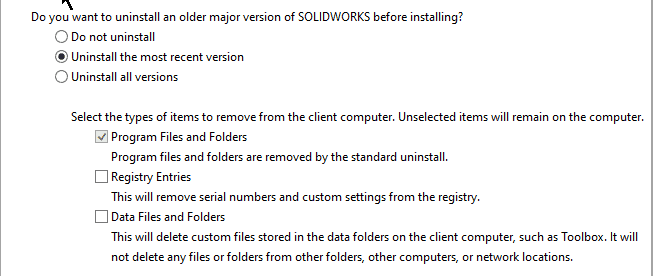
Choose whether to leave or uninstall older major version of SOLIDWORKS.
Note: If choosing Uninstall; select the additional options you want uninstalled (Program Files and Folders, Registry Entries and/or Data Files and Folders)
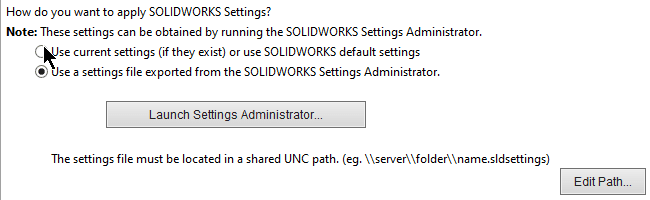
Choose to use current or SOIDWORKS default settings, or use a settings file exported from the SOLIDWORKS Setting Administrator. If choosing the Settings Administrator, click the Launch Settings Administrator and go through the Setting Administrator Wizard to make your choices. Edit Path as needed.
Select if you want the SOLIDWORKS Activation to run automatically after the install is complete or not. If choosing the Activate automatically; please provide a valid email address.
Note: If installing a SolidNetWork License (SNL) Serial Number(s) (Typically starting with 9010 or 0010); no activation is needed as the activation is only needed on the server for the SNL.

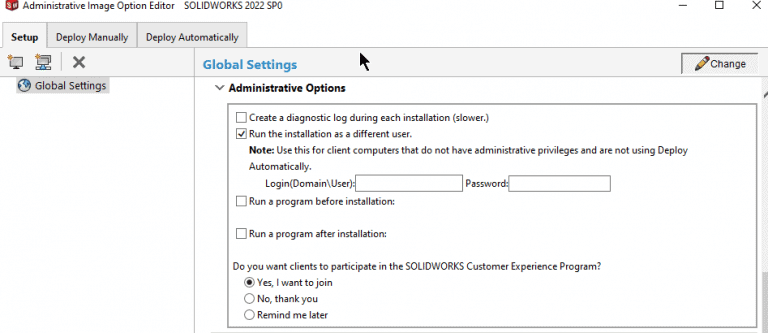
Administrative Options
The most common option here is to Run the installation as a different user. Full Administrator permissions are required to install SOLIDWORKS Products. Provide the admin login here
You can also choose to run programs before and after the installation, as needed.
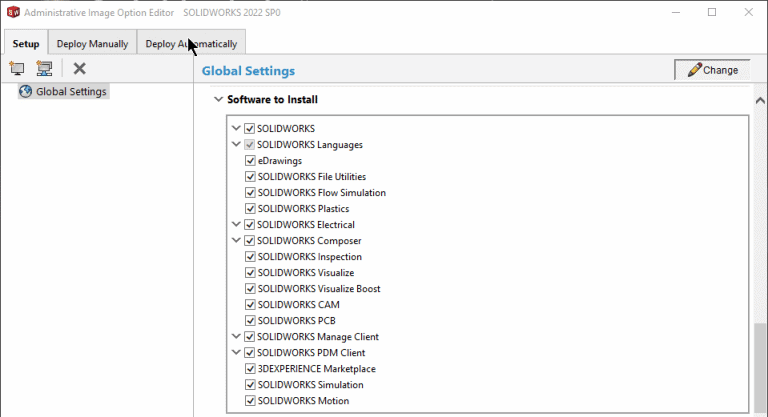
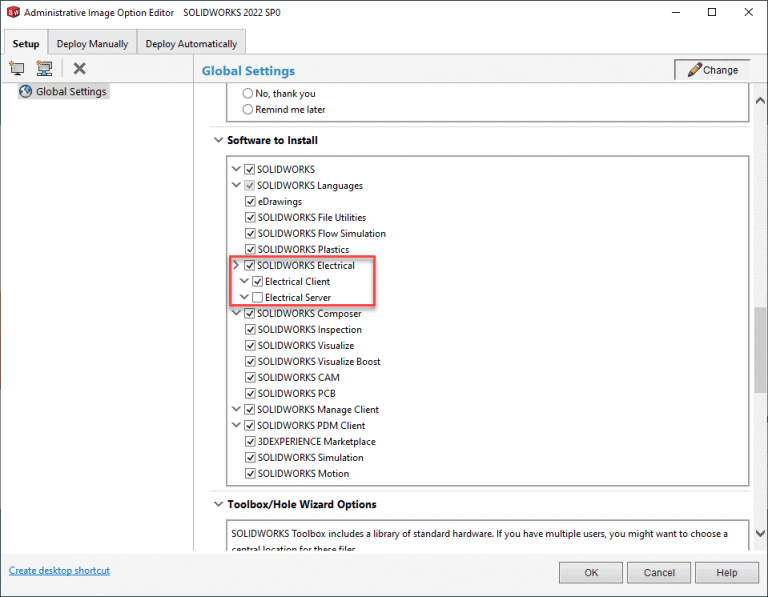
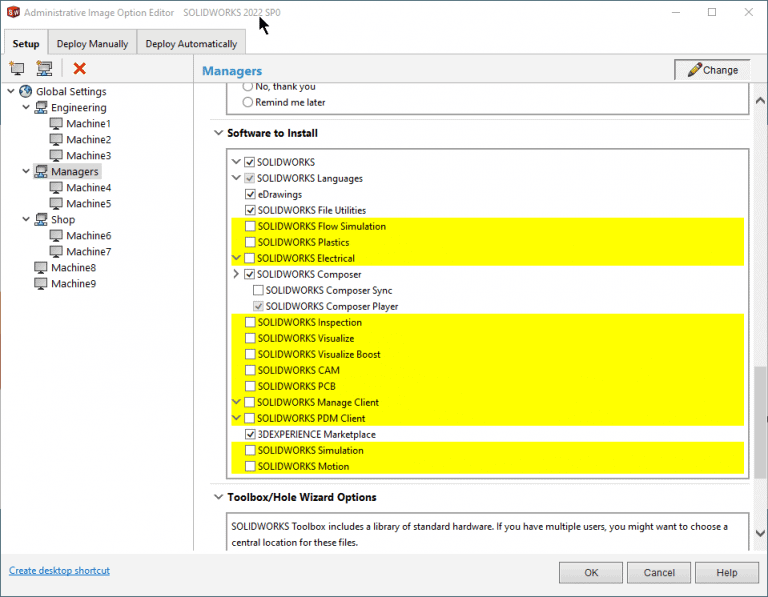
Select Software to Install
Check and uncheck Software as needed; expand the arrows next to Products to view all items that will be installed with that Product.
Note: Selecting SOLIDWORKS Electrical and SOLIDWORKS PDM Client require additional option settings which will be reviewed later.
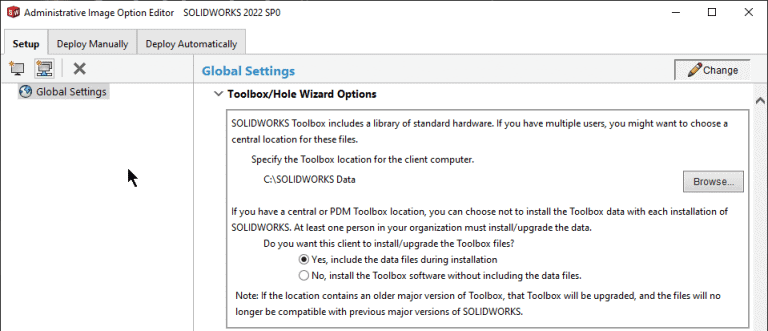
Toolbox/Hole Wizard Options
Determine Toolbox/Hole Wizard Options. By default, SOLIDWORKS will create a new folder (C:\SOLIDWORKS Data). If the path points to an existing C:\SOLIDWORKS Data folder, it will automatically upgrade that to the version being installed. You can also choose a Network Location for sharing this folder among users.
Note: Due to Read/Write access requirements, If SOLIDWORKS Data folder exists on a Network already (from a previous version), the Toolbox will not automatically update. The recommendation is to copy the folder local to one user’s machine and have the admin image point to that location. Once upgraded, it can be copied back to the network location.
If you are going to have multiple versions of SOLIDWORKS installed on the same Client, then change the name of the folder (Ex: SOLIDWORKS Data_2022) to keep it separate. Once a Toolbox/Hole Wizard is upgraded, it will no longer be accessible by older versions of the software
SOLIDWORKS PDM Client (if selected)
Define Product Type: PDM Standard or PDM Professional
Define Type: Editor (CAD Users), Contributor (Non-CAD Users) or Viewer (Can only View files)
Select any Add-ins
Select whether to Set up a Vault View after the Installation
Launch View Setup Wizard if Vault View is selected
Electrical Options Client + Server (if selected)
For Electrical, this view is for first time setup. If the Server is going to be on a local machine, then the settings below are correct.
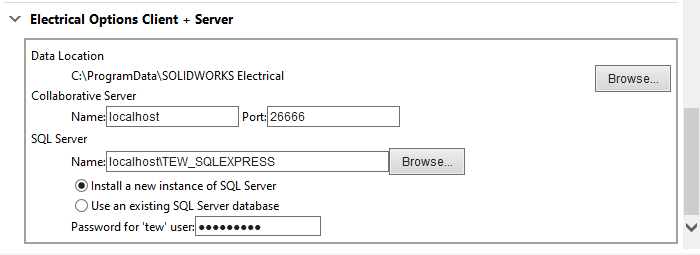
If the Electrical Collaborative Server is already installed on a server, then replace ‘localhost’ to the name of the server it is installed on and deselect Electrical Server under Software to Install.
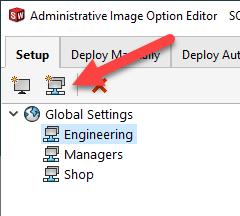
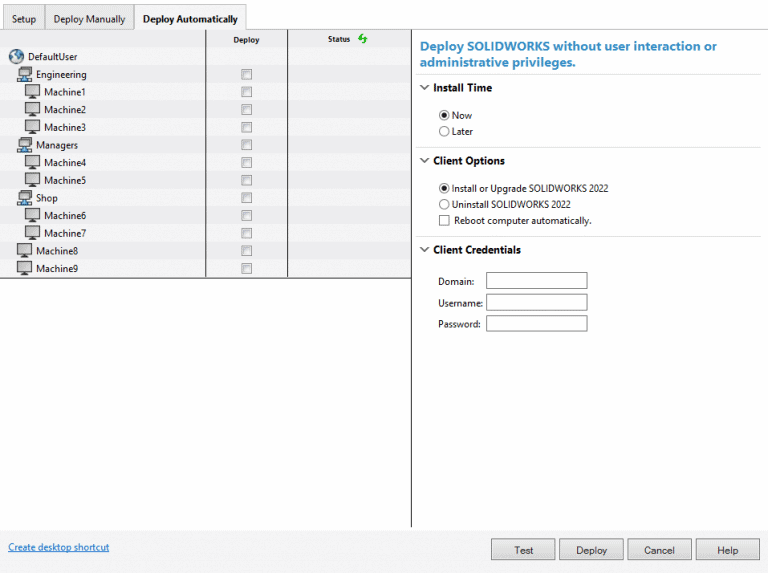
Creating Groups and adding Machines for Deployment
In the top-left corner you can select to create Groups or add individual Machines. Groups will allow you modify Admin Image settings that are different from Global Settings for multiple machines and deploy.
Select Group, then select the Machine icon to add Clients. You can add by Machine Name, IP Address or IP Address Range. Use Notes as needed.
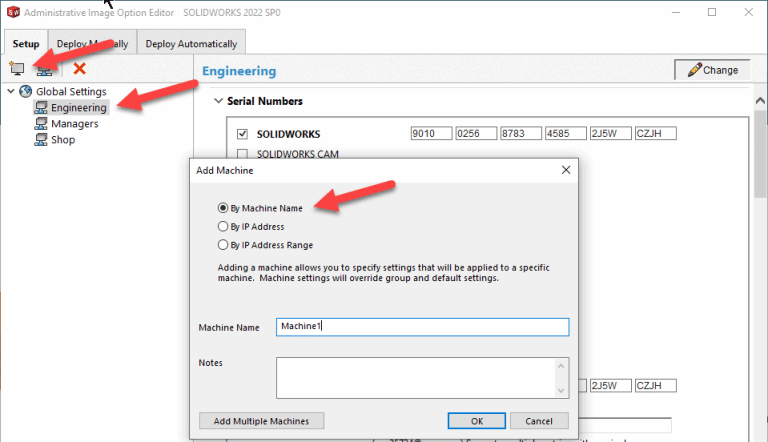
You can also select the Add Multiple Machines button and type or Copy/Paste machine names to quickly add multiple Clients to one Group; click OK.

When complete, you can select on a Group or specific Machine and go to Software to Install to choose what will be used for that Group.
 When done click the Change button again to save your Changes.

Deployment
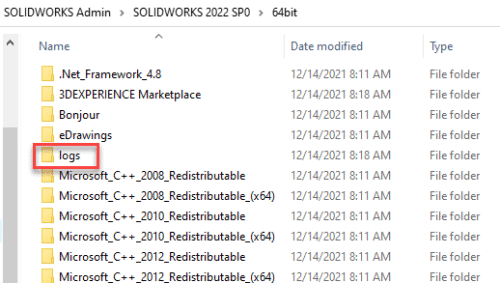
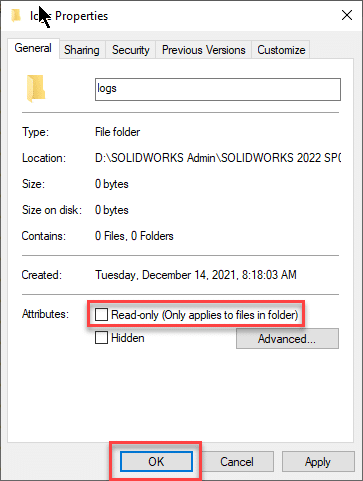
You can choose to deploy the SOLIDWORKS Admin Image either Manually or Automatically. In order to have logs and status updates from the Clients, the client account must have a minimum of ‘Read/Write’ permissions to the folder <admin_image>\64bit\logs. Right-click on the logs folder.
Choose Properties and modify the attributes at the bottom and uncheck Read-Only, click OK.
Manually
Select the Deploy Manually tab and click Send Email.
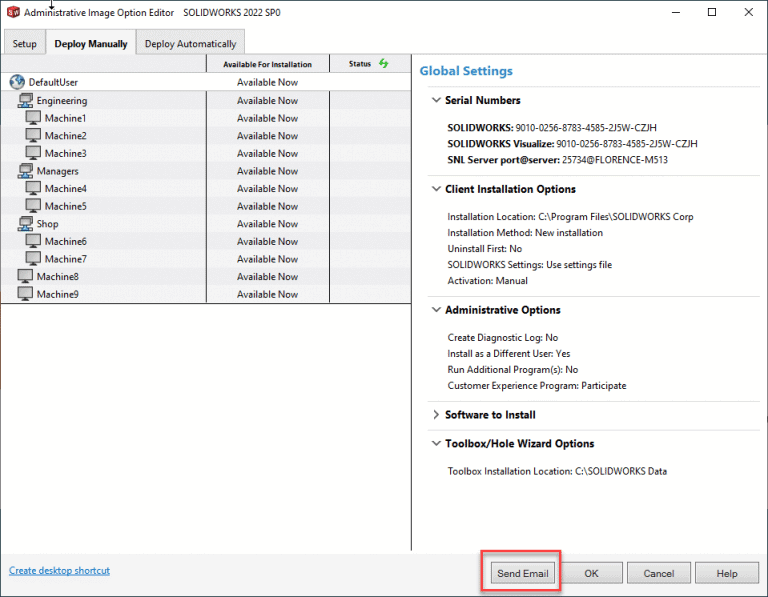
This will create an email that includes a link for the users to begin the install their SOLIDWORKS Products.

You can also browse to the folder <admin_image>\SOLIDWORKS 20XX SPX and double-click the StartSWInstall.hta file to begin the install as well.

Automatically
This option pushes the installation to the Clients silently and does not require any action from the user. This does require specific permissions to be set up to install correctly. The specifics of this are provided in the SOLIDWORKS Installation and Administrative Guide under Administrative Images –> Automatic Deploy.
The guide can also walk through how to Deploy via Command Line.
When using Deploy Automatically, you can select Groups and/or Machines to deploy; choose to Deploy Now or Later and define a Time and Date. You can then choose to Install/Upgrade or Uninstall as well as Reboot the computer automatically (recommended).
Enter Client Credentials for Admin rights.
Test the Deployment, if all is satisfactory, then select Deploy.
At any time, click on the Help button on the bottom-right for more assistance in specific areas.
Upgrading
When a new version or service pack is released, the Clients will need to be upgraded with a new Admin Image. Using the same steps at the beginning of this blog, launch the new Installation Manager and choose Create an administrative image… and choose Create a new image using settings and files from an existing image. Browse to the location of the old admin image and select the folder <admin_image>\SOLIDWORKS 20XX SPX; click Next and follow the prompts to complete the new Admin Image.
Additional Information and Suggestions
- If a user was installed with an Admin Image and is having issues; you cannot run a repair from the Control Panel – Programs and Features. Re-running the image that was used for the install will act as a repair.
- If you find that the Admin Image is having issues installing (typically because of a permissions issue); try copying the SOLIDWORKS 20XX SPX folder from the Admin Image location and copy locally on the client where they have Read/Write permissions. Some place like their Desktop or My Documents folder.
- If several users are having the same issue after being installed by an Admin Image, typically that will suggest some sort of corruption of the Admin Image. The recommendation would be to re-download a new Installation Manager (IM) and create a new Admin Image and Re-deploy.
As always, if you have questions or run into issues, reach out to your VAR for assistance.
Cami Florence
Technical Support Manager
Computer Aided Technology