Un-Boxing Your HandyScan 700
![]()
Getting your HandyScan 700 set up and ready to scan is a quick and easy process. This blog will highlight some of the key steps that you don’t want to miss.
First step in unboxing your HandyScan 700 is going to be making sure all of the contents are there.
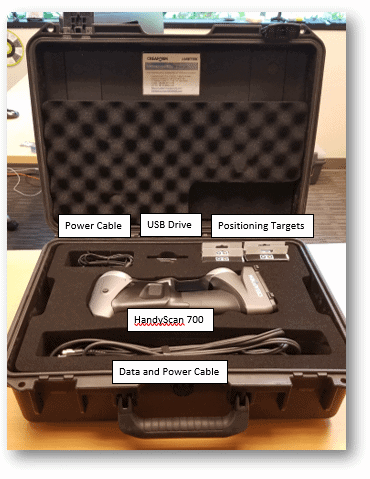
Using the slots on the side of the foam, lift the foam and contents up enough to check for looks like a flat wood box.
With all the necessary parts present, copy the contents of the USB on to your computer and then run the installation.
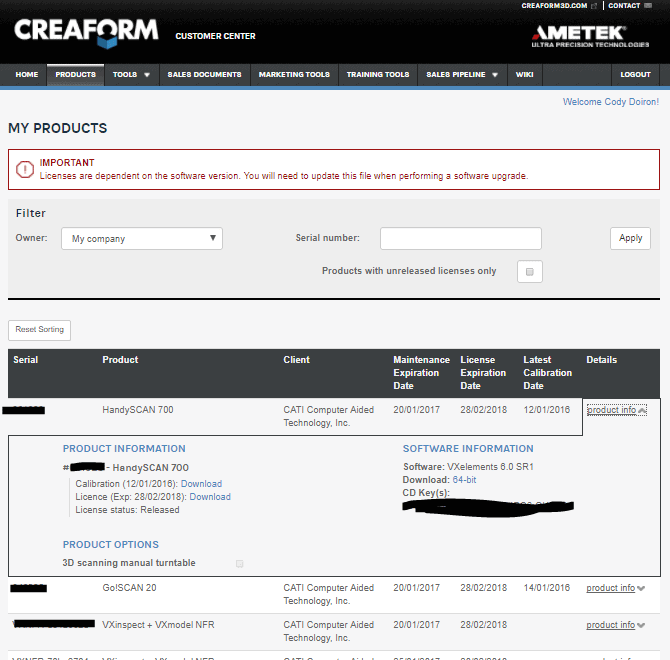
Follow the prompts until you get to section where it asks you to input the CD-Keys. Here you will need to go to https://support.creaform3d.com and login. Then go to the “Products” tab and you will find all the products that you have available. Go through each product (Including software packages like VX Inspect) that you want to activate and copy the CD – Key into the installation program and select “Add Key” but do not select next yet. Once you add they key it will clear the box and tell you if the key was successfully added. Continue to add all the CD – Keys and once all entered, hit next and continue the installation.
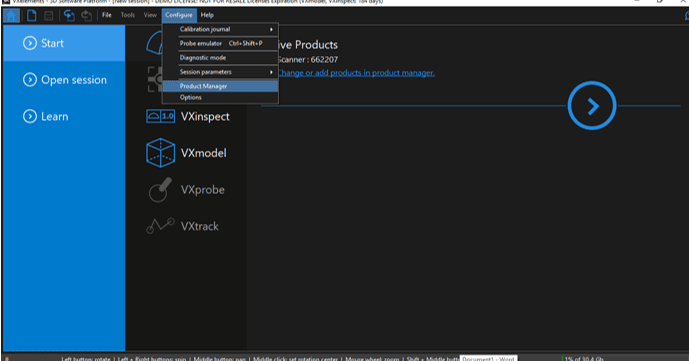
Open VX Elements once the installation is finished. Before plugging in your scanner, go to the configure tab and select product manager.
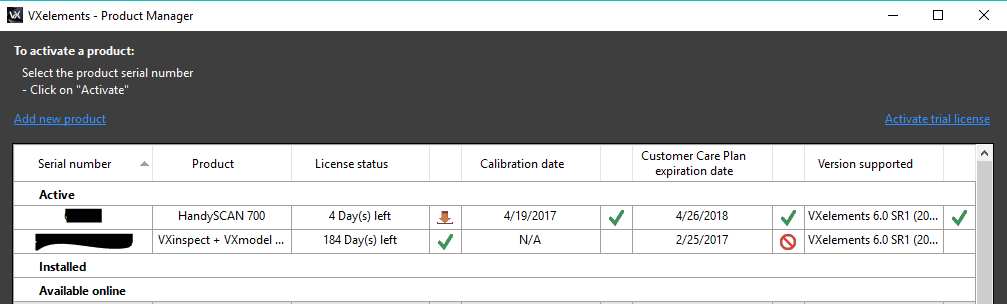
Double check that all the products you wanted activated are and everything is in place. If you have any software or hardware issues, check the product manager first to see if all is in order. If you are having any issues, contact Creaform Support.
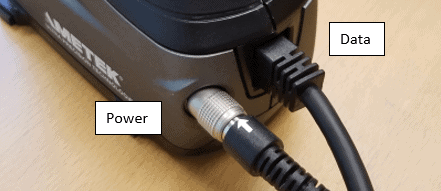
Now open VX Scan, and prepare all the cables.
Take care to always plug in everything in this order:
- AC Adapter into the wall outlet or extension cord
- Other end of the adapter into the Data and Power Cable
- USB C end of the Data and Power Cable into your computer
- Power into the scanner, then data into the scanner
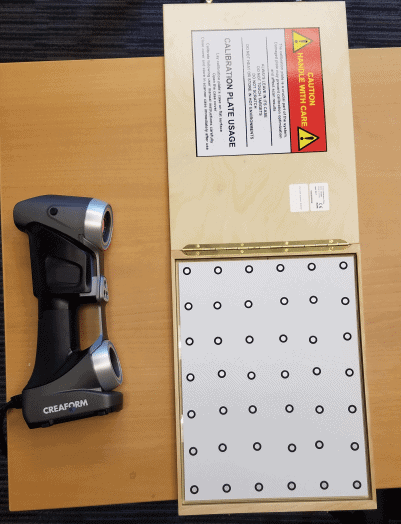
Now before you start scanning, it is a good idea to do the quick manual calibration. Pull out the flat wood box and carefully open it.
You want to be sure it is on a flat surface and set it up vertically as shown below.
Now start VX Scan and find the Scanner Calibration button in the top left corner and calibrate the scanner. Use the bars on the top and sides to help you position the scanner above the wood plate and align the two circles and cross hairs.
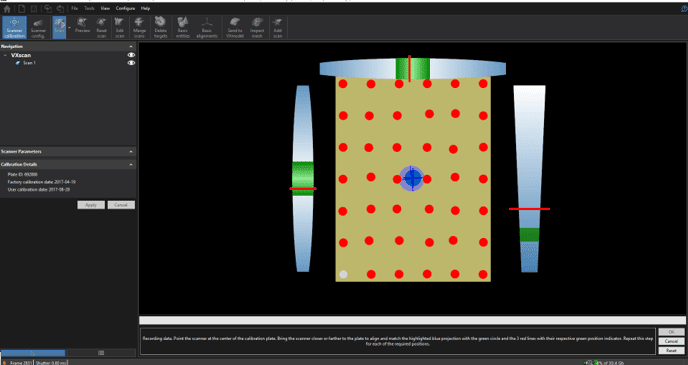
It is a good idea to periodically calibrate the scanner before beginning new scanning projects.
Congratulations! You are now ready to begin scanning.
Regards,
Cody Doiron – Application Engineer