Creating a WordPress Blog Post – The Easy Way
Creating a blog post in WordPress is simple and easy, and can be completed relatively quick.
1. Before logging into WordPress make your blog post in Microsoft Word without any special formatting. Any images you have in your document will uploaded as well.
2. Once you are logged in you will see the WordPress Dashboard. From here you can make various changes to your account, and post a new blog for review.

3. From the Dashboard, Click the ‘+New’ button near the top of the page. This will bring you to the ‘Add New Post’ page where you can begin making your blog post.

4. Near the bottom of the page you will see a ‘Browse’ button that allows you to select a ‘.docx’ file to upload. Click this button and select your blog post document that you created earlier.

5. Once you click open you should see a preview of your document below the browse button.
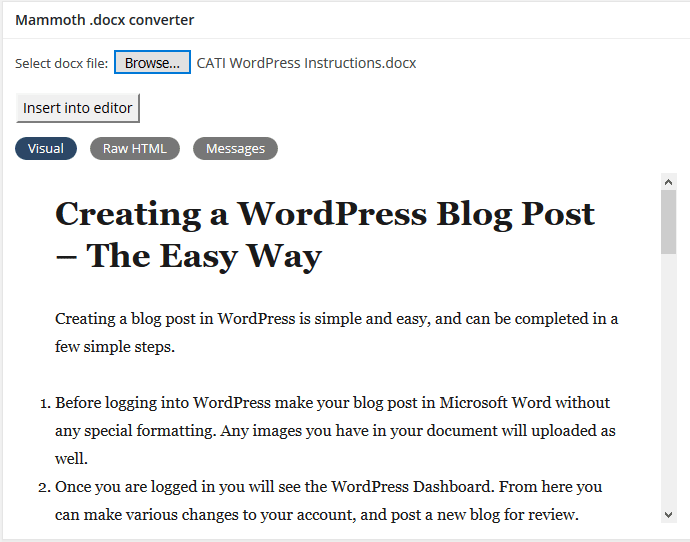
6. From the preview you can see how your document will look before you insert it into the actual blog post section. Along with the visual preview you can view the Raw HTML of your word document as well as any error messages.
a. The visual preview is not set in stone and you can change some things before you submit your blog post for review.
7. Once you are sure you have selected the correct document you can click the ‘Insert into editor button’ and your word document, along with any images, will be uploaded and placed into WordPress’ text editor.
a. From here you can tweak any mishaps that may have occurred during the upload.
b. You can also preview your post to test formatting or any other changes.
c. Your post will not have a title, so be sure to insert your title at the top of the page.
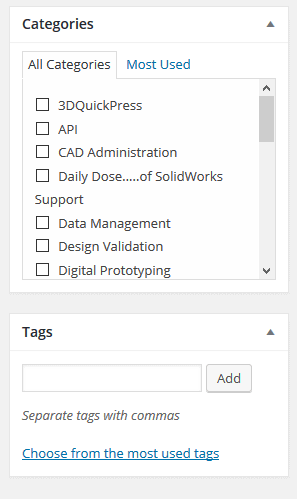
8. On the right hand side of the page you will see a list of Categories and Tags that you can choose from.
a. You can select multiple categories for your post.
b. You can choose tags based on their use, or you can enter your own.
9. Along with the Categories and Tags boxes on the right hand side of the page there is also a box for setting a featured image for your post.
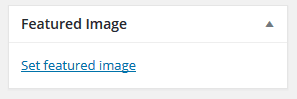
10. Click the ‘Set Featured Image’ link and choose a picture from one of your uploads.
a. The images toward the top are your most recent images.
11. Once you have your image selected click the ‘Set Featured Image’ button in the bottom right corner of the page, and your post should be ready for review.
12. At this point your blog post is ready. Make sure to double-check everything before clicking the submit for review button.