SOLIDWORKS TECH TIP: Image Quality Properties When Saving as JPG/TIFF
When you save as a JPG/TIFF with default settings from SolidWorks, the image quality may not appear to be very good. Why is that?This has to do with your display resolution. Per SolidWorks KB article:
“The image resolution of a JPEG/TIFF image saved from SolidWorks is dependent on the screen resolution (within Windows Display Properties or the graphics card settings). Thus minimizing the SolidWorks screen or maximizing it will give a different display resolution, although the DPI settings will remain constant (since this is determined by the Windows/GPU dpi setting).”
The following are some examples of different settings and their resultant output.
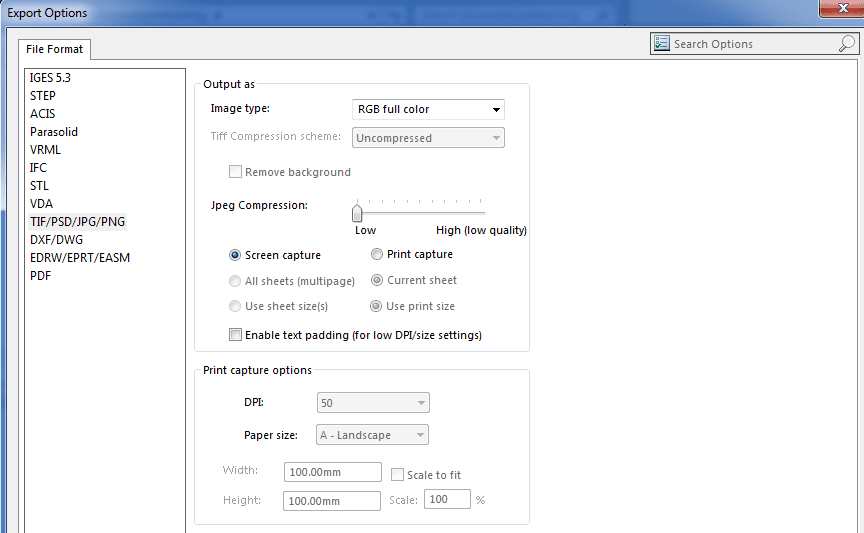

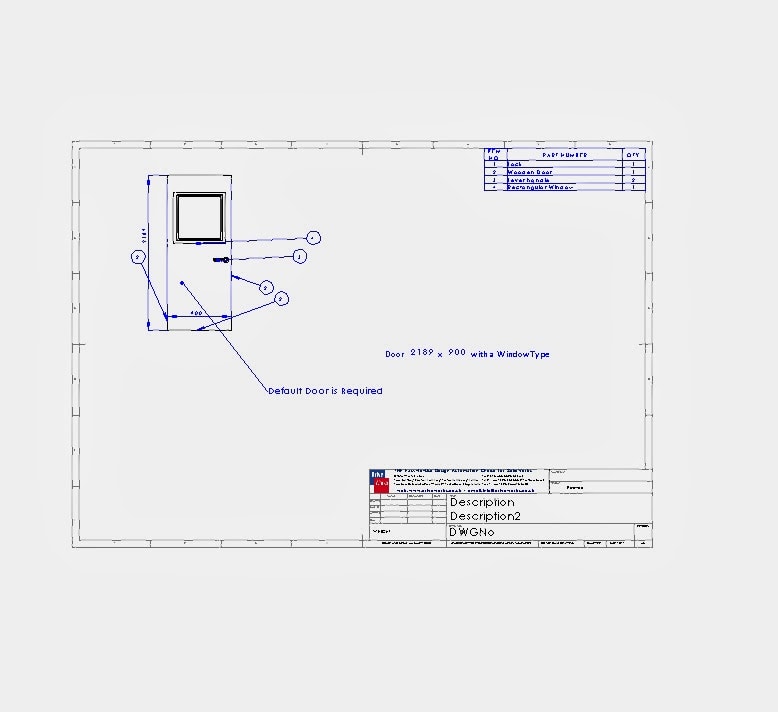
The resultant JPG with default settings and SolidWorks set as above is:
The following is the same defaults, just with SolidWorks set to Full Screen and drawing area maximized vs. the display:


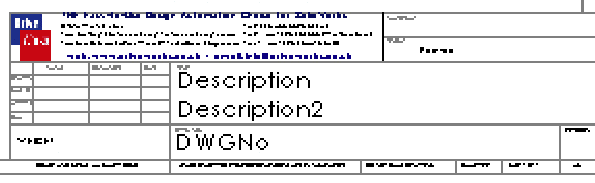
Showing zoomed in on the title block 6 times:

Notice the image is larger and the fine print is now legible.
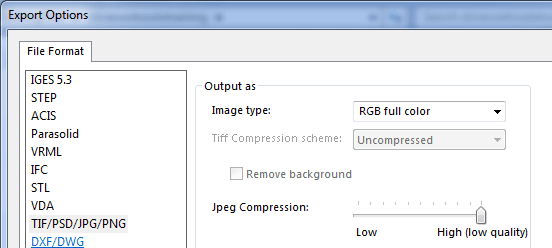
I modified the default “JPG Compression” only and set it to High (low quality). See slider in below image.
The result of just modifying the compression to HIGH is:

Note: Setting higher resolutions can increase the file size and the time to generate the JPG/TIFF substantially.

As a comparison, here is the Full Screen version of the title block (zoomed up 6x) using the Default settings.

Here is the resultant title block at 1200 DPI, actually scaled DOWN to fit.

It is very easy to see the clarity difference. You need to consider the file size and generation time if you are going to batch print a lot of drawings. You can find a happy medium if you play with the DPI setting vs. the end quality you need. The two drawings that generated the title blocks above had the following end file size:

I hope you find this information useful. Happy Modeling!
For more training and tutorials on the many 3D CAD Modeling solutions in the SolidWorks family of products and add-ons, register for an upcoming Event or look into our SOLIDWORKS training.
Related Articles
Tips for New SOLIDWORKS Users Part 2: Keep Your Sketches Simple
Tips for New SOLIDWORKS Users Part 3: Fully Define, Everytime