SOLIDWORKS PROPERTY TAB BUILDER
What is the SOLIDWORKS Property Tab Builder?
The Property Tab Builder is a stand-alone utility for creating a customized interface for adding properties to SOLIDWORKS Parts, Drawings, and Assemblies.
Starting the Property Tab Builder
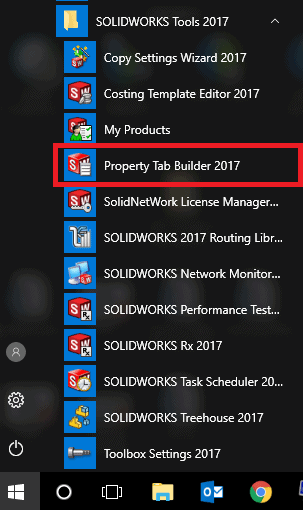
From the Start menu find the SOLIDWORKS menu item (Traditionally “SOLIDWORKS ‘Version Number’, for this example I have SOLIDWORKS 2017. Then locate the sub-menu “SOLIDWORKS Tools”, there you will find the Property Tab Builder application.
Understanding the Elements
Groupbox: The Groupbox is essentially a container that allows you to group the other items. For example, you can place part information such as Part Numbers, Article Numbers, and Descriptions into a Groupbox and material information like Material, Finish, and Weight into another Groupbox. Each Groupbox can have a name.
- Textbox: This item accepts free-form text and stores it as an associated property.
- List: List boxes present users with a list of predefined values that once selected will be stored as a property.
- Number: A number box accepts only numeric inputs to store as a property.
- Checkbox: With a checkbox you can have the user select between two predefined values to place as a property.
- Radio: Radio buttons allow you to define a selection of up to three predefined values that can be used to show or hide elements in the dialog. As an example, you might want different text boxes to show based on the selected radio button.
File types
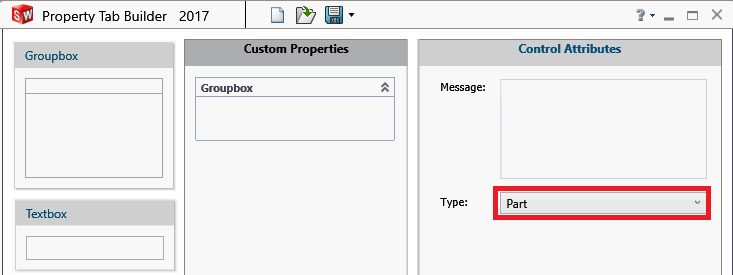
There are four file types you can save; .PRTPRP for PARTS, .ASMPRP for ASSEMBLIES, .DRWPRP for DRAWINGS, and .WLDPRP for WELDMENT PARTS. The type of dialog is selected by changing the TYPE in the Control Attributes.
Using the Tab Builder
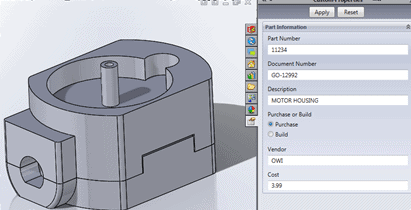
For this example, I am going to build a simple tab for parts, it will contain two Groupboxes. After starting the Tab Builder, I added two Groupboxes by dragging the Groupbox into the middle of the screen and adding a title in the Caption.
Then I placed three Textboxes into the ‘Numbers’ Groupbox and labeled then “Part Number”, “Document Number”, and “Description”. I also assigned the Name, Type, Value, and Configuration values.
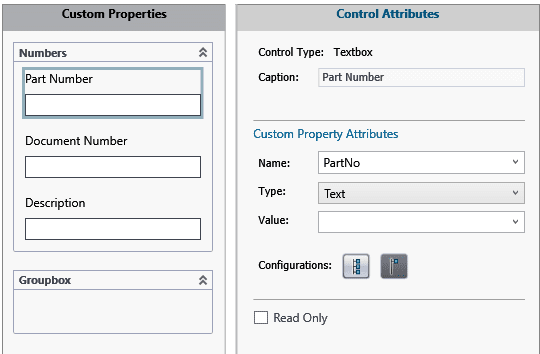
For the ‘Name’ value enter the name of the property you wish to create in SOLIDWORKS. It is helpful to match the existing property naming convention your company already uses, specifically if you are using a PDM system. You can access the predefined names by hitting the dropdown arrow in the value column. For the ‘Type’ value it is a best practice to leave this as text. The other options (DATE and YES/NO) will insert the date as defined in your operating system or simply the words YES or NO into the property. For the ‘Value’ item you can either leave this blank or enter a predefined value that will appear whenever the tab is used. If it is not changed that value will be used as the text for that property. The last item deals with configurations, if you are not using configurations set this to the rightmost option (Show on Custom Tab). This will place all the properties on the custom tab, otherwise the properties will be added to the ‘Configuration Specific Tab’.
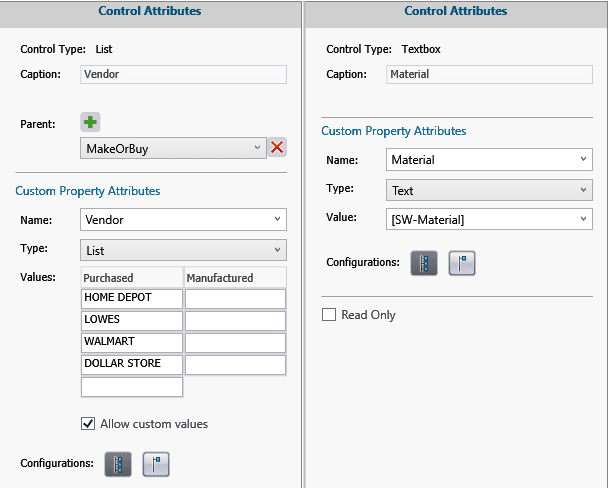
The second Groupbox will contain three Textboxes Vendor, Cost, and Material. However, I want the user to specify if the part is purchased or manufactured and based on that selection I only want certain Textboxes or Lists to be displayed (Vendor and Cost for purchased parts and Material for manufactured parts. For the vendor, I wish to limit the options to two companies so I will use a List for the Vendor. To accomplish this, I will drag a Radio button into the appropriate Groupbox then the List and Textboxes.

I will set the properties for the List and Textboxes first. For the list box, I will set the Caption, name, Type and Values. Then I will set the attributes for the Textboxes as described in the previous step. For the List, there are additional options available that I will describe. The ‘Type’ options are: List (a set of items defined in the Tab Builder), Text and Excel are lists that reference either an external TXT file or Excel spreadsheet and ACCESS allows you to point to a Microsoft Access database to retrieve the list items. For this example, we will use ‘List’, for the other options please contact our support agents to help setup for your specific requirements.
Materials can be entered manually or if you select ‘SW-Material’ from the dropdown arrow in the ‘Value’ attribute, the user will be presented with the SOLIDWORKS Material manager when they select item in the Tab while in SOLIDWORKS.
Next, I will define the Radio button, after defining the Caption, “Name” of the custom property and Quantity (how many radio buttons). Next is the ‘Label’ and ‘Value’. For this example, I will use two buttons, then the user selection option property will be created based on the name (Purchased or Manufactured). Then its value will be Purchased, if option two is selected, the value will be Manufactured.
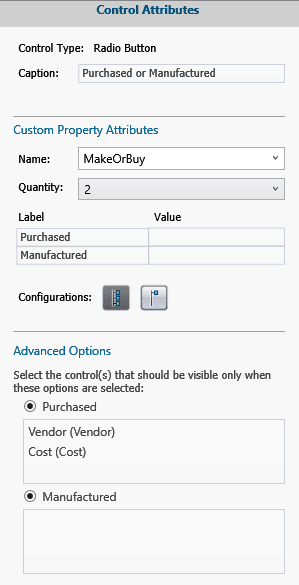
The Advanced options allows you to select, from the middle screen, which items will be displayed based on the users selection.
One last thing, if you are working with an Assembly or Drawing and you have created a “Part Tab”, when you are in the Assembly or Drawing and you select a part the “Part Tab” will appear and any values entered will be placed in the parts properties not the assemblies. This works the same for sub-assemblies as well.
Dennis Barnes
Applications Engineer, Computer Aided Technology