Using SOLIDWORKS ‘Split’ Feature with SOLIDWORKS Sheet Metal
Using The SOLIDWORKS ‘Split’ Feature with SOLIDWORKS Sheet Metal
Your detail drawings are released to the shop floor for manufacturing and the laser operator comes into your office and says, “Houston, we have a problem”. Ughhhhhhhhhh ?
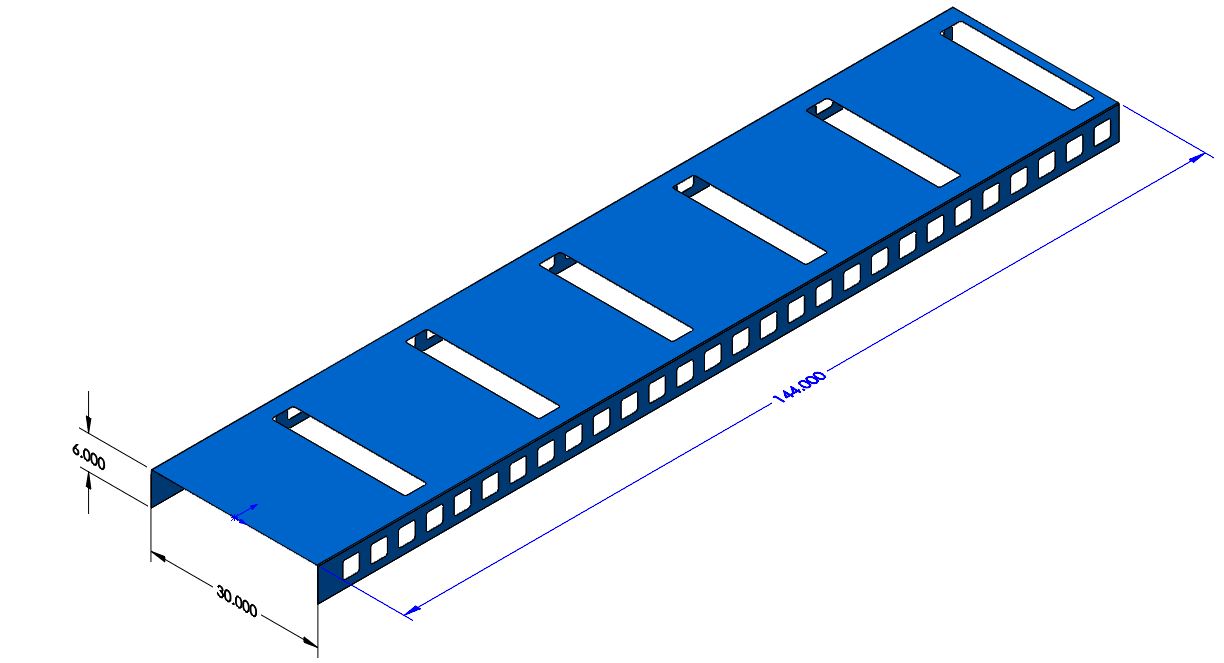
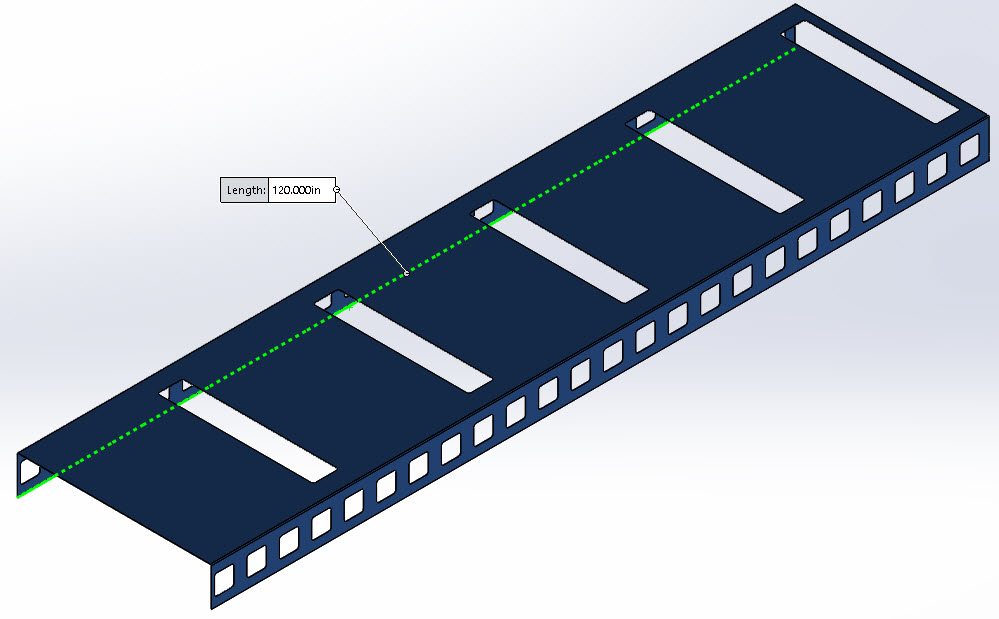
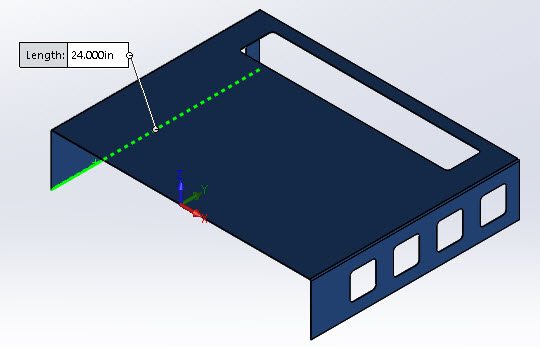
It turns out the normal stock sheet metal size is unfortunately not available. You were going to make the part out of a 60” x 144” piece of sheet but only 60” x 120” is available. So, now you need to make your sheet metal part out of two pieces, instead of one piece. The laser operator would like you to QUICKLY generate two flat patterns for the laser, from your single piece sheet metal part.
No problem. Never fear, the SOLIDWORKS ‘Split’ Feature is here. ![]()
The SOLIDWORKS ‘Split’ feature will help you create a multibody sheet metal parts which will generate the desired flat patterns to export to the laser machine in no time. The SOLIDWORKS Split feature in SOLIDWORKS Sheet Metal allows you to break apart into multiple solid bodies without removing any material. You can use sketches, faces, planes and surfaces as tools to split parts into multibody parts.
Where do I find the SOLIDWORKS Split feature?
![]()
Step 1. Create a plane where you want to split your part. 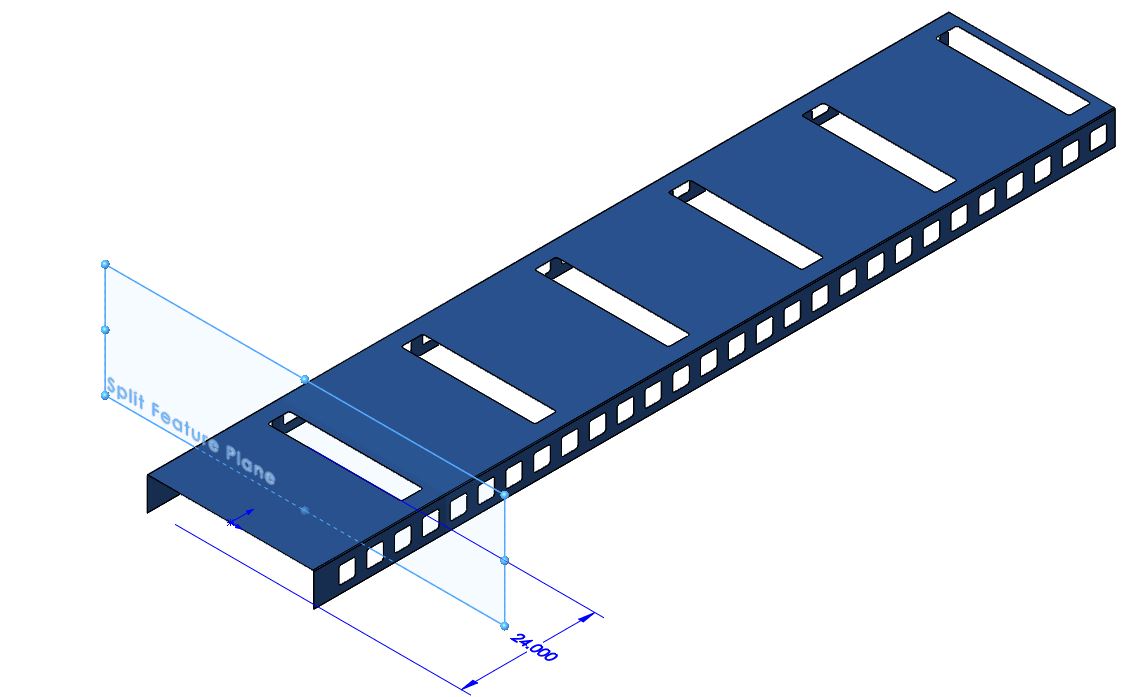
Step 2. Click Insert Features
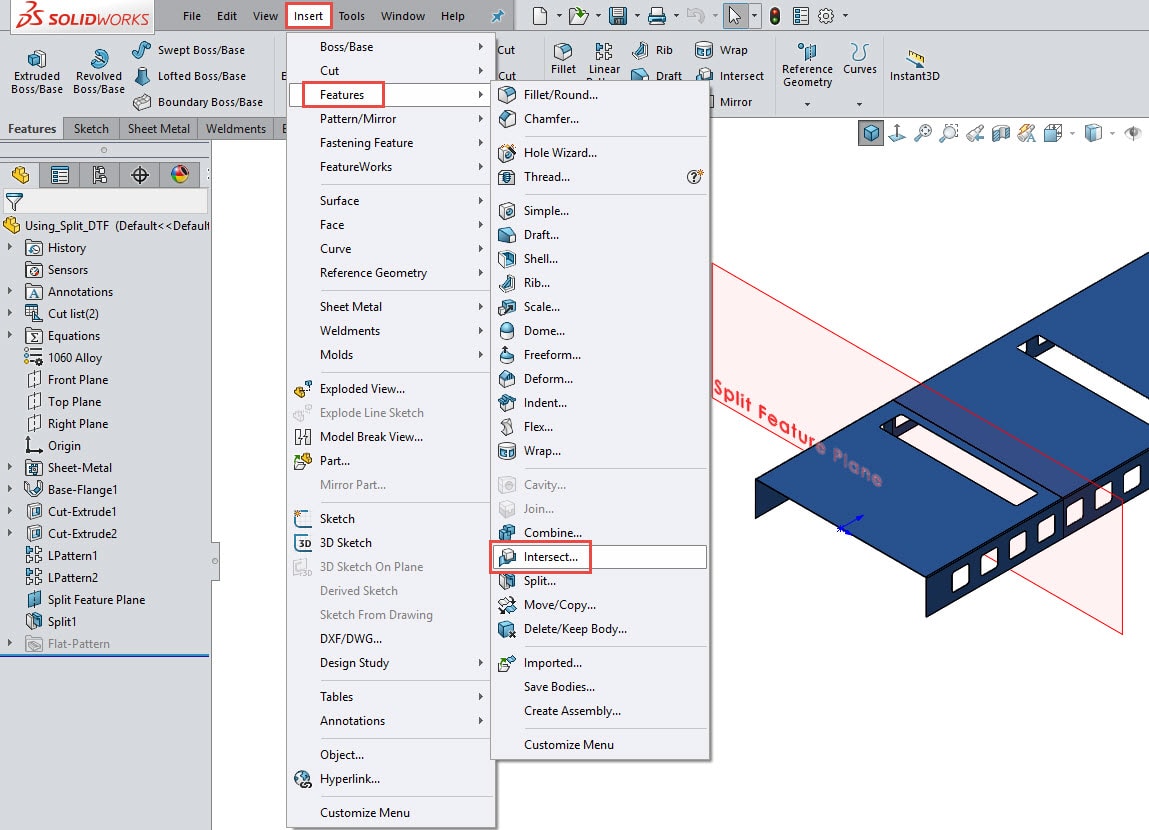
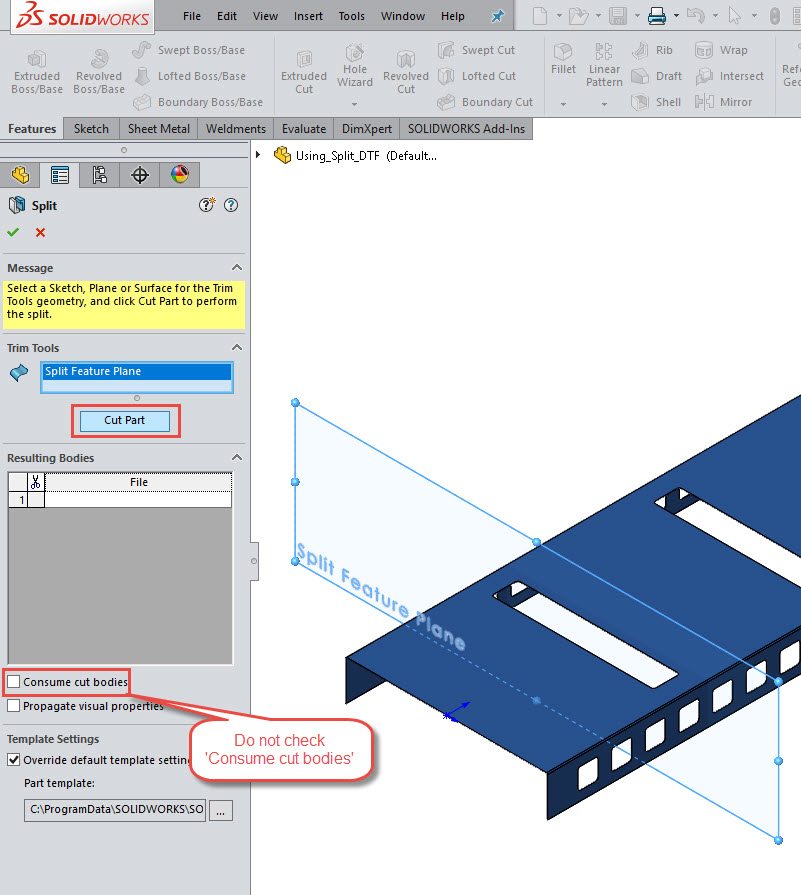
Step 3. Select the plane as your ‘Trim Tool’, un-check box for ‘Consume cut bodies’, then click button ‘Cut Part’.
 Step 4. Select the check boxes for bodies Body1 & Body2, then click button

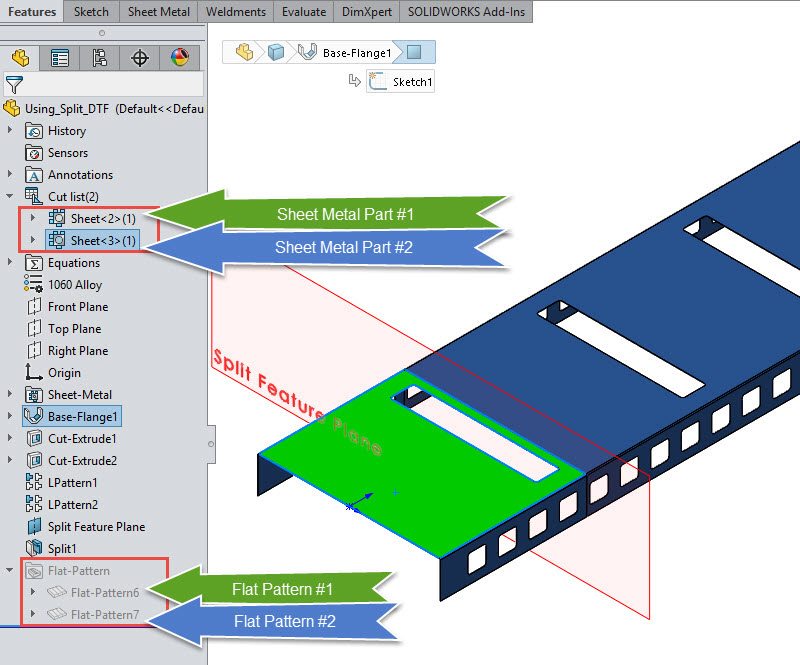
Note: There are 2 bodies in the Cut List folder and 2 different flat patterns as well.
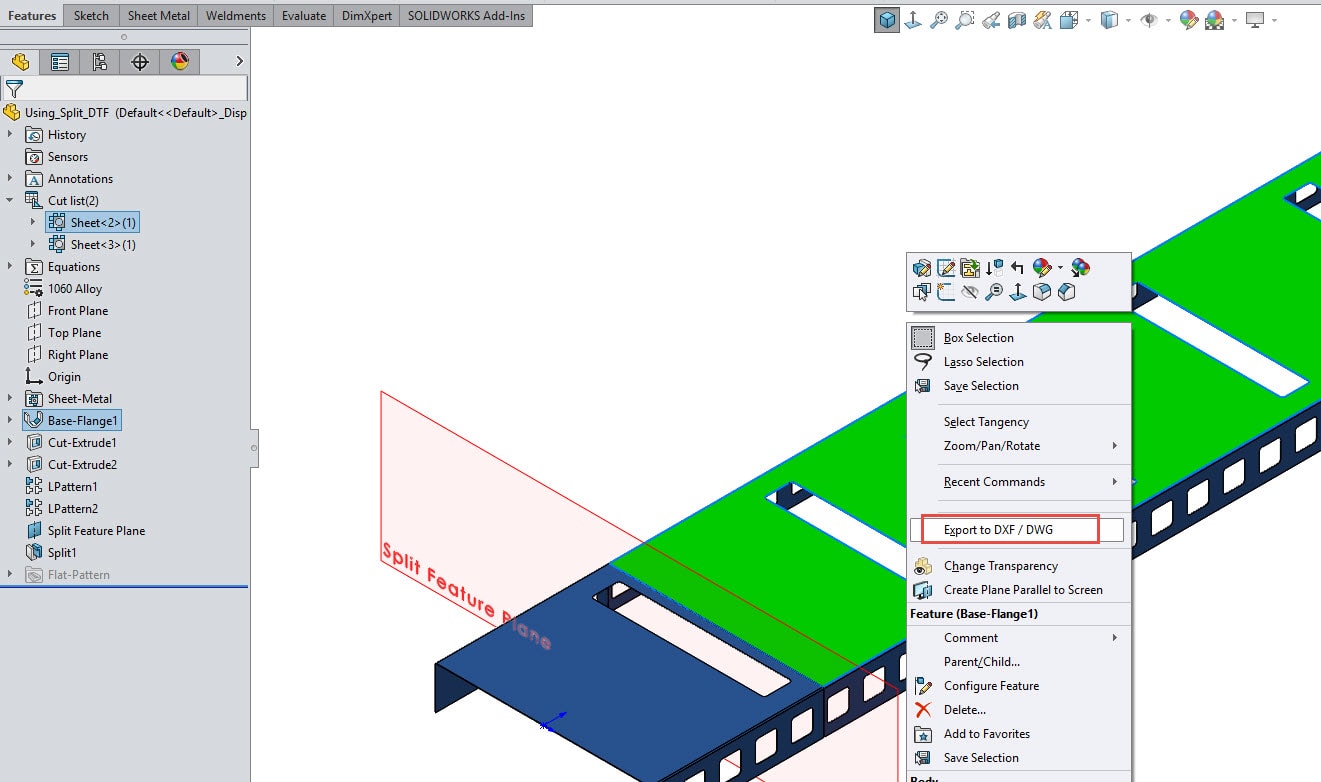
Step 5 (Optional). Right click on each multibody part in the graphics area, to export each flat pattern individually as a DXF and/or DWG file.


I hope this makes you a more efficient SOLIDWORKS user.
Don Glaske
CATI – Technical Services Manager, CSWE
Computer Aided Technology