3D Scanner Basics: Alternatives to Targeting Parts
During my time working with CATI and Creaform 3D scanners, I have received many different iterations of the same question over and over. Something along the lines of: “Do you need targets on the part?” or “What are those stickers? Do we need those?”
For the HandySCAN and Go!SCAN, there is an easy answer. YES! … But there is some wiggle room if you’re resourceful.
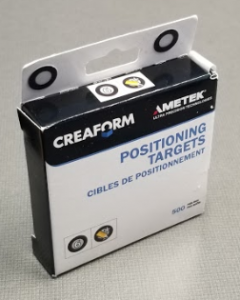
First, a little explanation about the targets. Basically, they’re small stickers (or magnets) with a reflective, white dot and a black outer ring. They are manufactured to have the reflective dot be 6mm or 3mm in diameter and the be a very specific thickness. This allows the software to recognize the profile and be able to triangulate the scanner’s location in relation the object being scanned as well as be edited out automatically in the finalization process after scanning. Without targets, the HandySCAN won’t be able to scan and the Go!SCAN Spark, while requiring fewer, should have a few as a solid foundation in conjunction with geometry or texture mapping.
But what if you can’t fit targets on your part? What if you want to scan several of the same part and want to save time targeting individual parts? What if you have larger parts that, while having simple geometry, would be time consuming to add targets to?
These are some of the situations where that wiggle room comes in. Let’s wiggle!
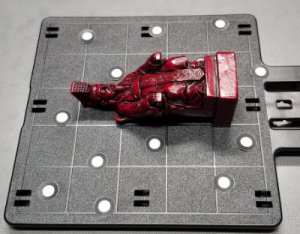 Well how do you get around parts you can’t fit targets on? This is a fairly common situation where there are parts that are large enough to be able to be scanned but have too many features/too much detail to be able to fit targets on the surface. You may have seen one of our engineers at a demo or trade show use a turntable or lazy Susan with targets on it to support and spin the target while scanning. This is a great solution for many parts where you will be able to use targets that are located around the part instead of on it. It can be even simpler with a platform like the 3D printer tray pictured to the right.
However, for many parts this will leave you with incomplete scans. Simply flipping the part and creating multiple scans and merging them together with the ‘Add Scan’ and ‘Merge Scans’ buttons in VXscan can very easily overcome this.
If you have several similar parts that you will be scanning for an inspection report or just cataloging inventory, this platform/turntable technique can be extended into a (semi)permanent fixture for those parts. Then all you need are adequate targets on the fixture to greatly reduce your targeting time.
Now for large parts. Something with a lot of surface area with limited features (like a fridge?), you can use something like these: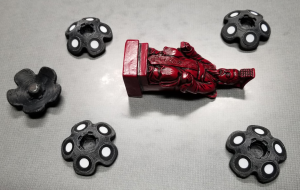
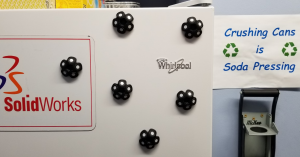 These are little 3D printed ‘flowers’ with 5 targets on them and a magnet embedded on the back. A brainchild of the great Cullen Williams of our manufacturing solutions team. These can be dropped onto non-critical surfaces of the part. Non-critical basically means surfaces that don’t need to be precisely measured from your scan. The placement is important because, while the software will filter out the volume of the targets, the extra plastic parts holding them will remain.
These can also be used to similar effect as a targeted platform where they are placed on a table surrounding the part. Another simple substitute would be something like cardboard or plastic tents that are easy to create that you can put targets on. Just be careful not to let them move on the table as you are scanning.
I hope this information was helpful and, even if they don’t apply directly to your application, give you some inspiration and direction to a solution that works for you.
Nathan Fears
Application Engineer – 3D Scanners & SOLIDWORKS
Computer Aided Technology, LLC