SOLIDWORKS Upgrade Headaches and How to Avoid Them
What do these things have in common?
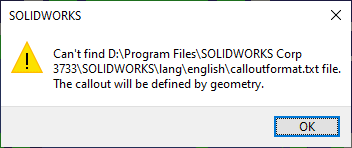
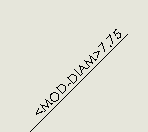
Answer: They tend to occur right after upgrading, and these aren’t the only things that can occur after an upgrade. The first one can occur when creating a hole or hole callout because the system can’t find the hole callout information. The second one happens when SOLIDWORKS can’t find the symbol library file.
The reasons for this are due to the way that SOLIDWORKS stores information and upgrades. SOLIDWORKS has 2 main file locations where it stores files. The first one is the main installation folder:
C:Program FilesSOLIDWORKS CorpSOLIDWORKS
The second location is:
C:ProgramDataSOLIDWORKSSOLIDWORKS <version>
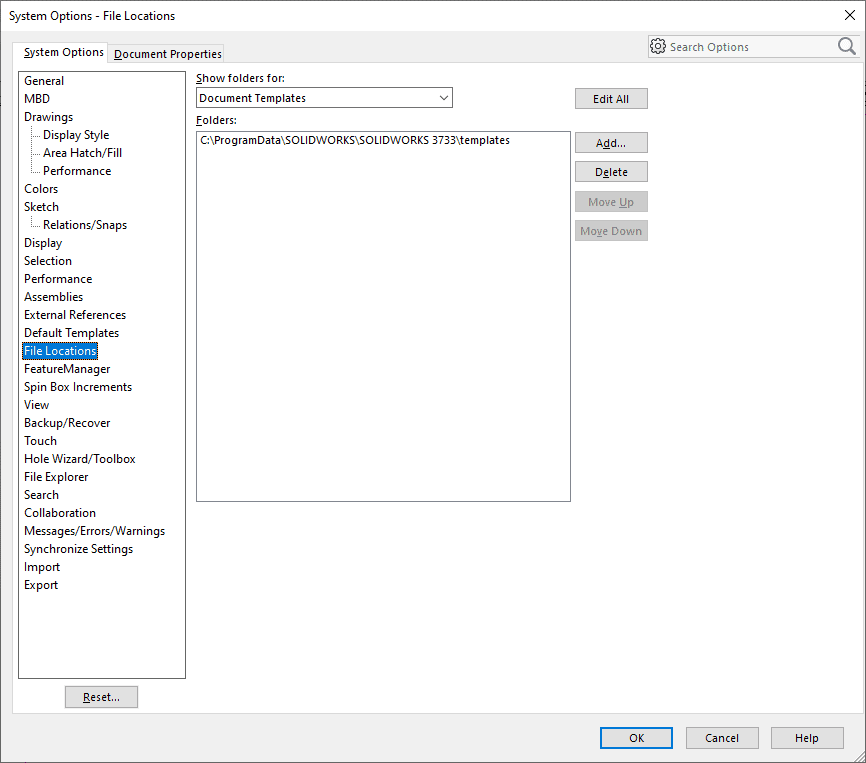
There are lots of sub-folders that items are stored in, but they come down to these 2 root folders. These paths can be found in Tools -> Options -> File Locations.
When installing a new version of SOLIDWORKS, the first time you launch the software it reads the registry values from the most recent previous installation that it can find and copies the values over.
This works okay if you’re upgrading your software. The installation folder C:Program FilesSOLIDWORKS CorpSOLIDWORKS remains the same and sub-folders can get re-used. If you install a second version alongside the first, now your installation path becomes C:Program FilesSOLIDWORKS CorpSOLIDWORKS (2). The new version pulls the registry keys from the old version and is still looking at SOLIDWORKS without the ‘(2)’ added on to the end. This usually works fine until the day comes that you uninstall the old version. At that point the SOLIDWORKS folder winds up mostly empty and your new version looking into the SOLIDWORKS folder starts to have problems finding the files that were there.
For this reason I recommend a few things:
First, I would modify the installation path. By default the Installation Manager uses C:Program FilesSOLIDWORKS Corp. I append this by adding the version (i.e. C:Program FilesSOLIDWORKS Corp 2019) This allows you to clearly know what is located where. I also do the same thing with the Toolbox folder (C:SOLIDWORKS Data becomes C:SOLIDWORKS Data 2019)
Doing this allows us to easily update our file paths as well. When we go into Tools -> Options -> System Options -> File Locations, we see this:
Clicking on the ‘Edit All’ button in the upper right shows us this dialog:
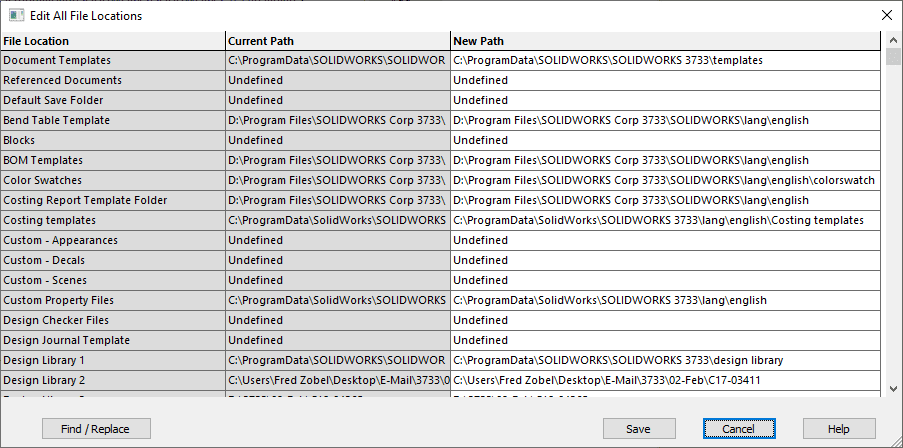
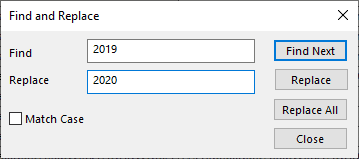
In the bottom left we can click on ‘Find / Replace’ and use it to find older versions and replace them with newer versions.
For example, after installing 2020 alongside my 2019 I used Find/Replace to replace my 2019 paths with my 2020 paths. (In the examples above I used Find/Replace to replace 2019 with 3733, and to change it back after generating the errors at the top of this article.)
If you get in the habit of adding the year to the installation path, you can use a simple find/replace to update paths after installation. If you have custom files that you use (such as specific BOM templates, file templates, etc) you can always put those into a unique folder and as SOLIDWORKS upgrades, it will read those out of the registry and you won’t need to update the path, or worry about the files disappearing during an uninstallation.
Hopefully this can help ease your next installation.
Fred Zobel
Senior Support Engineer
Computer Aided Technology, LLC