3D Scanning Target Tips and Tricks
The Creaform HandySCAN Black Elite 3D Scanner is a very fast, accurate, and powerful machine when it comes down to it. The only thing that can cause trouble is having to put the tracking targets on the part before you can scan anything. Also the issue of having to take them off. Usually, this isn’t much of a problem for average-sized parts that are only a couple of feet across. But if the part you are scanning is too small to have targets placed on it properly or if the parts are really big, like a boat or large metal casting it can slow down the process.
In the name of expediency, users of Creaform Scanners have been coming up with ways to speed up the process of adding and removing targets. Here are some ideas you can use to help speed up your pre/post scan rituals.
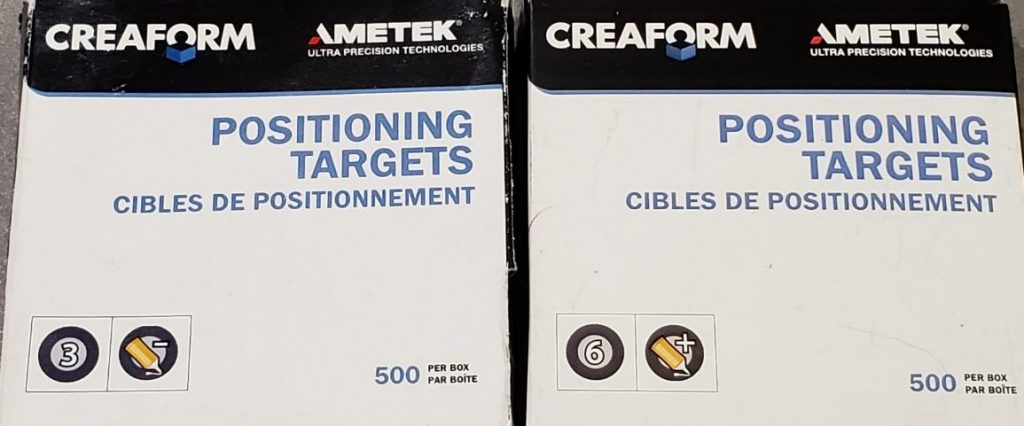
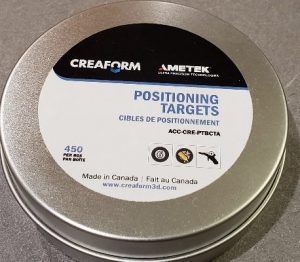
The easiest place to start is with the Size of the targets, either 3mm or 6mm in diameter, and how sticky they are. If you want to be able to remove them quickly and easily and do not need to leave them on the part for days you can use the low-level adhesive targets, noted with the ‘glue minus’ picture. Or if you are worried about the surface of the part being sticky resistant or wanting to leave the targets on for an extended period so you can come back for multiple scan sessions, use the’ glue plus’ targets. The glue levels are available in all sizes.
There are also other unique targets to choose from, like higher reflective targets so the scanner can pick them up better in challenging conditions and also magnetic targets. The magnetic targets can be useful because they are easily reused and come off without any fuss, and they also can be applied with a sticker gun dispenser to make applying more targets faster and easier.
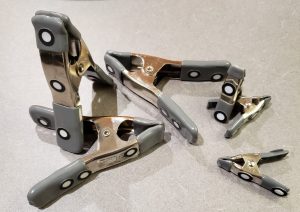
There are also lots of different ways of using the targets other than just putting them directly on the parts. You can have targets on the sides of clamps and just apply the clamp to the part. This can be very useful for situations where you might not be allowed to use adhesives on the parts, or if you need some additional reference points while trying to scan around the edge of a thin part.
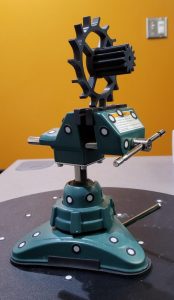
If you are scanning smaller parts, and even the 3mm targets won’t work well, you can put the targets around the part and still be able to scan it. Using a lazy-susan turn-table can make this very easy because the setup is reusable and you can scan the parts from all sides without having to walk around it. Also putting targets on a vise and having that hold the part can be very helpful for not only scanning around the part 360 but also scanning the underside of the part too because it is held up off the table. And using them in conjunction makes for a world of help on small part scans.
There are still lots of other ways users have found to make their life easier and more efficient when it comes to 3D scanning. If you have a good way of doing it and want to share feel free to reach out and let us know.
Tim Crennen
Sr. Applications Engineer – 3D Printing/ 3D Scanning/ Solidworks
Computer Aided Technology, LLC