Import your SOLIDWORKS Models to SIMULIA for SOLIDWORKS
Structural Performance Engineer and Structural Mechanics Engineer are two of the 3DEXPERIENCE Finite Element Analysis Roles. Both Roles are part of SIMULIA for SOLIDWORKS, and offer advanced SIMULIA Solvers, Contacts, and Meshing capabilities.
This article has been created to help document the most direct way of importing a SOLIDWORKS model into Structural Performance Engineer, or Structural Mechanics Engineer.
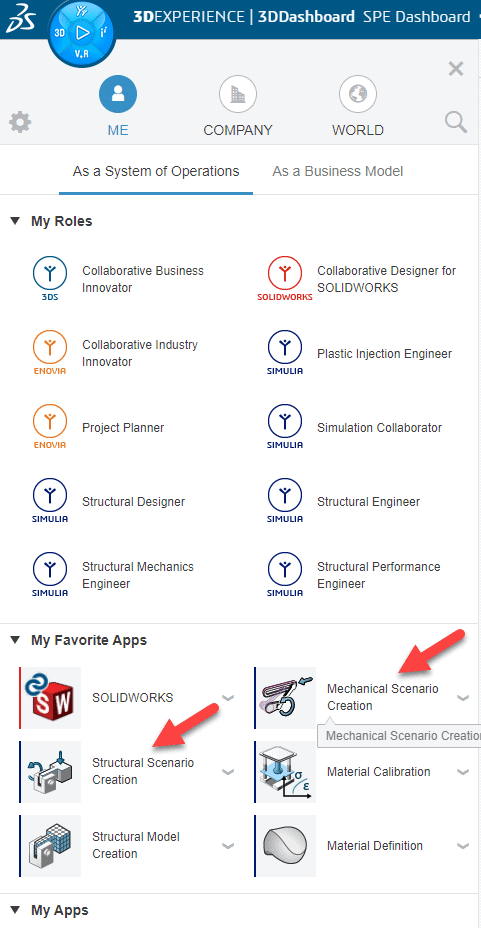
Step 1: Open Structural Mechanics Engineer or Structural Performance Engineer Role. Choose Structural Scenario Creation, or Mechanical Scenario Creation App. Note Structural Scenario is related to Structural Performance Engineer, and Mechanical Scenario is related to Structural Mechanical Engineer.
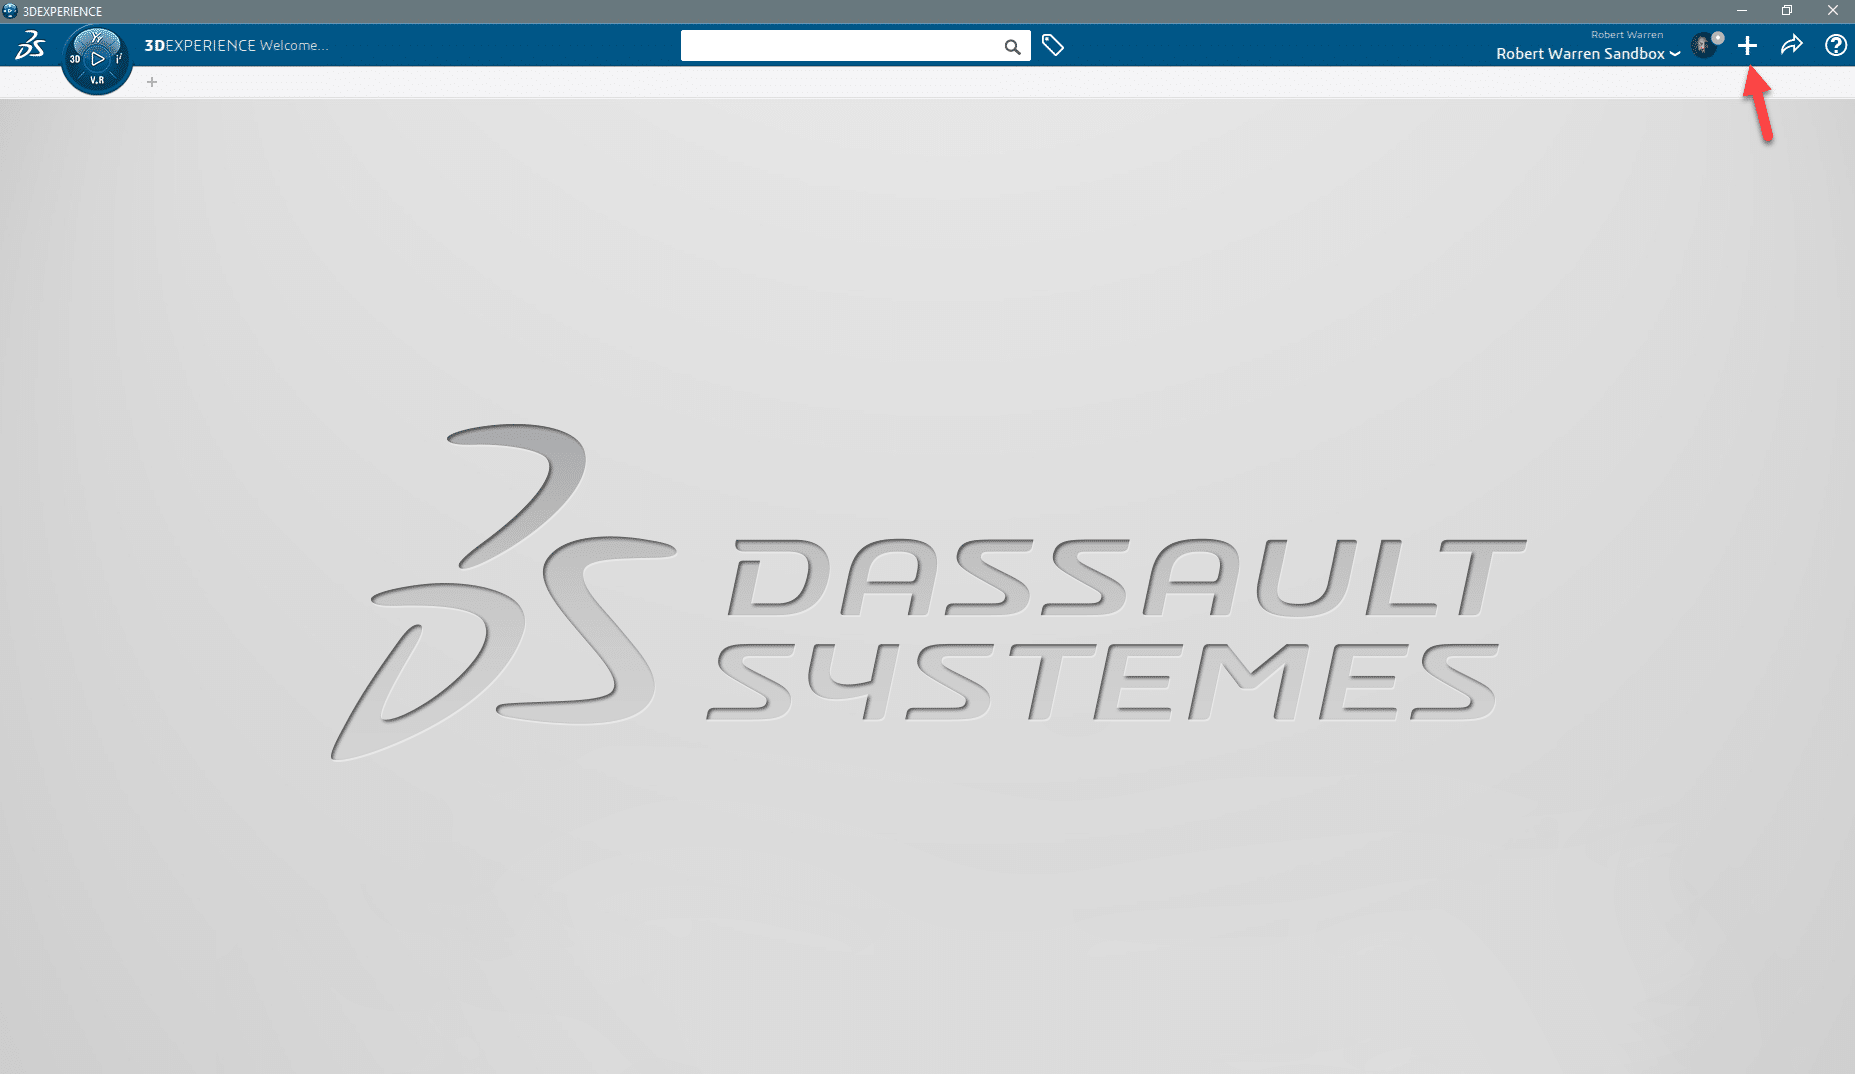
Step 2: After the App opens proceed to the Plus Sign in the upper right-hand corner of the screen.
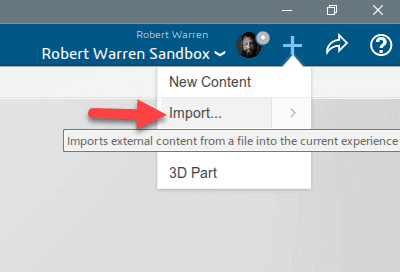
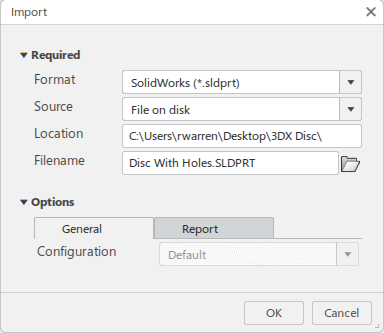
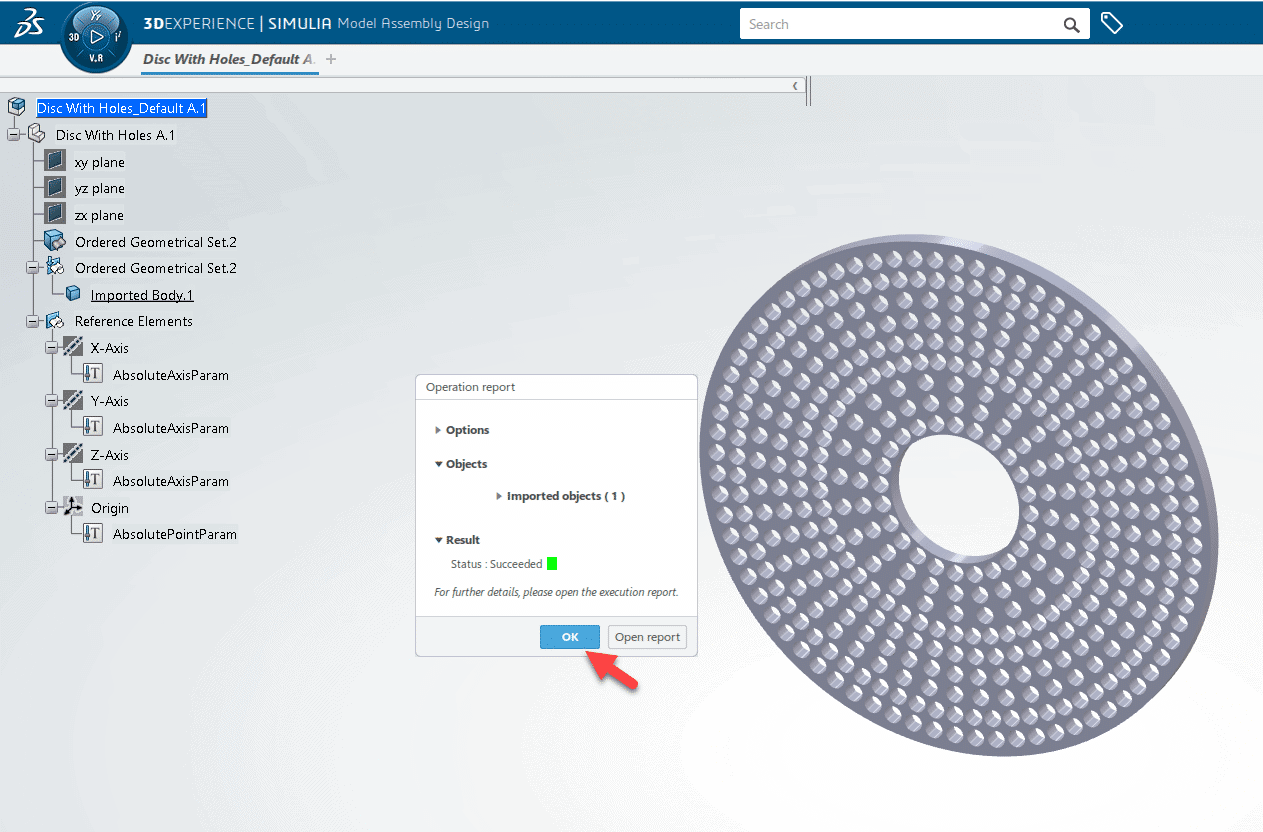
Step 3: Choose Import and specify the file type and location.
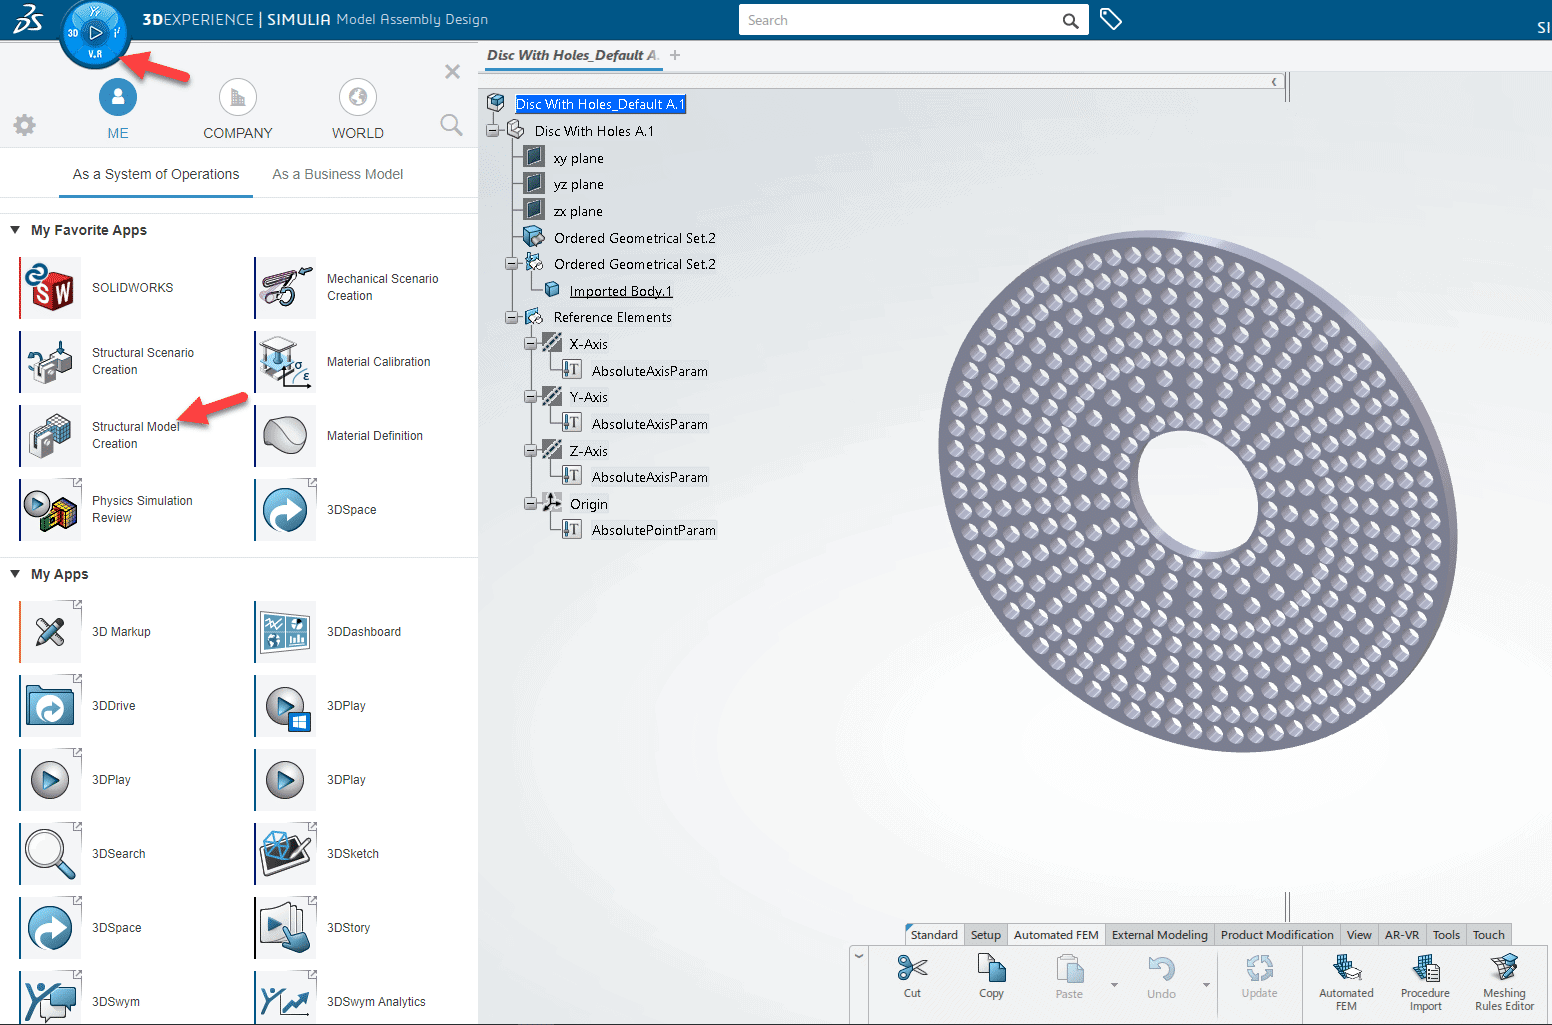
Step 4: Switch to the Structural Model Creation App.
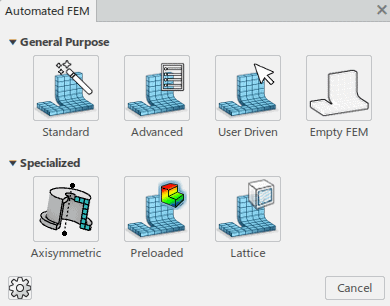
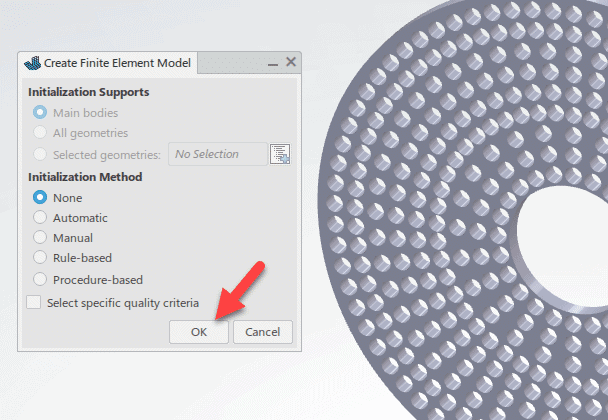
Step 5: Select the Standard FEM REP Creation option.
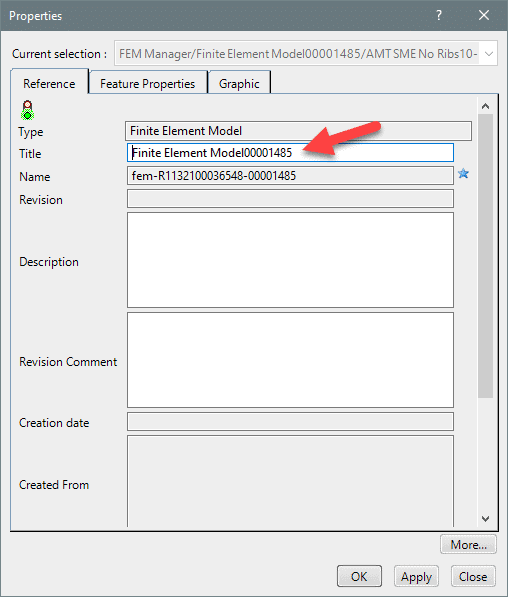
Step 6: Note this step is not necessary but does help in finding the file set later. RMB on the Finite Element Model in the design tree and choose Properties. Rename the FEM Rep to the model name.

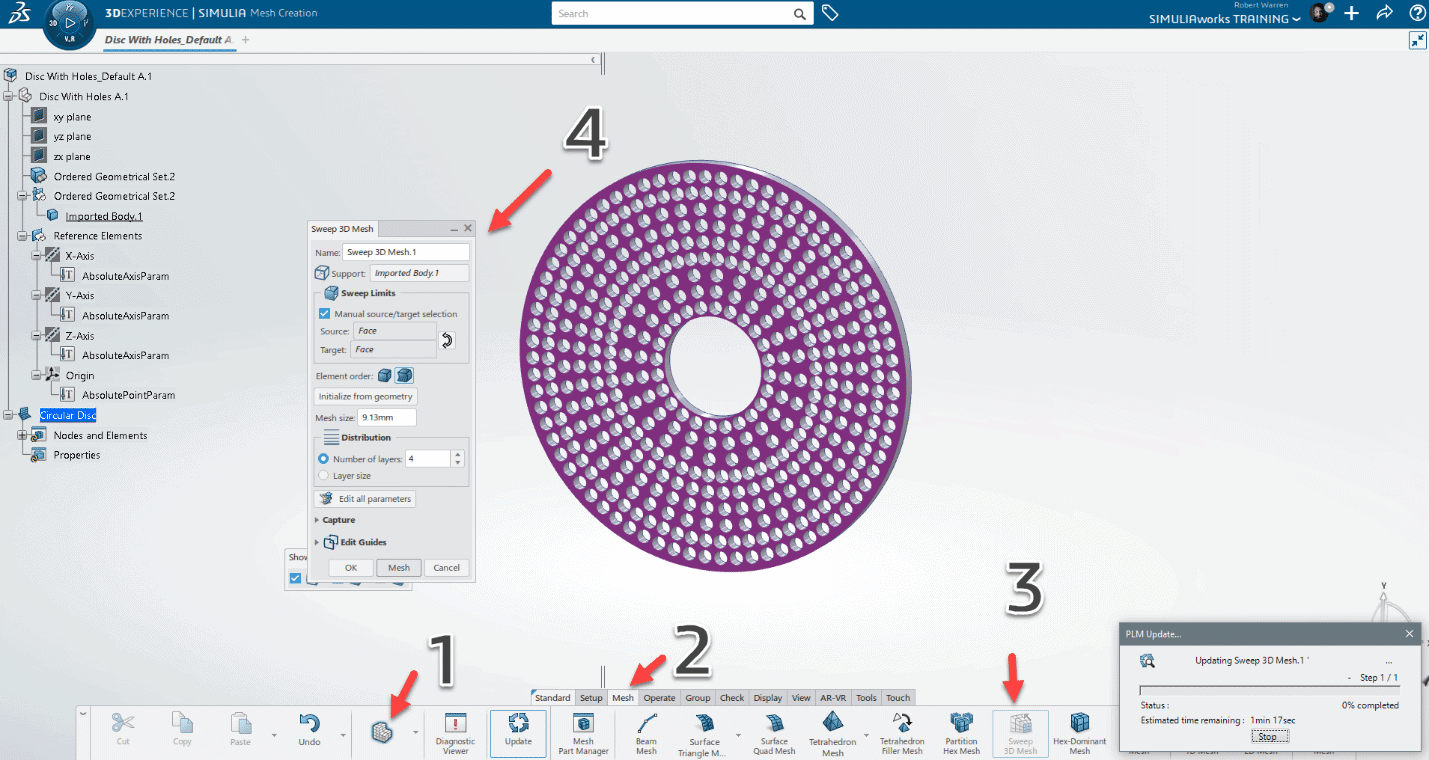
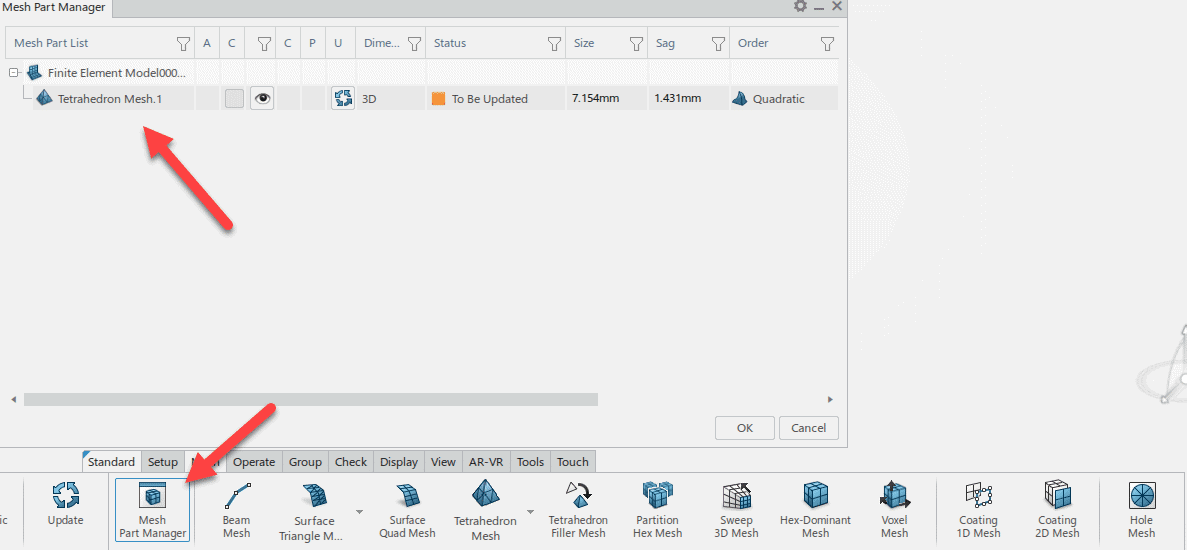
Step 7: Create the Mesh. Select the mesh section from the ribbon bar. Mesh according to geometry and study output requested. NOTE: a mesh was created on import and may need to be deleted from the Feature Manager.
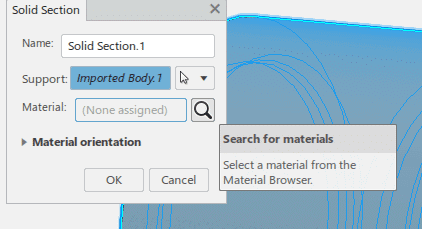
Step 8: Assign Section Properties to the model. With the Model option on in the ribbon bar choose Properties and select the SOLID Section. Choose the Import Body from the screen or the tree.
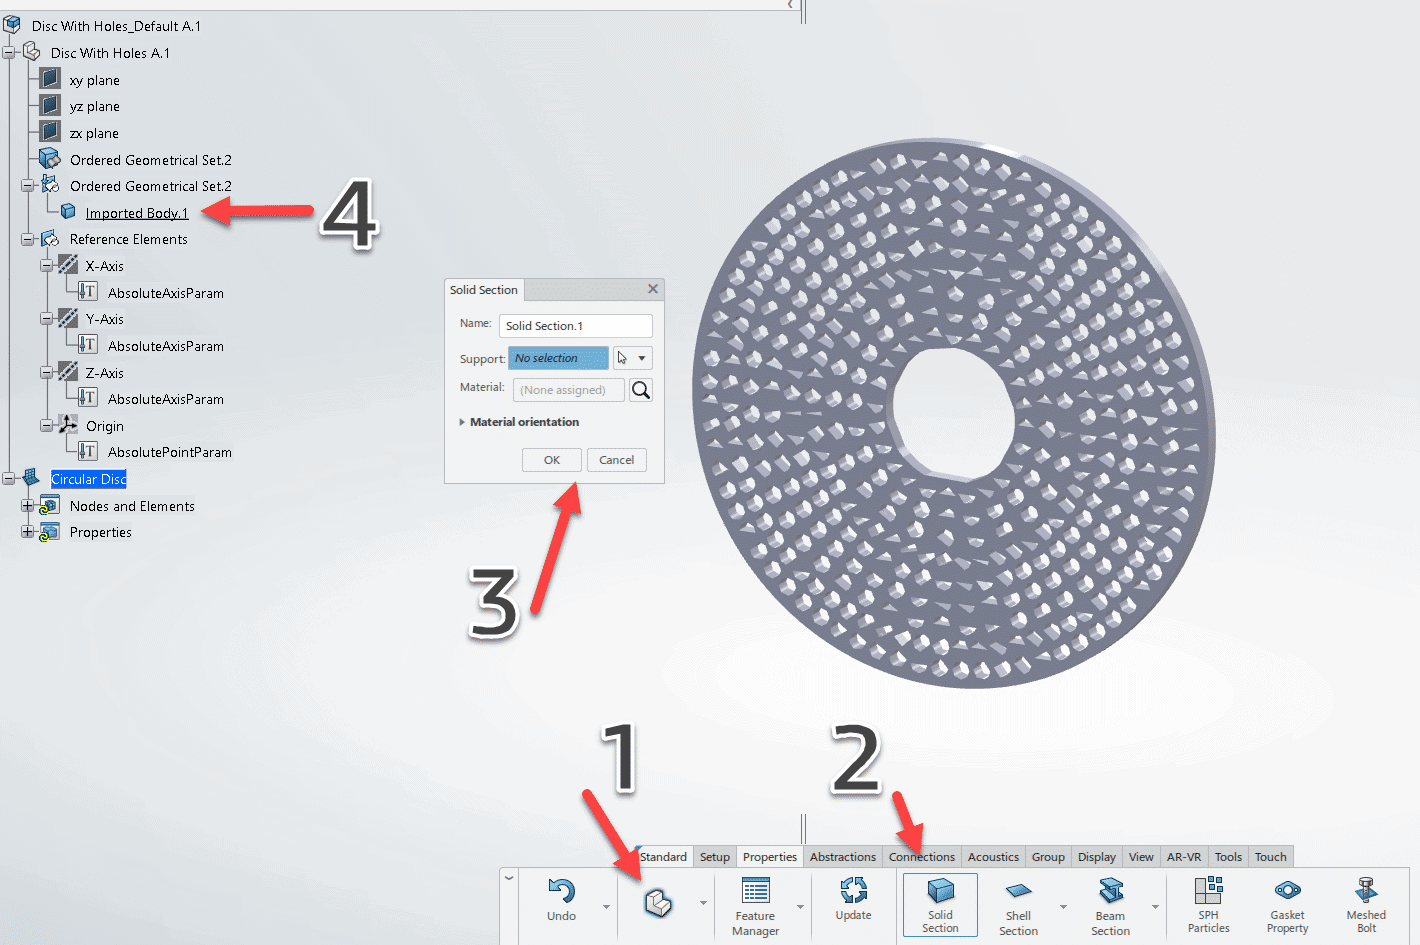
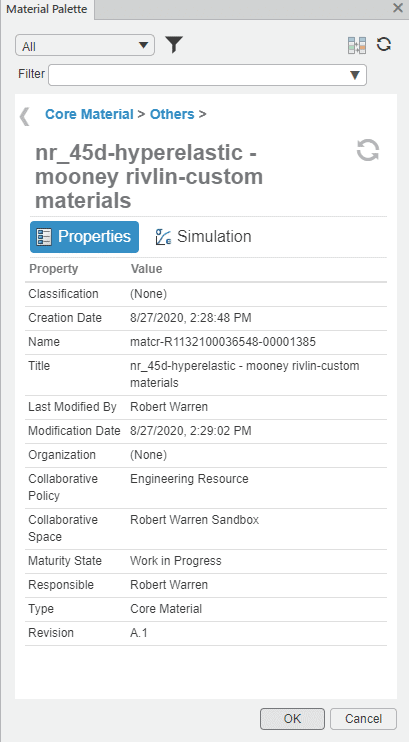
Step 9: Assign Material Choose “Search for Materials”. Choose the appropriate material and exit the Solid Selection.
Step 10: Switch Back to Mechanical Scenario, or Structural Scenario Creation App.

Step 11: Continue assigning boundary conditions etc. like normal using the assistant or ribbon bar.
I hope this article helps streamline the SOLIDWORKS part file import into SIMULIA for SOLIDWORKS. If you are interested in the advanced capabilities of SIMULIA for SOLIDWORKS or FEA in general do not hesitate to reach out to us here at Computer Aided Technology.
Robert Warren
Simulation Specialist, Elite Application Engineer
Computer Aided Technology