How Do I Complete a Simulation Drop Test?
How do I complete a drop test study in SOLIDWORKS Simulation Professional? Every study in SOLIDWORKS Simulation follows the same six general steps. You can read more about these steps in our Six Steps To Your Simulation Study. Drop test studies are no different.
Many consumer products like cell phones, cameras, and other products are all subject to being dropped. I know I drop my phone more than I care to admit. SOLIDWORKS Simulation drop test is specifically tailored to help an engineer understand the forces, stress, and displacements caused by dropping an object. Because Drop Test is a special nonlinear analysis, additional options exist specific to this study.
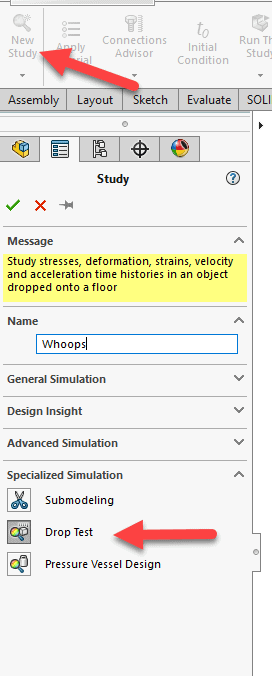
To start a Drop Test analysis, go to the Study Tab of the Simulation Command Manager, and choose Drop Test for the study type.
Assign your material to the model, keeping in mind that because this is technically a nonlinear study the Plasticity Von-Mises material model is available. Plasticity Von-Mises allows the user to add a Tangent Modulus to the material properties. 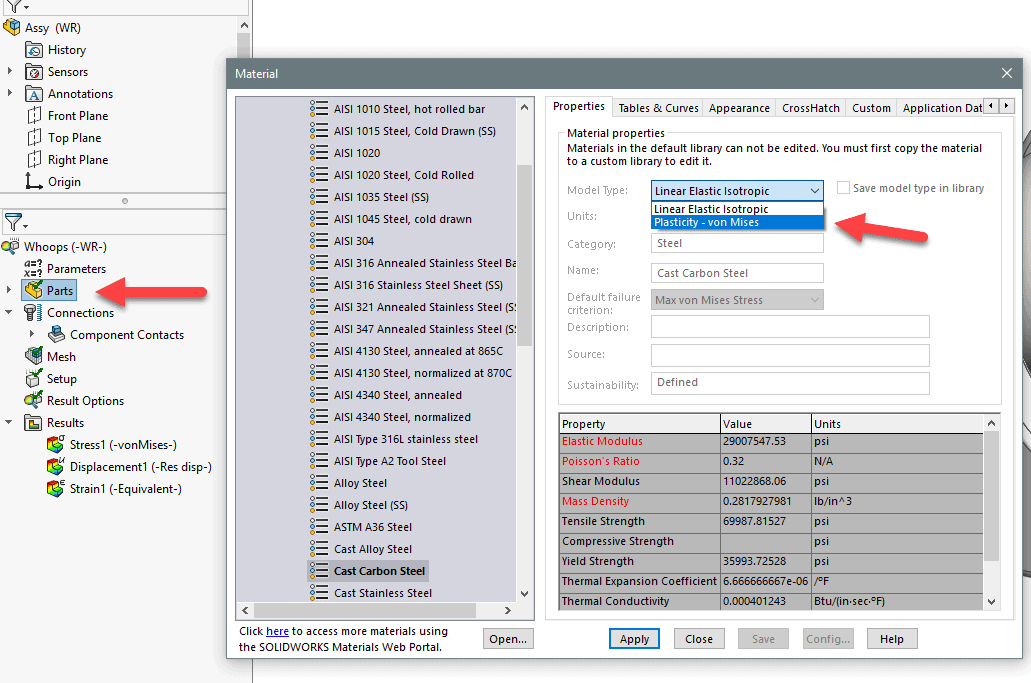
Mesh the model as usual. Keep in mind the denser the mesh the longer the run time.
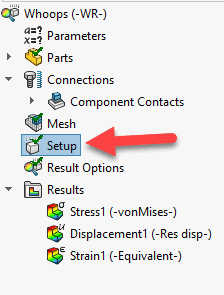
The loads and fixtures vary from a traditional static analysis and are specific to the Drop Test Study. The study “loads” for the component being dropped is applied through the study Setup.
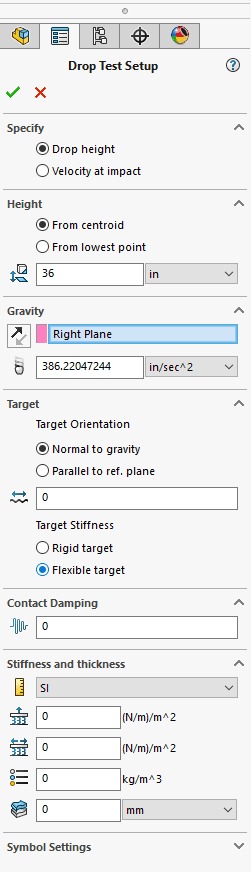
In the study Setup, the parameters of the Drop Test are specified. Starting with the way the user wants to drop their object. Drop Height is how far above the “floor” the object is dropped from. Velocity at Impact is how fast the object is moving at the moment of impact.
Choosing the Drop height option allows the user to specify where the measurement takes place, ether from the object’s centroid or lowest point.
Gravity specifies the direction of the drop using a reference.
The Target is what the object is being dropped onto and allows the user to specify the orientation of the “floor” target, and the stiffness. A Rigid stiffness allows no energy to be passed on to the target. A Flexible target utilizes a normal to, and tangential stiffness, material density, and thickness.
Last, contact damping can be applied.
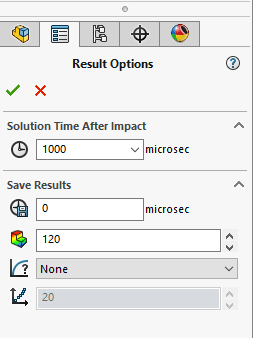
The Result Options tell the software the time span of results the user would like to report.
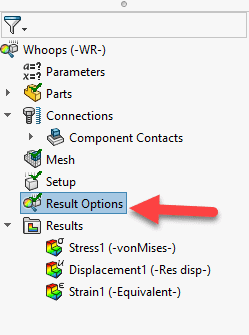
The user can specify the solution time after impact, in microseconds. Save results indicates the start point of the save, number of plots, and linking to sensors of interest.
Run the study and view the results. Results can be viewed at specific time moments, or at maximums/minimums across all steps. Notice the shockwave move through the part as the impact energy is transferred.
This blog has an accompanying video under the same title. Check out the Computer Aided Technology video page for more information and subscribe.
Robert Warren
Simulation Specialist, Elite Application Engineer
Computer Aided Technology, Inc.