How to make PDM Pro's Dispatch share files
Shared files in PDM give you the ability to have the exact same file exist in multiple folders. This is a handy way of sharing files without making copies. Below is a procedure to have SOLIDWORKS PDM Pro Dispatch create shared files automatically for you.
How it works – behind the scenes
[Warning: in this section I do get into some code writing. You don’t really need to know any of this to make it work in your Dispatch. If you just want to make it work, skip to the next section.]
Dispatch doesn’t have a “share file” command. However, it does let us to run our own custom code with the shell command. I haven’t found a limit to the amount of text you can add to the shell command, so we have lots of options.
Here is the PowerShell code that we’ll have the shell command execute:

- Line 1 creates a PowerShell variable containing the PDM vault object.
- %NameofCurrentVault% is a Dispatch variable. Dispatch will replace the variable name text with the name of the vault.
- %SharedFolder% is the name of the custom variable that you will create below. This line creates a PowerShell variable that contains the object of the target folder for the shared file.
- %PathToSelectedFile% in line four is also a Dispatch variable, it is the name of the file the Dispatch routine is working on. You’ll notice GetFileFromPath it is using the $folder variable as its second parameter. PowerShell requires that you declare the second parameter as a folder object. So, I am using the same $folder variable as defined in the previous line. Since PowerShell passes GetFileFromPath’s second parameter by reference, you would expect the $folder variable value to update to a new value after that line is run. However, since I don’t have a “[ref]” prefix in front of the variable, the variable remains unchanged. This is good because I don’t need the file’s folder anyway.
- At this point I have all I need to share the file. Line three defines the folder, the file in line four. The AddFileShared function in line five is used to actually create the shared file.
Take this code and combine all five lines into one, separated with semicolons. Then, tell the shell execute command you want to run the code with PowerShell by putting the word “PowerShell.exe” at the beginning of the line and put all of the code inside of double quotes.
Implementation
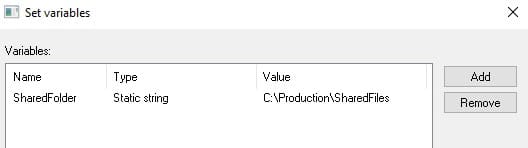
First, in Dispatch, create a new administrative action. Next, create a custom variable named “SharedFolder”. Give this variable the value shared folder name. But be careful, don’t include the trailing backslash!
Then, add an action with “Shell Execute” as the command. Choose to have the shell run a command line and paste this text in as the command:
$vault = New-Object -COMObject ConisioLib.EdmVault;$vault.LoginAuto('%NameOfCurrentVault%',0);$folder=$vault.GetFolderFromPath('%SharedFolder%');$file=$vault.GetFileFromPath('%PathToSelectedFile%',$folder);$folder.AddFileShared($file.id,0)

This code blindly tries to create the shared file. There is no feedback to the user if the command was successful. If you figure the risk is rather low if this doesn’t work, leave “Halt execution of script until Shell command is completed” unchecked. This will improve performance quite a bit if you are sharing many files at one time, However if you would like to give your user some feedback on if the file was shared successfully, you need to check this option and add a “Get File” command, as I’ll describe next.
I don’t have a clean way to report the success of the sharing process. The easiest/fastest tool I have found is to add a “Get File” command. The “Get File” command complains to the user if it could not find a file. It won’t say anything if everything works as expected. If you want this check, add the “Get File” action and configure as below.
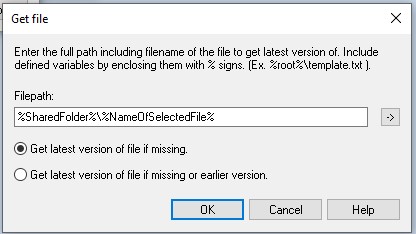
%SharedFolder%\%NameOfSelectedFile%
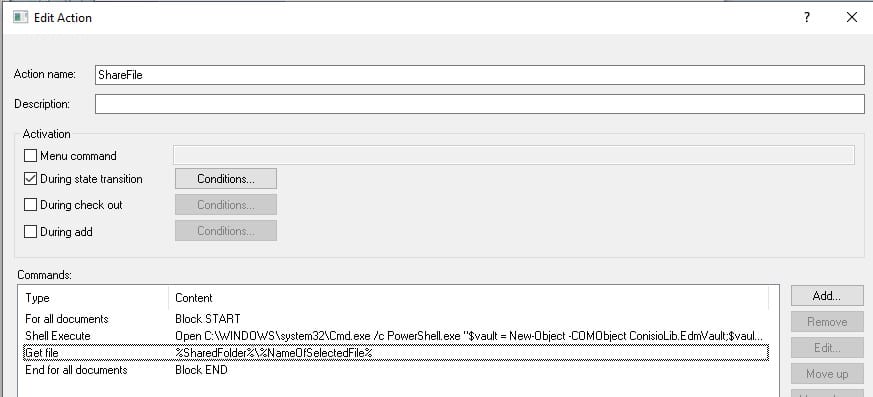
Two more things. First, set the activation of this Dispatch action to occur during a state transition and/or a menu command. Then, enclose the above two actions in a “For all documents” block so the action will cycle through all files.
The complete Dispatch script should look like this:
Deleting the share
There isn’t a special procedure in deleting a shared file. The procedure is exactly the same as deleting any other file.
But maybe you want Dispatch to delete it for you. (Probably because a workflow transition is doing this work.) Create a new administrative action, create the same “SharedFolder” variable, create a Delete file action, define it as below, and sandwich between a “For all documents block”.
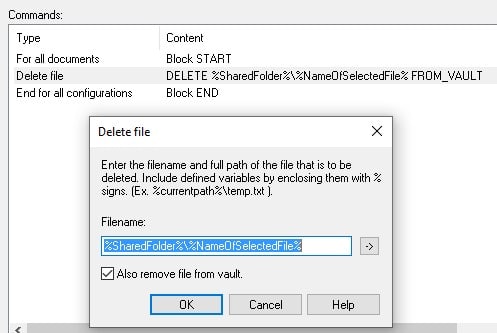
%SharedFolder%\%NameOfSelectedFile%
If you want to get rid of the little shared icon, you need to destroy the share.