Installing the SOLIDWORKS PDM Client
The SOLIDWORKS installation manager comes with all the SOLIDWORKS products you need – anything from PDM to Simulation – included in one convenient package. When installing SOLIDWORKS, you can be sure to include PDM at the same time! If you already have SOLIDWORKS installed and now you need the PDM client as well, you can just modify your installation to add PDM onto it without uninstalling anything or starting from scratch.
If you already have SOLIDWORKS installed:
- Open Control Panel (you can search “Control Panel” from your Start menu).
- Go to “Programs and Features”.
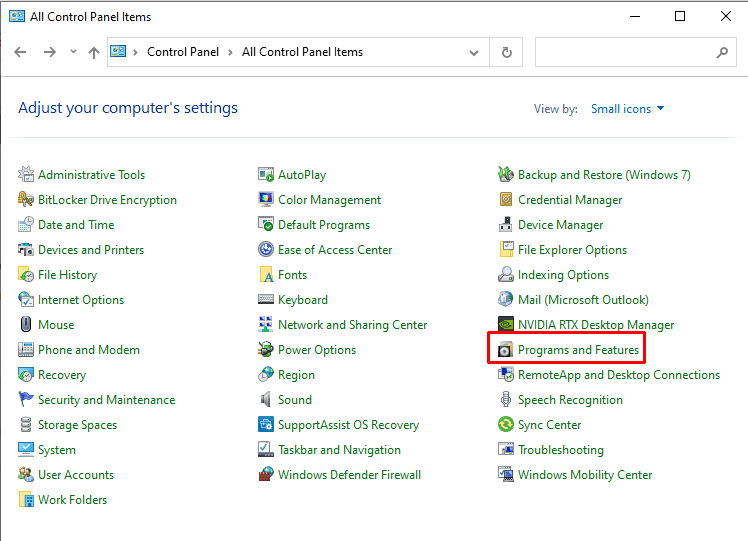
- Scroll down to “SOLIDWORKS 20XX SP0X” and select “change”.
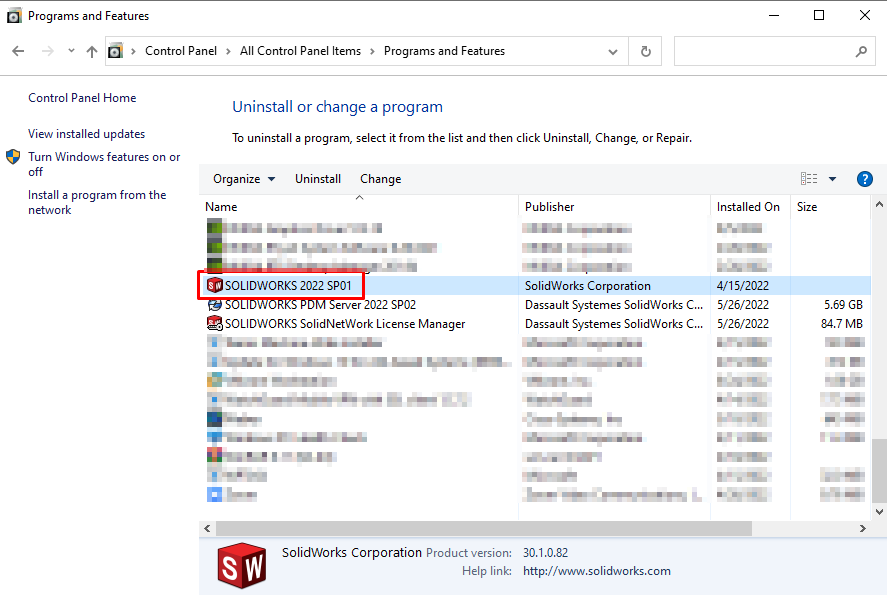
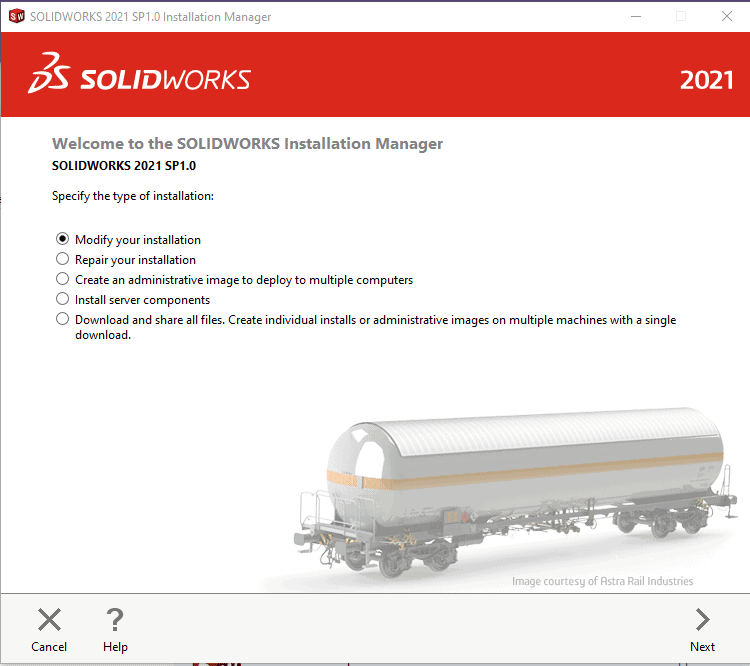
- The SOLIDWORKS Installation Manager will pop up. If you receive a warning about a pending Windows reboot, you can hit “ok” and continue through. Reboot when done installing.
- Select “Modify your installation” and hit Next.
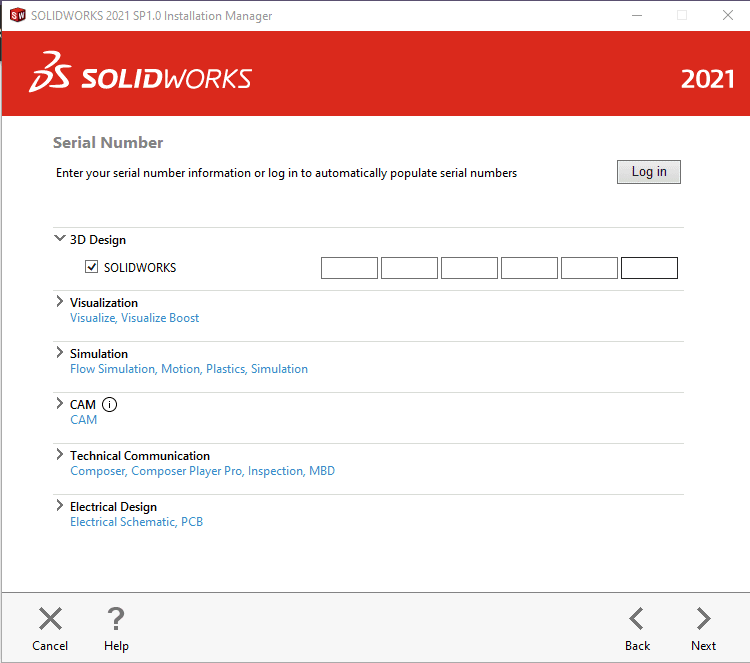
- Your Serial Number should already be pre-filled on this page. You can leave everything as-is and hit Next.
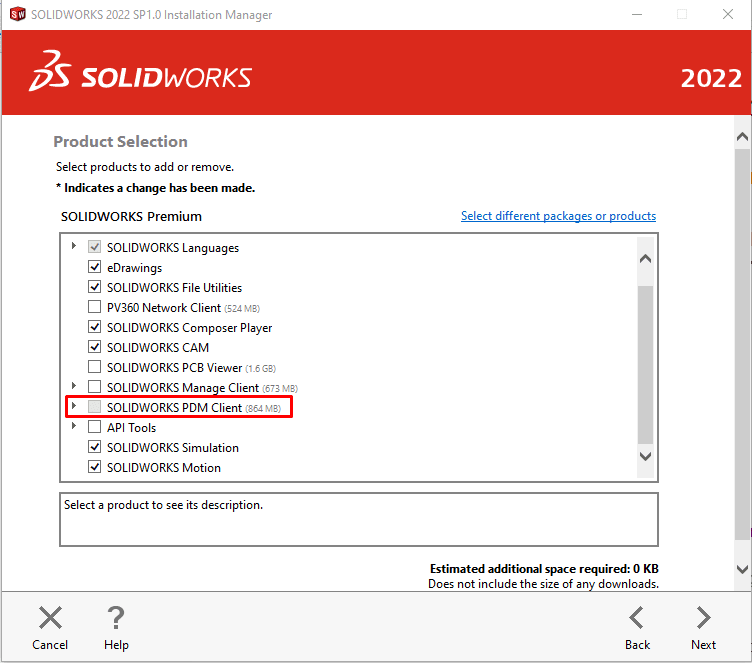
- On the Product Selection page, check “PDM Client” and hit Next.
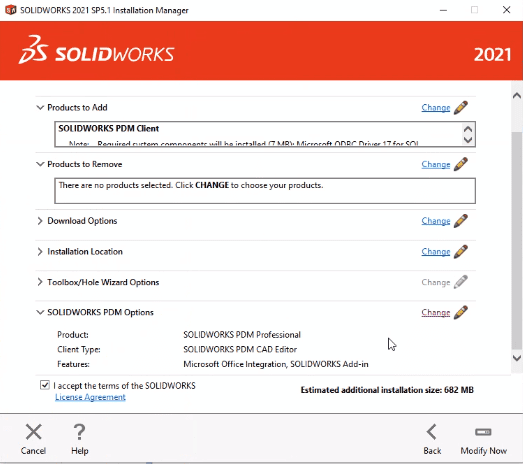
- On the Summary page, hit “Change” next to “SOLIDWORKS PDM Options”.
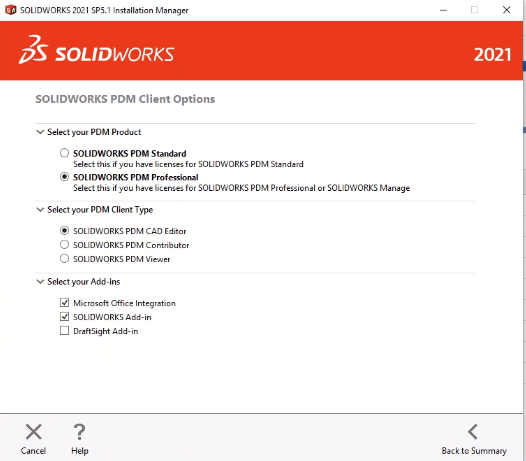
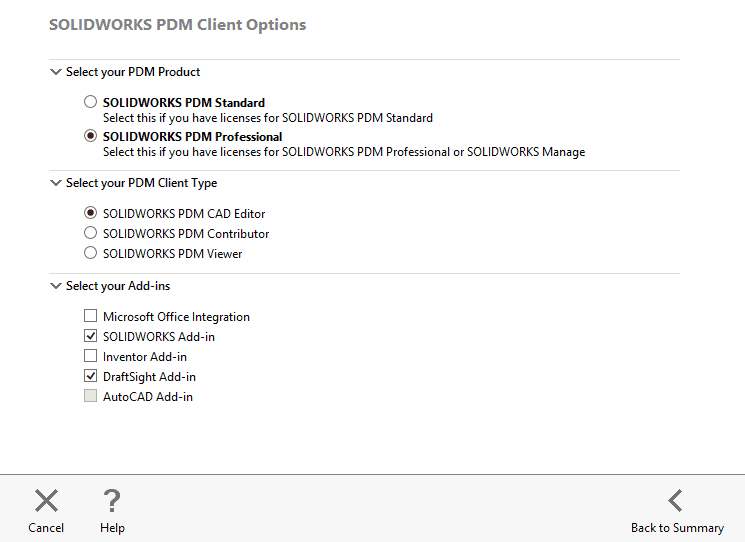
- Make the following selections
- PDM Professional or Standard (if unsure, you can safely select Professional, since this will work for clients with both Professional and Standard licenses)
- Select the appropriate license level: Editor, Contributor, or Viewer.
- If Editor is selected, be sure to select Add-ins for the software you have installed.
- If you’re unsure, reach out to your administrator or select “CAD Editor” and confirm after, since license type can be changed easily later.
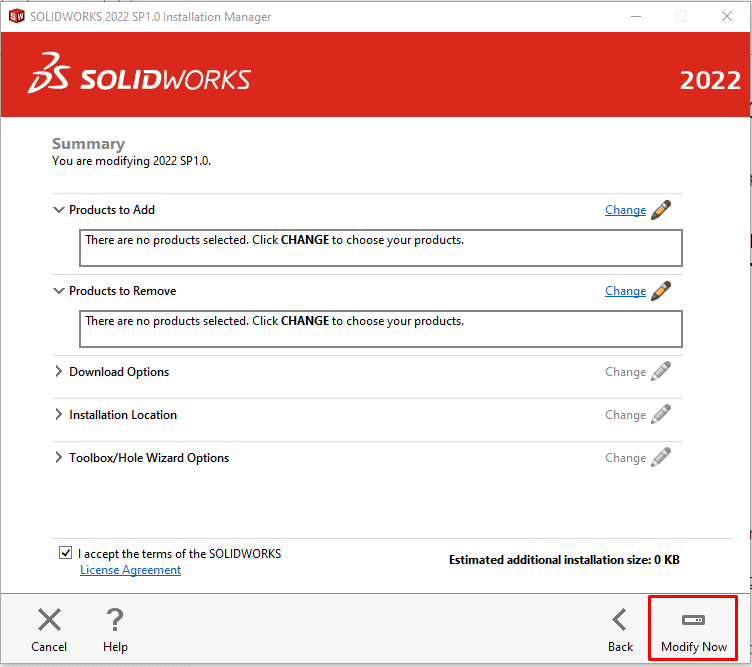
- From the Summary page, accept the terms and select “Modify Now”.
- After installing, a reboot is recommended to ensure the installation is allowed to complete fully. You should now have the PDM client installed on your workstation while retaining your original SOLIDWORKS client and any menu customization you may have made.
If you need SOLIDWORKS & PDM:
- Navigate to http://customerportal.solidworks.com and log in with your account.
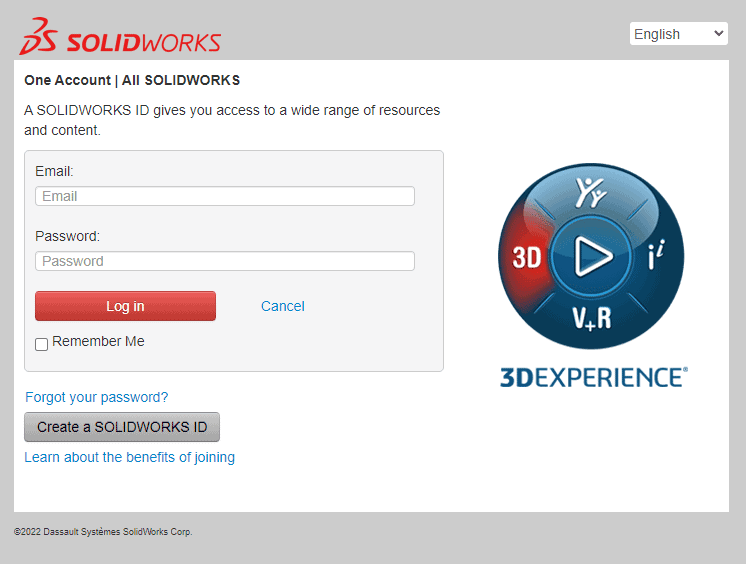
- If you do not have an account, select Create a SOLIDWORKS ID and register using your serial number. Once logged in, select Downloads and Updates.

- Select the year and service pack you wish to install, accept the agreement, and download the setup.
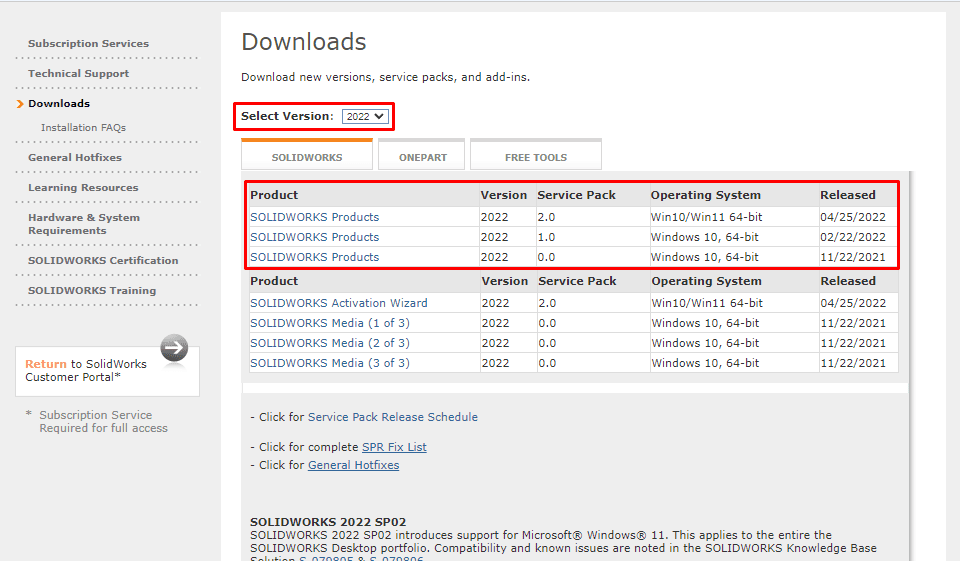
Note: This download is the setup file only so there will be additional downloading when installing the client.
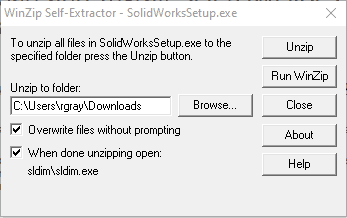
- Run “SolidWorksSetup.exe” & choose to Unzip.
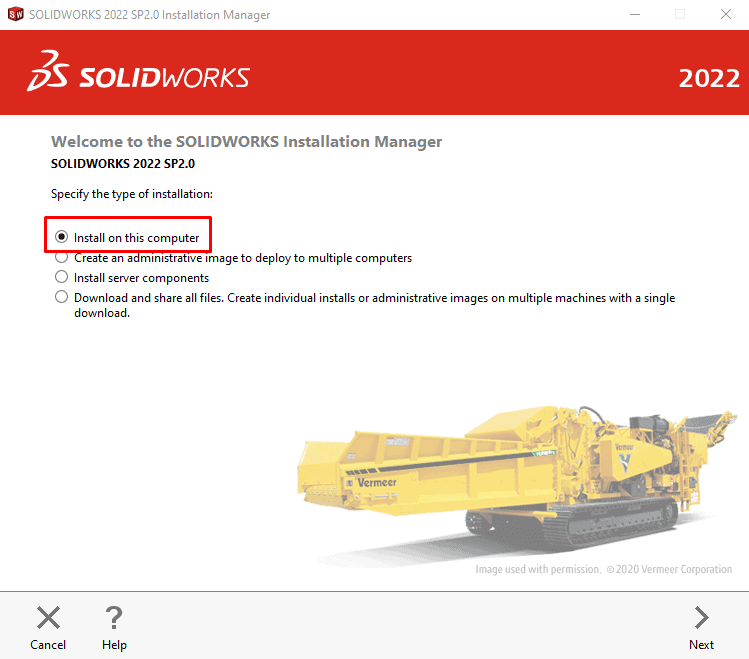
- When that finishes, the Installation Manager should start automatically. Select “Install on this computer” & hit Next. If you get a pop up stating a reboot is pending, feel free to ignore it and hit “ok” to continue.
- If you previously installed SOLIDWORKS, your serial number should be pre-filled. If not, be sure to enter it in the box next to SOLIDWORKS. Expand and select any other design software you’d like to install on your machine here (like Visualize or Simulation – PDM comes later). Hit Next.
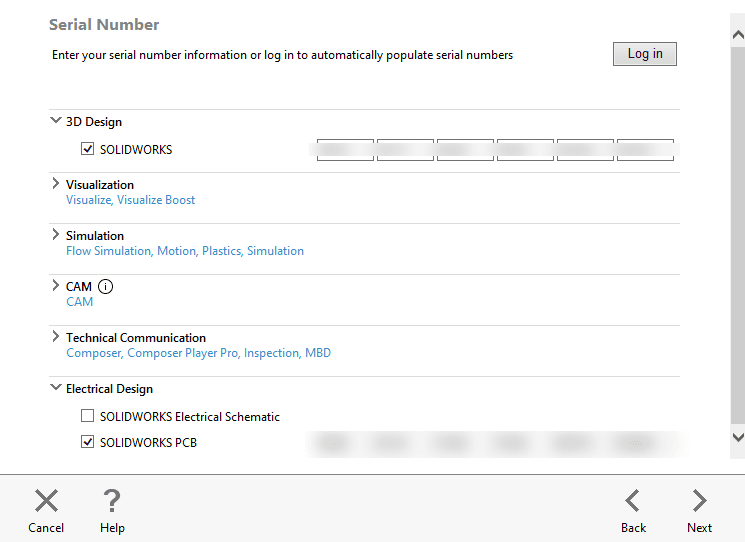
- You will either be taken to a Product Selection page, or to the Summary page. If you get to the Summary page, select “Change” next to “Products”.
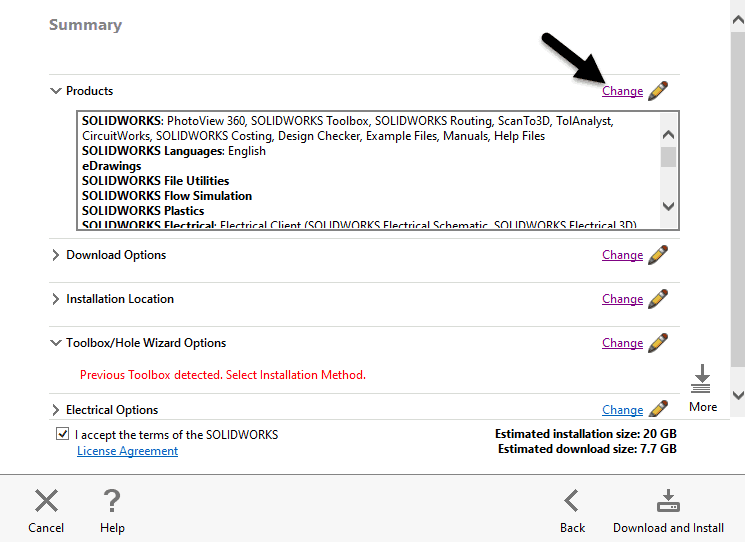
- On the Product Selection page, check the “SOLIDWORKS PDM Client” box. When done, select “Back to Summary”
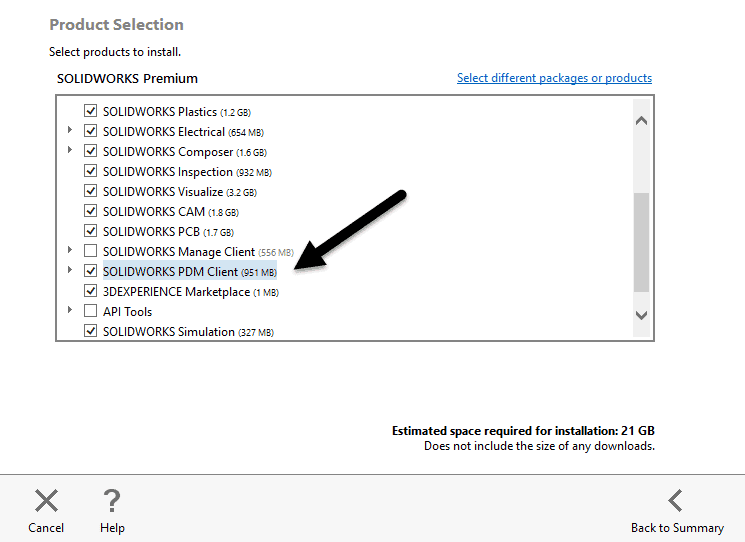
- Select Change next to SOLIDWORKS PDM Options (you may need to scroll down).
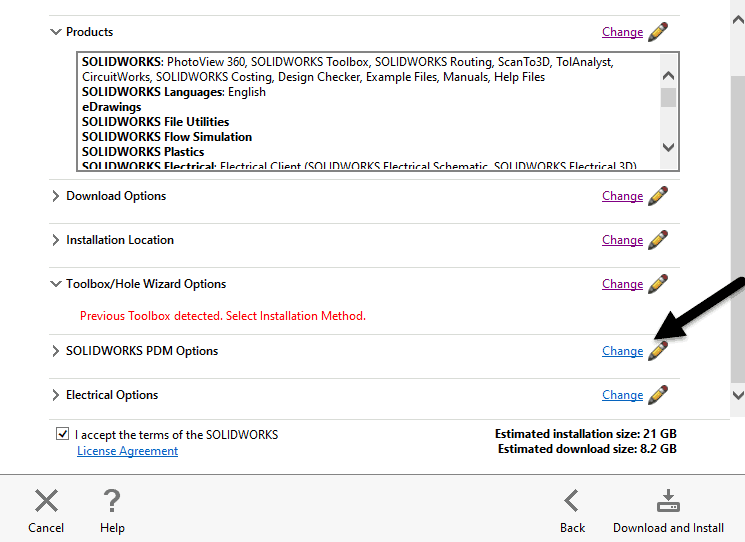
- Make the following selections:
- PDM Professional or Standard (if unsure, you can safely select Professional, since this will work for clients with both Professional and Standard licenses)
- Select the appropriate license level: Editor, Contributor, or Viewer.
- If Editor is selected, be sure to select Add-ins for the software you have installed.
- If you’re unsure, reach out to your administrator or select “CAD Editor” and confirm after, since license type can be changed easily later.
- Finally, return to the Summary page and select Install Now. You may be prompted for a license server that should be entered in the format 25734@<server name>.
- If you’re unsure of your license server, reach out to your administrator.
Creating a Vault View:
- Open your Windows Start menu, find the SOLIDWORKS PDM folder, and select View Setup.
- Select Next > to bypass the Welcome screen.
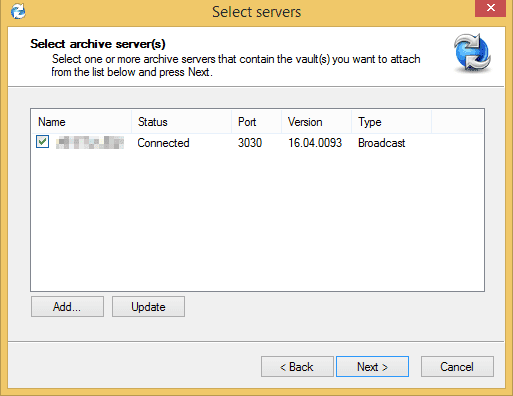
- In the next screen, your server name may show in the white window.
- If it does, select it.
- If it does not, select the Add button at the bottom of the menu to manually add it.
- Once the server is added, check the box to the left of the server name and select Next >.
- Check the box next to the vault you would like to add a vault view for and select Next >.
- If it is grayed out, try following the troubleshooting steps according to the error messages listed in this related article.
- Set the file location. It is strongly recommended that all users put it in the root of the C or data drive.
- Finally, select the option to create the view “For all users on this computer”, if available. Select Next > and then Finish.
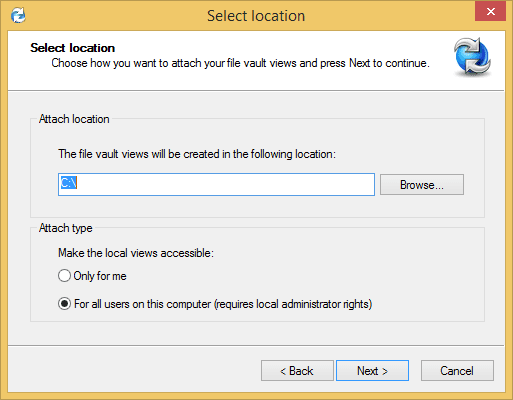
Note: Only for me should only be selected if the user does not have administrative rights on their machine. It will become apparent if the vault view fails to complete. In this case, users must place the vault view in their Documents folder or a folder created on the C: drive and select the Only for me option.
Rowan Gray
PLM Support Team Lead
Computer Aided Technology

 Blog
Blog