Saving PDM Convert Task Output to Parallel Folders
The Convert Task in SOLIDWORKS PDM is a utility to automatically convert SOLIDWORKS files to many different outputs. The most common file types are PDF and DXF, refer to the PDM Administration Guide for a complete list. (PDM Standard includes PDF output only). For this blog we will focus on PDF output.
Limited options are available for the converted output. Listed below are the “out of the box” options for output file locations:
- Source Folder Path (location of file to be converted)
- Vault Root\<folder path>
Saving the output to either one of these options can result in a large number of files in one folder location, which is typically not desirable.
Common folder structure for projects includes a sub-folder designated for PDFs. It is possible to save the converted output to a folder designated for PDF’s by altering the script in the PDM Task.
Configuring the Task
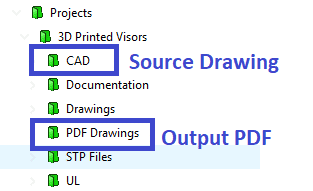
For this example, the customer has designated folders PDF Drawings and STP Files for the File Output Locations:
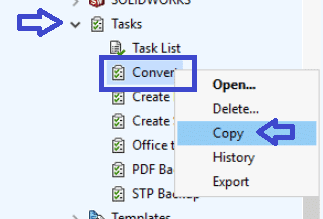
Step 1: Copy the original Convert Task
Open the PDM Administration Tool. This can be accessed from the Start Menu or within the File Explorer Local Vault View>Tools pulldown>Administration. Navigate to the Tasks>Convert and Copy the original Convert Task. I always recommend preserving the original Convert and make copies for new Tasks. This way you will keep the original script intact in case you need to go back. Rename the copied Task as required.
NOTE: If you do not see the Convert Task you will need the load the SWTaskAddIn from within the Admin Tool by going to File>Open, navigate to C:\Program Files\SOLIDWORKS Corp\SOLIDWORKS PDM\Default Data, and select Convert_gb file. After opening you can then drag and drop into your vault.
Step 2: Edit the Script
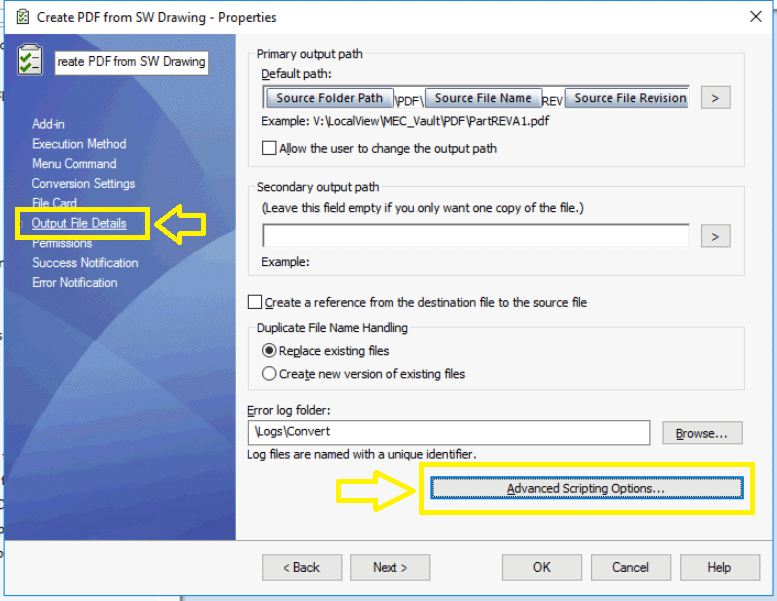
In this example the copied task is called “Create PDF from SW Drawing”. Open the Convert Task by double-clicking on it. Click on the “Output File Details>Advanced Scripting Options” to access the script: (the script ignores the Default Path)
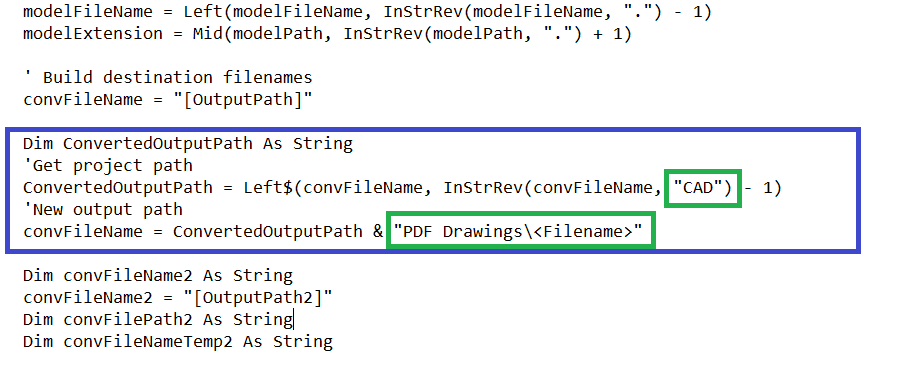
Add the following text inside the green box below, where “CAD” equals the CAD drawing source folder, and “PDF Drawings\<filename>” equals the converted output folder under the Project folder. Add the text directly below the line “convFileName = “[OutputPath]”:
Step 3: Complete Configuration of the Convert Task in SOLIDWORKS PDM
Refer to the PDM Administration Guide for all other configuration options as this blog focuses only on the converted output. The online help file has great information as well, both for configuring the task in PDM Standard and PDM Professional.
Conclusion
Having the Released Drawing PDF’s segregated into their own folder will allow for cleaner organization of files by keeping the CAD files from being cluttered with PDF’s, and also avoid creating a large file set in a single PDF folder.