SOLIDWORKS Plastics and the Million Dollar Waffle
Makers of waffle makers, I have a million-dollar idea for you. Maybe even a billion-dollar idea! Redesign your waffle makers to be more like an injection molding machine. If you’ve stopped laughing and are willing to read on, I think you’ll agree. Prepared waffle batter is the ultimate thermoset plastic resin. The rough process is to fill the mold, close it, apply heat, pressure, and time to cure the resin, then eject the thermoset part from the mold. Isn’t that how you prepare a waffle, but the resin curing is waffle batter cooking? Your current waffle irons already have a timer built in. The other changes to your delicious waffle molding machines will take some work, so please bear with me as I plead my case for new and improved waffle makers.
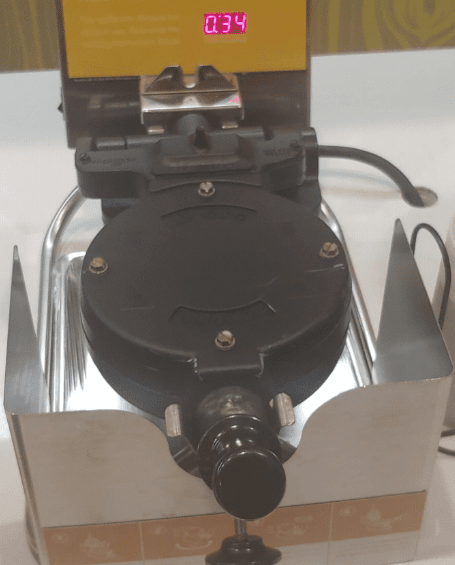
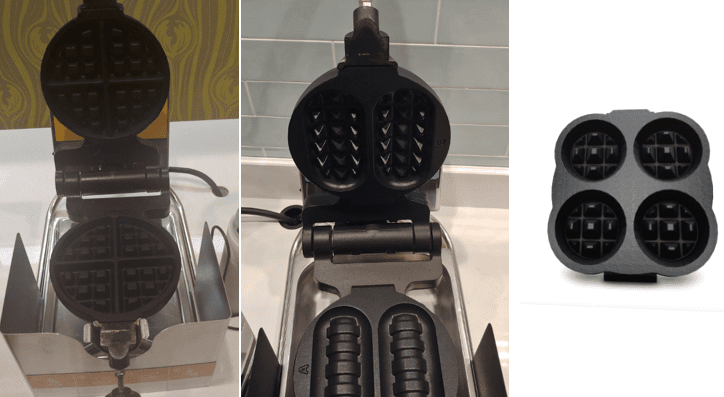
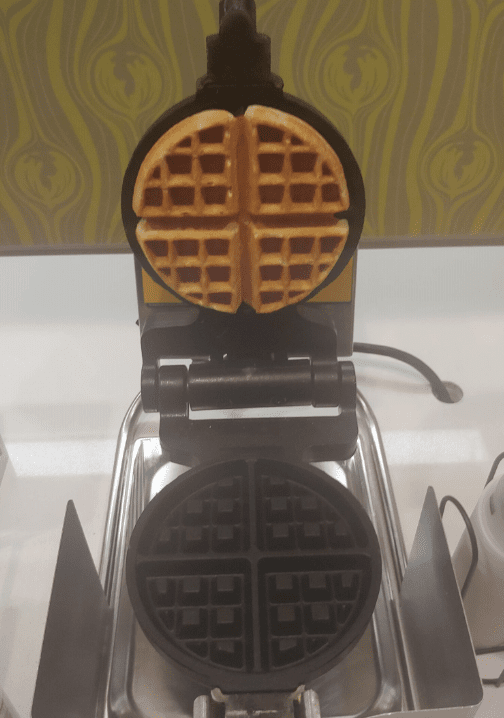
Let’s look at the equipment and process of producing the perfect waffle with a thermoset molding process. First, you have the waffle maker – the injection mold tool. There are standard, large diameter waffles, the awesome ‘boat’ waffles (which my daughters think are cool), and the quad-mini waffles. These are just single cavity, two-cavity, and four-cavity molds.
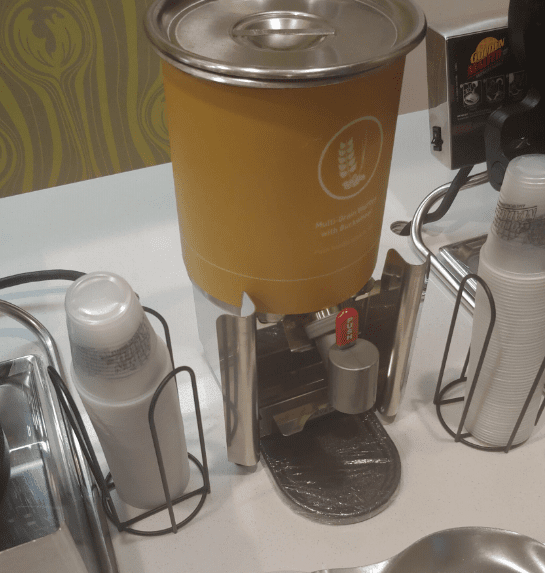
The current “injection” system is inefficient. You’re never certain how much resin (batter) is in the hopper, shot size (batter dispensing) is done manually and changes from shot to shot, and it is not injected directly into the mold (waffle iron). The shot size is how an individual pours the batter into either a paper or plastic cup, usually available on either side of the hopper. To make matters worse, the amount of batter dispensed into the cup is never the amount that ends up in the mold. Hey, waffle makers have that in common with a sprue and runner system! The batter that remains in the cup can’t be re-used later, like regrind is for many plastic injection molding companies; it’s thrown in the trash. You need to add the equivalent of a filled hot runner system to dispense the batter directly into the waffle maker. For the two- and four-cavity molds, you could add the option for how many cavities to fill (waffles to cook), but that valve gate system could be a future improvement.
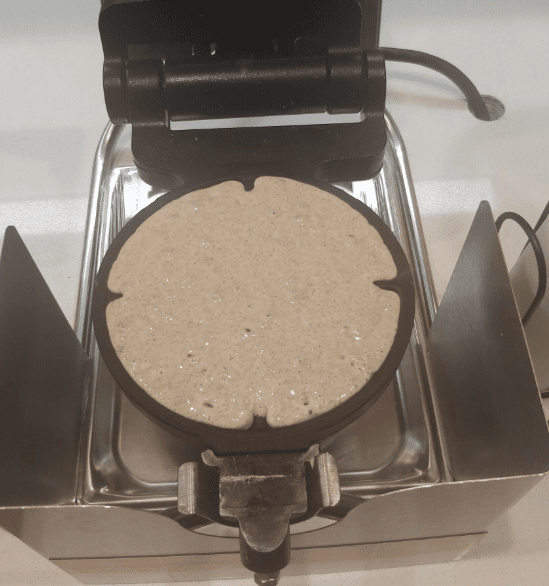
When you think you have mastered the perfect shot size, you realize that even you, an experienced molder (waffle connoisseur), short shots the waffle. The only grace with the current process is that I know about the short shot before it causes issues with the molding process (cooking my waffle). I need to add a bit more resin (batter) to the plastic cup and fill out the mold completely.
There are, of course, other pitfalls to the molding process. Occasionally, the part (waffle) hangs on the wrong side of the injection mold tool (waffle iron).
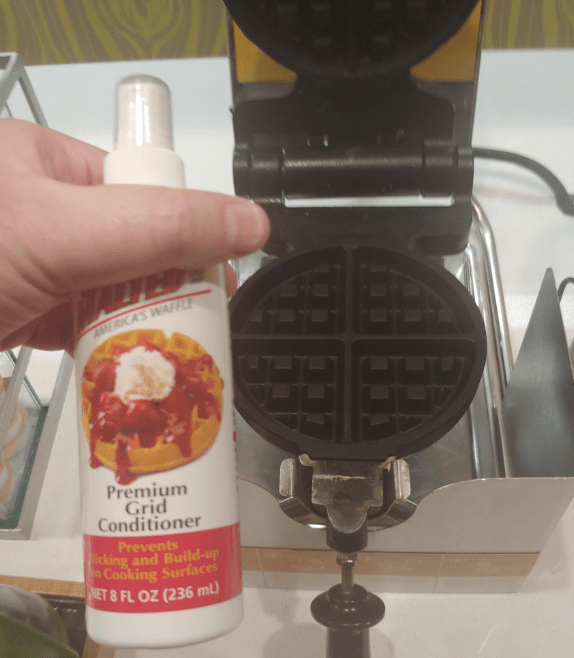
This was especially disappointing as I thought I’d applied the correct amount of mold release agent (grid conditioner) prior to this first shot trial.
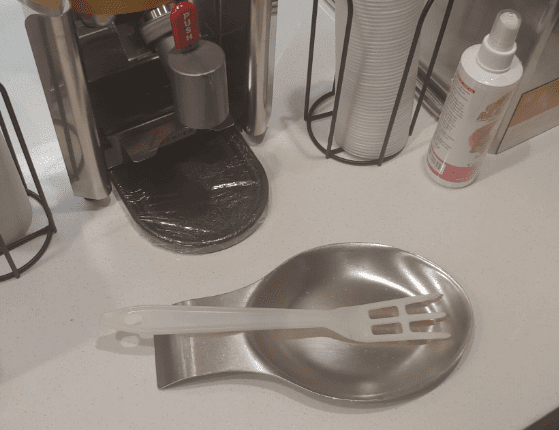
Fortunately, my molding mishap did not require the entire injection molding machine (waffle iron) to be shut down in order to remove the stuck part (retrieve my waffle for consumption) from the injection mold tool (waffle iron). Thank you for providing the appropriate mold cleaning tool (heat resistant fork) on site for the press operators (waffle consumers), like me!
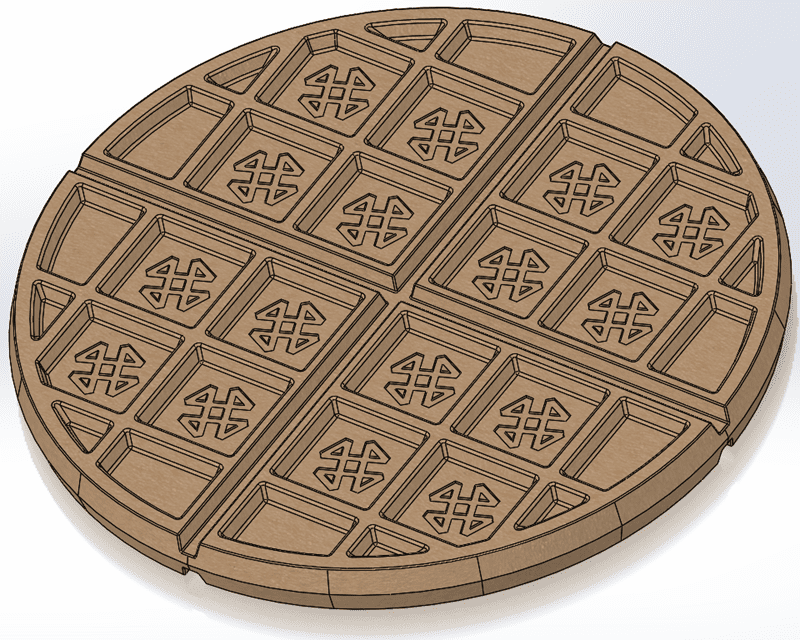
If you’re not yet convinced that the waffle iron re-design is needed, I’ll continue to plead my case using SOLIDWORKS Plastics Professional, by analyzing the rest of the waffle making process. I created a SOLIDWORKS CAD model of a 7.5” diameter waffle, the approximate size of the single-cavity waffle maker discussed earlier. For an upcharge, you can customize the waffle iron grids with corporate logos, as I have done with my waffle!
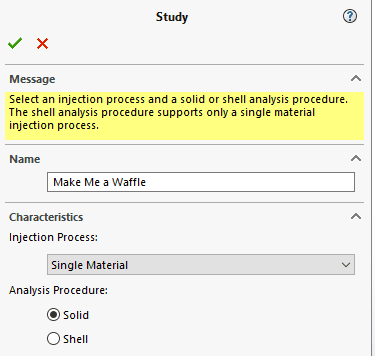
I began a new SOLIDWORKS Plastics study using a Single Material Injection Process, a Solid Analysis Procedure, and gave the study a name.
With the study created, I then focused on the appropriate boundary conditions for the analysis. The injection location is on the bottom of the waffle in the center where each of the four quadrants come together. The split lines on the outer edges of the waffle at the parting line generate vertices where I assigned vent locations for the SOLIDWORKS Plastics analysis. Here, I highly recommend adding adequate venting along the parting line of the mold to induce a little bit of part flash. Why, you ask? The overcooked pieces of waffle are like thin, crispy breakfast cookies, according to my daughters. The clamp force direction should be obvious!
![]()
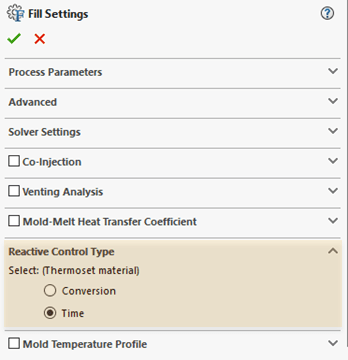
After creating the mesh, I assigned the material ‘custom waffle batter’ to the SOLIDWORKS Plastics project. I’m assuming the waffle batter will act like a thermoset plastic, so the analysis requires both the FILL and PACK stages of the molding process. For the FILL settings, I can modify the Process Parameters, such as Fill Time or Mold Temperature, though I chose to keep the default settings. When working with a Thermoset material, I need to pay attention to the FILL setting for Reactive Control Type. For cooking the waffle, I know how long the process should take, so I changed this from Conversion to Time. Reference SOLIDWORKS Knowledge Base Article S-064107 for a description of the two settings.
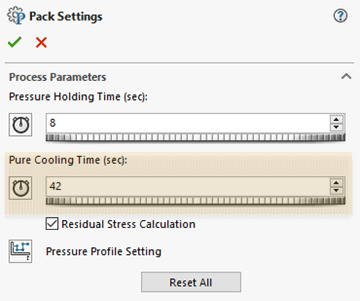
For the PACK settings, Pure Cooling Time will be used to calculate the conversion of prepared waffle batter to cooked waffle.
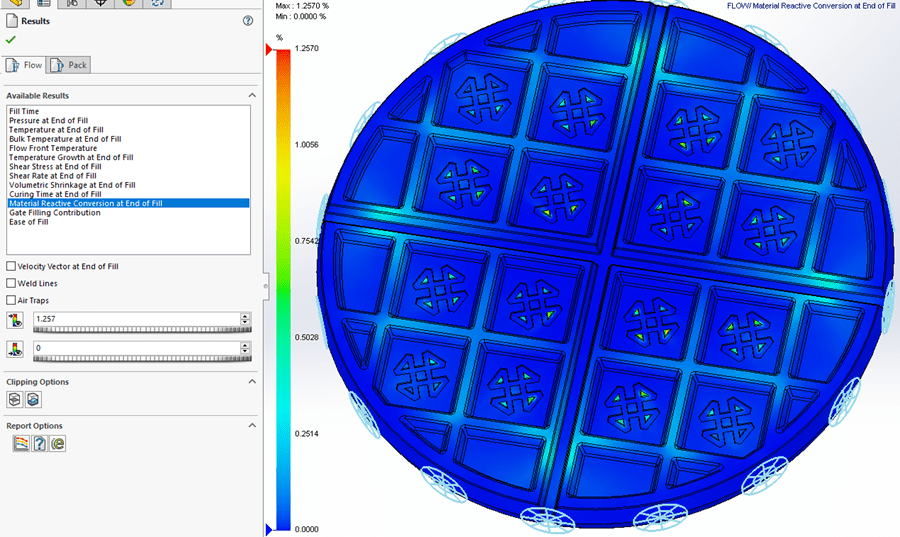
With the setup complete, I solved both the FILL and PACK stages of the analysis. When working with a thermoset plastic analysis, there are a couple additional outputs from SOLIDWORKS Plastics that should be reviewed. The first result plot is Material Reactive Conversion at End of Fill on the Flow results tab. This plot tells me how much of the waffle has cooked when the FILL stage of prepared waffle batter has completed. I want this to be as low as possible! If too much of the batter cooks prior to filling the entire mold, the result can be a short shot.
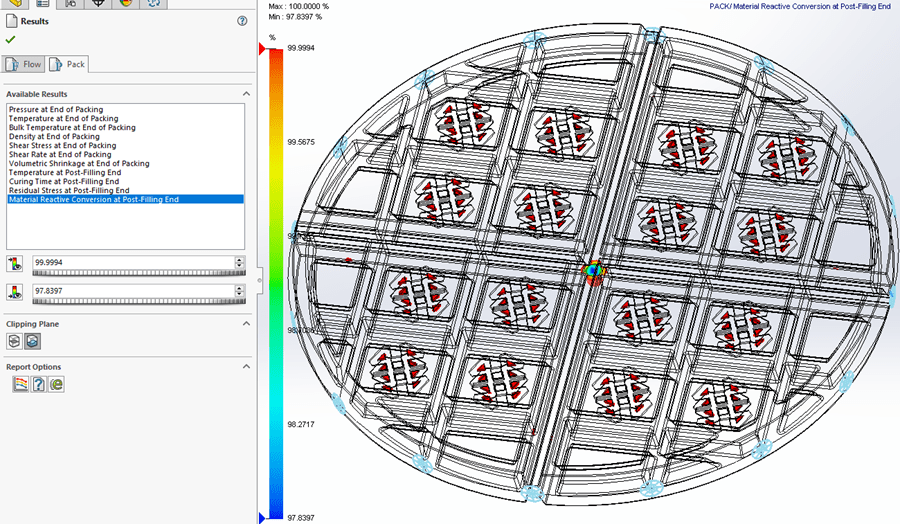
The second result plot is Material Reactive Conversion at Post-Filling End on the Pack results tab. This plot indicates how much of the prepared waffle batter has cooked at the end of the PACK stage, specified by Pure Cooling Time. This should be as high as possible; it is an indication of how much batter has finished the cooking process. In the picture below, I have changed the plot to Isosurface mode, then changed the legend maximum. The remaining red regions indicate where the waffle batter has achieved 97.8% to 99.9994% conversion. With my current process settings, I can safely eject the waffle from the waffle iron! If 97.8% conversion isn’t sufficient or the regions of non-converted resin are unacceptable, with future mold trials (making waffles) I can increase the Pure Cooling Time setting to increase the conversion percentage.
So, makers of waffle makers, are you willing to modify your waffle irons to produce a more consistent, superbly delicious waffle? I certainly hope so! I think the next step is to pour syrup on a waffle with the pats of butter that our very own Robert Warren simulated for making cookies. Until that blog is written, I’ll be waiting for your call to make a better, injection molded waffle. Now go make your products better with SOLIDWORKS Simulation!
PS – Credit for the ideas supporting this blog go to one of my amazing CATI colleagues, Chris Snider. Chris and I had a very inspired conversation at 3DExperience World in Nashville, TN, while eating… breakfast!

Bill Reuss
Product Specialist, Simulation
Father, Golf Junkie, Coffee Connoisseur, Computer Nerd
Computer Aided Technology, LLC