Using the Isolate Command in SOLIDWORKS
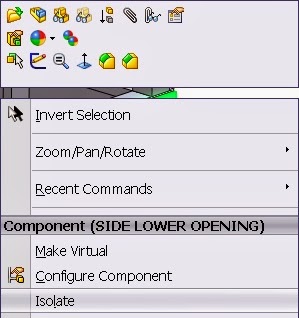
You’ll find that SolidWorks has many underrated tools that allow a user to get to that final design just a little faster; the Isolate command is one of these. It can be used in an assembly or in a multi-body solid part. A user selects all the components or bodies they want fully visible and then can set all others to hidden, transparent, or wireframe. Basically, what a user has invoked is a temporary display state.
Multi-Body:

Assembly:
In an assembly, there is an option to save these as new, permanently selectable display states as they are created. In a multi-body part, you only have the option to turn the temporary display state on and off. In either case, it allows a user to wade through the “visual noise” of components or bodies in the way of designing or analyzing a project throughout its design process.
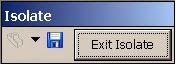
Once a user is finished with the command, they can simply click on Exit Isolate to bring all the other components back to the previous visual state.
It’s one of those hidden gems in the repertoire of SolidWorks commands. My personal favorite use of this command is to use it to edit a component to save time. There are two well known methods of editing parts in your assemblies.
The first method entails right-clicking on the component and opening it into its own files. It takes time to open the part individually, and it takes a bit of time to save and close the part. Then it takes a little more time for the assembly to update.
The second method involves right clicking and editing the component in context of the assembly. This allows a user to confirm proper fit visually or to borrow potential sketch geometry from other components.
However, stock SolidWorks settings turn all your other components wireframe. This can not only slow performance in a large assembly, it can also be visually confusing, as all the components stack up on each other. Using the Isolate command can help this.
Start by selecting the part or parts to isolate. This would include the part to edit but may also include a part to help make the design changes. Once this is achieved, right-click and edit the component in context of the assembly. Once editing is complete, exit back to the main assembly and turn off the Isolate command. This saves time that we would lose if I were opening the part on its own, and allows me to make quicker changes without a bunch of parts or sub-assemblies in the way.
Give it a try! The Isolate command is a great tool to add to your SolidWorks tool belt. Thanks for reading and happy designing!
For more training and tutorials on the many 3D CAD Modeling solutions in the SolidWorks family of products and add-ons, register for an upcoming Event or look into our SOLIDWORKS training.