The SOLIDWORKS JOIN feature. What’s that?
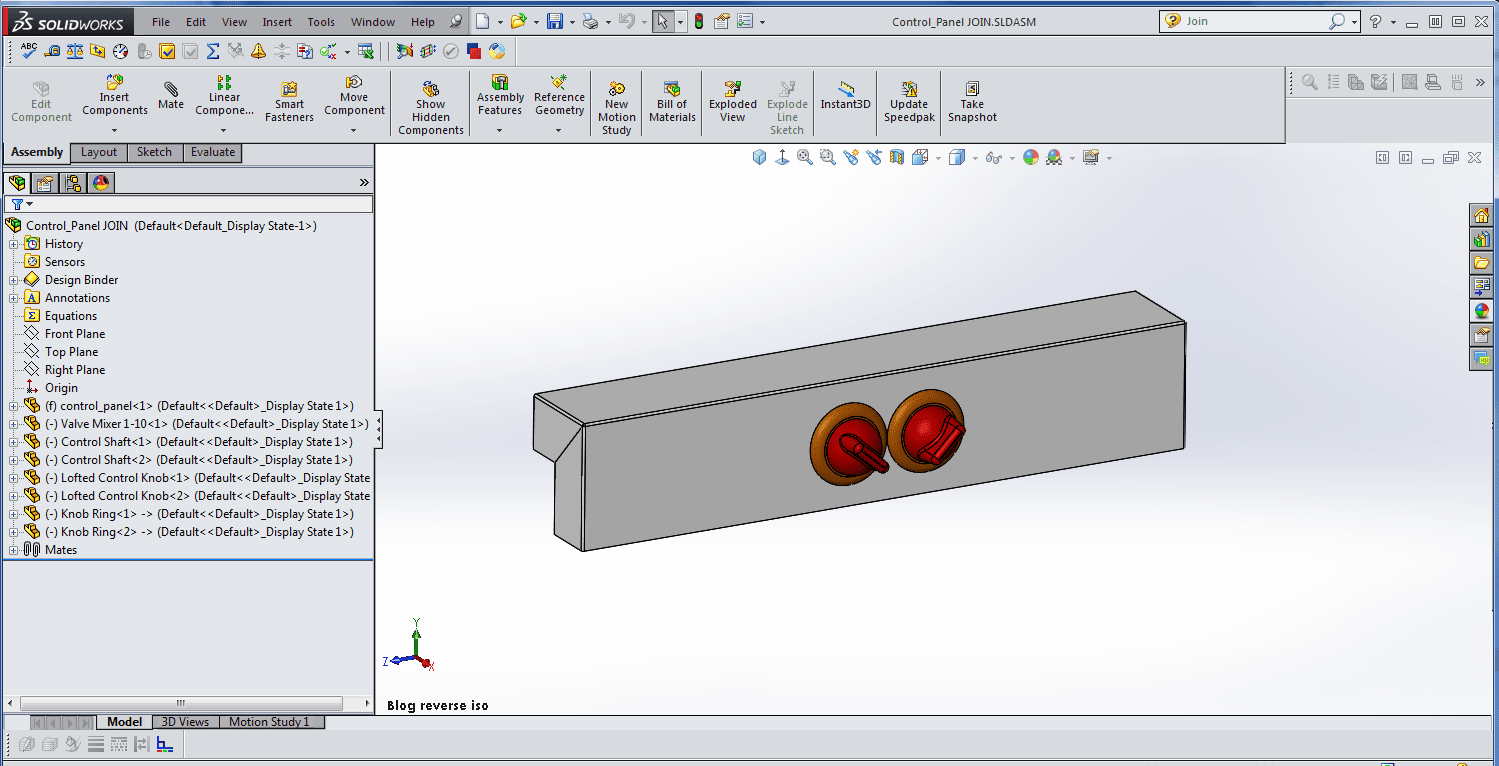
SOLIDWORKS has so many commands and features. While working on a presentation that a coworker created, I was reintroduced to the assembly feature JOIN Parts.
JOIN is used when in an assembly mode. Two or more parts can be joined to create a new part. The JOIN operation removes surfaces that invade each other’s space and merges the part bodies into a single solid volume.
This feature is helpful if you’re designing and decided to have 1 part instead of 2. By joining them, this eliminates you recreating the part.
Creating a Joined Part
Here you see an assembly with a knob and knob back plate. During the design, it was decided to create the knob and back plate as 1 part, not 2.
To join parts:
- Create the parts in the assembly. The parts are then positioned as desired in the assembly by mating them.
- Save the assembly but do not close
- Insert a new part into the assembly. Do this by :
- Click New Part
 on the Assembly toolbar or click Insert > Component > New Part.
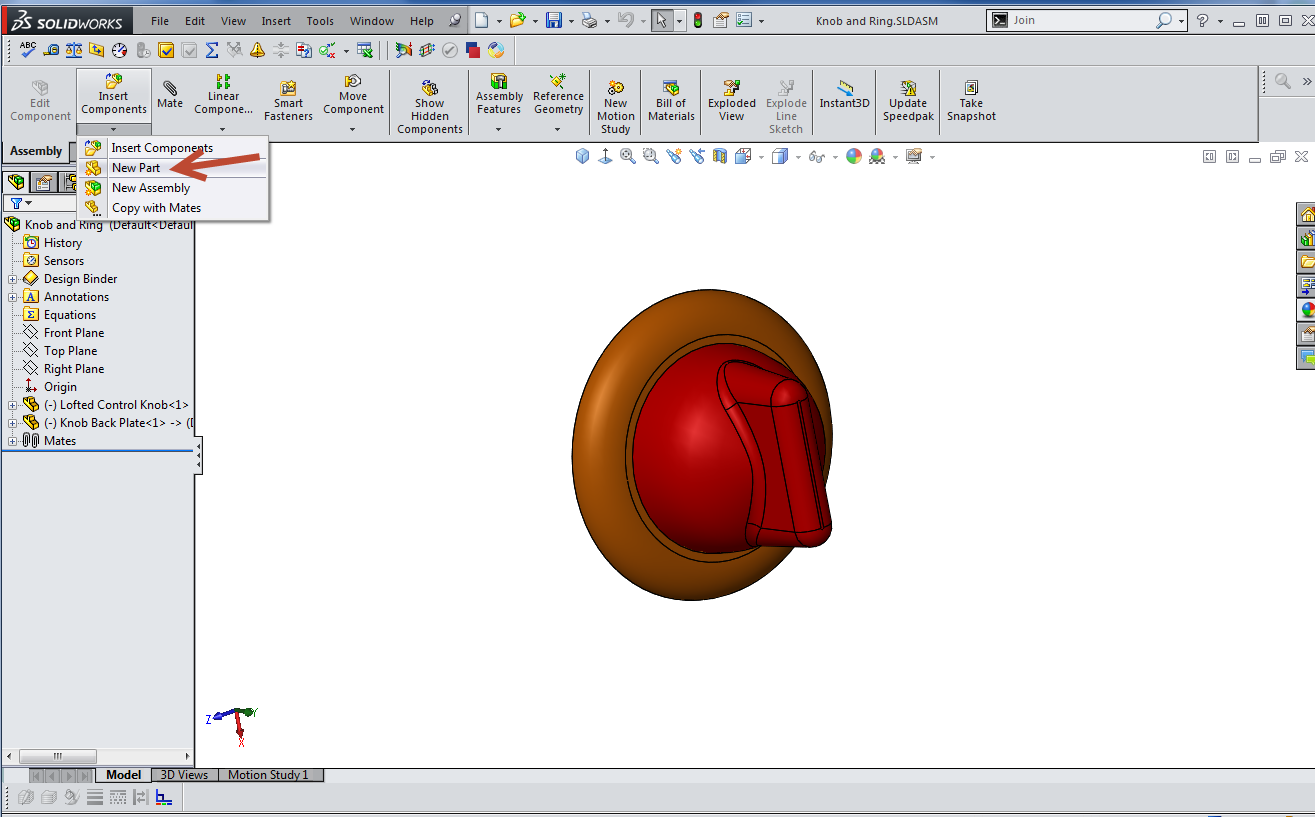
- Click a plan or planar face on a component. In the new part, a sketch will open on the selected plane. Close the sketch because we joining parts not create a new one.
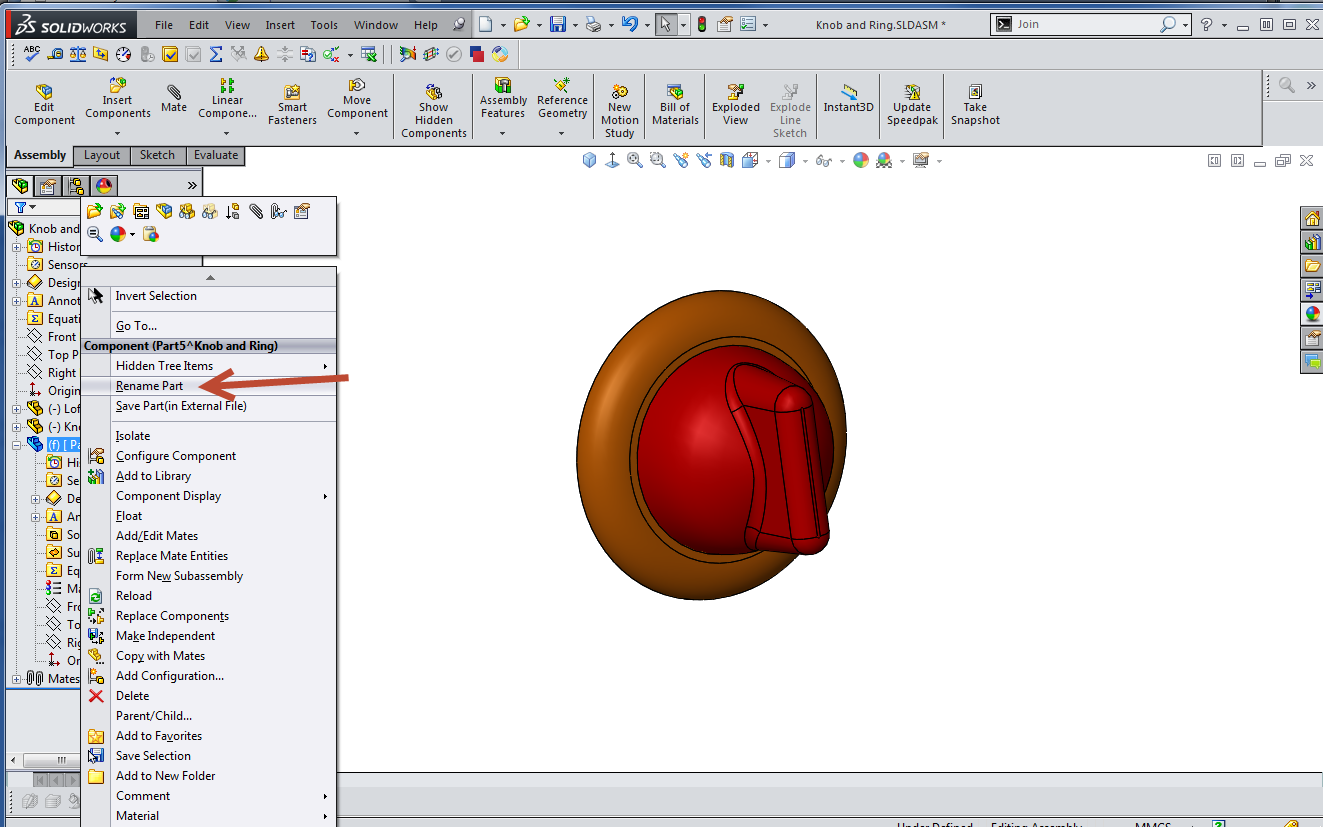
- On the Feature Manager Design tree, Right-mouse click the new part name and select Rename Part. Rename the part.
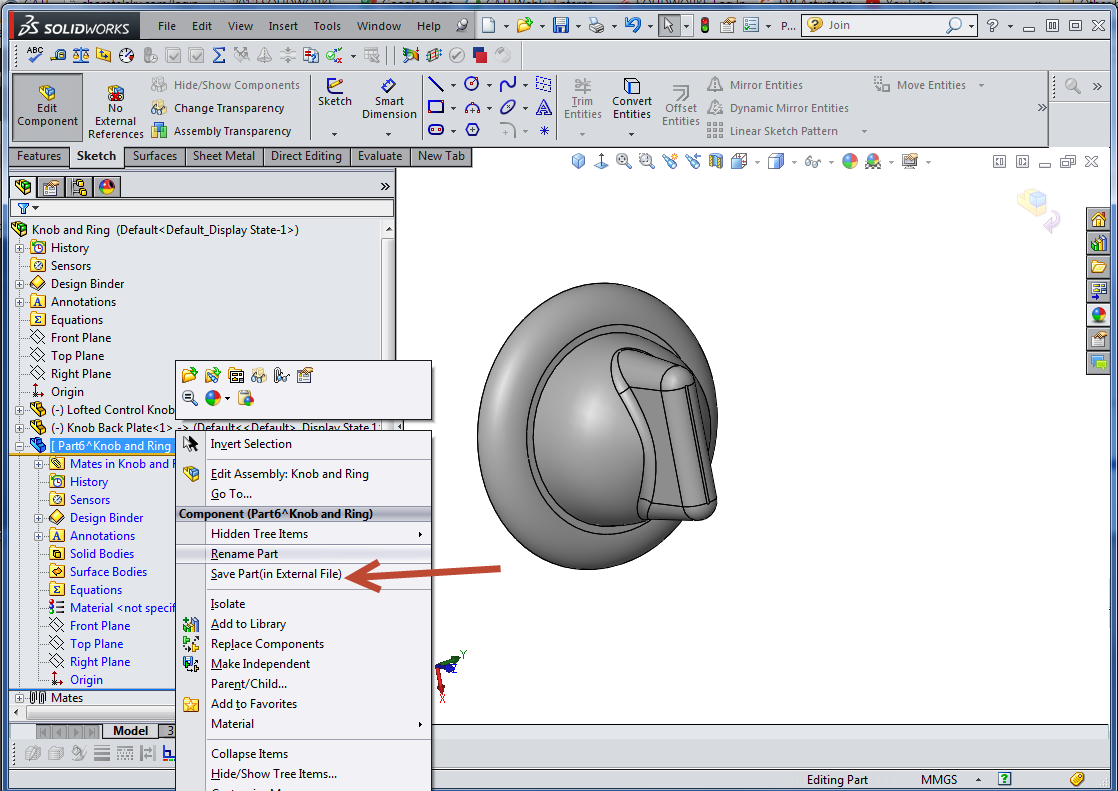
- Save part external
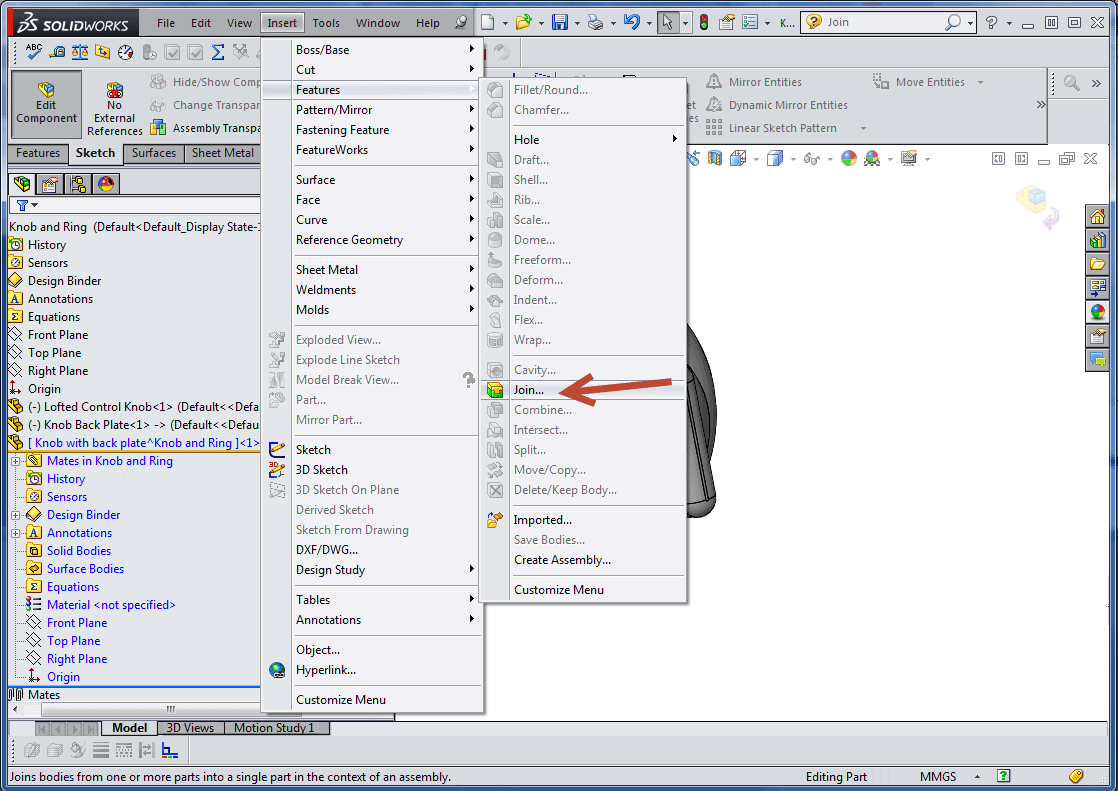
- Click Insert > Features > Join
- Make selections and set options in the Join Property Manager.
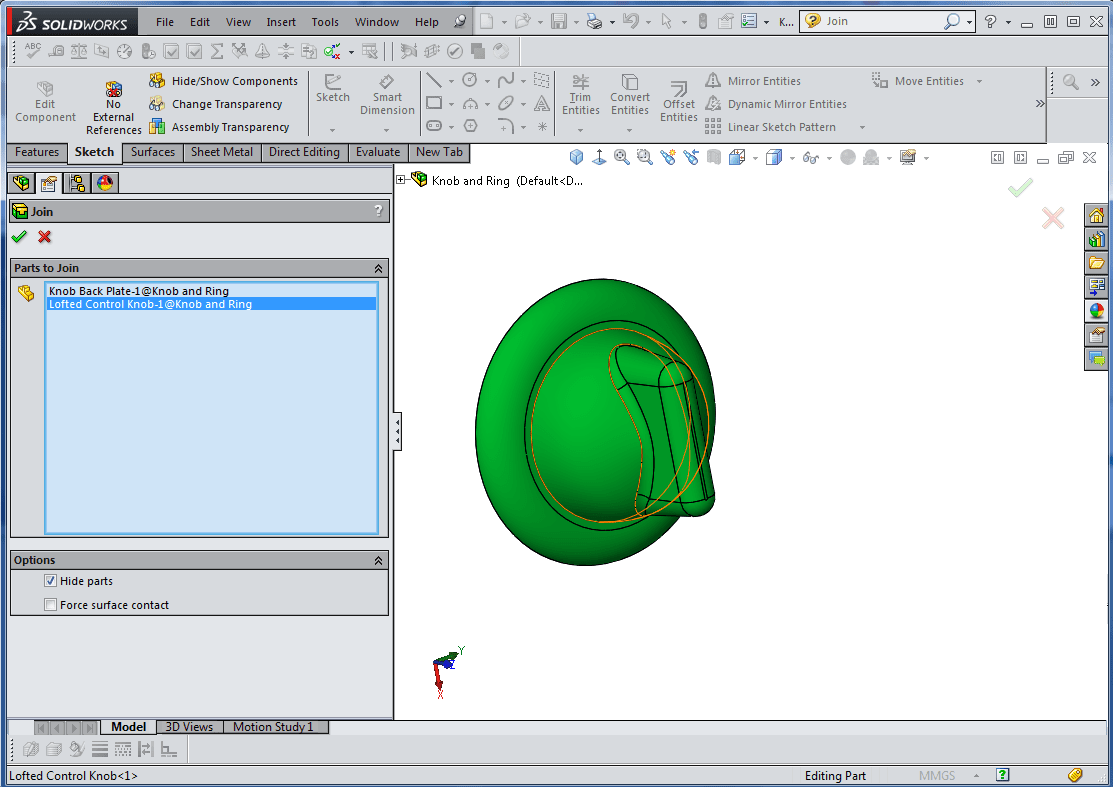
- Click OK
 to create the joined part.
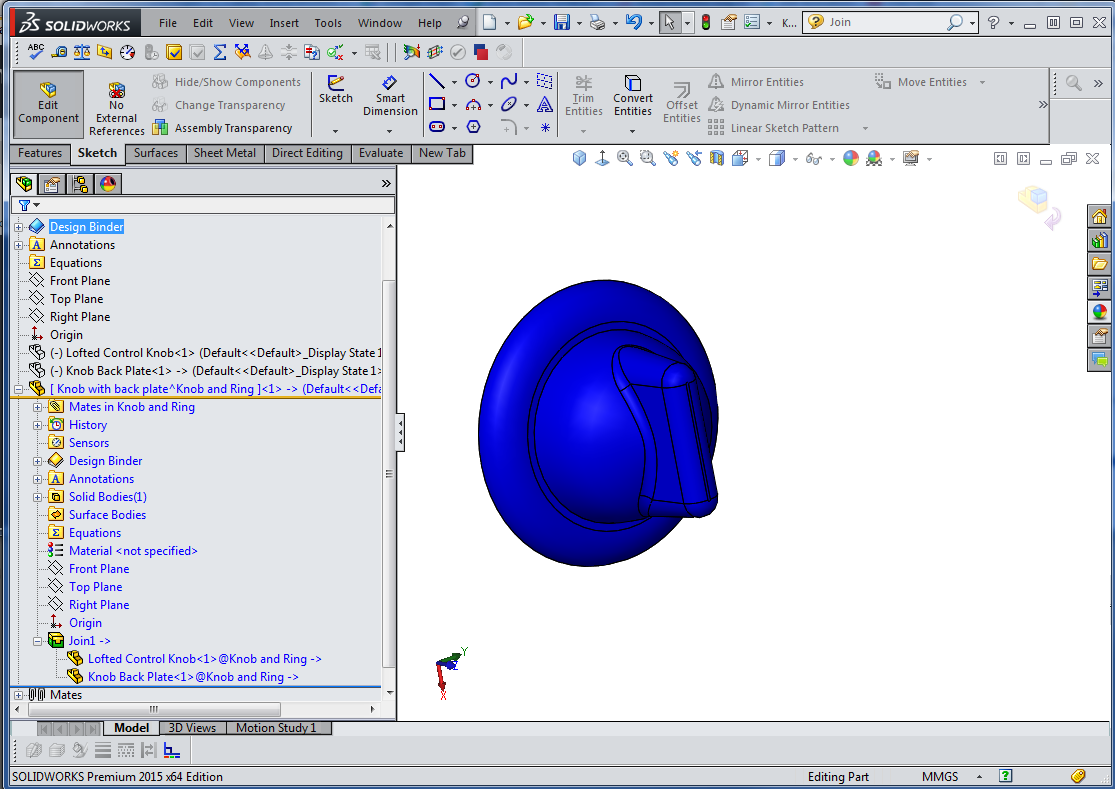
Return to the assembly by selecting Edit Assembly (assembly name) or click Edit Component  on the Assembly Toolbar.
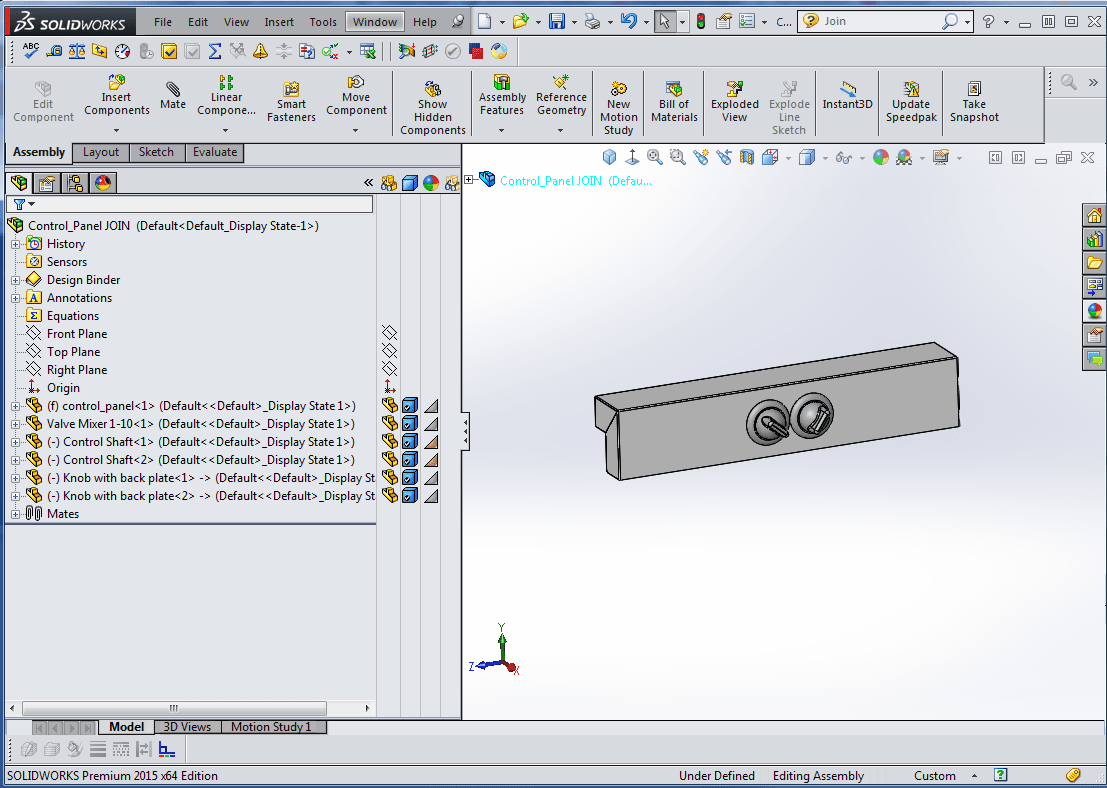
Update the assembly by Dissolving the sub-assembly and removing the individual parts leaving the joined part.
The new component appears in the Feature Manager Design Tree. The part contains a Join feature, Join1
To edit a Joined Part
Edit a joined part by right-clicking the part in the FeatureManager design tree of the assembly OR in the graphic area and select Edit Feature.
Click the parts that you want o remove from the joined component or add additional parts to be joined. To remove all parts, right-mouse click in the graphics area and select Clear Selections. Click OK.
Note: The joined part is fully associative to the original parts and to the assembly. Any changes made to the original parts are reflected in the joined part. If the parts move relative to each other in the assembly, the joined part changes also.
Thanks for reading!
Judy Marlo
Application Engineer
Computer Aided Technology

 Blog
Blog