SOLIDWORKS: Using Design Checker to Change Sheet Formats
Using SOLIDWORKS Design Checker to Change Sheet Formats
One of the more useful utilities that you get with SOLIDWORKS Professional and Premium licenses is the SOLIDWORKS Design Checker program. This program allows you to capture your drafting and modeling standards into a simple user interface. Then use these rules to check against your completed files to find little mistakes where the drawing didn’t quite follow the company’s rules.
Sometimes the user might make a drawing, only to find out that something has been changed on the company’s title block. Company name change, address update or perhaps a simple change with tolerance or layout of the title block itself. Having to open each file and manually replace the sheet format can be timely and a chance for mistakes.
Here is how you can simply add a rule to check for the sheet format in use and to prompt the user when the new one should be used.
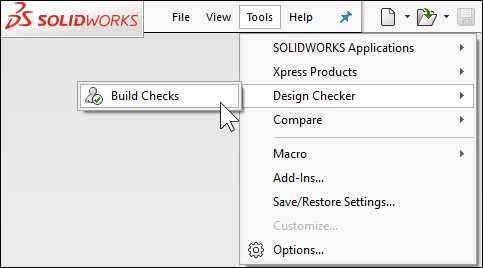
Step 1, go to Tools, Design Checker, Build Checks:
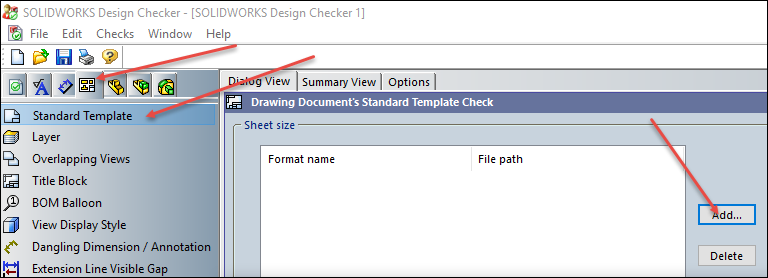
Step 2, Go to the Drawings Tab, Select Standard Template and Add the new Sheet Format file path:
Step 3, Save this file that you have created in the Design Checker. It will be saved as a *.swstd file and place this in a location that you can easily get to.
Step 4, Open the SOLIDWORKS Task Scheduler and select the Design Checker task. Next Add Standards, and add in the file you saved from Step 3:
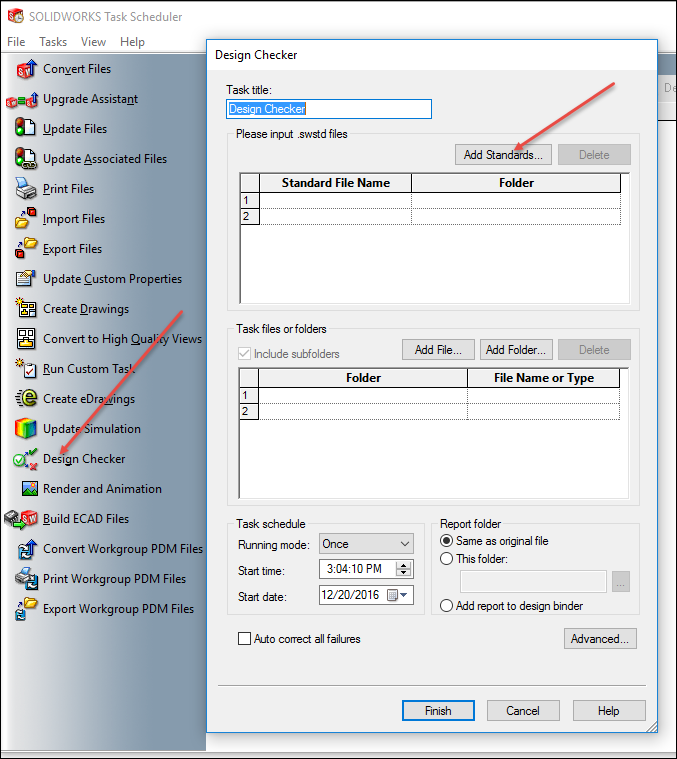
Step 5, add the drawing files that you need to update to the new sheet format by selecting the Add File or Add Folder buttons under this task.
Finally, when this task has completed, you will have new sheet format files loaded into all of your drawings!
Pretty cool and a nice way to use out of the box automation with SOLIDWORKS Design Checker and Task Scheduler.
Brian Reel
CATI Field Technical Services Manager
Computer Aided Technology