Stratasys F123 Series Tip Wipe Assemblies
It is important to keep the tip wipe assemblies in your Stratasys F Series printer working properly. If the tip wipe assemblies are not cleaning the tips properly, bad print results can occur. The tip wipe assemblies should be checked and cleaned on a monthly basis or anytime you are having print quality issues that may be related to a print head. You should also check the tip wipe assembly any time you notice that material stays stuck to the tip.
When cleaning the tip wipe assemblies check for wear or damage to the brush and the flicker portion of the tip wipe assembly. Material can become embedded in the bristles of the brush causing the brush to be ineffective when cleaning the tip. The flicker portion of the tip wipe assembly can wear down and can develop a notch which the tip can completely pass through. If you find the tip wipe assemblies to be worn or damaged you need to replace them.
You can order new tip wipe assemblies at https://store.cati.com/Catalog/PrinterSupplies/Detail/451-123-00306-f123-tip-wipe-assemblies-kit-2-pack
To replace the tip wipe assemblies:
- power off the printer and make sure the printer has had enough time to cool down.
- If necessary, move the print heads away from the tip wipe assemblies.
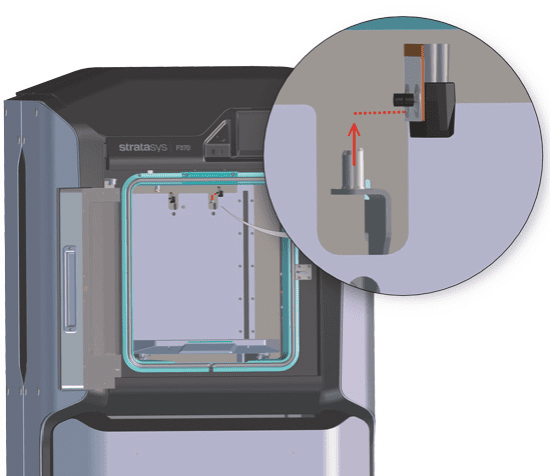
- Lift up on the tip wipe assemblies to clear the posts. see the picture below.
- Install the new tip wipe assemblies.
- The posts are different sizes so you can’t install the tip wipe assemblies backward.
- Make sure there is no material around the posts that can keep them from sitting flat.
To clean the tip wipe assemblies:
- Clean and inspect the surface around the locating pins.
- Make sure that the tip wipe assemblies can sit flush on the surface.
- Remove any material from the brush/flicker area.
- You should also check the tip wipe height adjustment to verify that the tip wipe assemblies are contacting and cleaning the tips.
To do the tip wipe height adjustment follow these steps.
Let the printer cool down before performing the adjustments. The parts inside the chamber get extremely hot.
Make sure that the toggle bar is in the lower position.
- Power OFF the printer.
- Open the top cover.
- Open the oven door.
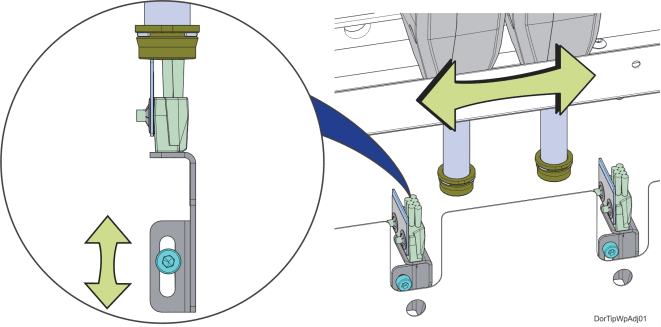
- Manually move the model head (left side) back and forth above the model tip wipe assembly (left side).
- Verify that the brush and flicker both make contact with the tip shield.
- If necessary, adjust the tip wipe height.
- Using a 3mm hex wrench, loosen the tip wipe mounting screw at the back of the oven enclosure.
- Adjust the height of the tip wipe so that the tops of the brush and flicker just contact the bottom of the head tip shield.
- Tighten the tip wipe assembly mounting screw.
- Manually move the head back and forth to verify that the brush and flicker are contacting the tip shield without extreme resistance.
- Repeat these steps for the support head (right side) and support tip wipe assembly (right side).
You should now know how to replace, clean and make adjustments to your Stratasys F123 Series tip wipe assemblies. Happy printing!
Paula Durham
Field Service Engineer
Computer Aided Technology, LLC