F123 Spotlight: How to use Draft Mode to Reduce Material Usage and Print Faster
The Stratasys F123 line-up of printers have proved to be some of the easiest and most reliable FDM printers on the market. One feature on these printers that doesn’t get much spotlight is their ability to print in “Draft Mode”. Curious about the differences of draft mode, I ran some tests.
What is Draft Mode?
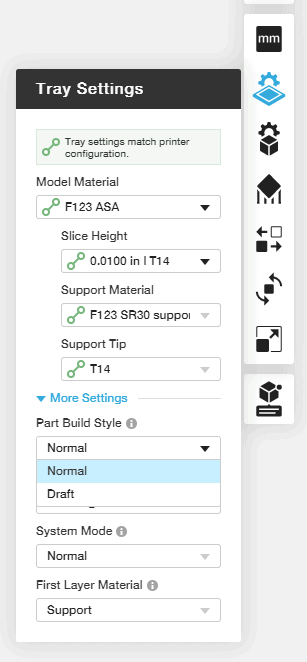
Draft Mode is a setting within the Tray Settings tab of GrabCAD Print. Selecting Draft Mode will change many parameters within GrabCAD Print that result in a faster build time and less material used. However, the changes that GrabCAD Print makes to the part are not without consequences. The parts printed in draft mode will not have nearly as much strength due to their infill style and density. The extremely sparse support may present some challenges depending on the part geometry. For parts that are needed in a hurry for form and fit purposes, Draft Mode is a great choice.
What printers can use Draft Mode?
Draft Mode is a setting available on the F123 series of Stratasys printers, which includes the F120, F170, F270 and F370.
What does Draft Mode do?
When Draft Mode is selected, GrabCAD Print displays the following message:
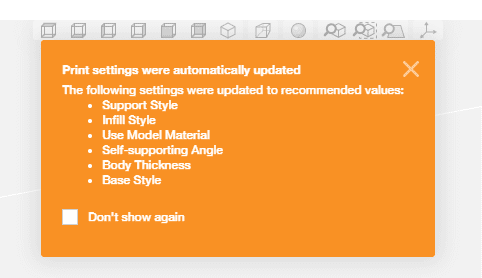
However, GrabCAD Print doesn’t give any further information on the changes. Here is what I have gathered from looking at what has changed:
Setting |
Description |
Default Value |
Draft Mode Value |
Print Time |
Model Material |
Support Material |
Part Strength |
Notes |
| Model Infill Style | The internal structure of a part. Sparse infill results in faster print times and lower material usage, but also a weaker part. | Sparse Double Dense | Sparse | ↓ | ↓ | ↓ | ||
| Infill Density | The spacing between infill structures. Less dense infill results in faster print times and lower material usage, but also a weaker part. | Varies depending on material, layer thickness and infill style. | 0% | ↓ | ↓ | ↓ | Lowest selectable setting is 30% with ASA building @ 0.007in layers. | |
| Body Thickness | The thickness of the outer shell of the part. Thinner body thickness results in faster print times and lower material usage, but also a weaker part. | 0.06 in | 0 in | ↓ | ↓ | ↓ | Lowest selectable setting is 0.06in. | |
| Purge Part Type | The purge part contains the material that was purged into the back of the machine on older Stratasys printers. Purging is required when switching between model and support materials. Normally at the start of each layer the purge part gets a new layer of purged material. This helps with surface finish. Selecting “Last Swap” stops the machine from adding to the purge part after the last swap between support and model materials. This reduces the build time and model material, but may affect the surface finish once the purging stops. | Full Height | Last Swap | ↓ | ↓ | |||
| Support Style | The type of supports created in the model. SMART support is the default and is a good option for any build. The other options have conditions that make them useful. Depending on the setting and part geometry changing the style may result in a faster print time and/or lower support material usage. | SMART | Sparse | ↓ | ↓ | The sparse setting in Draft Mode is different than any of the selectable options normally available. | ||
| Support Self-Supporting Angle | The angle at which support can safely overhang. | 44° | 0° | Lowest selectable setting is 30°.
The special supports that are created in Draft Mode grow vertically and therefore don’t need any self-supporting structure. This explains the 0° value in Draft Mode. |
||||
| Use Model Material in support | Model material is utilized in support structure. This reduces purging and head movement, resulting in a faster print time. Support material usage decreases, but model material usage increases. | Unchecked | Checked | ↓ | ↑ | ↓ | This option is very useful when running low on support material. | |
| Support Base Style | The interface between the model and the supports with the tray usually has a large base of support material. This helps with part warpage. When “Model only” is selected, the support structures no longer create a base on the tray. This reduces support material used, but may increase the likelihood of the support coming off the tray during the print. | Model & Supports | Model Only | ↓ | ↓ |
How much of a difference does Draft Mode make?
To test the differences each of these settings made to print time and material usage, I ran estimates for each variable. A twenty-sided dice was used for estimations.
Below are the results.
Small D20, ASA Ivory @ 0.007in layers |
Time |
Model |
Support |
Total Materials |
| Draft Mode | 48 | 0.419 | 0.078 | 0.497 |
| Default settings | 78 | 0.652 | 0.193 | 0.845 |
| Sparse Infill, SMART support | 77 | 0.525 | 0.193 | 0.718 |
| Sparse Infill, Infill Density @ 30%, SMART support | 76 | 0.494 | 0.193 | 0.687 |
| Sparse Infill, Infill Density @ 30%, Purge Tower Last Swap, SMART Support | 69 | 0.411 | 0.193 | 0.604 |
| Sparse Infill, Infill Density @ 30%, Purge Tower Last Swap, Sparse Support | 70 | 0.411 | 0.212 | 0.623 |
| Sparse Infill, Infill Density @ 30%, Purge Tower Last Swap, Sparse Support with Model Material | 71 | 0.429 | 0.193 | 0.622 |
| Sparse Infill, Infill Density @ 30%, Purge Tower Last Swap, Sparse Support with Model Material & Self-supporting Angle of 30° | 71 | 0.46 | 0.151 | 0.611 |
| Sparse Infill, Infill Density @ 30%, Purge Tower Last Swap, Sparse Support with Model Material & Self-supporting Angle of 30°, Base Style Model Only | 73 | 0.487 | 0.114 | 0.601 |
| Sparse Infill, Infill Density @ 30%, Purge Tower Last Swap, SMART Support with Model Material | 70 | 0.432 | 0.174 | 0.606 |
| Sparse Infill, Infill Density @ 30%, Purge Tower Last Swap, SMART Support with Model Material, Base Style Model Only | 71 | 0.432 | 0.16 | 0.592 |
Interestingly, when I attempted to recreate draft mode using the available options the print time started getting longer! The special sparse support in draft mode makes some of the support settings more useful. The fastest setting ended up using the default SMART support with changes to the infill and the purge tower.
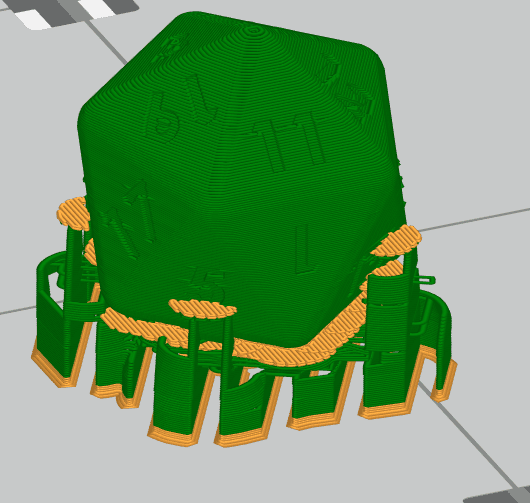
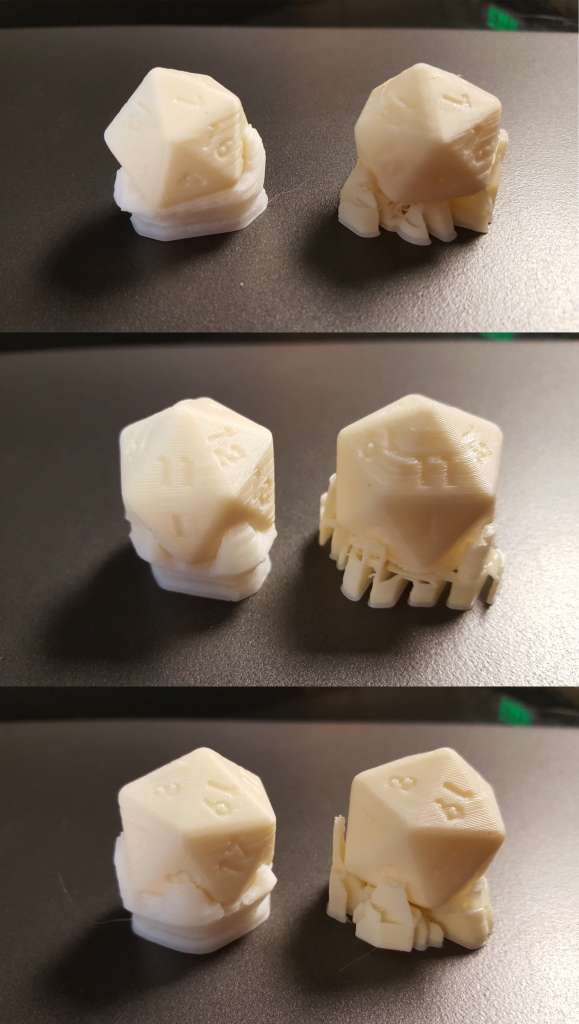
Below are pictures of two twenty-sided dice I printed as tests. The images at the bottom show a print job paused early on to showcase the difference in support structure. The purge tower on the draft mode print has some indications of moisture in the filament. This resulted in a rougher surface finish on the draft mode part. This wasn’t caused by printing in draft mode and therefore shouldn’t be considered when comparing the parts.
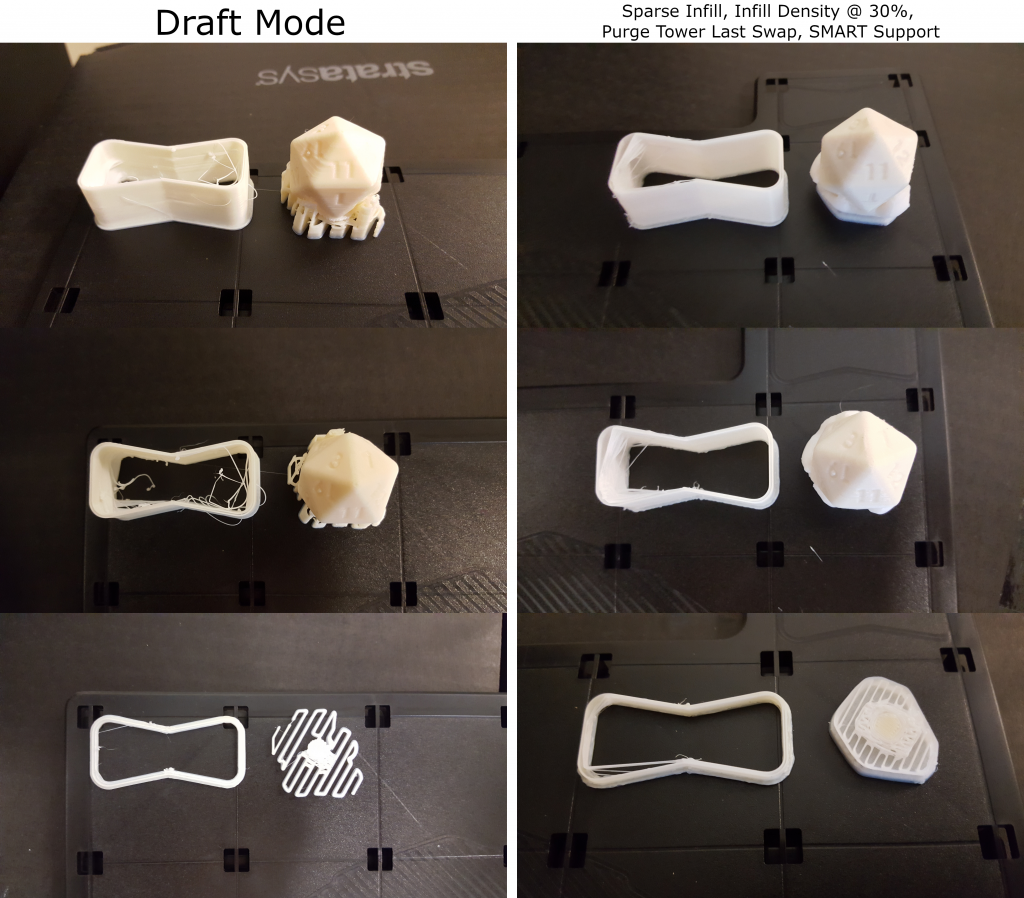
The comparisons below showcase the differences between the parts with supports still on (the draft mode part is on the right).
Can Draft Mode be made even faster?
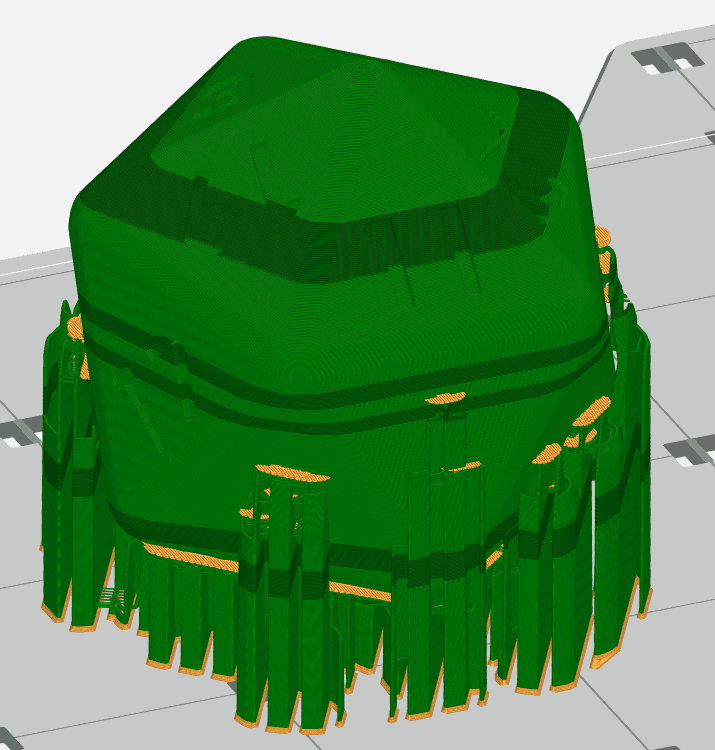
Another variable that can be used to further decrease build time is Adaptive Slice. This is a setting that increases the layer thickness of a part in areas without changing geometry, like vertical walls. This decreases print time and usually increases part strength, but increases material usage slightly. This setting isn’t changed when Draft Mode is selected, but can be selected. Note that Adaptive Slice can only be used when there is a single part on the tray.
To test the effect of adaptive slice, a larger twenty-sided dice was used for estimations. The regions of darker green are printed in 0.010in layers instead of 0.007in.
Below are the results:
Large D20, ASA Ivory @ 0.007in layers |
Hours |
Minutes |
Total Time |
Model |
Support |
Total Material |
| Draft mode, Adaptive Slice | 6 | 27 | 6.45 | 8.417 | 0.378 | 8.795 |
| Draft Mode | 6 | 46 | 6.77 | 8.351 | 0.37 | 8.721 |
| Default Settings | 13 | 29 | 13.48 | 18.506 | 2.416 | 20.922 |
| Sparse Infill | 11 | 45 | 11.75 | 11.327 | 2.416 | 13.743 |
| Sparse Infill, Infill density @ 30% | 11 | 16 | 11.27 | 9.744 | 2.416 | 12.16 |
| Sparse Infill, Infill density @ 30%, Purge Tower Last Swap, SMART Support | 11 | 6 | 11.10 | 9.64 | 2.416 | 12.056 |
| Sparse Infill, Infill density @ 30%, Purge Tower Last Swap, Sparse Support | 11 | 42 | 11.70 | 9.656 | 3.088 | 12.744 |
| Sparse Infill, Infill density @ 30%, Purge Tower Last Swap, Sparse Support, Model Material Supports | 12 | 26 | 12.43 | 11.665 | 1.518 | 13.183 |
| Sparse Infill, Infill density @ 30%, Purge Tower Last Swap, Sparse Support, Model Material Supports, Model Base | 12 | 26 | 12.43 | 11.673 | 1.458 | 13.131 |
| Sparse Infill, Infill density @ 30%, Purge Tower Last Swap, SMART Support, Model Material Supports | 11 | 40 | 11.67 | 10.533 | 1.96 | 12.493 |
| Sparse Infill, Infill density @ 30%, Purge Tower Last Swap, SMART Support, Model Material Supports, Model Base | 11 | 39 | 11.65 | 10.543 | 1.888 | 12.431 |
| Sparse Infill, Infill density @ 30%, Purge Tower Last Swap, SMART Support, Model Base | 11 | 4 | 11.07 | 9.64 | 2.359 | 11.999 |
| Sparse Infill, Infill density @ 30%, Purge Tower Last Swap, SMART Support, Model Base, Adaptive Slice | 11 | 9 | 11.15 | 9.64 | 2.411 | 12.051 |
Once again the fastest setting ended up using the default SMART support with changes to the infill and the purge tower. Using Adaptive Slice while in Draft Mode decreased the print time, but increased the material usage.
Conclusion
Draft Mode can make your printing faster and more efficient, but knowing when to use it is vital. Form and Fit tests where strength isn’t needed are a great scenario for Draft Mode. Other situations that require higher part strength should not be done in Draft Mode, although some of the other settings like Adaptive Slice and Purge tower last swap may still save you time.
(Blooper: Always remember to tighten your tripod!)

Computer Aided Technology exists so our customers can focus on what they do best. If you have questions about our products or want us to cover a specific topic in a future blog send an email to tipsandtricks@CATI.com.
Until next time,
Kelsey Gabel
Application Engineer, Manufacturing Solutions
Computer Aided Technology, Inc.