Stratasys 3D Printing: Monitor Your Stratasys 3D Printer
Monitor Your Stratasys 3D Printer
Have you ever wondered if your print job is printing or the build is complete? Wouldn’t it be nice to check on unexpected errors or ensure proper build start if you wanted a job to start at a specific time? Maybe you’re in another part of the building far from the printer or at another location at want to monitor the printer.
While any off-the shelf networked video camera will work, Stratasys has designed a camera mount for a Samsung WIFI camera, (model SNH-P6410BN), to work conveniently with any Stratasys FDM and Polyjet 3D printer with a flat viewing glass. Modifications can be made should you have a rounded viewing glass. Below you will find the easy step by step instructions. If you would like a copy of these instructions or stl files, please feel free to contact me via email.
PROCESS
STEP 1: Produce the camera mount. Any FDM material will work and the Polyjet DABS material is best for strength however and any opaque Vero material will work as long as you do not use Vero Clear.
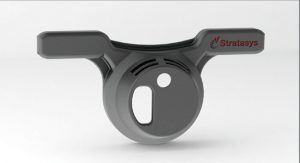
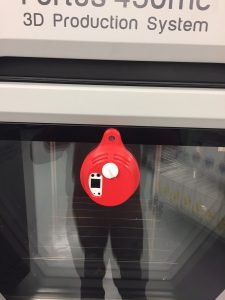
Camera mount for Fortus 250-360-380-400-450 and polyjet printers
STEP 2: Make a light shield for viewing window. This is used to prevent any glare from the room. A template will be provided for you to use to cut the opaque plastic sheet.
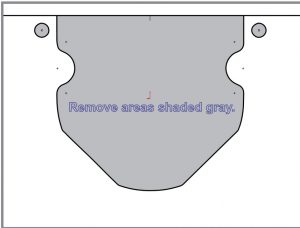
Light shield (note: not to scale)
STEP 3: Clean the bonding surface on the camera mount and printer, clean outer viewing glass on printer, remove adhesive strips from 3M Command strips or similar high strength mounting tape. Insert camera into camera mount. Attach camera to viewing window. Align horizontal wings on camera mount to black window trim or center camera mount to center of Polyjet printer window glass just below window trim blackout.
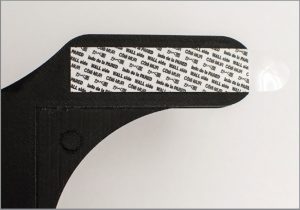
Adhesive strips
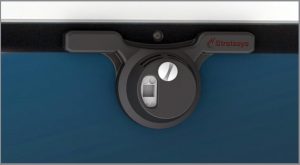
Alignment to window black trim
Camera mount for Fortus 380-450 using center mount screw
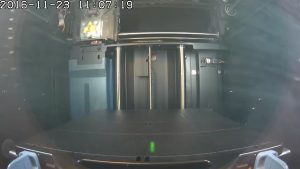
Inside view of our Fortus 250

Inside view of our Fortus 450
Derek Ellis
Application Engineer
Computer Aided Technology