Inserting Metal into a 3D Printed Part with SOLIDWORKS
3D Printing has transformed the manufacturing industry, allowing parts to be produced with unprecedented speed. FDM thermoplastics are durable and strong enough for most applications, and high performance materials expand those possibilities even further. Still, some designs require off-the-shelf or metal elements to do the job. But did you know that it’s possible to directly integrate these pieces into a 3D printed model? With a Stratasys production FDM printer and some tricks in Insight, it’s possible to build a 3D printed model around a metal insert.
This blog will demonstrate how I used Insight and a Stratasys Fortus 250 machine to create a simple knob on a bolt head.
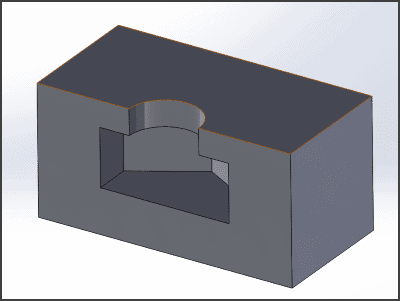
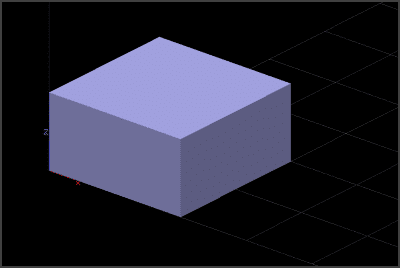
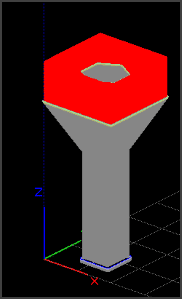
First I designed the knob. I used SOLIDWORKS 3D CAD to make a simple rectangular extrusion, but this could be done in Insight too, by drawing a curve (Edit>Draw) and copying it thru z (Edit>Copy curves through Z). Insight is the slicer for all Stratasys FDM production machines, and allows toolpaths to be manually drawn or edited.
I also had to design a pocket in the knob for the bolt – a bit oversized to account for any defects in the bolt. Again, this is easy in SOLIDWORKS, but Insight would have worked too. (Tip: Until you’ve got a feel for this process, 0.010in is a good safe clearance to start with.)
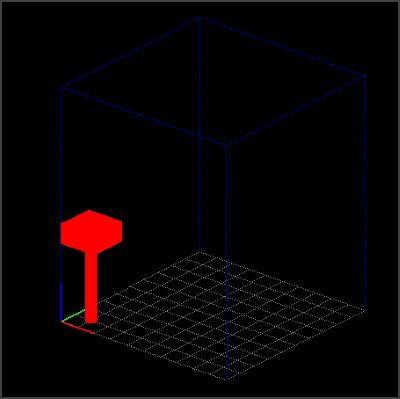
Once I designed my piece, I used Insight to arrange the part (STL>Rotate) and slice it. (I flipped it over because the bolt would otherwise stick up and make contact with the print head).
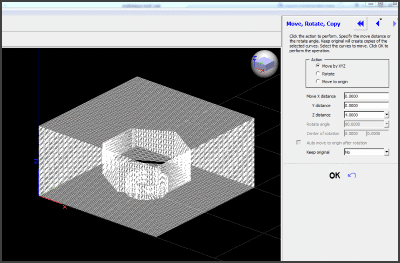
To allow for the length of the bolt, I moved (Edit>Move, copy, rotate) the slice curves 4” in z.
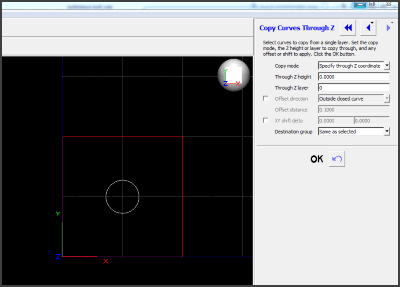
Before generating supports, we’ll create sort of a dummy bolt shaft to keep the supports from getting in the way. The circle at the bottom of the part is convenient; I’ll copy it through z to the bottom layer.
Now generate supports.
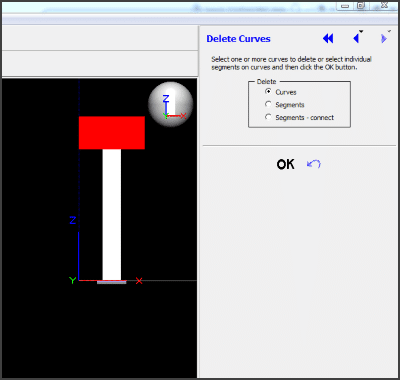
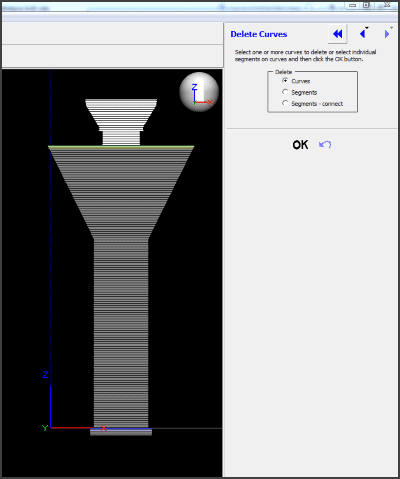
The model curves I created can now be deleted (Edit>Delete). Temporarily hiding (View>Hide curves) the support curves can make deleting the model curves easier. (Don’t forget to go back and unhide the support curves afterward).
Now we can see the empty channel for the bolt to slide into from above.
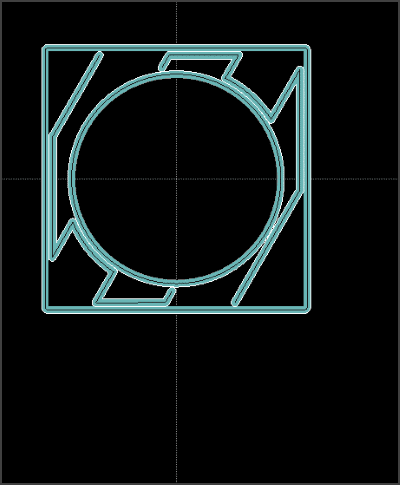
But there is still support material inside the part, where the bolt head needs to go. It will need to be deleted (the bolt will act as a support in that area). Again, this is made easier by hiding the model curves. Viewed from the side, the support curves in the model void are easily identified and deleted; then unhide the model curves.
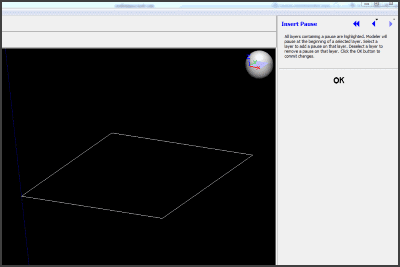
Now it’s time to insert the Pause (Toolpaths>Insert pause), which will do a couple of things: It will stop the machine when it is time to insert the bolt, and it will stop the machine before building the layer selected. In this case, we would want to select the first solid layer above the void for the bolt head; the machine will pause before starting this layer.
Now we need to generate toolpaths, send the job to Control Center (or GrabCAD Print), and start the print. Once the machine reaches the Pause, we’ll drop in the bolt (ensure the bolt is not protruding above the model to avoid risk of making contact with the head), and resume the build. (Tip: Add silicone spray to the insert to help the filament stick, and improve the quality of the next few layers.)
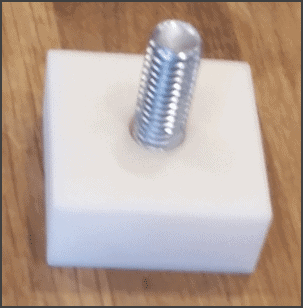
Once the part is complete, the support material beneath the part can be removed, revealing the finished product.
I hope you found this tip helpful, for more tips and tricks check out the related articles below. Want to learn more advanced Insight skills? Check out our training page.
Need help? CATI is here to support you with your hardware questions.
We have multiple ways you can connect with us. Visit our support page to find out how.