Using GrabCAD Print to Make a Multi-Colored Nameplate
This is the second part in a two part blog series, where in the first post I designed a simple nameplate using SOLIDWORKS. In this blog post, I’ll prepare the model for printing using GrabCAD Print, the latest 3D Print-Preparation (aka “slicing”) software from Stratasys, and print the model on a Stratasys F370 3D printer.
One of the design goals outlined in the last article is that the nameplate be attractive and easy to read. I’m happy with the overall design of the part, but I’d like it to have plenty of contrast to make the text easy to read. I can do that by printing the part in two colors. With Fused Deposition Modeling (FDM) technology, a color change requires a material change. So I’ll start the print with one color, pause the build at a certain layer and switch materials, then resume the print to complete the part with the second color. I’ll need to keep this in mind while orienting the part. Let’s get started.
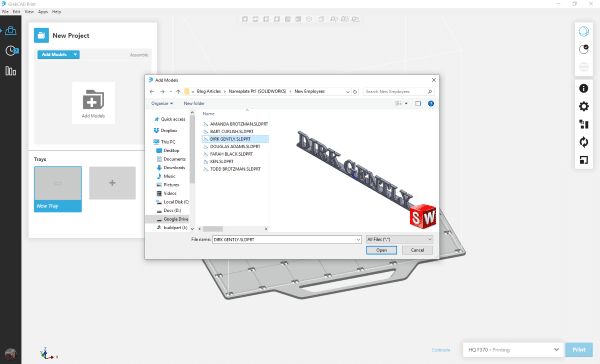
GrabCAD Print can handle nearly any file format (not just STL files), so I can just add the native SOLIDWORKS file directly.
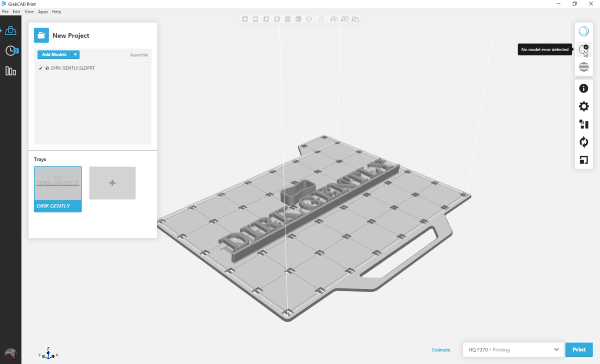
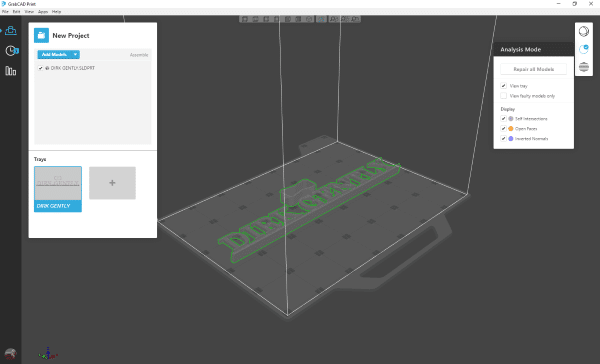
By default GrabCAD Print automatically scans models for errors. I can see that this model is error free, and confirm that in Analysis Mode (where any errors could be automatically fixed).
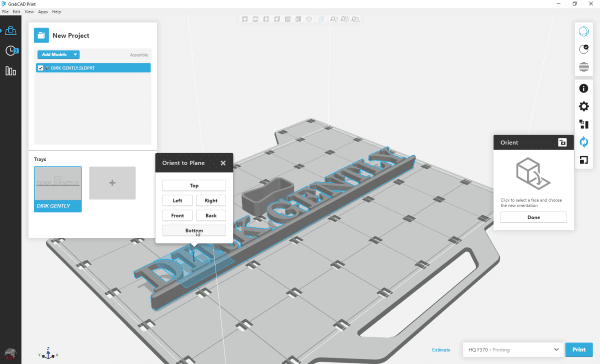
Now let’s consider the orientation of the part. This orientation works for my color-change plans, but there’s quite a large overhang under the text, which would require a lot of support material.
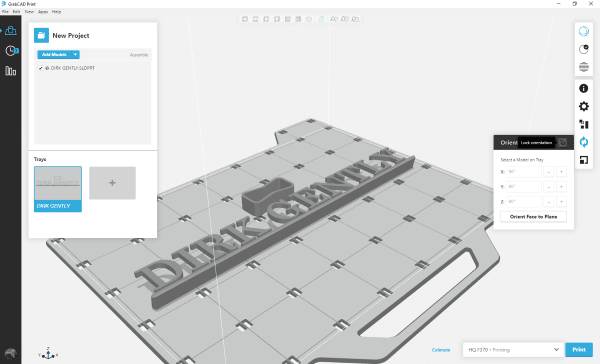
To build this part fast and cheap as intended, I’ll need to minimize support material. I’ll orient the text face toward the bottom instead.
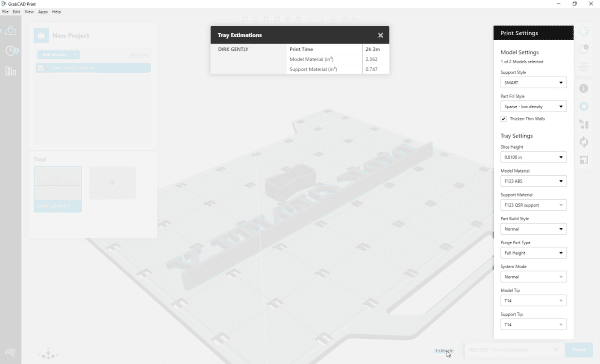
Using the default options for the F370 building ABS, this build is expected to take a couple hours and use just over 3 cubic inches of material.
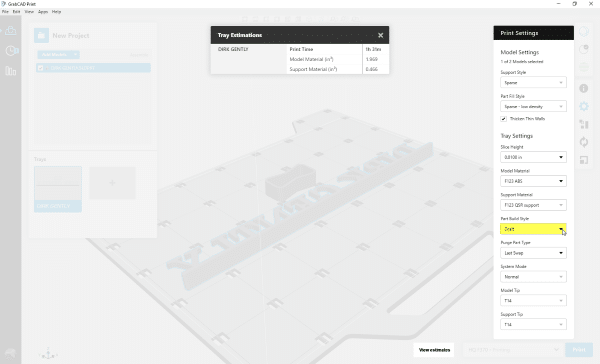
I should note here that the other part on the build tray is the purge tower; a sacrificial part that helps ensure good part quality by priming the nozzle before each layer. This priming is especially important on layers with both model and support material, but that won’t be of much concern with this part, since there aren’t any overhangs requiring support. Switching the build mode to “Draft” reduces the purge tower height, increases the self-supporting overhang angle, and reduces the thickness of the raft underneath the part. These changes might affect the build quality slightly, but probably not enough to notice in this part. But they shave 25% off the build time and uses 15% less material; sounds good to me!
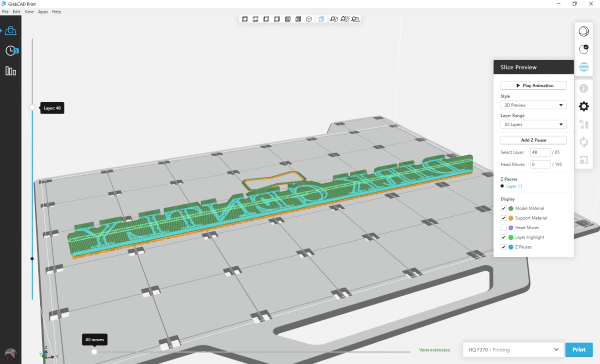
The last step before printing this part is to define the location of the color change with a Z Pause. As of version 1.11.17, the Slice Preview mode now includes that option.
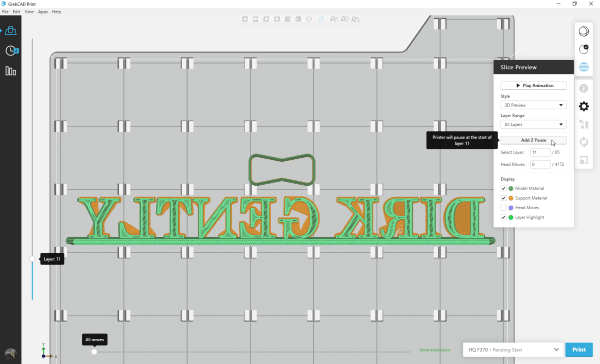
(Note: Pauses are highlighted in blue in the preview.)
Some of you may know that this particular nameplate belongs to the title character of a certain novel. If you’d like to proudly showcase this on your desk in the color(s) of your choice, send the name of that book’s SEQUEL along with your blog topic suggestion. I look forward to hearing from you.
Related Articles
Design a Custom 3D Printed Nameplate using SOLIDWORKS
How to Manage Part Curl in your FDM Parts
How Important is Orientation to your 3D Model?
Don’t forget to subscribe
About the Author
 Dan Erickson is a student of life. With a BS in Mechanical Engineering Technology from Michigan Tech University and a penchant for tinkering, he is driven to understand how the world works and improve wherever possible. After several career iterations, Dan came to Fisher Unitech in 2011 as a SOLIDWORKS Support Engineer. He has since followed his passion for transformative technology to the 3D Printing department, supporting the Sales and Marketing teams as 3DP Application Engineer.