Custom Render Mode in Composer
If you are a user of SOLIDWORKS Composer, you know it is great at allowing us to focus the attention to a specific piece of geometry to tell our story. The many tools to control geometry color, transparency, position, camera orientation, and various types of annotations give us tons of flexibility. All this great functionality is covered in detail in our SOLIDWORKS Composer training. Even with training, some of the subtle options are easy to miss.
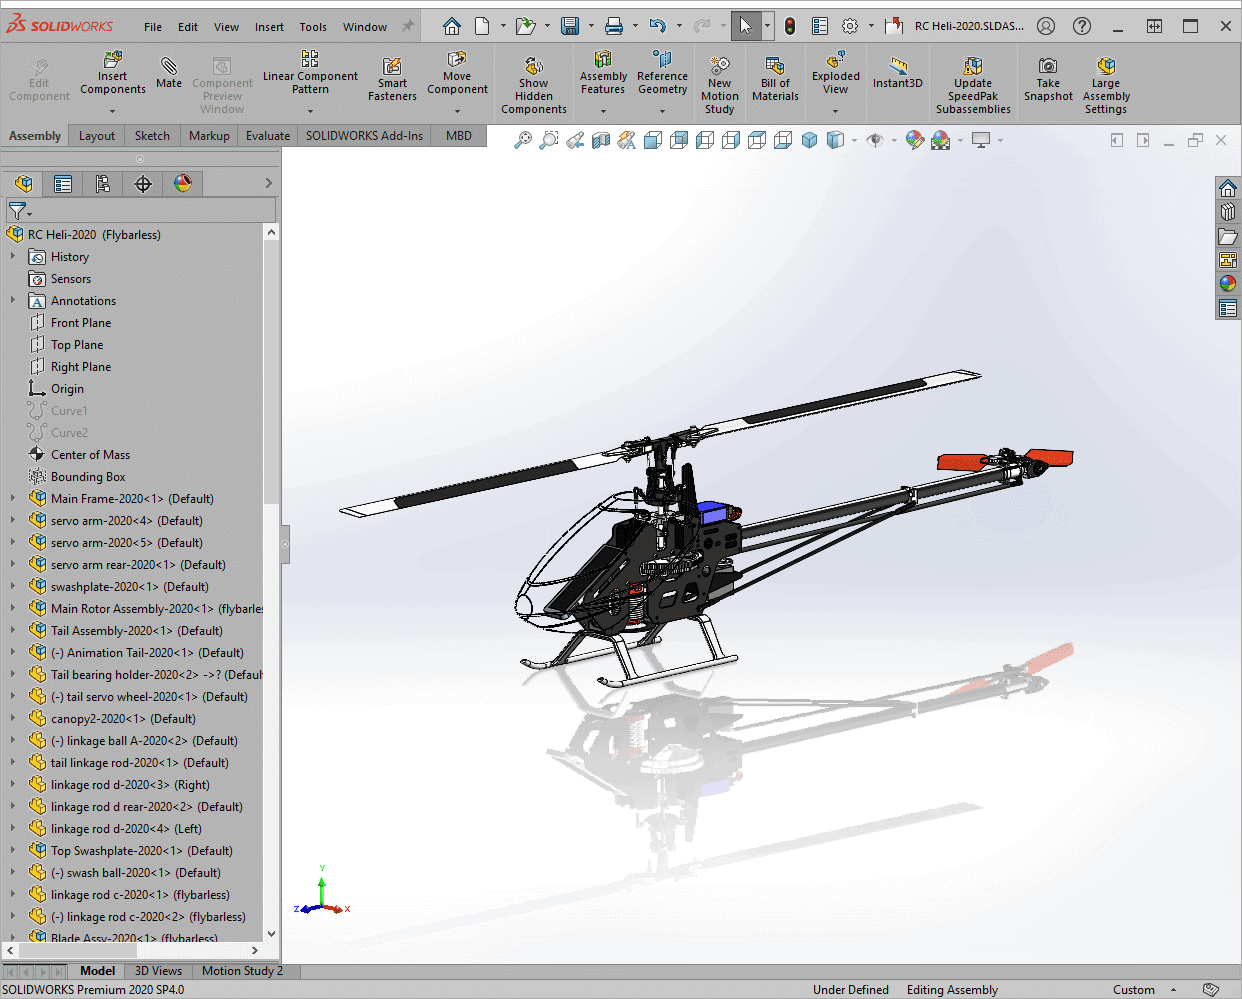
The image below is from SOLIDWORKS where a majority of the model is shaded, yet the canopy is shown in hidden lives removed. Easy to do in SOLIDWORKS by using the Display Pane and saving the result in a Display State. Here’s is a blog post by Courtney Roemer that breaks down the Display Pane.
How do we achieve this type of result in SOLIDWORKS Composer and mix the rendering modes? The answer is to use Custom Rendering.
The first step is to create a New View so we do not accidentally modify one of our other views.
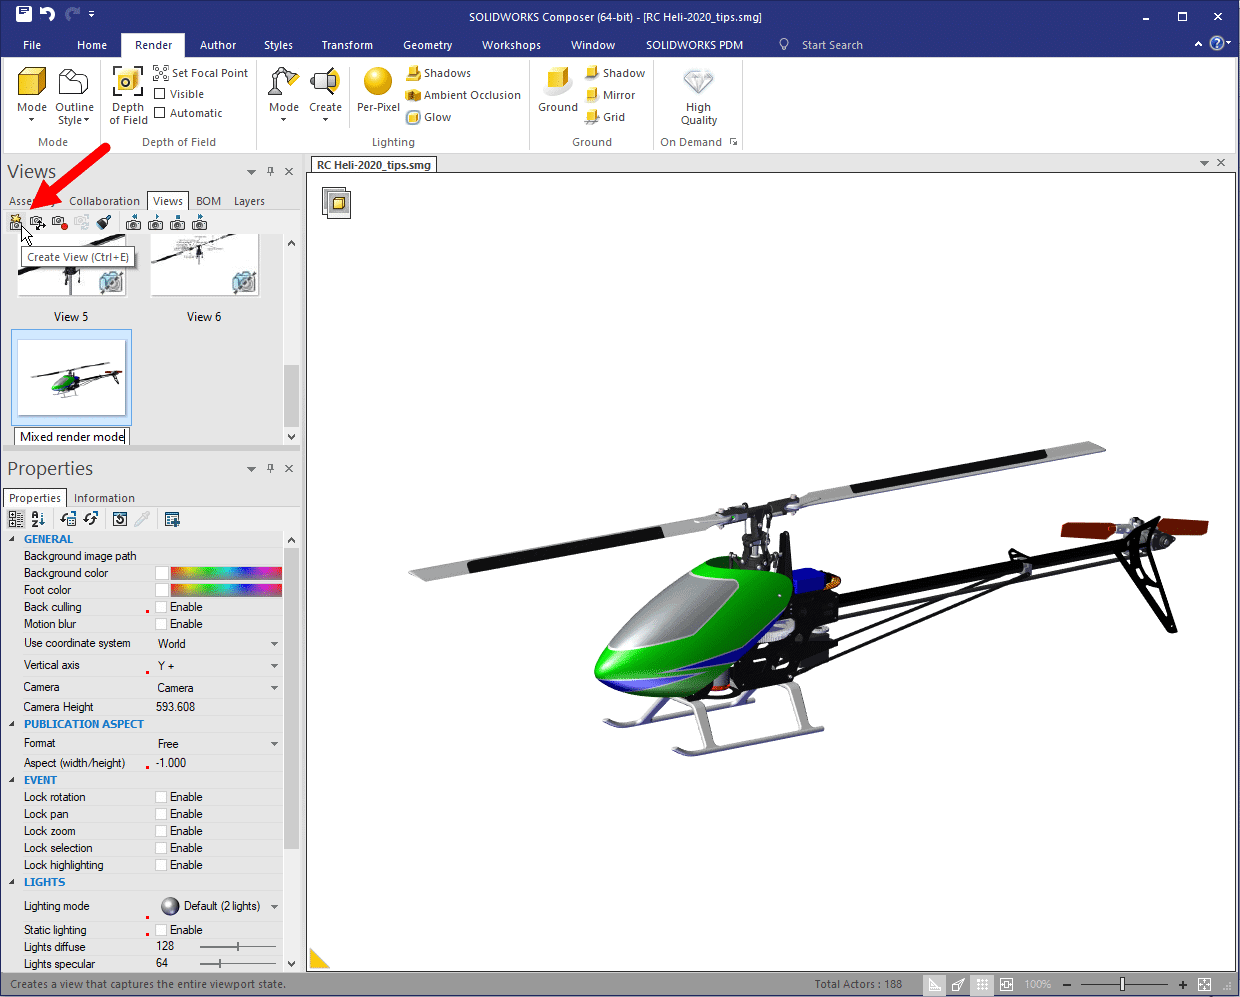
Next, set the Render mode to Custom on the Render tab of the Ribbon. In doing so, the render mode will automatically change to Smooth, regardless of the previous setting. Watch out for this.

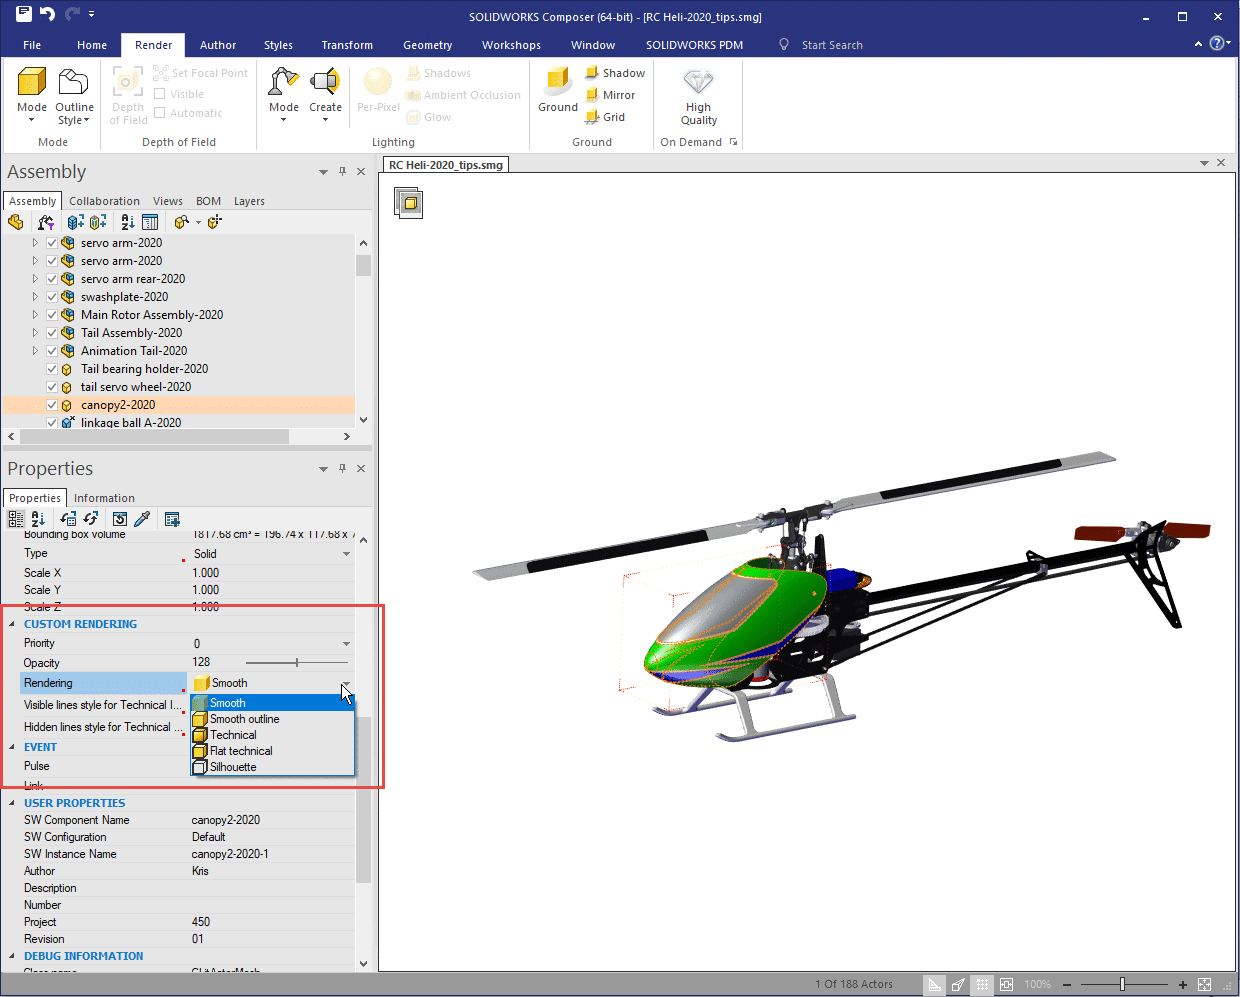
Finally, select the desired geometry actor and change the “local” rendering mode in the Custom Rendering area of the Properties Pane. If you are thinking, “I’ve never seen those settings before?” That is because they only show when Custom is selected for the Mode on the Render tab.. To change the mode for all geometry actors, select the assembly name (which selects all geometry actors) and change the Custom Rendering mode. Don’t forget to save or update your view!
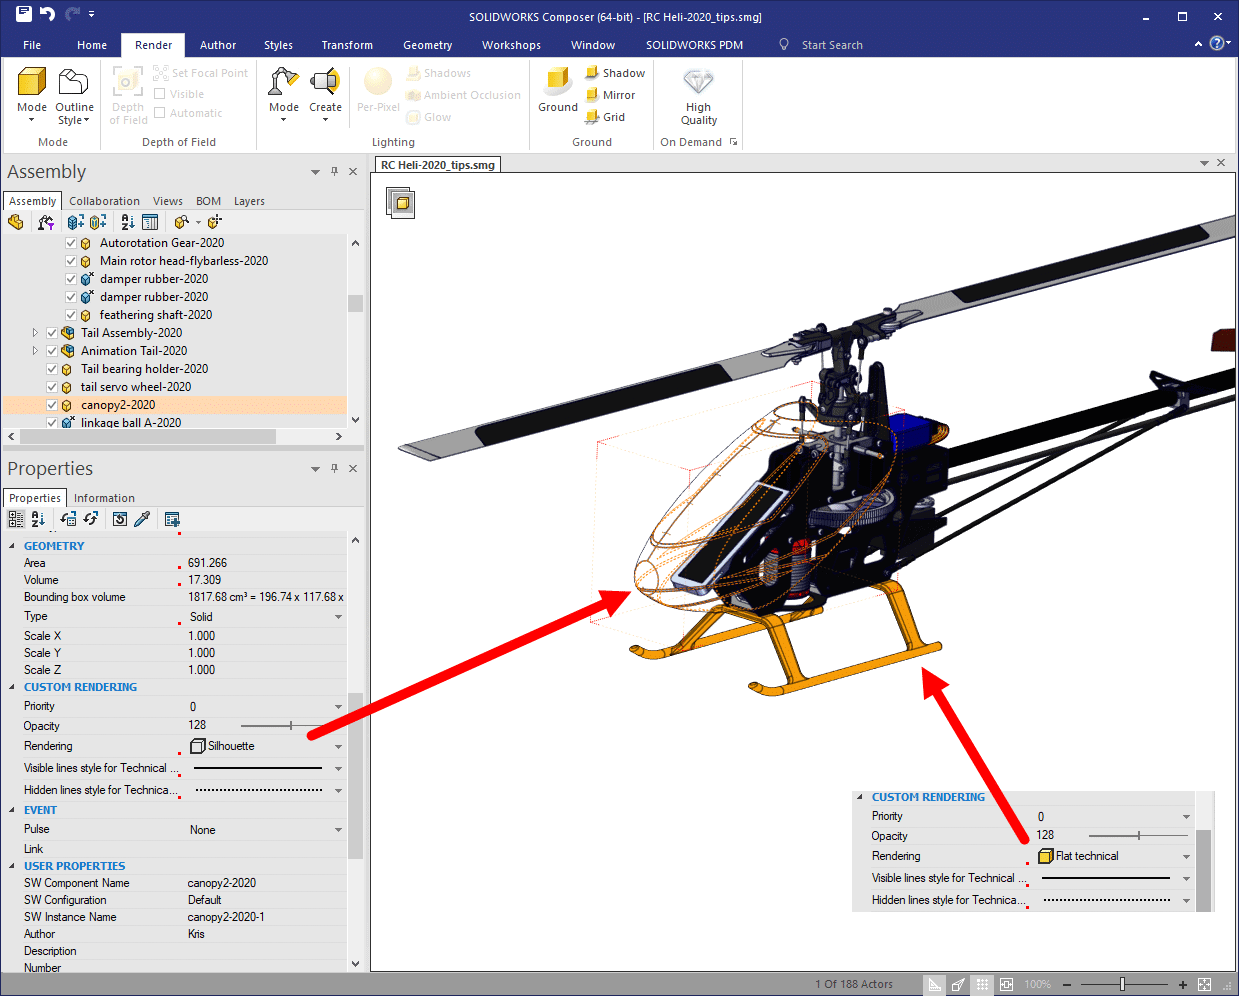
Here you can see the result that is similar to the Display State screen from SOLIDWORKS. I set the canopy to Silhouette and the landing skids to Flat Technical.
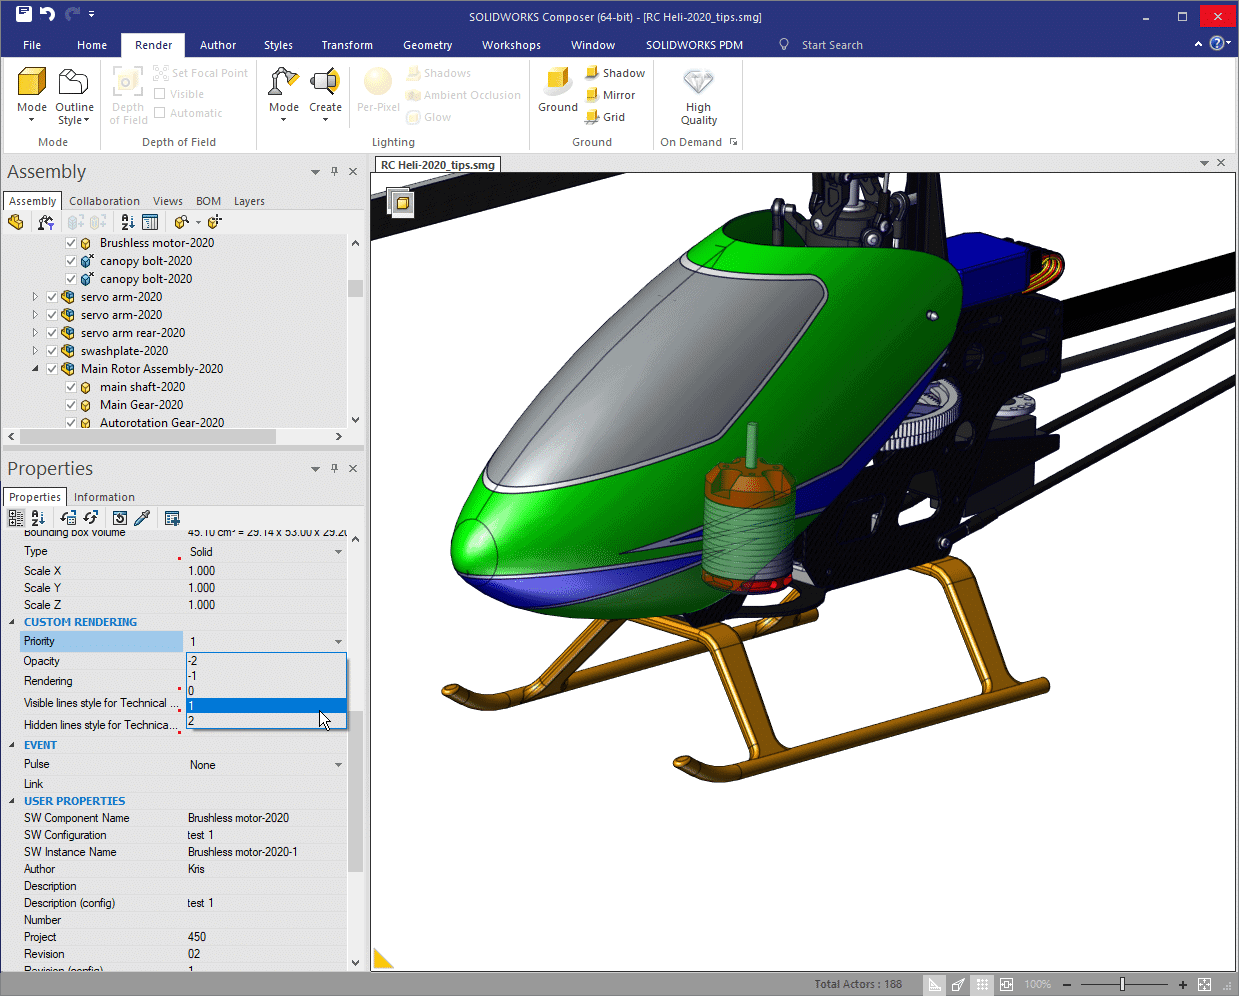
Another Custom Rendering function is the Priority, which promotes or demotes the rendering level of a selected geometry actor. Geometry Actors with higher priority values are rendered above those with lower values. Below, I have set the brushless motor’s Priority to 1, while all other geometry actors are at 0. The motor is clearly visible though the canopy. Likely not the desired effect buy you can see how the setting changes the dislpay.
There are a few other Custom Rendering properties I’ve not covered, take a look at them and experiment to see what they can do for you. Using these Custom Rendering properties on desired geometry actors can really help you focus the attention on exactly what you need.
Thanks for reading!
Kris Dubuque
Managing Application Engineer
Computer Aided Technology, Inc.