Animating Flexible Components in SOLIDWORKS Visualize Professional
Have you ever needed to animate flexible or deformable components like wires, springs, or hoses? SOLIDWORKS has this ability built-in with a feature that allows you to define flexibility in components. However, the only way to render these flexible components is to use Photoview360. Since Photoview is integrated into the CAD environment, when the model is rebuilt and changed as each frame progresses, Photoview simply uses this new geometry in each new frame.
Export your animation to Visualize Professional and sadly you would realize that the flexibility of those components was not working, this is because Visualize cannot rebuild the model in between each frame. What if I told you there IS a way to get a similar result? While this is not an EASY task, it is possible to do with a bit of configuration magic, parametric modeling, and Visualize keyframes.
Essentially, the goal is to create the work of CAD rebuilds, AHEAD of time, for each frame. This means I need to create a new model or configuration for each frame where the part is moving and changing shape. Once those models have been created, they all need to be in the assembly and connected to any component that will be driving their motion in the frame. Then, I can import the assembly to Visualize where I’ll control the on/off state of each size with a keyframe at a specific point in time. Sound difficult? Let’s look at a real example…
How to Animate Flexible Components
Want to follow along? Download this model provided by luis00k from GrabCAD.
Decide on Timing
First, I want this animation to be quick, showing the compression of the spring, and the pre-load collar function. The spring and piston will compress in one second, pause for 0.5 seconds, then un-load in one second. I don’t want to make more spring lengths than necessary, so for the pre-load function, I will re-use the same sizes, but halve the distance and timeframe, still pausing for 0.5 seconds in-between loading and unloading.
Decide on Movement
Next, I need to determine how far I want the piston to compress. The spring has 10 coils, and the wire diameter is 9mm, which makes the stack height 90mm. The uncompressed height of the spring is 160mm, so over 1 second of animation, the spring should compress 70mm. However, if I use this value, the sweep will fail at the stack height because of intersecting geometry, so I will make this value a bit smaller, about 66mm.
Creating Multiple Sizes
Now that I know distance and animation time, I will need to divide the distance up over multiple frames in the animation. My video will run at 30 frames per second (FPS), so 66mm / 30fps = 2.2mm of height change per frame. Configurations and excel will make this easy, however, I will need to make a model that’s parametric, with finished ends, and a center section that will vary. I can use sweeps and surfaces to create a helical intersection path, then vary the height with a design table.


Add ALL the springs
Now that I’ve laid out all my sizes, I’ll add them all to the assembly using a pattern. Unfortunately, a pattern can’t set the distance to zero; I only need to place the spring multiple times, but I want to speed up the process. SOLIDWORKS wants a linear distance larger than 0.0001mm, so 0.00011mm will have to be sufficient. I shouldn’t be able to discern this tiny movement in the final animation anyway. Total instances will be 31 (+1 for the final spring height). Once I’ve made the the pattern, I can set a unique configuration for each instance in the pattern.

Each instance has been changed to a unique configuration. Part of animating flexible components in Visualize Professional is that we have to show each position of the spring in the model.

Create an Animation in SOLIDWORKS and Send it to Visualize
To simplify the motion and keyframing I need to do in Visualize, I’ll start with some simple animation in SOLIDWORKS. I can easily do this with the mate controller and some distance mates on the piston and pre-load collar. Additionally, I can set up new positions and create a simple timeline of events.

Position 1 – Spring un-loaded

Position 2 – Spring fully compressed

Position 6 – Pre-Load Collar fully compressed
Now that this is done, I can send the animation to the motion timeline and export it to Visualize.


Calculated Motion Study and export
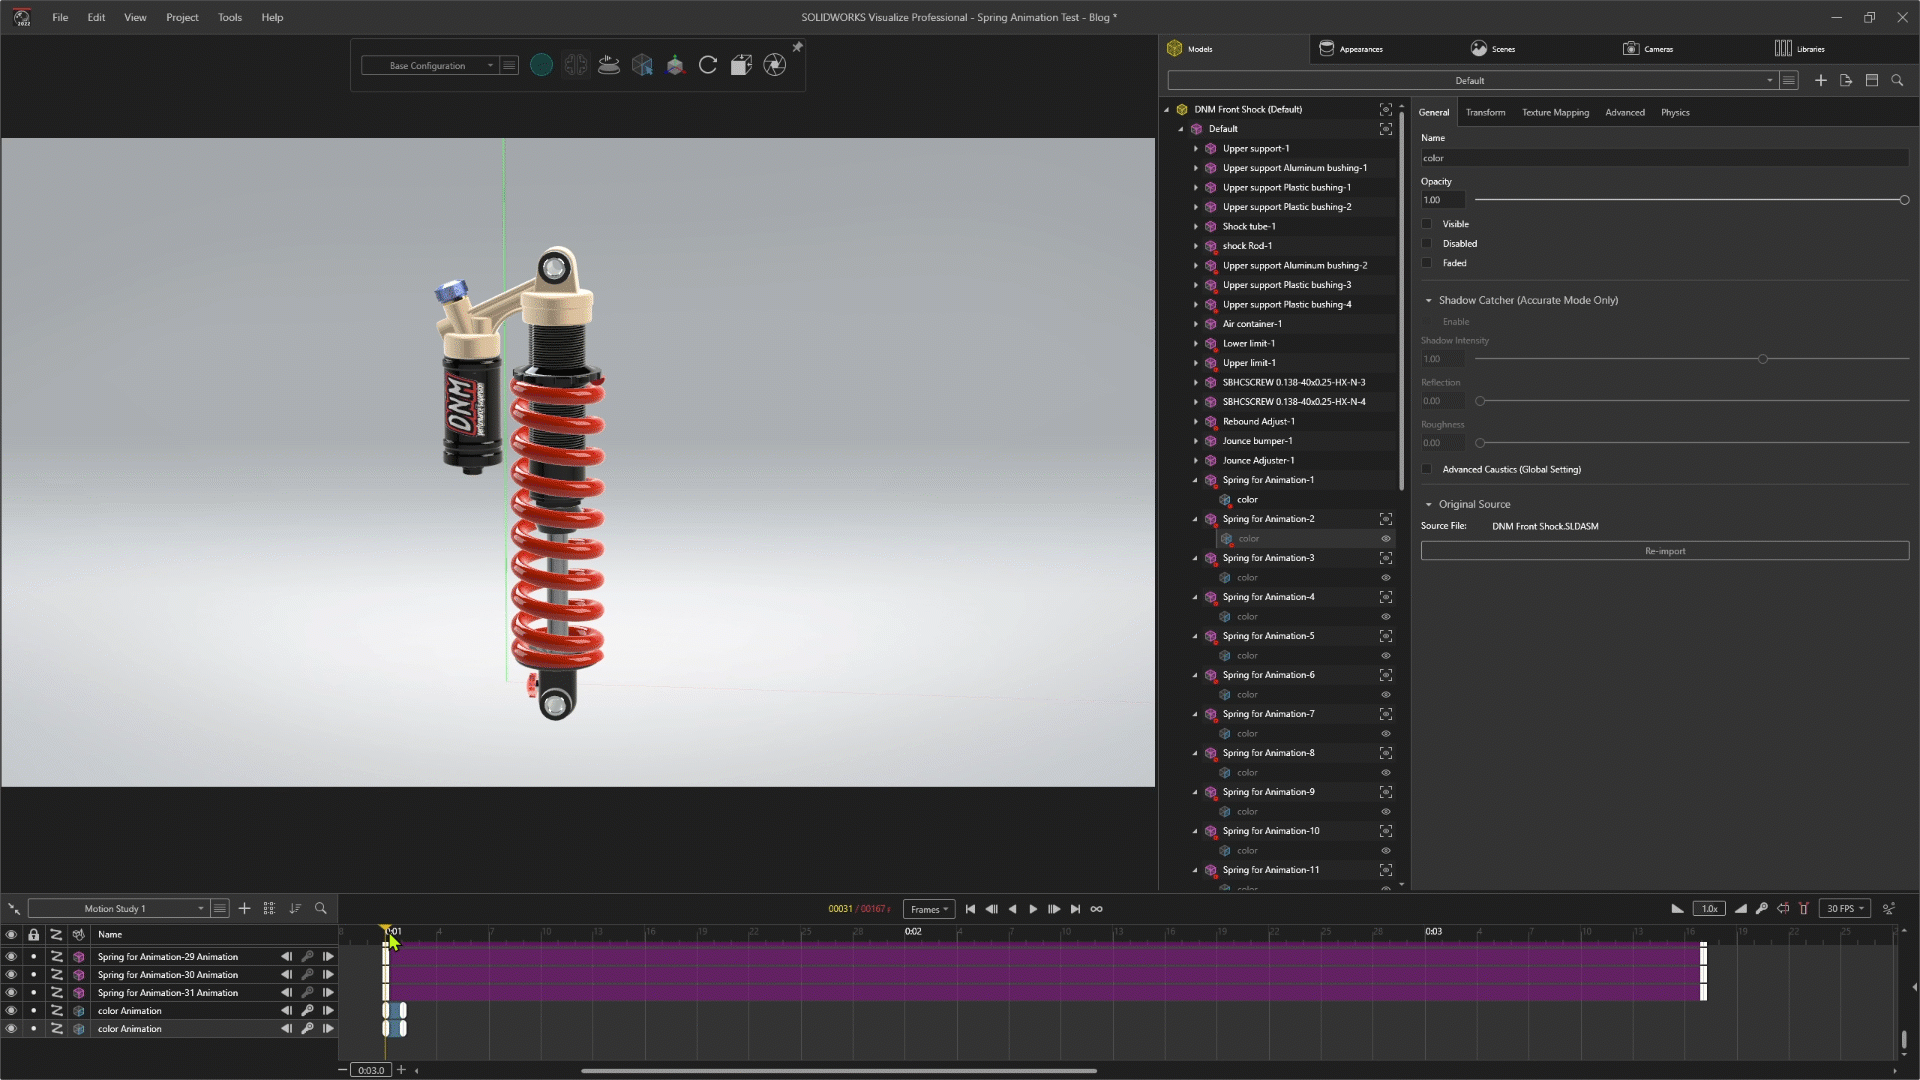
Visualize Professional Keyframes
I’ve imported my animation, and I can see every spring. The first thing to do is hide all springs except for the full uncompressed version. IMPORTANT NOTE: I must hide the PART, not the GROUP when hiding each spring. This is because the imported motion is connected to the GROUP. Adding keyframes to the PARTS will allow me to make changes to the animation without affecting the original imported Motion Study. 
Now I can move the play head to the 1-second mark; this is where the piston and spring start to move. On this frame, I will place a keyframe (hotkey – K) for the full spring PART and next size spring PART. Remember to not assign this keyframe to the group. 
In the next frame, I can see that the piston and full spring is moving. Here, I’ll hide the full spring, and show the next size. This creates a sequential keyframe for each part and when I move the play head between the two frames, the spring appears to compress.
I’ll continue to do this for the next 30 springs. Once the piston stops moving, I can scrub ahead by 0.5 seconds and reverse the process to show the spring uncompressing. There is another section where the pre-load collar compresses the spring. Here, I can follow the same method and create keyframes for the springs to show it compressing. This last section is only half as long.
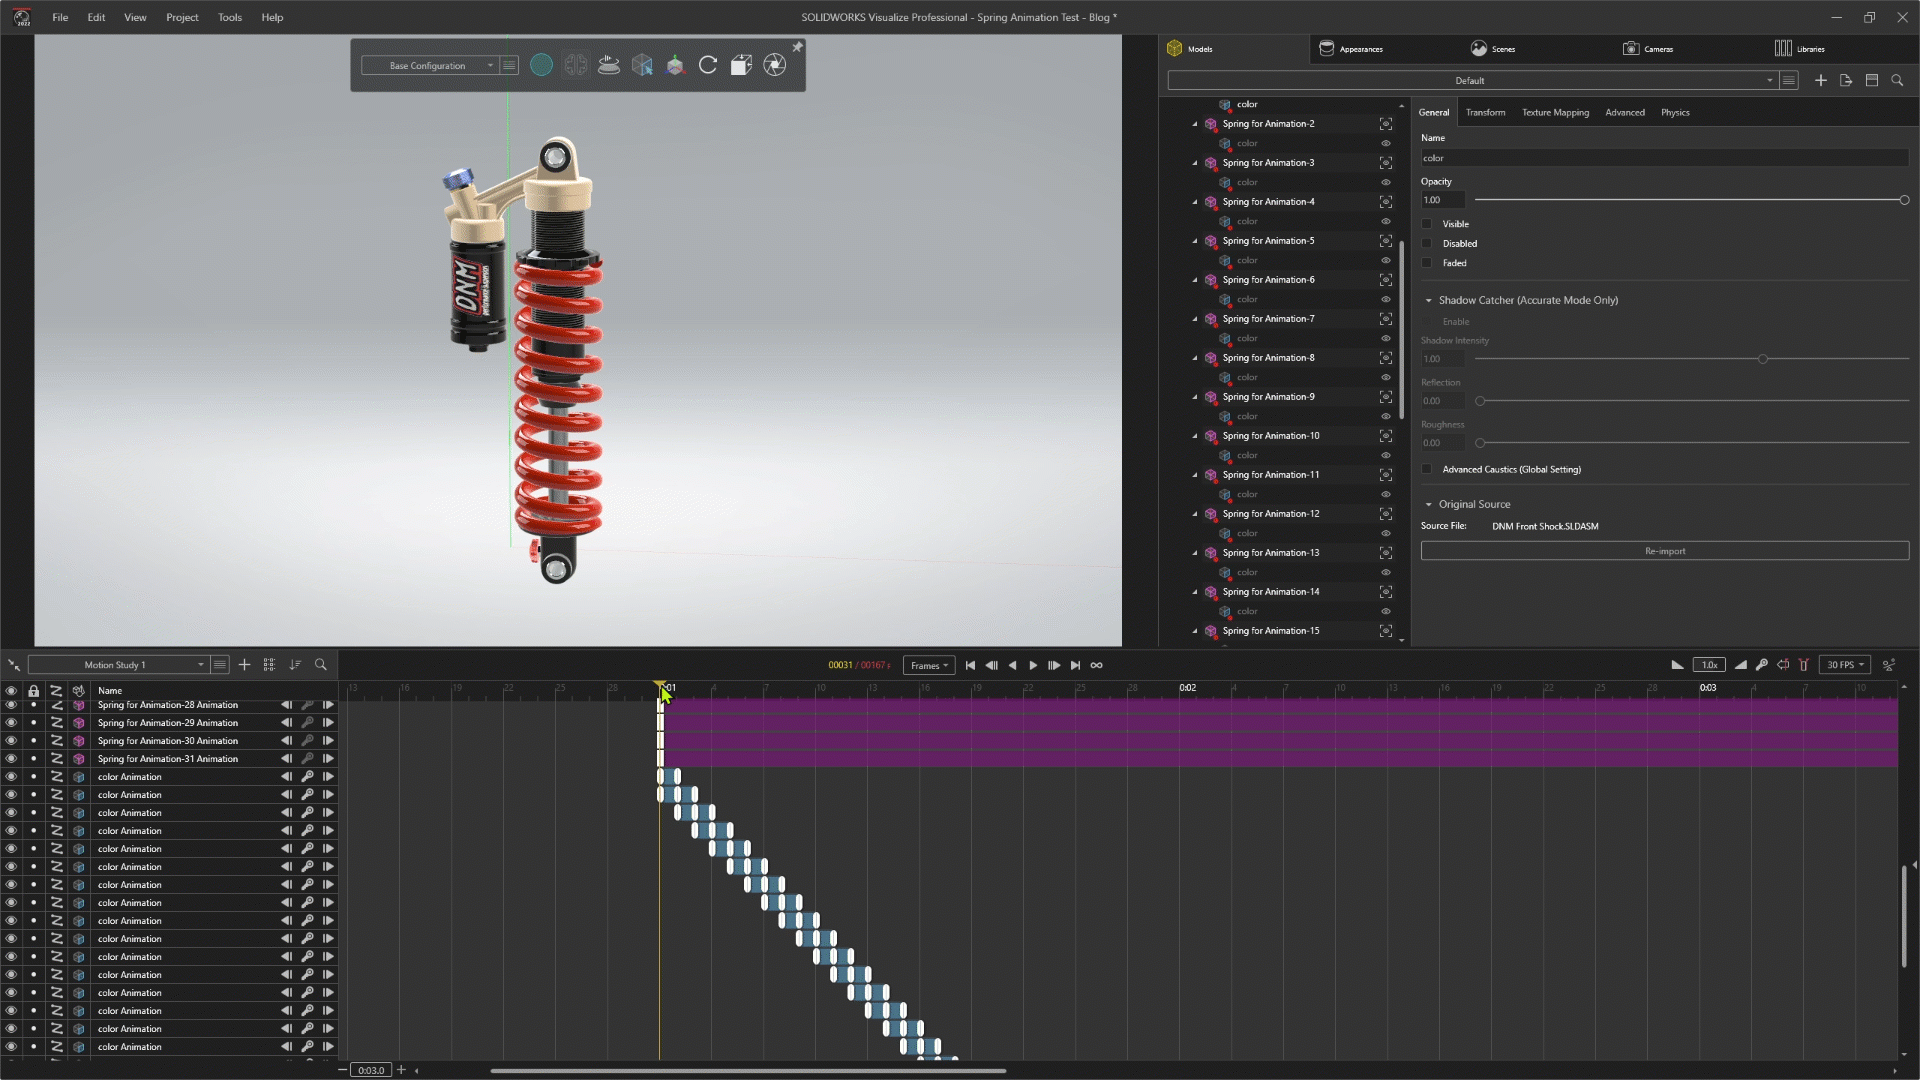
Here we have the finished timeline. 
Lastly, for the spring pre-load collar (upper limit-1), I need a rotation animation. I have to add this twice, one each at the 4-second and 5-second mark for 1 second. To do this, I’ll add the part to a second group, this way the new group, and the part will each get their own rotation; one forward, the other backward.


Export Final Animation
Now that I’ve done the hard manual work, I can let the computer render all the frames and create an animation.


Note that motion blur should not be used with this method since the spring is not actually compressing; the results will look strange. However, you can post-process motion blur with an editing application like Davinci Resolve, or Adobe Premier.
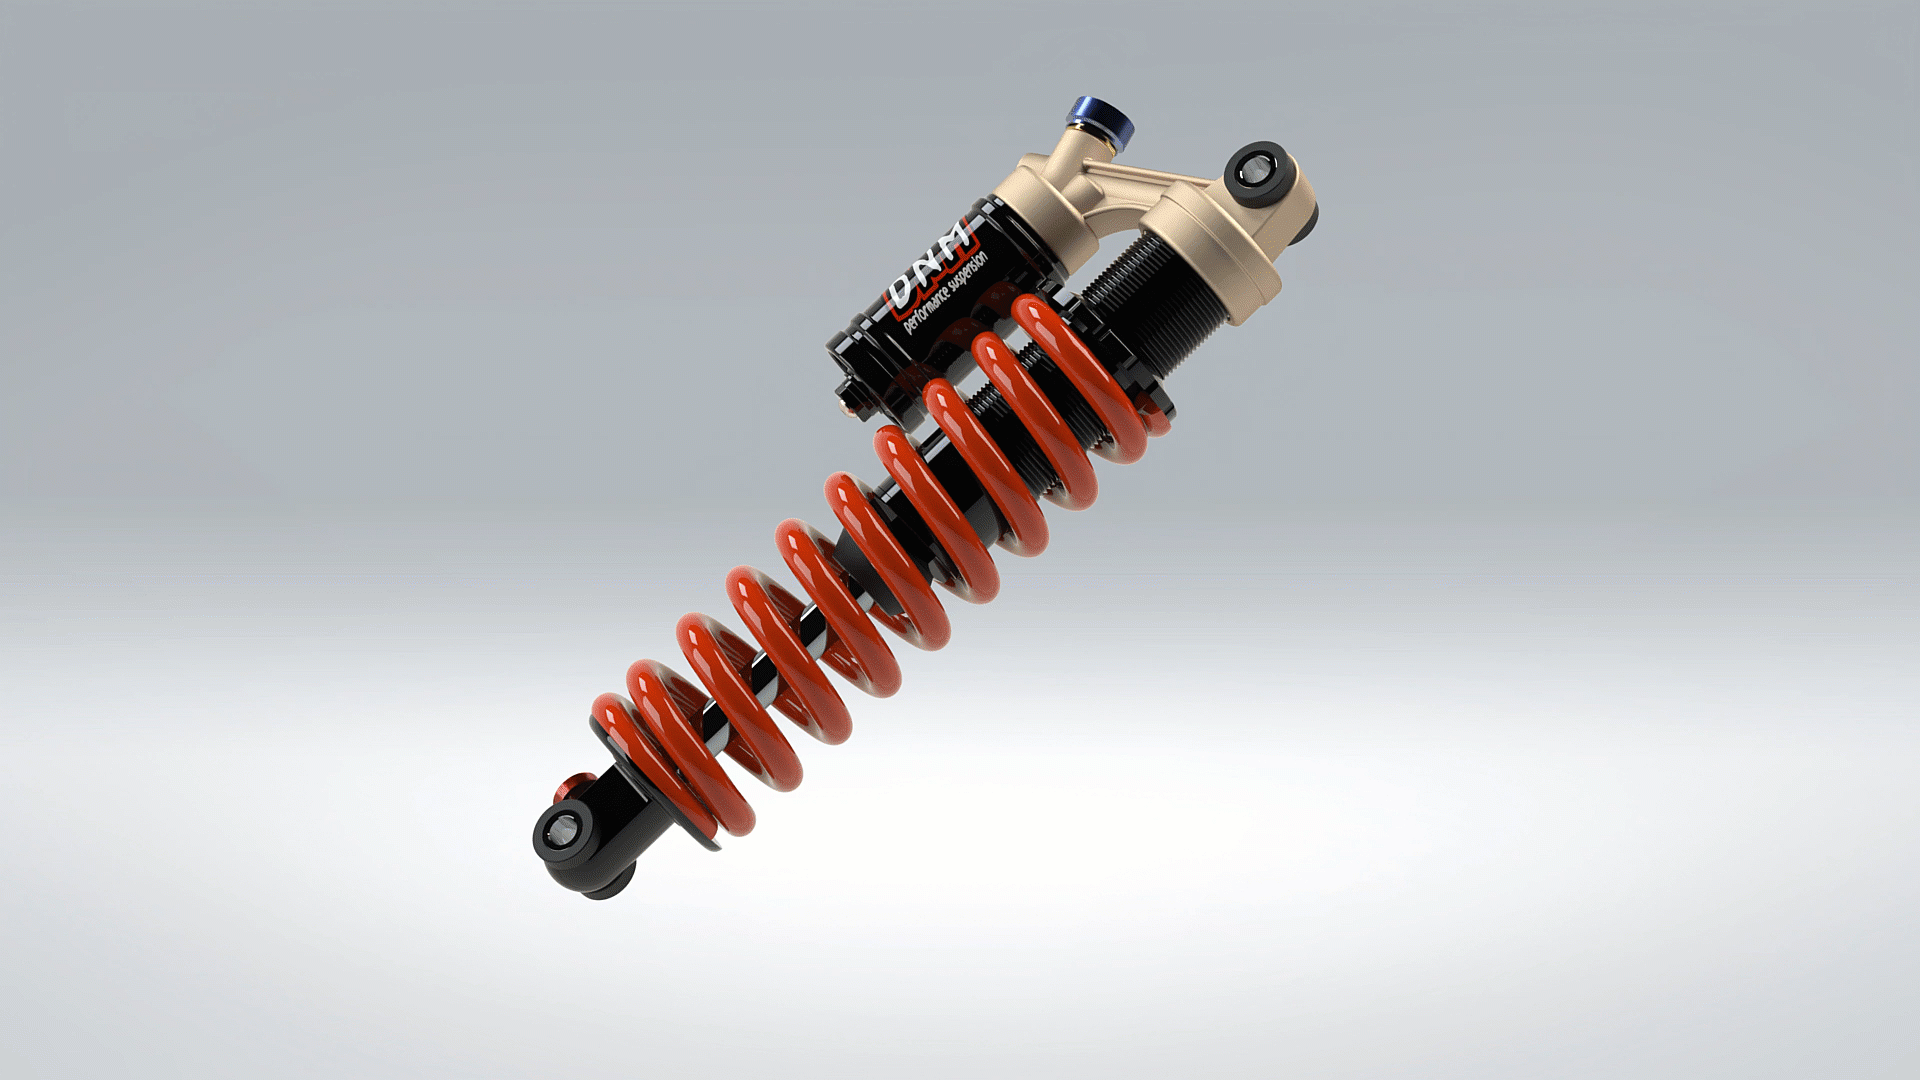
View the 4K animation, with and without motion blur.
I hope you find this tip useful for your next project when you need to animate flexible components to show some flexibility in your assembly, and you want to use Visualize to render your project.
Happy Rendering,
Alex Worsfold – CSWE
Computer Aided Technology