Tips for Creating Consistent SOLIDWORKS Composer Projects
I’d like to discuss a few tips for creating a SOLIDWORKS Composer project with a consistent look and feel. What do I mean by that? How about views having the exact same camera position, or setting standard colors and sizes for annotations? If you need company standards in your technical documentation keep reading. SOLIDWORKS Composer is the perfect tool for quickly tying your complex models to detailed technical documents.
Camera Views
My first tip for creating a Composer project is all about the camera views. SOLIDWORKS Composer lets you capture views with a single button click and captures everything in the viewport. This includes camera orientation, model colors and exploded positions, annotations, etc. A by-product of this easy view creation is the camera position is (almost) always in a different position view to view.
A Camera View only captures the properties of the Camera, orientation and zoom, nothing else. So, set the camera exactly as needed and create the Camera View.
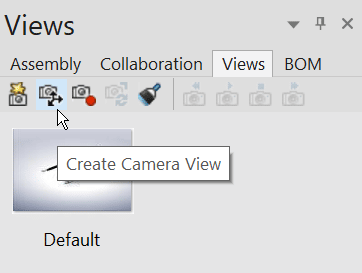
Once created, apply them to any existing view (double-click or drag into the graphics window) and you’ll notice the camera orientation update instantly. Update the view and move on to the next. Each of them will now have the same camera orientation and zoom level.
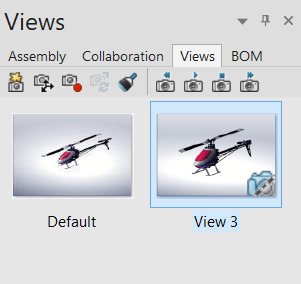
Note: Camera views will have a small camera icon in the lower right corner. Older versions of Composer have dark shading in the lower right corner for Camera Views, not the camera icon seen above.
Custom Views
A Camera View is a type of Custom View as they only capture as subset of all possible properties. Custom Views also allow capturing specific geometry actor (parts and assemblies) properties such as their position. A “position” custom view can simulate the motion of a part or replicate the exploded locations from one view to the next. Check out another one of my blog posts for more information on Custom Views.
Styles
Styles allow saving the properties of any actor (annotations) to control its appearance. For example, the size, color, outline thickness, and transparency of arrows. Once saved to a Style, those properties can modify the appearance of existing or new actors.
You can subscribe actors to a style. In my opinion, this is one of the most overlooked features of Styles. So with that in mind, subscribing actors to a Style is my second tip for creating a composer project. Then when a style changes, any subscribed actors automatically inherit that change. This is very useful for large changes; all text labels need to be switched to 12pt. Arial font.
Use the Styles Workshop Pane to create one. Go ahead and select an actor, an arrow annotation, and create a New Style.
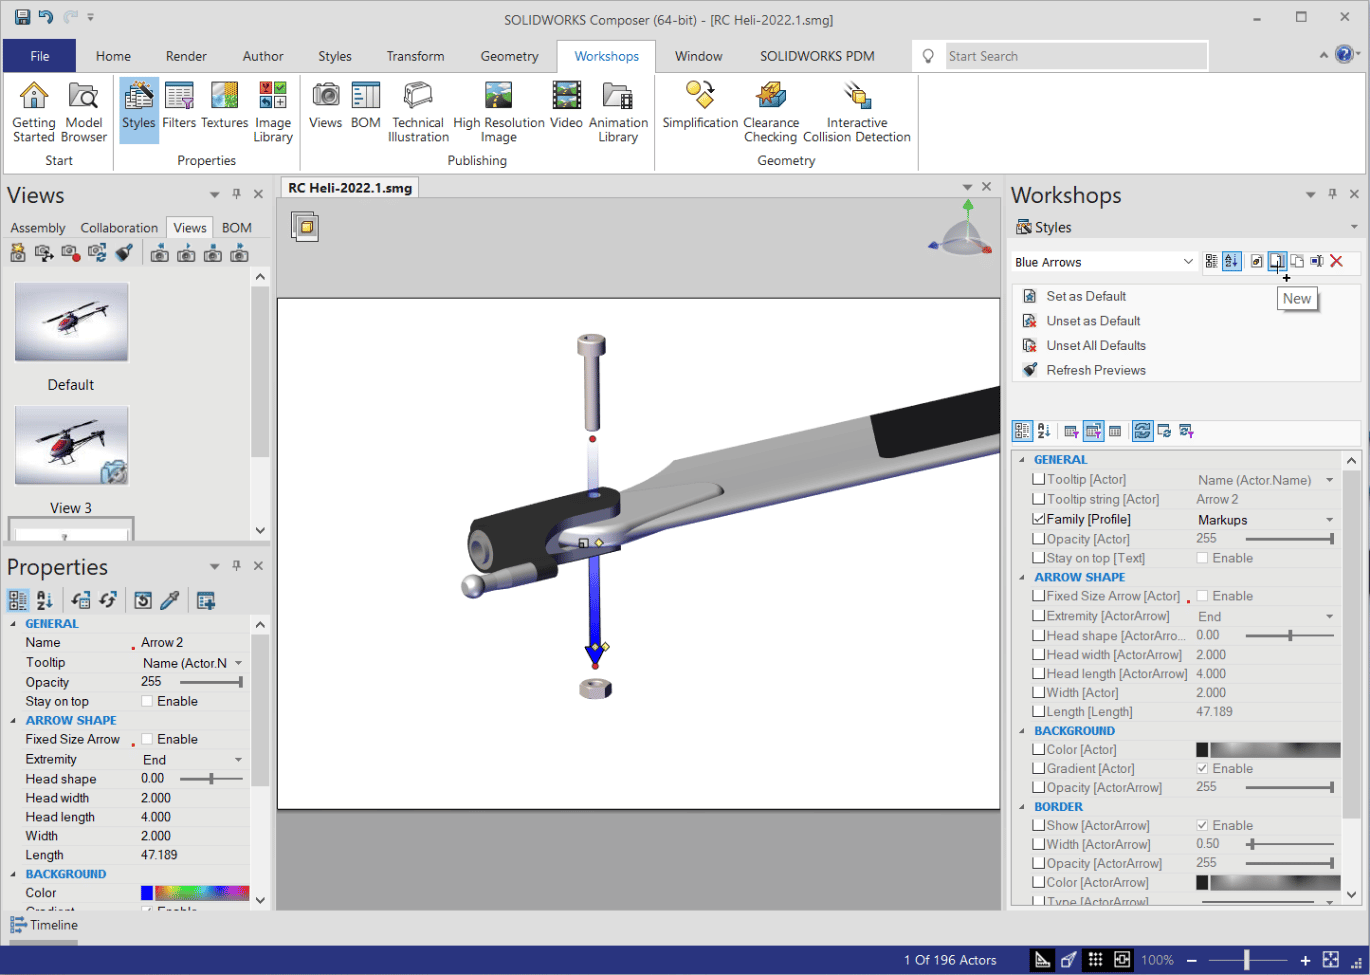
Selecting the Family property associates the style with an actor type and keeps them organized in the Styles Tab of the ribbon. If you are unsure of the Family an actor belongs to, look to the labels on the Author Tab of the ribbon.

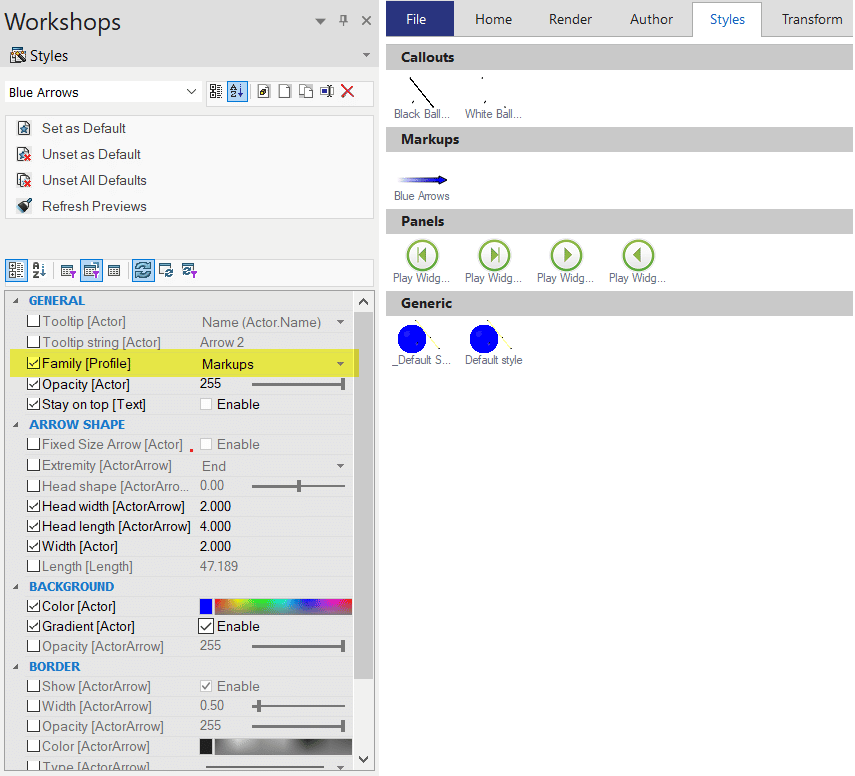
Continue selecting properties in the Style pane and adjust the settings as needed. This Style controls the following properties:
- Opacity sets the arrows to fully opaque
- DISABLE Stay on top so arrows pass through the geometry
- Sizes to fit the arrows in the geometry
- Set the color to Blue
- Enable Gradient for a “fade-in” look
Setting a Style as Default will automatically apply the properties to any annotation of the matching Family. This is where having the Family set correctly pays off and gives you that consistency in your project.
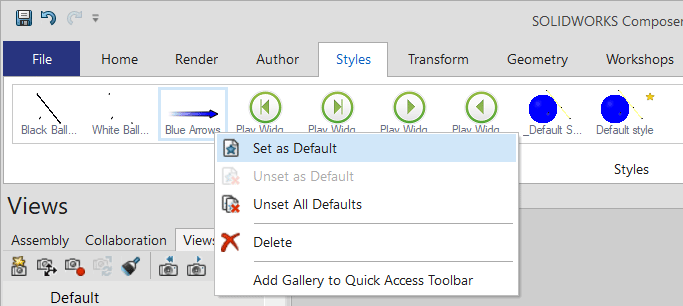
Note: A Default style will have a small yellow star in the upper right corner.
Tip #3 – User Profiles
Profiles save the settings within a Workshop to a file on your computer. Most users create several Profiles when customizing the settings for the High Resolution, Technical Illustration, or other Workshops. What they may not know is they likely have a collection of Profiles to share.
Creating the Blue Arrow Style is also saving a Profile named Blue Arrow.smgStyleSet to the SOLIDWORKS Composer user profile folder:
C:\Users\USERNAME\Documents\SOLIDWORKSComposer\User\Profiles
Copy the saved Profiles to all Composer users’ profile folders and everyone is using the same settings.
For a list of all Profiles, see the Composer online help.
Data Paths
The alternative to copying Profiles to all users is using Data Paths in Composer. Data Paths store lists of folder locations for Composer resources, including Profiles. Place the Profiles in shared folder locations and modify the Data Paths to direct Composer to that location. How do we modify the Data Paths? We edit the DataPath.xml file in the user profile folder. For information on editing this file and required syntax, see the Composer online help.
Wrap up
Hopefully, you can see Composer has many capabilities to help maintain consistency with your projects. Instead of changing the same properties on every annotation every time how about trying a Style to help do that for you?
Kris Dubuque
Sr. Application Engineer Manager
Computer Aided Technology

 Blog
Blog