SOLIDWORKS: eDrawings Markups
eDrawings Markups
This Blog article will walk you through adding markups to a drawing, saving those markups, inserting them into SOLIDWORKS, and then removing them from SOLIDWORKS.
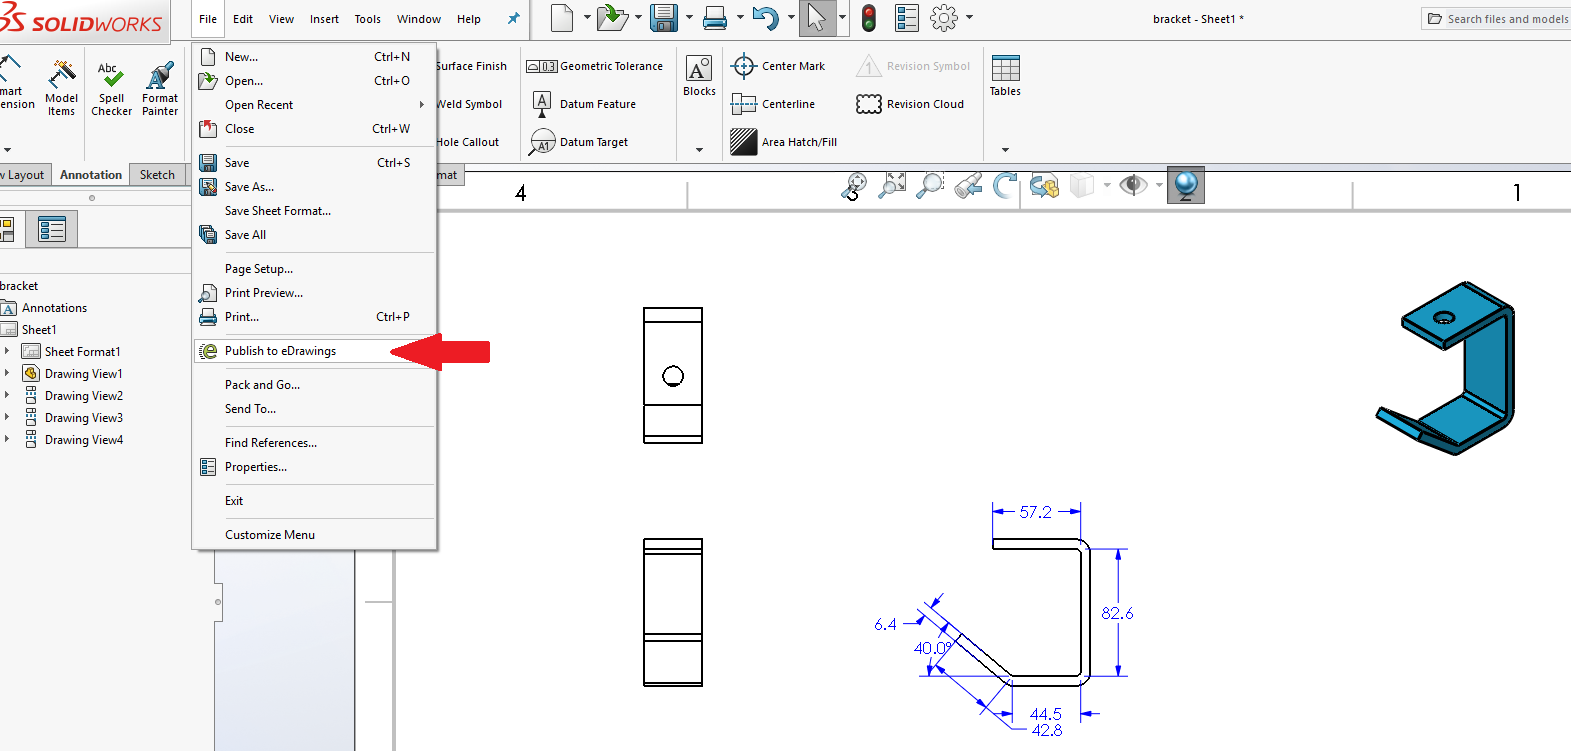
Publishing a Drawing to eDrawings
You will find this option in the FILE pulldown menu of your open SOLIDWORKS document, it will say “Publish to eDrawings”.
Once it is published to eDrawings, we can add markups with the option to add a comment. When directing someone to the view your markup is referencing, you have a few options; you can add a shape, text box, dimension, or even a picture.
To Begin My MARKUP
You will find the MARKUP option on the bottom right hand side of eDrawings.

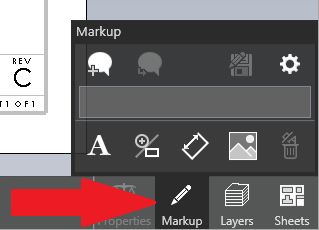
Left Click the MARKUP button and a menu appears above it.
This Menu contains:
- Comments
- Text box tool
- A variety of outline shapes
- Dimension tool
- Insert picture tool
I will use the square shape to outline the view I want to comment on.
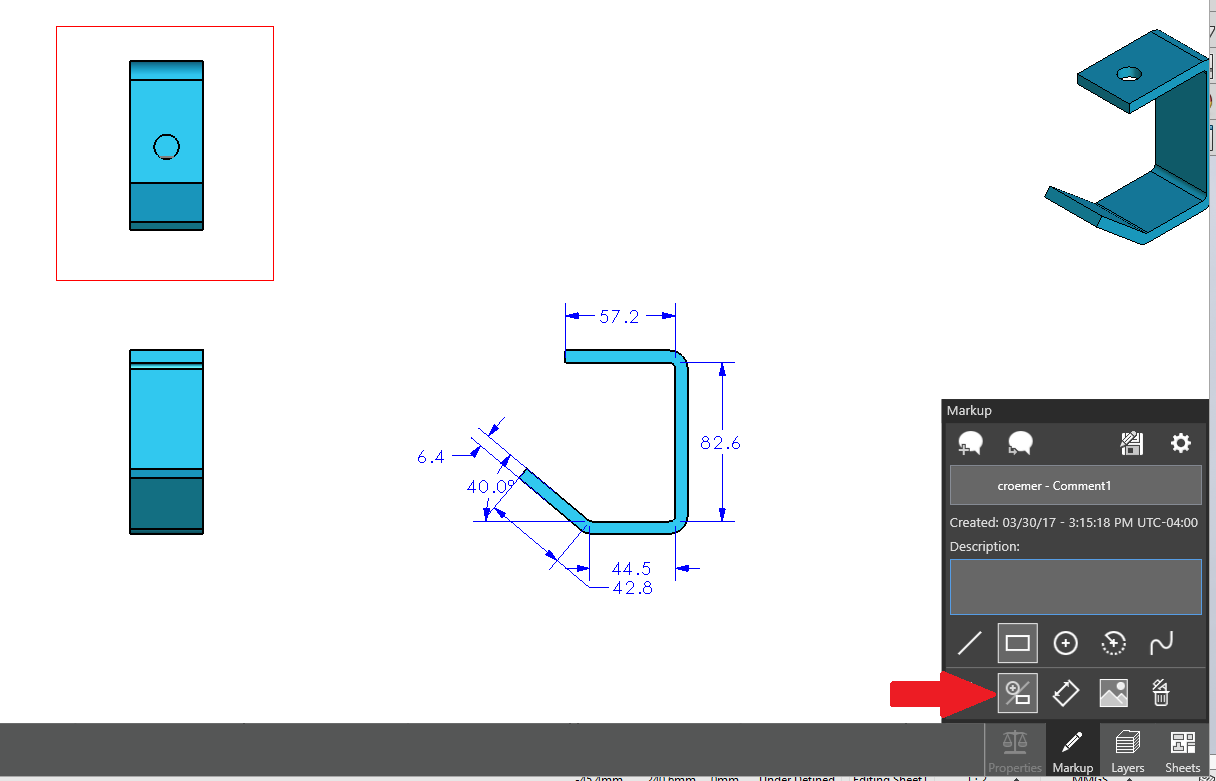
I can add my comment in the Description box, this will show in the Feature Manager Tree within SOLIDWORKS after having inserted it.
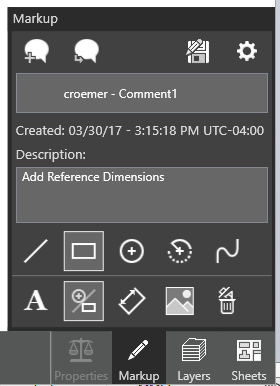
After inserting a comment into the dialog box, you will need to save the Markup. You will see a save button with a pencil icon on it, this allows you to save and update a Markup or existing Markup.
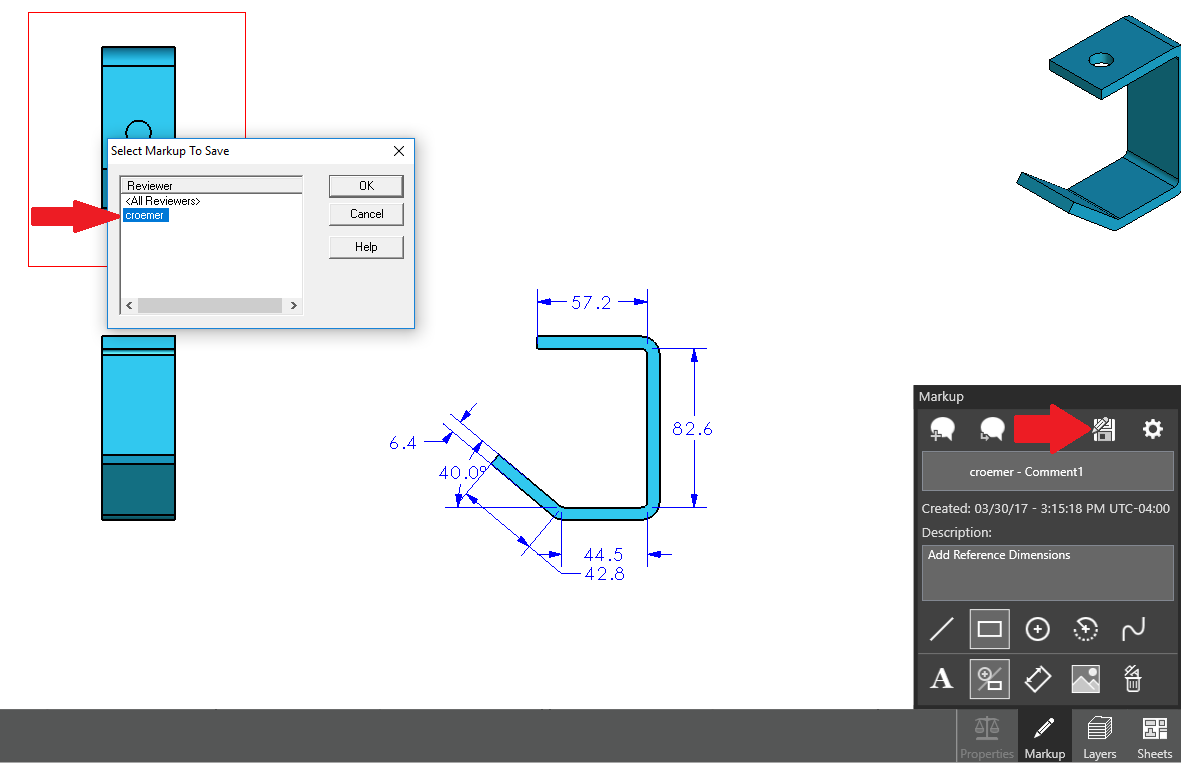
Name your Markup and save it in a place you will recall.
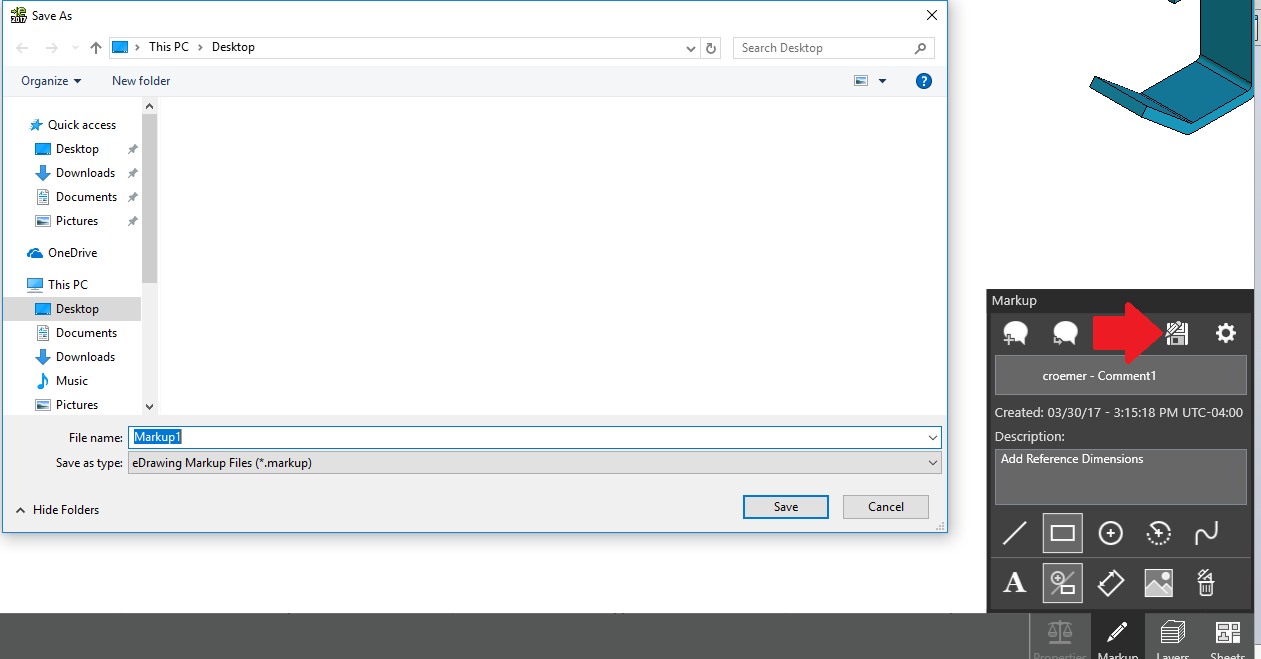
You will notice the file format is a “.markup” file extension.

Inserting your Markup in SOLIDWORKS
> Inside of SOLIDWORKS
> Insert pulldown menu
> eDrawings Markup File
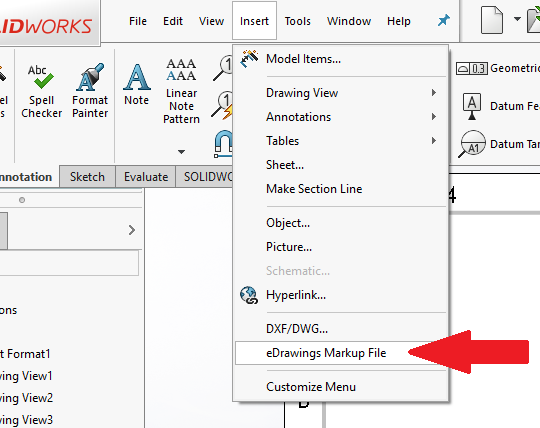
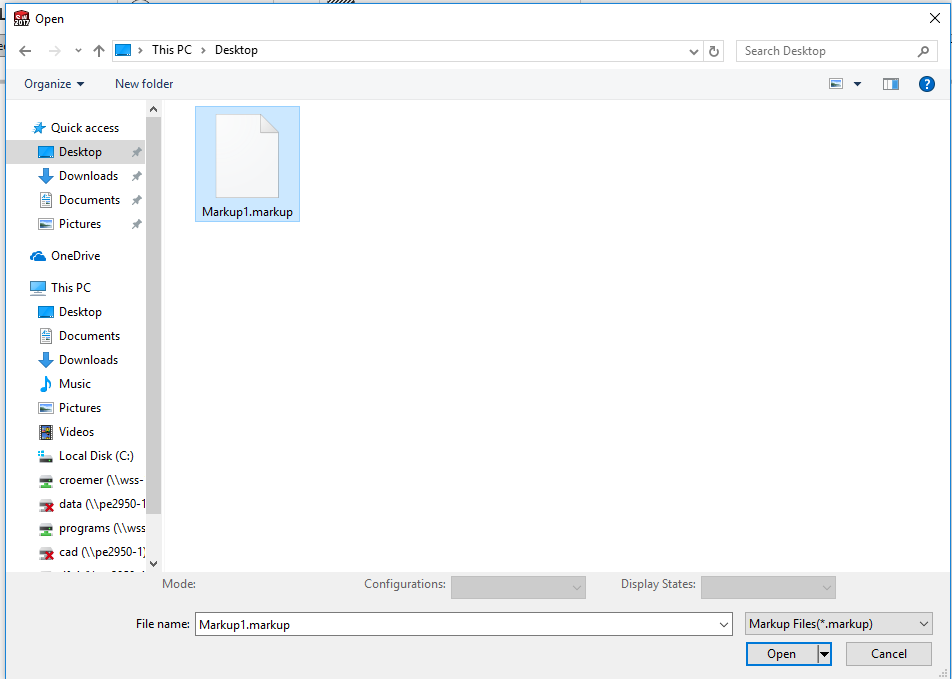
This will pop up an open window where you need to then Browse for the Markup file.
Once the Markup has been added into your SOLIDWORKS Drawing it will be listed on the left at the top of your Feature Manager Tree, under the heading of “eDrawings Markups”.
Selecting a Markup in that list will preview the comment associated with that Markup.
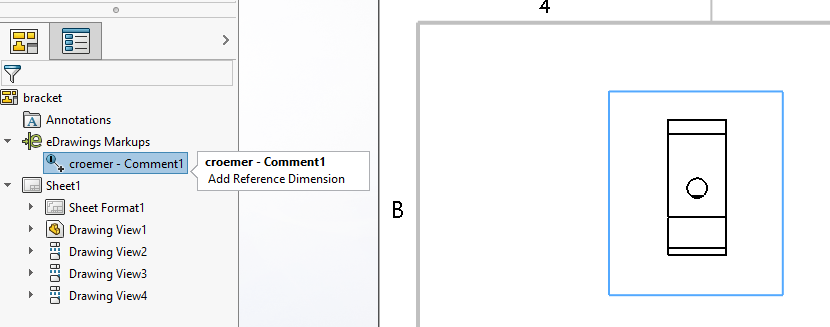
Below shows the Markup box while not selected in the menu.

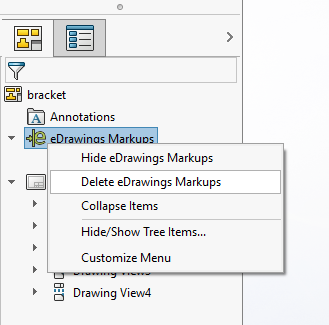
Removing an eDrawings Markup
- Right click on the eDrawings Markups Header
- In right click menu select “Delete eDrawings Markups”
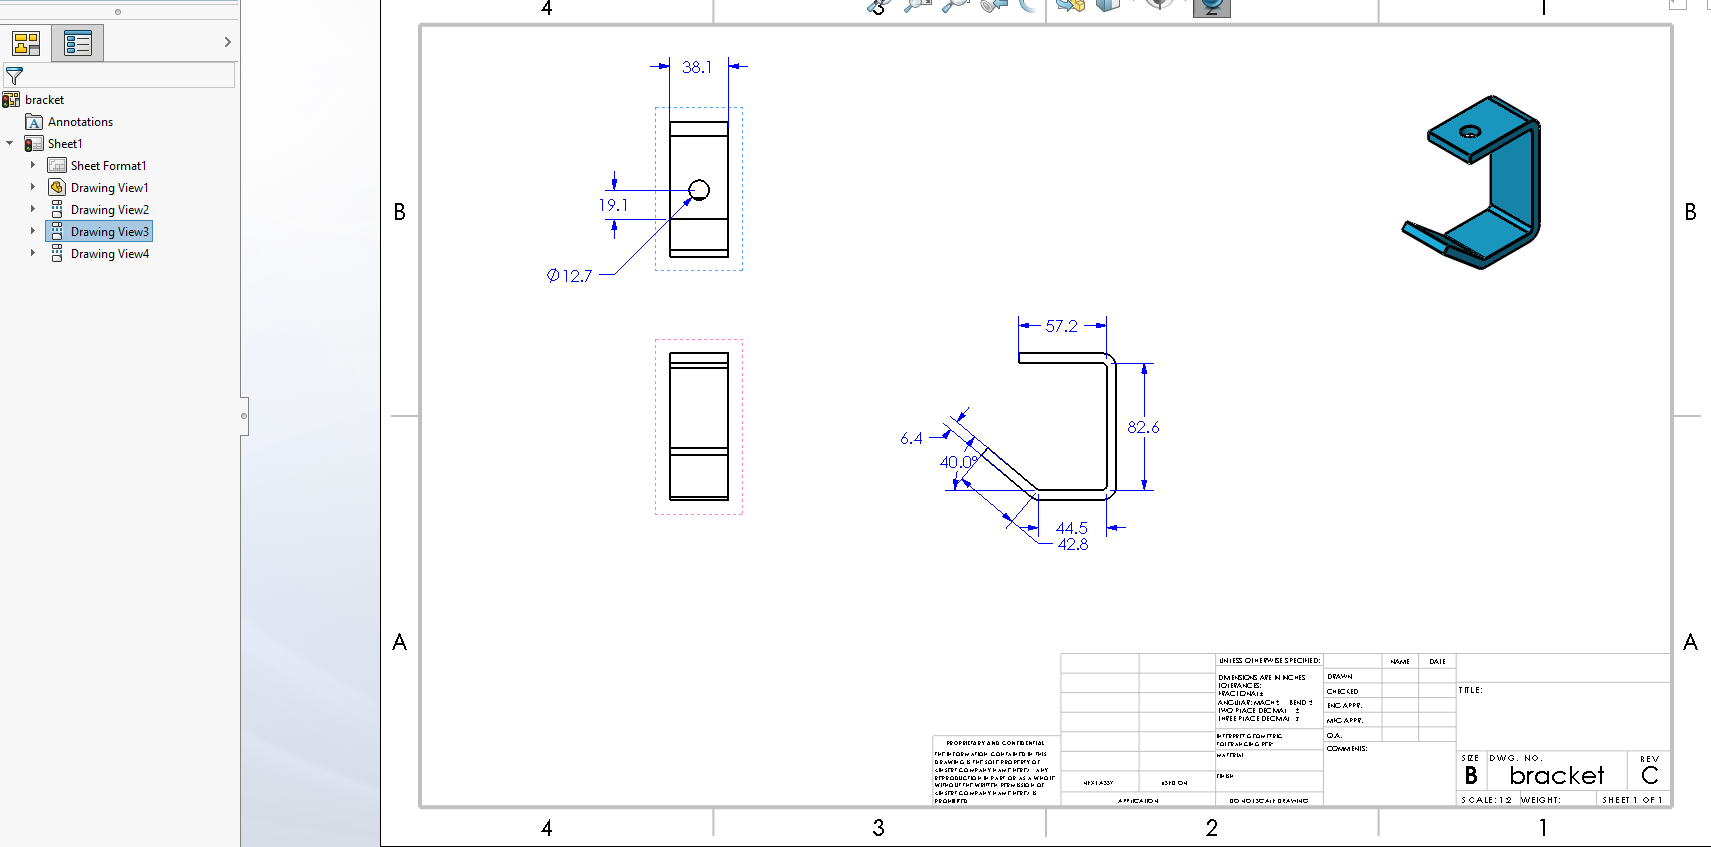
End Process
Once you have viewed the Markup, read the comments, and deleted the Markups you are free to implement those suggested changes.
In this case our Markup said to add reference dimensions to the top view, so in our last image we show those reference dimensions added.
Courtney Roemer
Application Engineer | CSWE
Computer Aided Technology