Ideas for Using Scans to Make Custom 3D Printed Fixtures
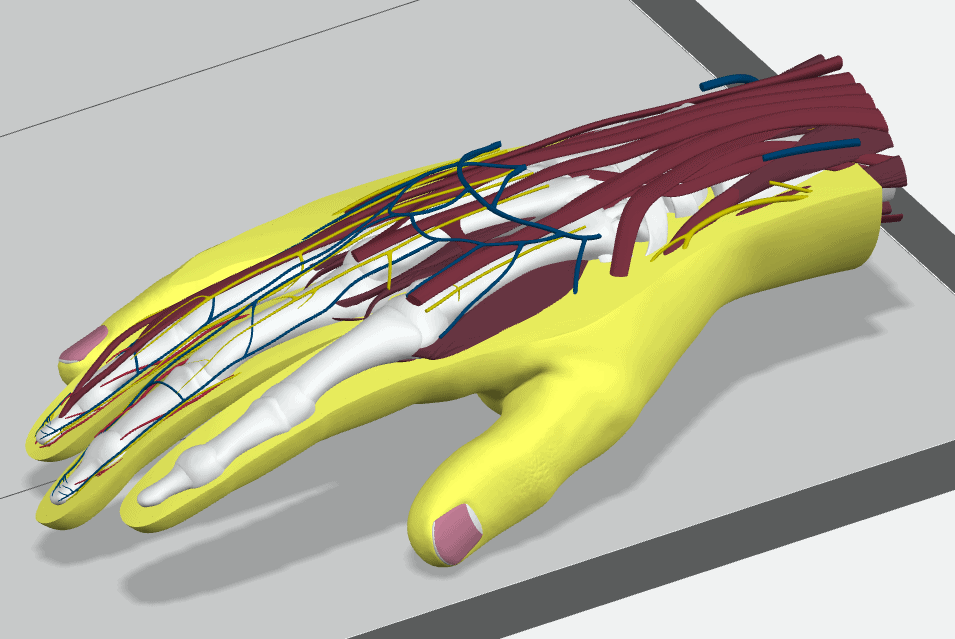
I have this really cool model of a hand we 3D printed on our J750, and I wanted it to stand out in our displays as a real medical model and not just another 3D print. So, I thought this would be a perfect opportunity to show off how easy it is to create custom holders or fixtures using scanning and 3D printing combined. This same process could be used if instead of a scan, we already had an actual CAD model.
Below is the scan data (mesh) for the hand. I used this multi-body mesh to print the model and to make these fixtures as well.
I used 3 different software tools in this project:
Creaform VX Model – to create surfaces from the mesh body that would then be imported into SolidWorks.
SolidWorks – to model the fixtures using those surfaces.
Stratasys GrabCAD Print – to set up the hand mesh and fixtures for 3D Printing on our Stratasys printer.
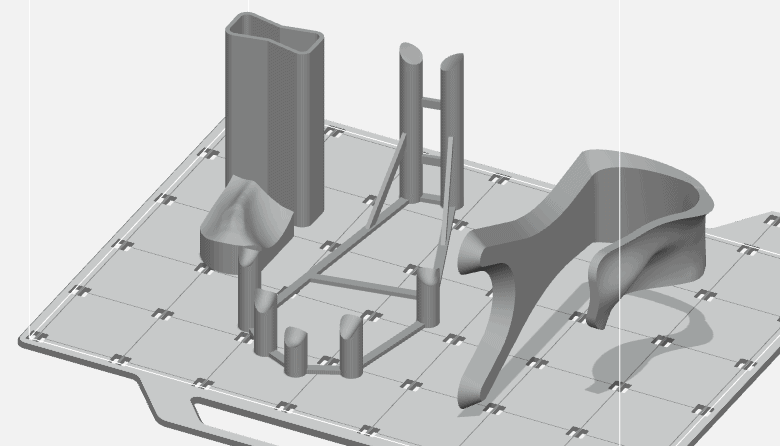
Idea 1:
The idea for these fixtures is that the hand will be suspended up above the table a couple inches, and be able to be easily picked up, looked at, and placed back down on the fixture.
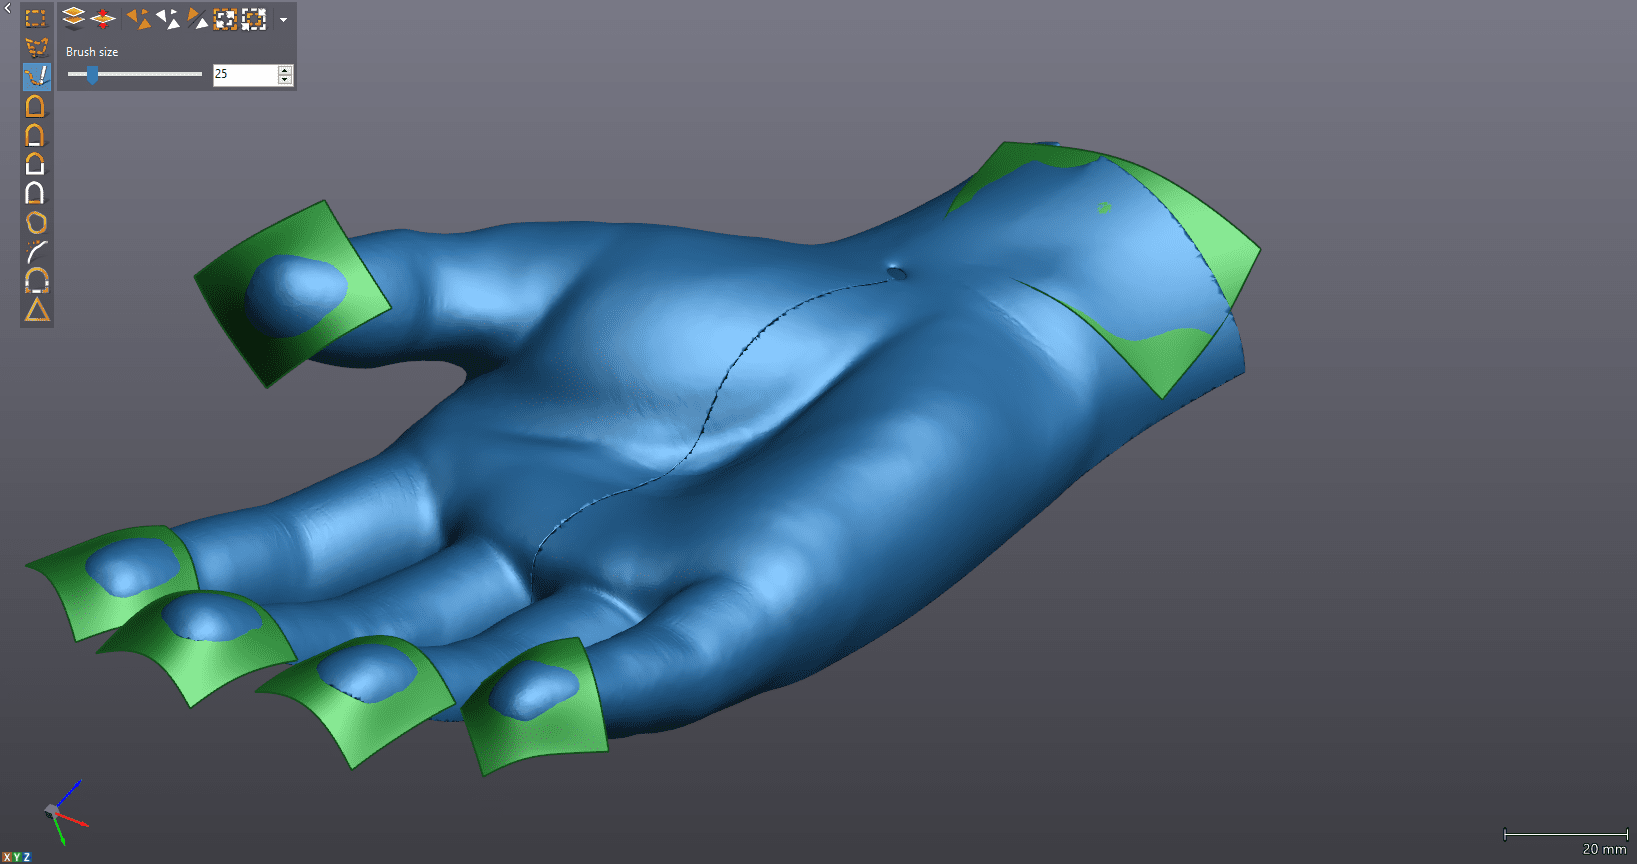
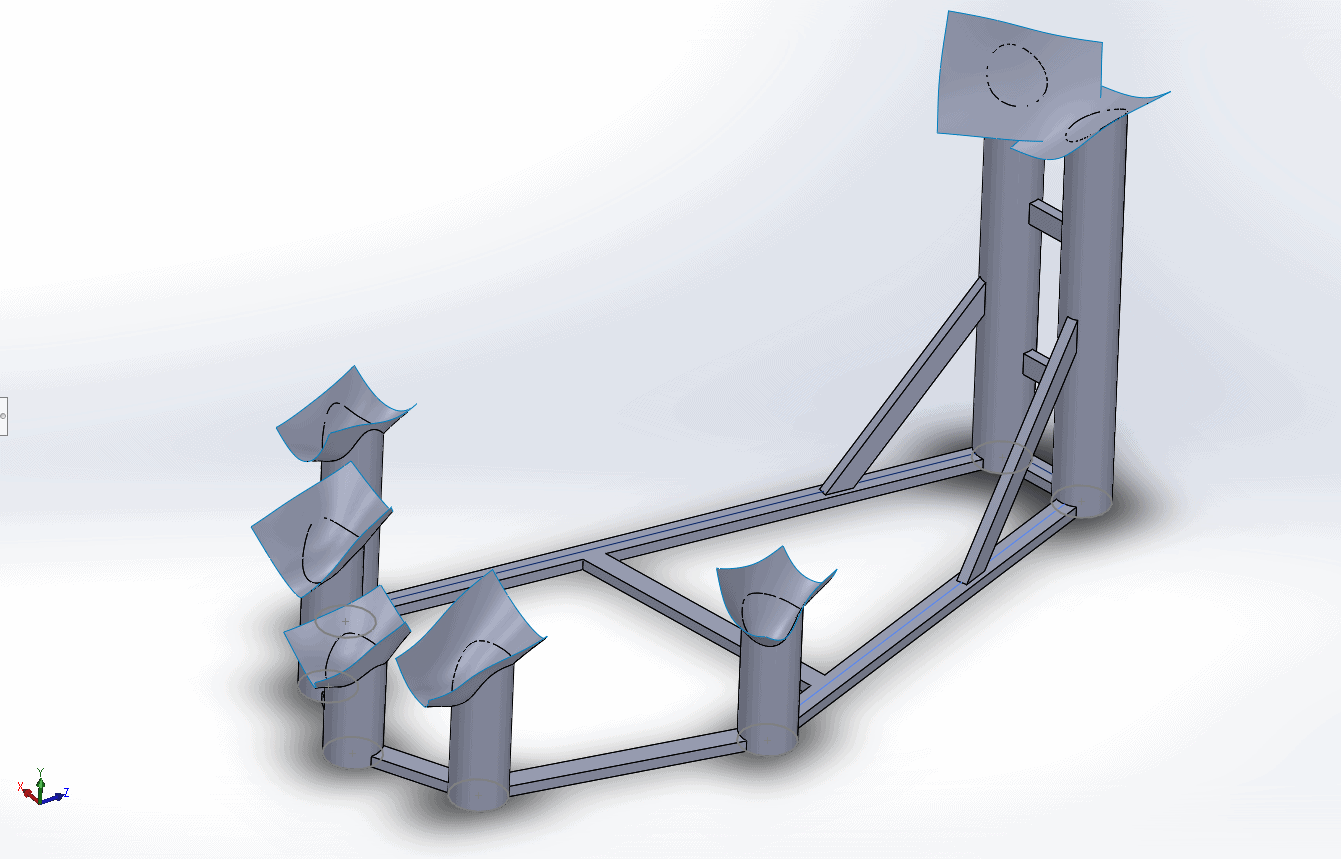
This first idea used each finger and the wrist as contact points that would be held up by little posts.
With Creaform’s Scan/Mesh tool VX Model, I generated these little single patch surfaces at specific contact points on the hand and imported the surfaces into SolidWorks. Then, all I did was extrude simple geometry up to those surfaces in order to create perfectly shaped and positioned posts at each contact point. I then attached each contact post together with struts and added some supporting struts.
Idea 2:
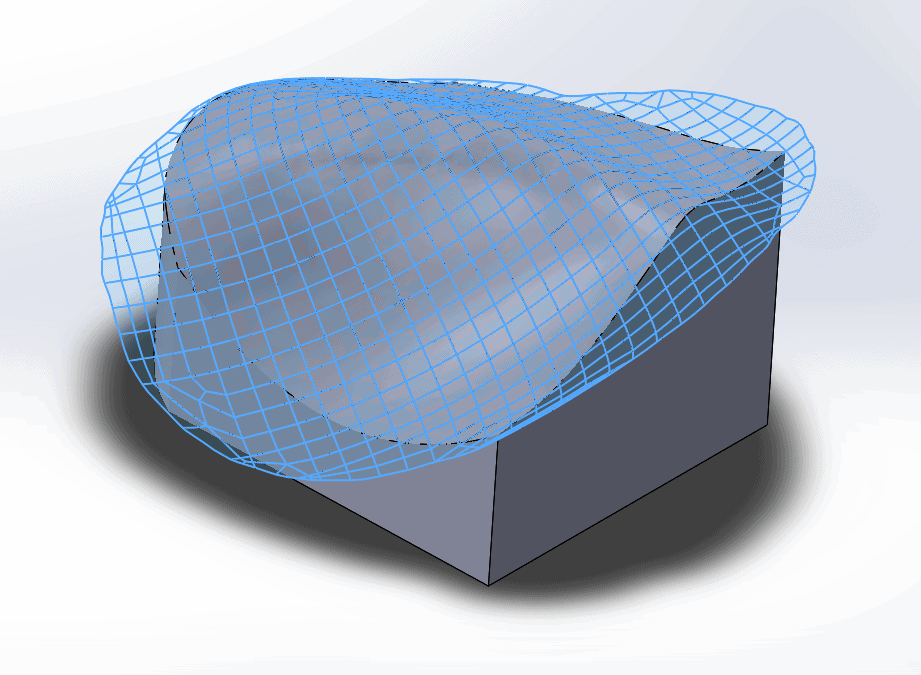
For this idea I wanted it to be just one large pillar to conform to the shape of the hand. So, I generated one multi-patch surface at about the center of mass of the hand. A multi-patch surface is a lot more accurate then a single patch surface but takes much more processing power to utilize. Then I again extruded a shape up to the imported surface.
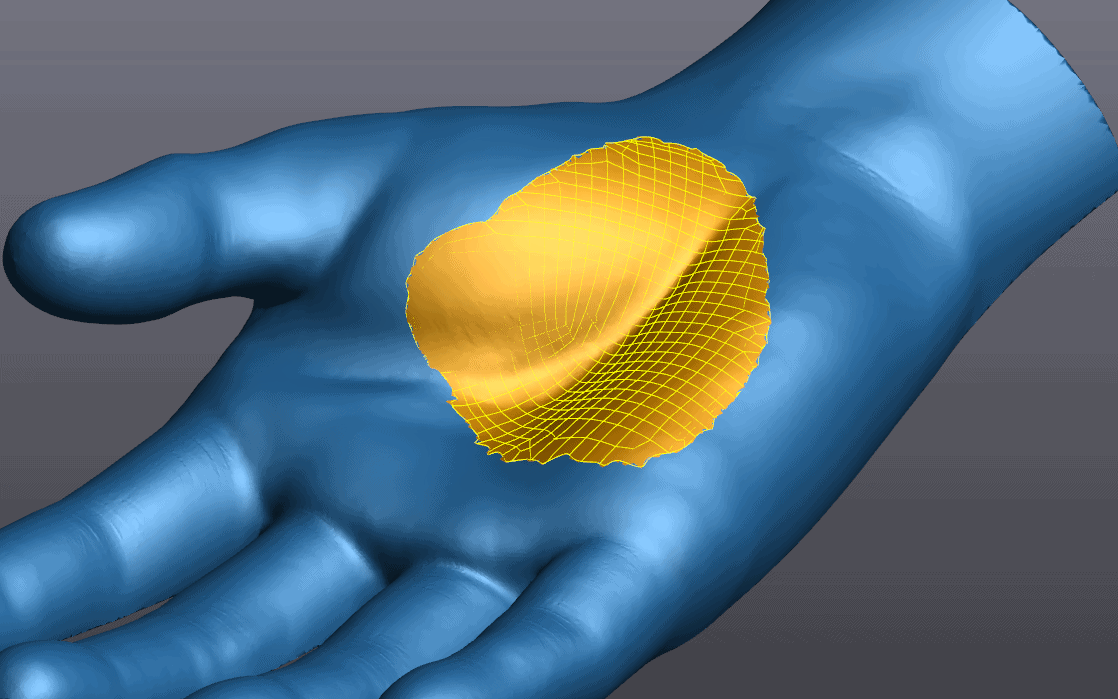
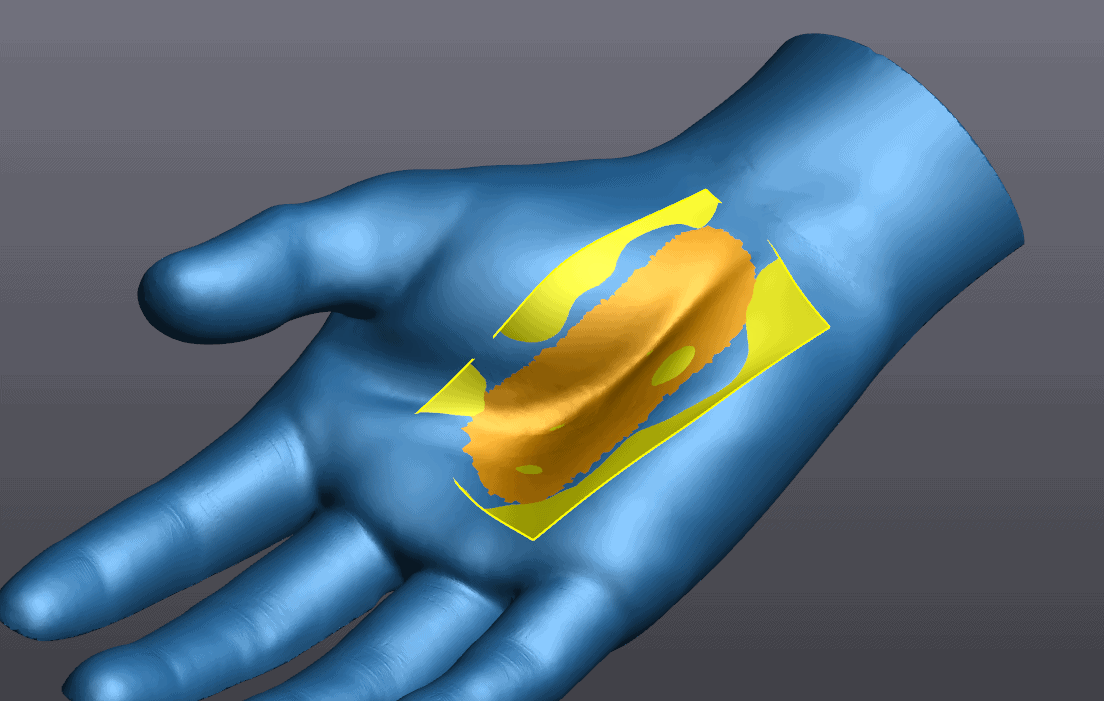
Idea 3: For this last fixture, I wanted to do something a bit more complex and aesthetically pleasing. I went with a larger single patch surface conforming to most of the palm. The orange highlighted area in the image is the selected triangles on the mesh and the yellow surface is the generated single patch surface calculated from those selected triangles.
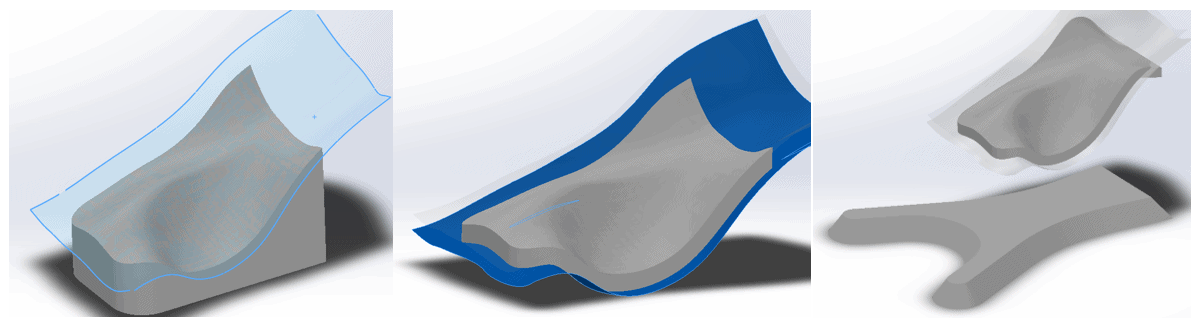
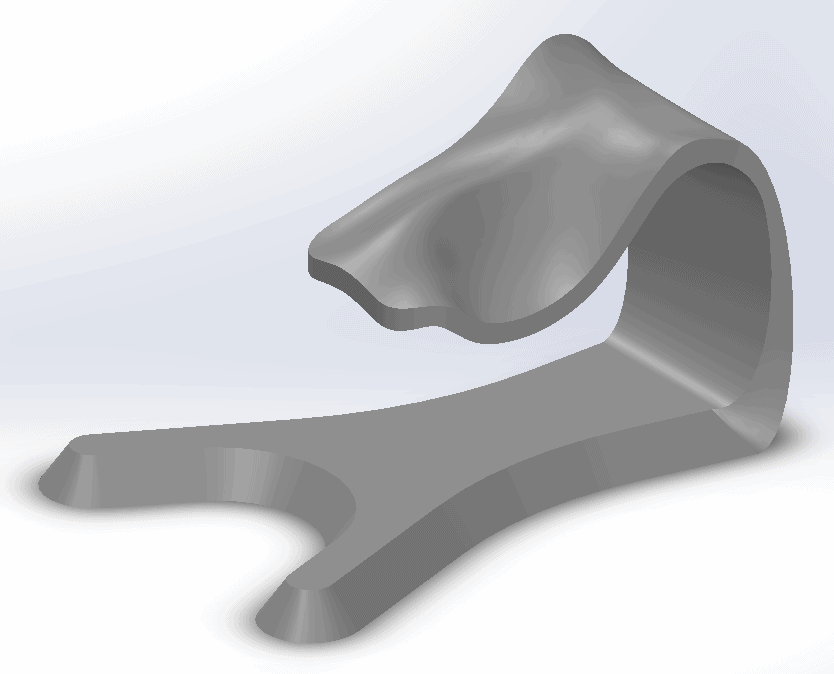
I extruded a shape up to the surface; same as the first two ideas. Then, I offset the imported surface and used that as a cutting tool to make a thin solid piece that matched the curvature of the palm. I created a base centered below the palm shaped piece and then attached the two pieces together with a curvy loft to complete the fixture.
Once all 3 ideas were completed, I brought the SolidWorks part files directly into GrabCAD Print. GrabCAD Print makes it easy to select the printer, arrange and orient your parts, and set basic parameters, so after just a few button-clicks my parts were ready to print. Almost all Stratasys’ 3D printers have a soluble support, so you don’t have to consider how supports will be generated or how easy will they be to remove. I just choose the orientation I want my model to be printed with and know that supports will be generated effectively and removed easily and hands-free.
If you’re curious to see how all these parts turned out or want to learn more about any of the software I used in this project, feel free to reach out!
Cody Doiron
Application Engineer – Manufacturing Solutions