Material Flow Issues and Filter Replacement on Objet Printers
There are times when your Objet printer may get head filling errors or you may see that some bottles of material are suddenly no longer usable by the printer.
You can install a new bottle in its place but the same thing occurs. It will work for a while and then the printer will no longer accept the bottle.
This is because there is a feature on the printer that counts the pump cycles for the specific RFID tag on the bottle. When the limit of pump cycles is reached the printer will no longer accept that RFID tag and that bottle can no longer be used.
If the printer is having material flow issues it will cause the pump to keep cycling and once the limit is reached it will not allow that bottle to be used.
If this happens and you end up with unusable bottles due to a material flow issue Stratasys will send you replacement bottles of material.
To request replacement material fill out the form below and send it to rma@stratasys.com
Sometimes when this issue happens it is due to clogged filters. The filters can be sent to you and they are customer replaceable.
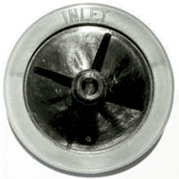
The filters have an input side which is marked on the filter and they must be installed correctly.
Match the inlet side on the old filter to the new one to make sure they are installed correctly.
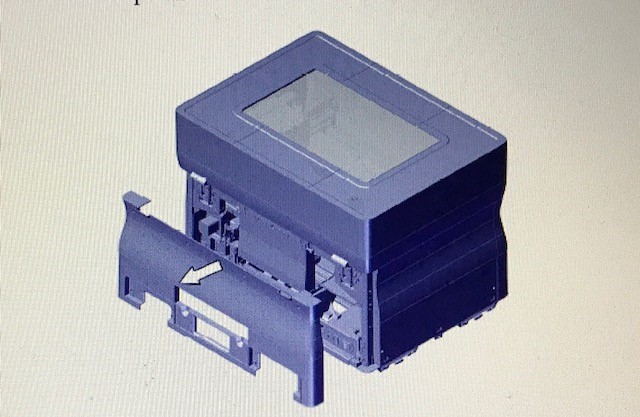
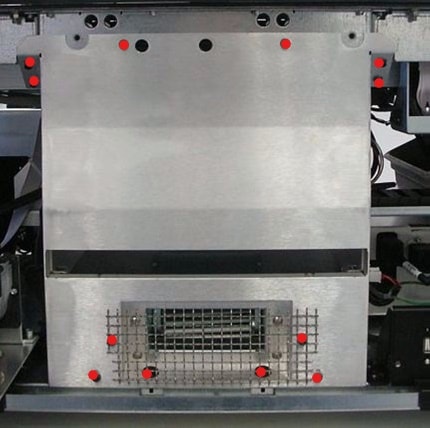
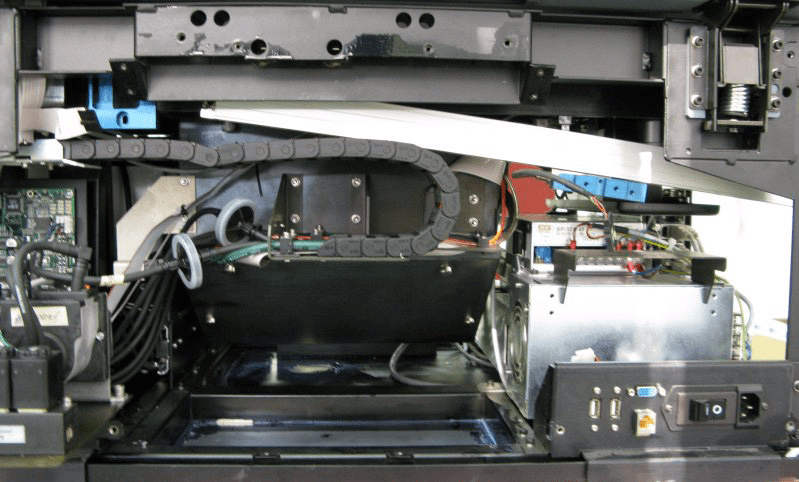
Below is a picture of a V3 printer material drawer showing the location of the filters.
The filters are identical and the Model and Support tubing is marked M and S.
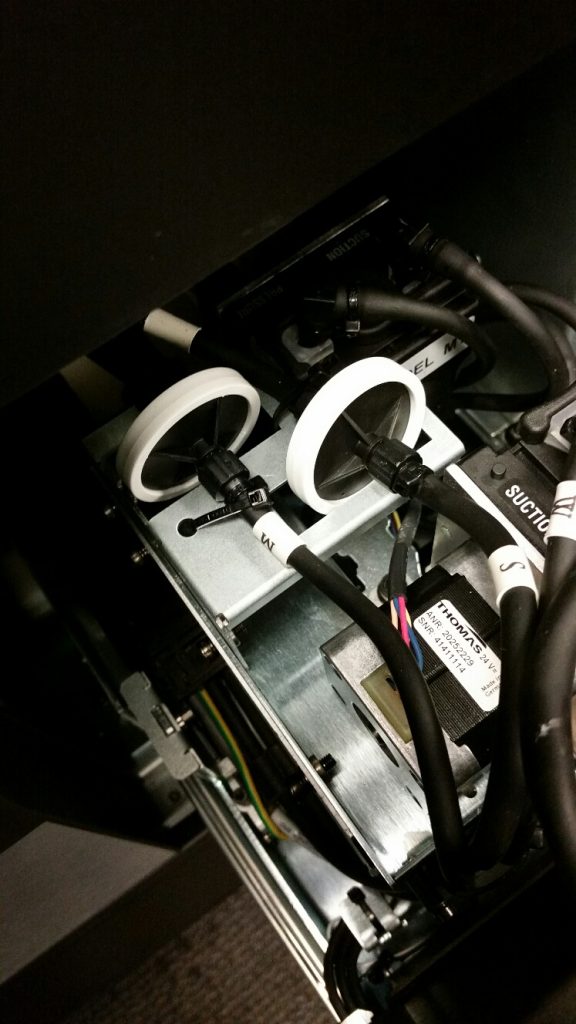
The V2 printers have the filters in the back of the printer. You will need to remove the back cover screws and remove the back cover.
Then remove the screws on the blower. Remove the blower.
You should now have access to the filters.
You can check the filters by running a material flow test at the input side of the filter and at the output side.
To check the material flow you will need a plastic cup or another small container to pump the material into, a timer set for 1 minute and a scale that measures grams.
Weigh the cup empty first.
Unscrew the input side of the filter (inlet is written on the filter) to verify that enough material is getting to the filter.
Put the hose from the inlet side into the cup.
Go into Maintenance Mode on the printer by moving the cursor to the lower right corner of the screen until it just disappears off-screen.
Press and hold CTRL-ALT and while holding these keys down press m.
A box should pop up. Press Enter.
You should now see a Maintenance tab in the printer software screen.
Click on Maintenance-Actuators and Sensors
Set your timer for one minute.
Click on the appropriate pump for the material you are having issues with, Model pump on or Support pump on.
Once you click Pump on and you hear the pump start, start the timer.
When the timer goes off click Pump off.
Weigh the cup of material and subtract the weight of the cup.
You should have around 26-30 grams at least of material.
If you do not have this at the input of the filter the issue will not be the filter and we will need to do more investigation to determine what parts we will need.
If you are getting the required amount of material at the input side of the filter then we will need to check the output side.
Reconnect the input hose to the filter and disconnect the output side of the filter.
Put the filter in the cup and run the test again.
If you are not getting enough material through the output of the filter but the input is good the filter is clogged and we can send you new ones.
Unscrew the old filters and screw on the new ones verifying the orientation.
Once the filters are replaced follow the procedure here to run the heads filling calibration and then run weight test calibrations.
https://www.cati.com/blog/2016/08/new-heads-filling-wizard-method/
Be sure to change the heads filling parameters shown in the blog to 400 for low and 415 for high for both model and support before running the heads filling calibration.
The blog for the weight test calibration is below along with the excel sheet to get the correct head voltages.
https://www.cati.com/blog/tag/weight-test/
Weight Test Calibration Excel – PJ Desktop, ver 1.6 (1)
If you have any questions or need any assistance with your printer contact support@cati.com
Paula Durham
Field Service Engineer
Computer Aided Technology, LLC