Tips and Tricks for VX Model: Patching Holes
Anyone familiar with 3D scanning knows that small holes in your scan are inevitable. Whether they are screw holes, pinholes, countersunk, or counterbore, you just can’t always capture the entirety of a small hole. Now, this begs the questions: “Do you just ignore them, or do you fix them?”. This depends entirely on what your scan is being used for. If you’re scanning to extract a surface from a mold design, then maybe you can just ignore those screw holes around the edge of the mold. But if you’re end goal is 3D printing or one where you need a watertight mesh, then you need to fix the hole. There are several different ways to patch holes large and small. I’m going to show you a pretty simple but effective process to patch holes that works great on a large majority of holes.
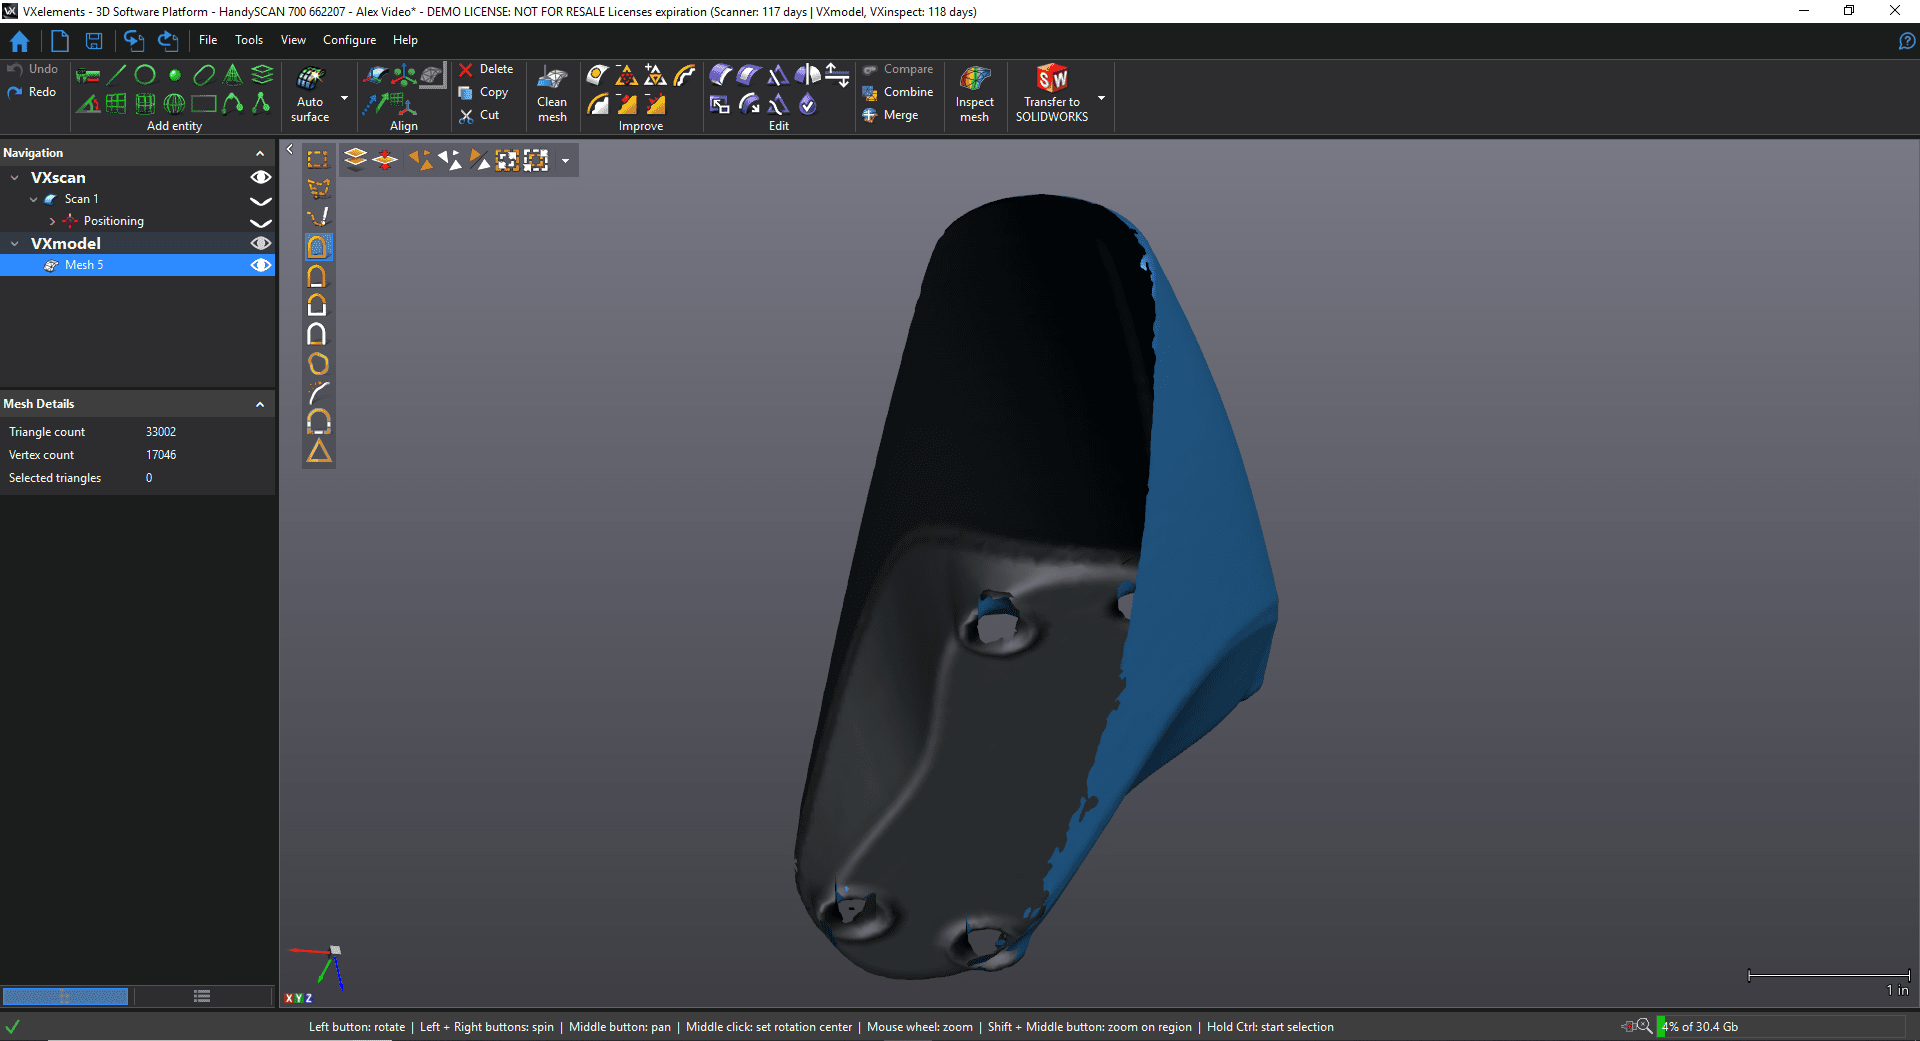
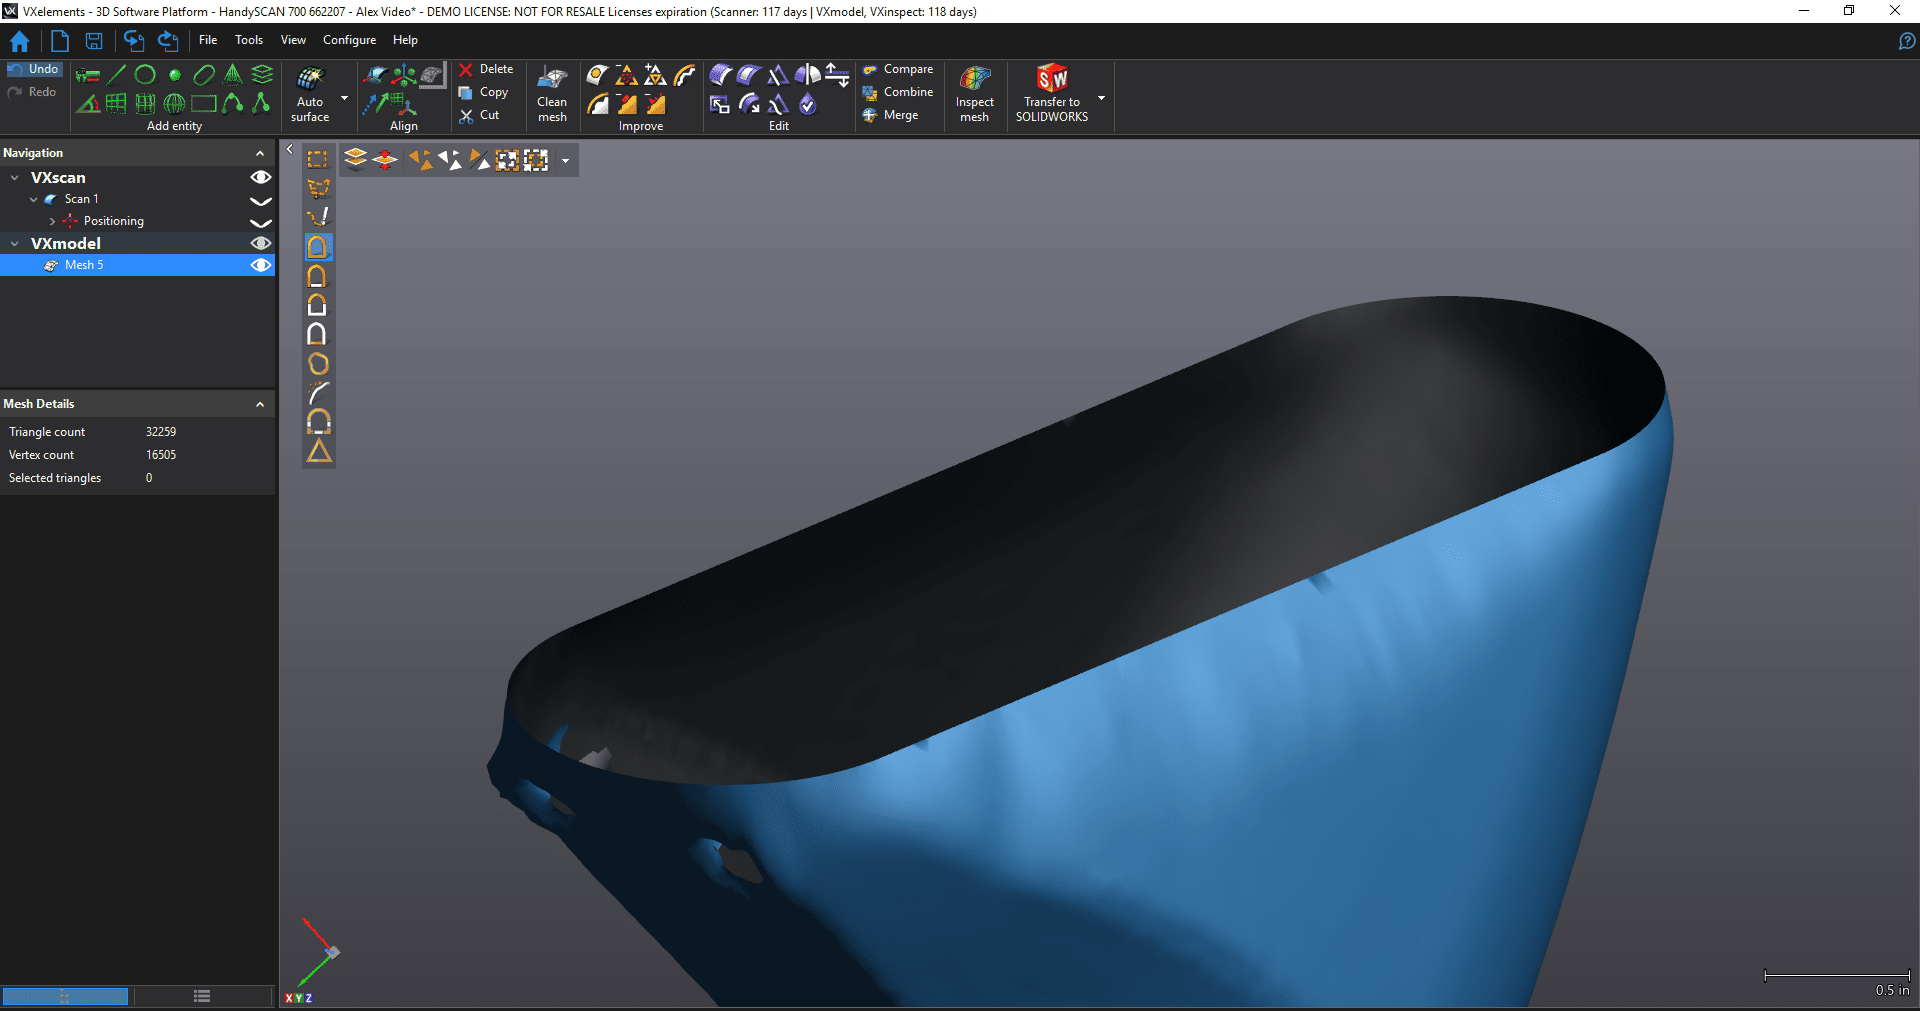
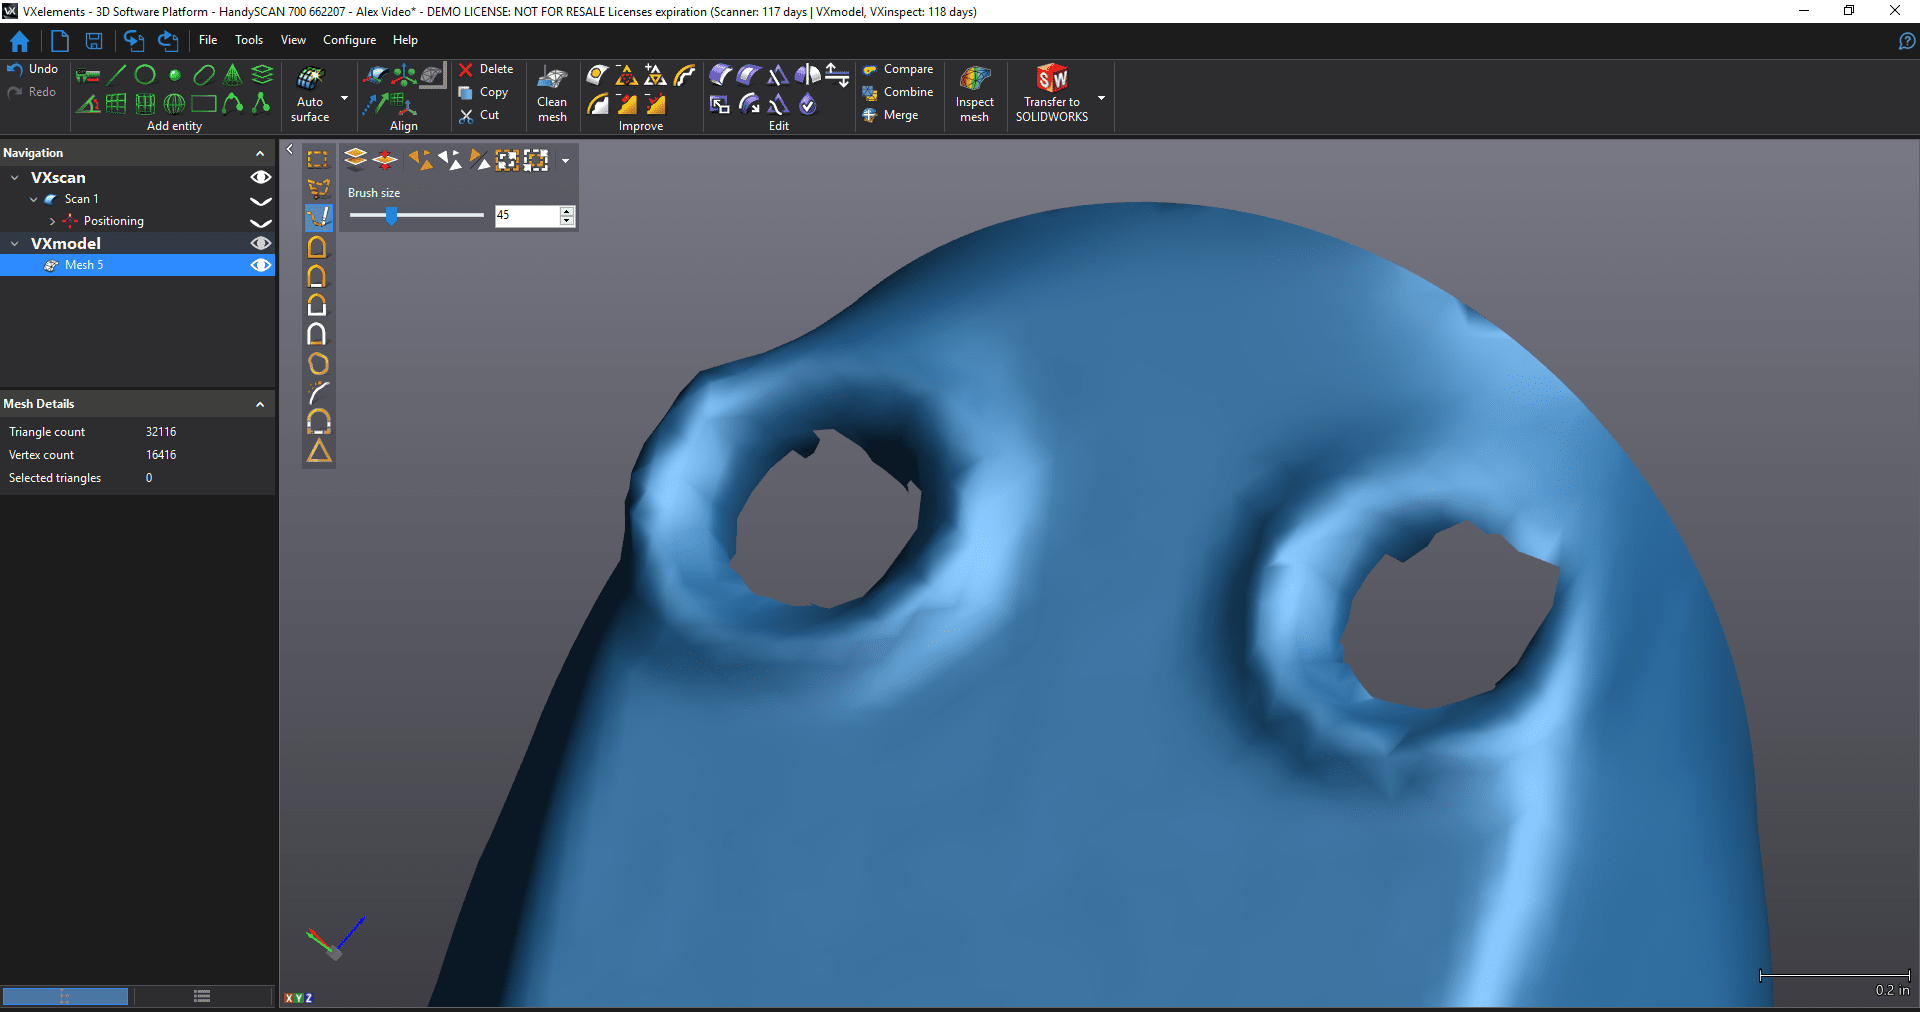
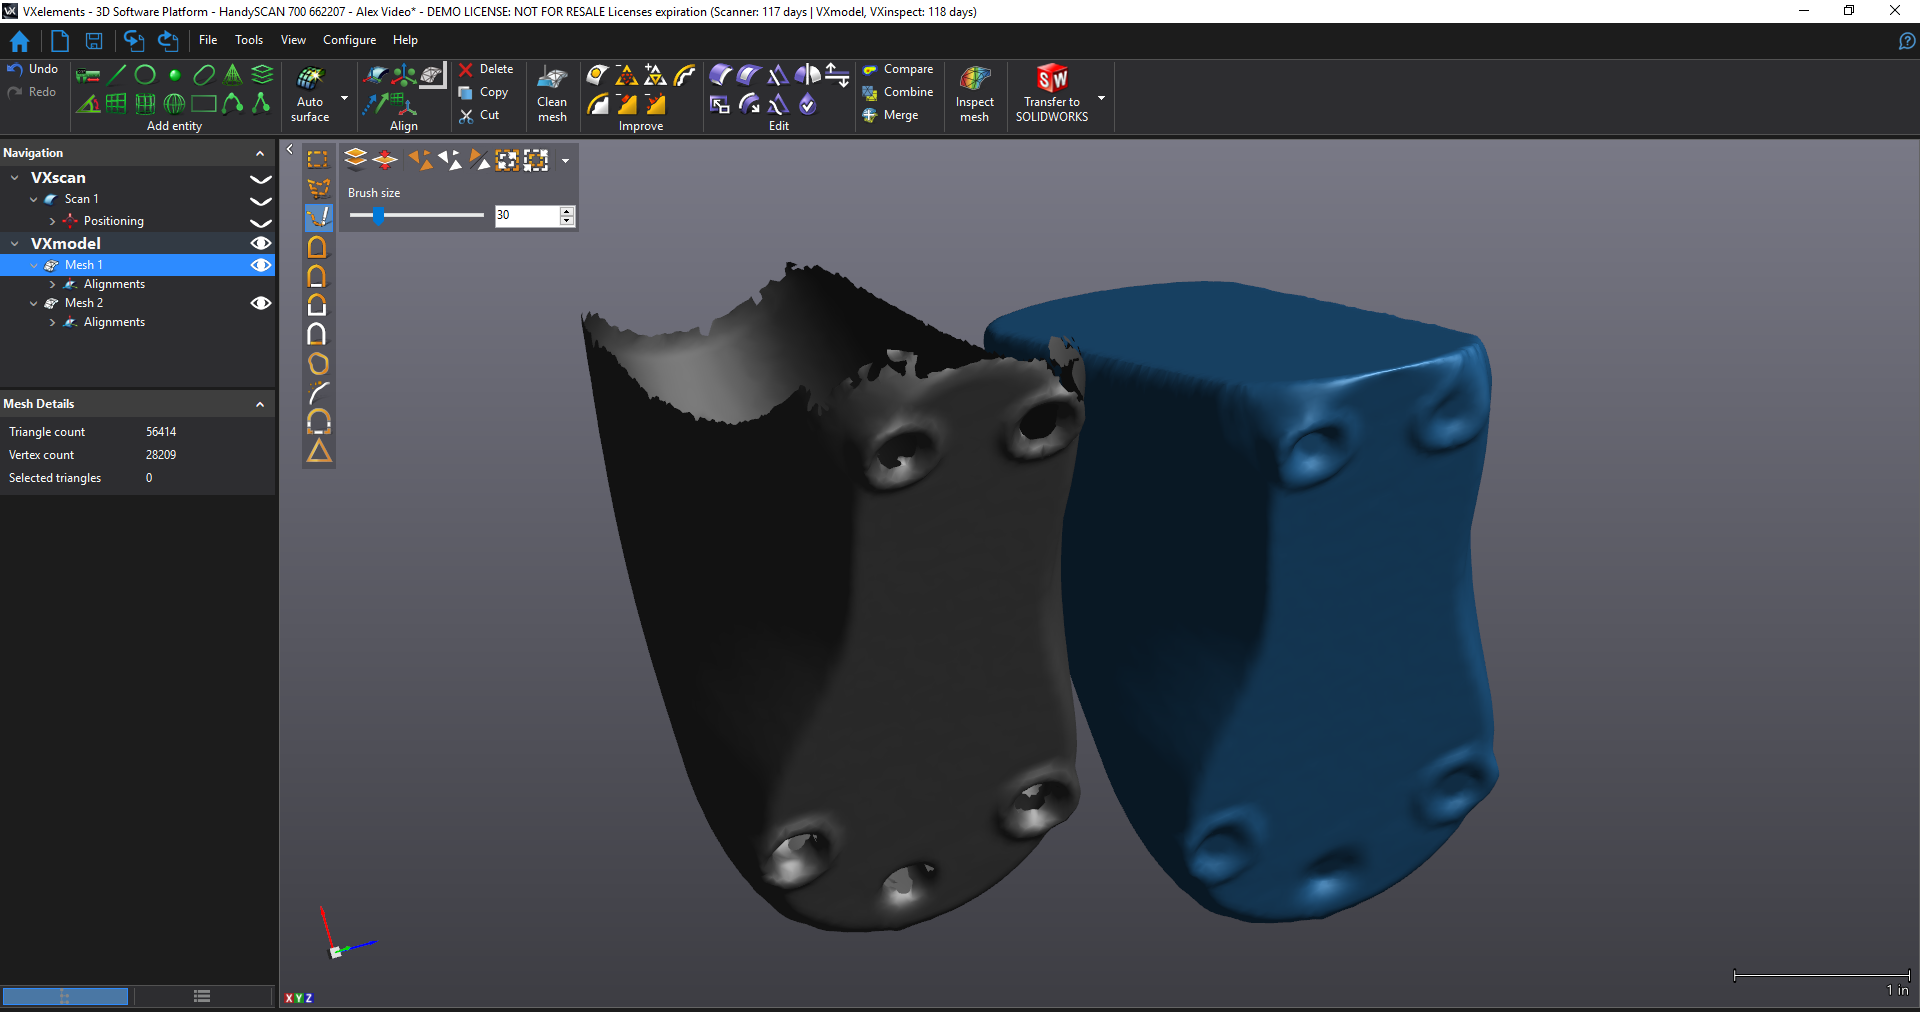
Here, we have a part with 5 small holes and one large, gaping hole. The process I’m going to use for the small holes is going to be nearly identical to what I’ll do for the large holes.
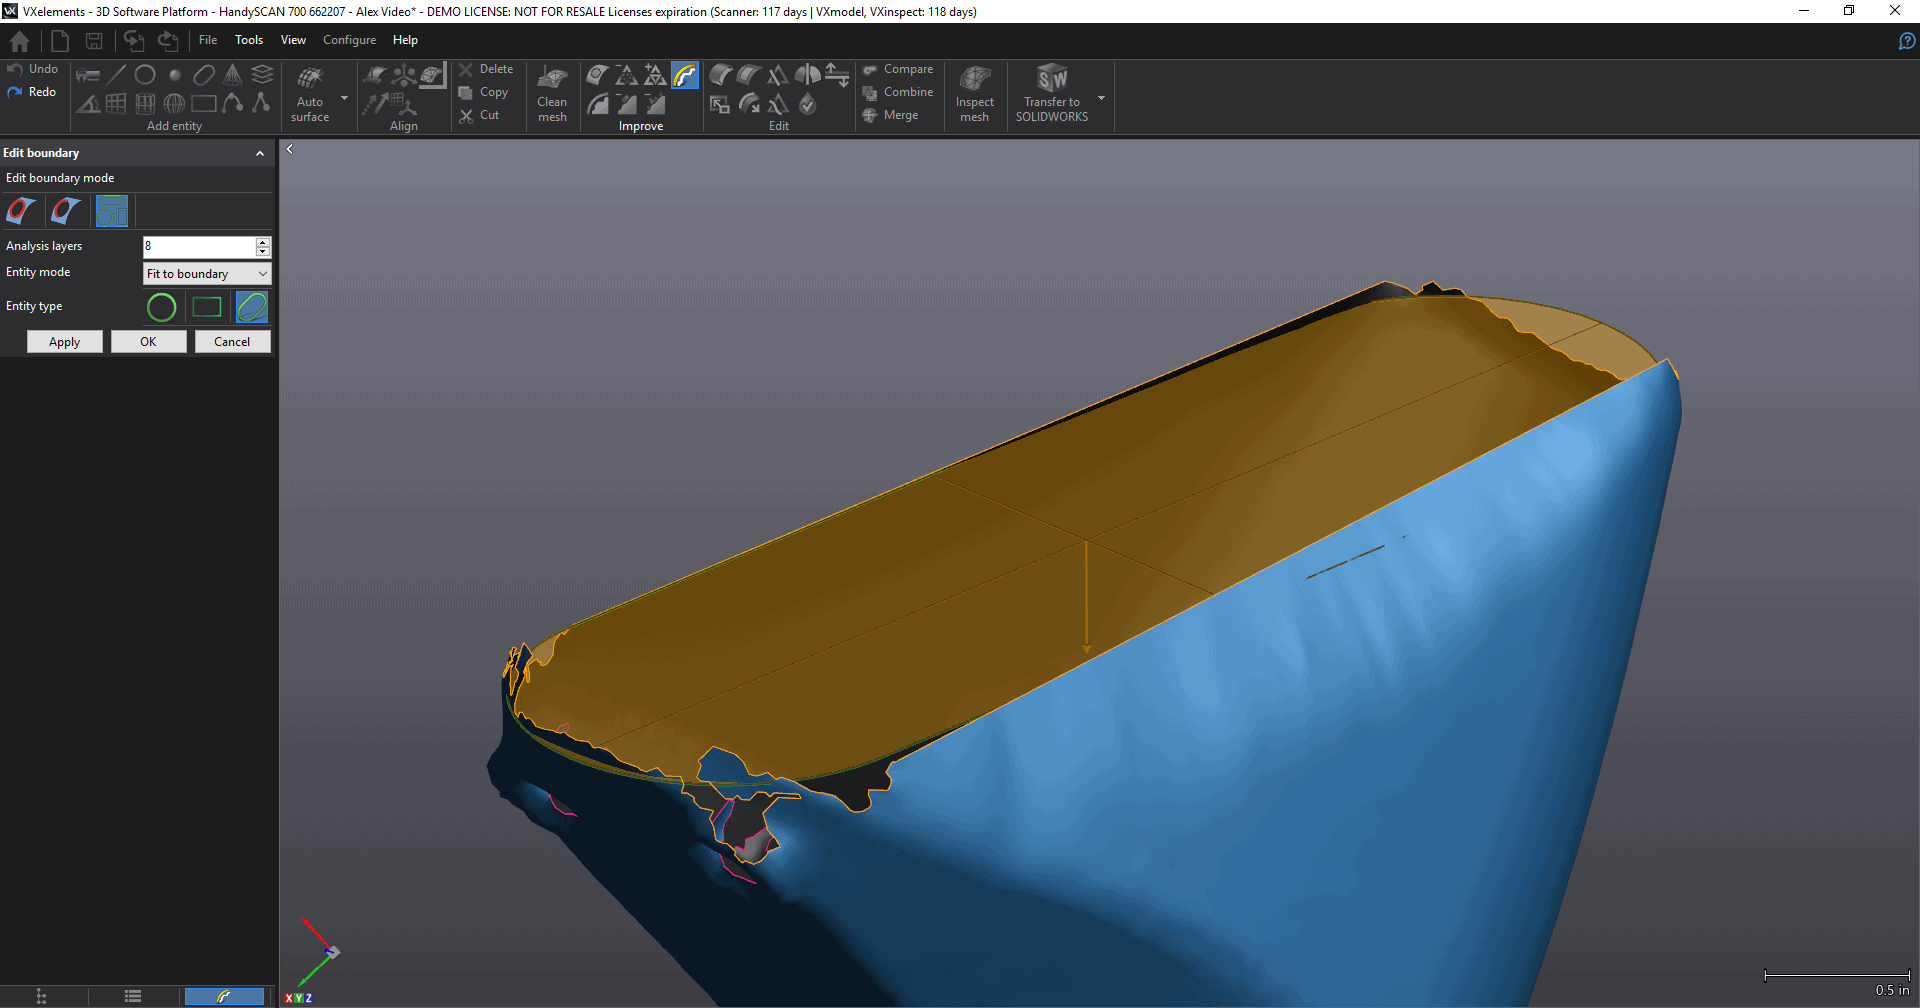
Let’s say I want the big hole just to be a flat surface. If I just tried to do a normal flat fill hole command, it won’t work. There are just too many irregularities for VX Model to compute a good result. What I’ll do is use the partial boundary edit tool and set my tension to 100 to straighten out the long edges on both sides.
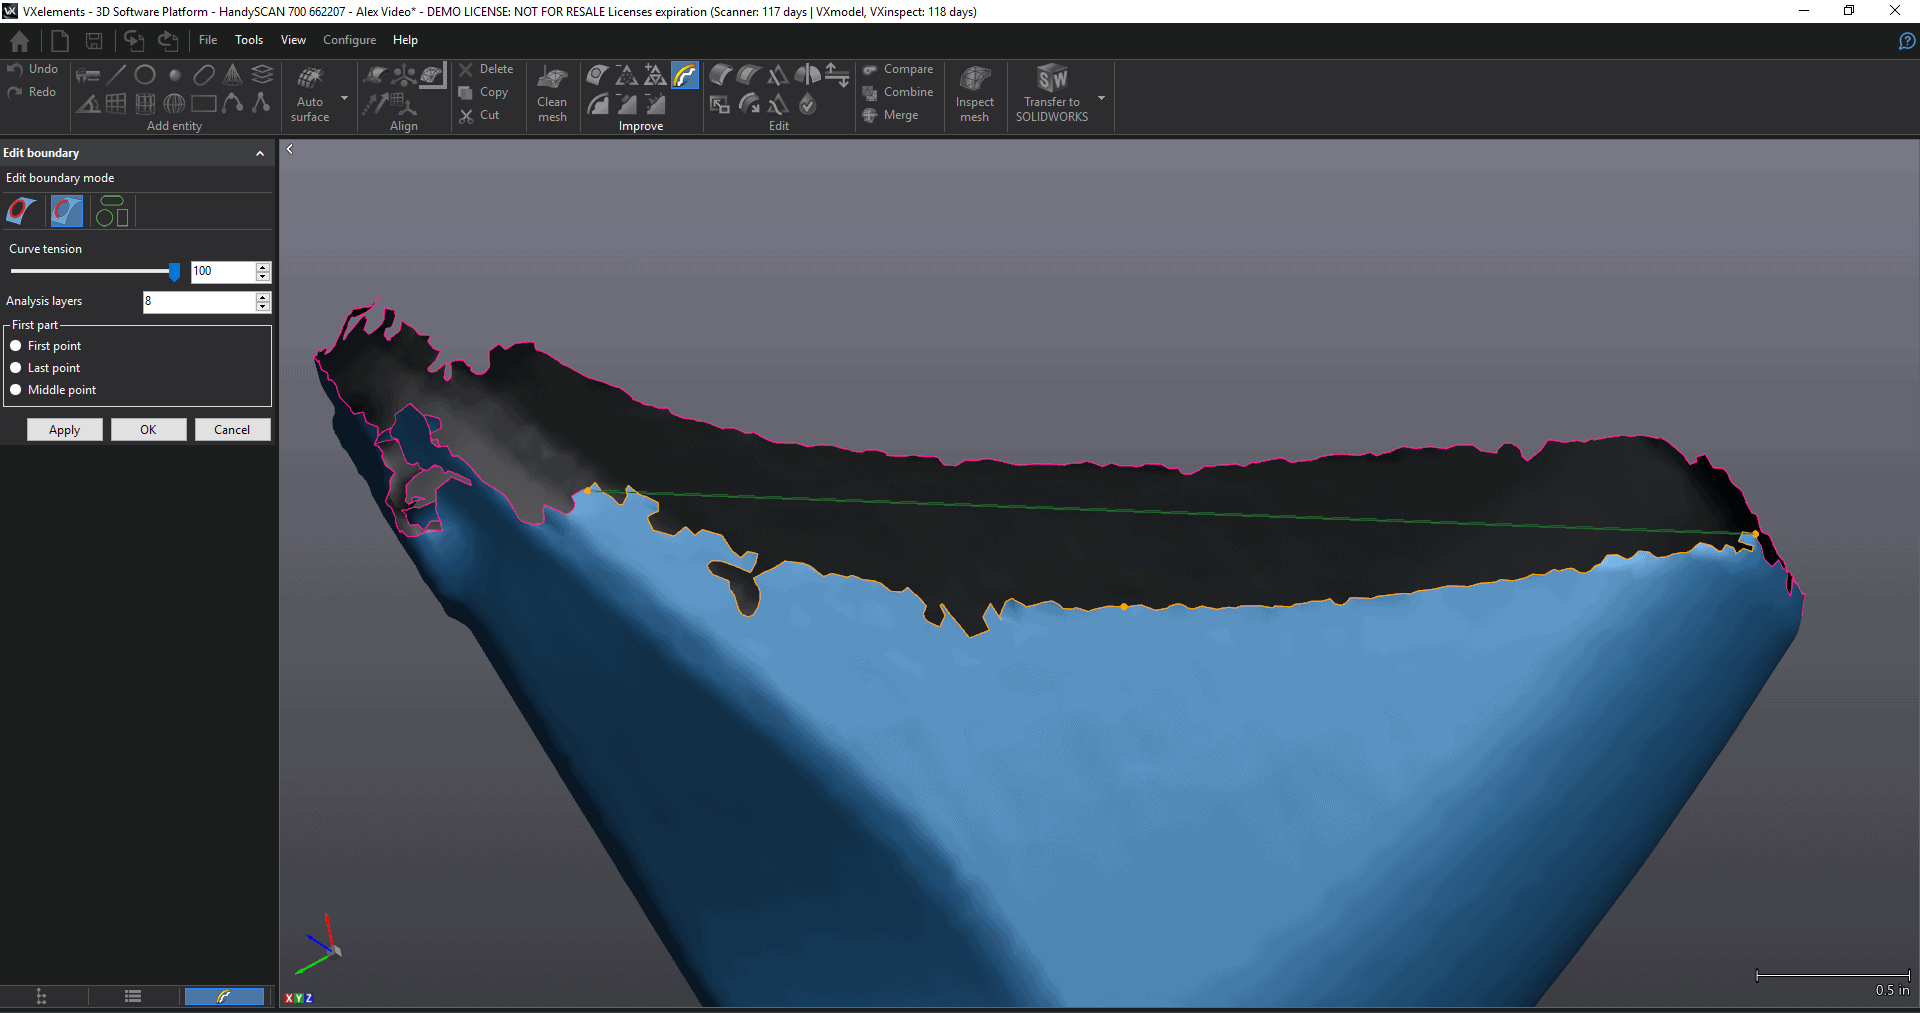
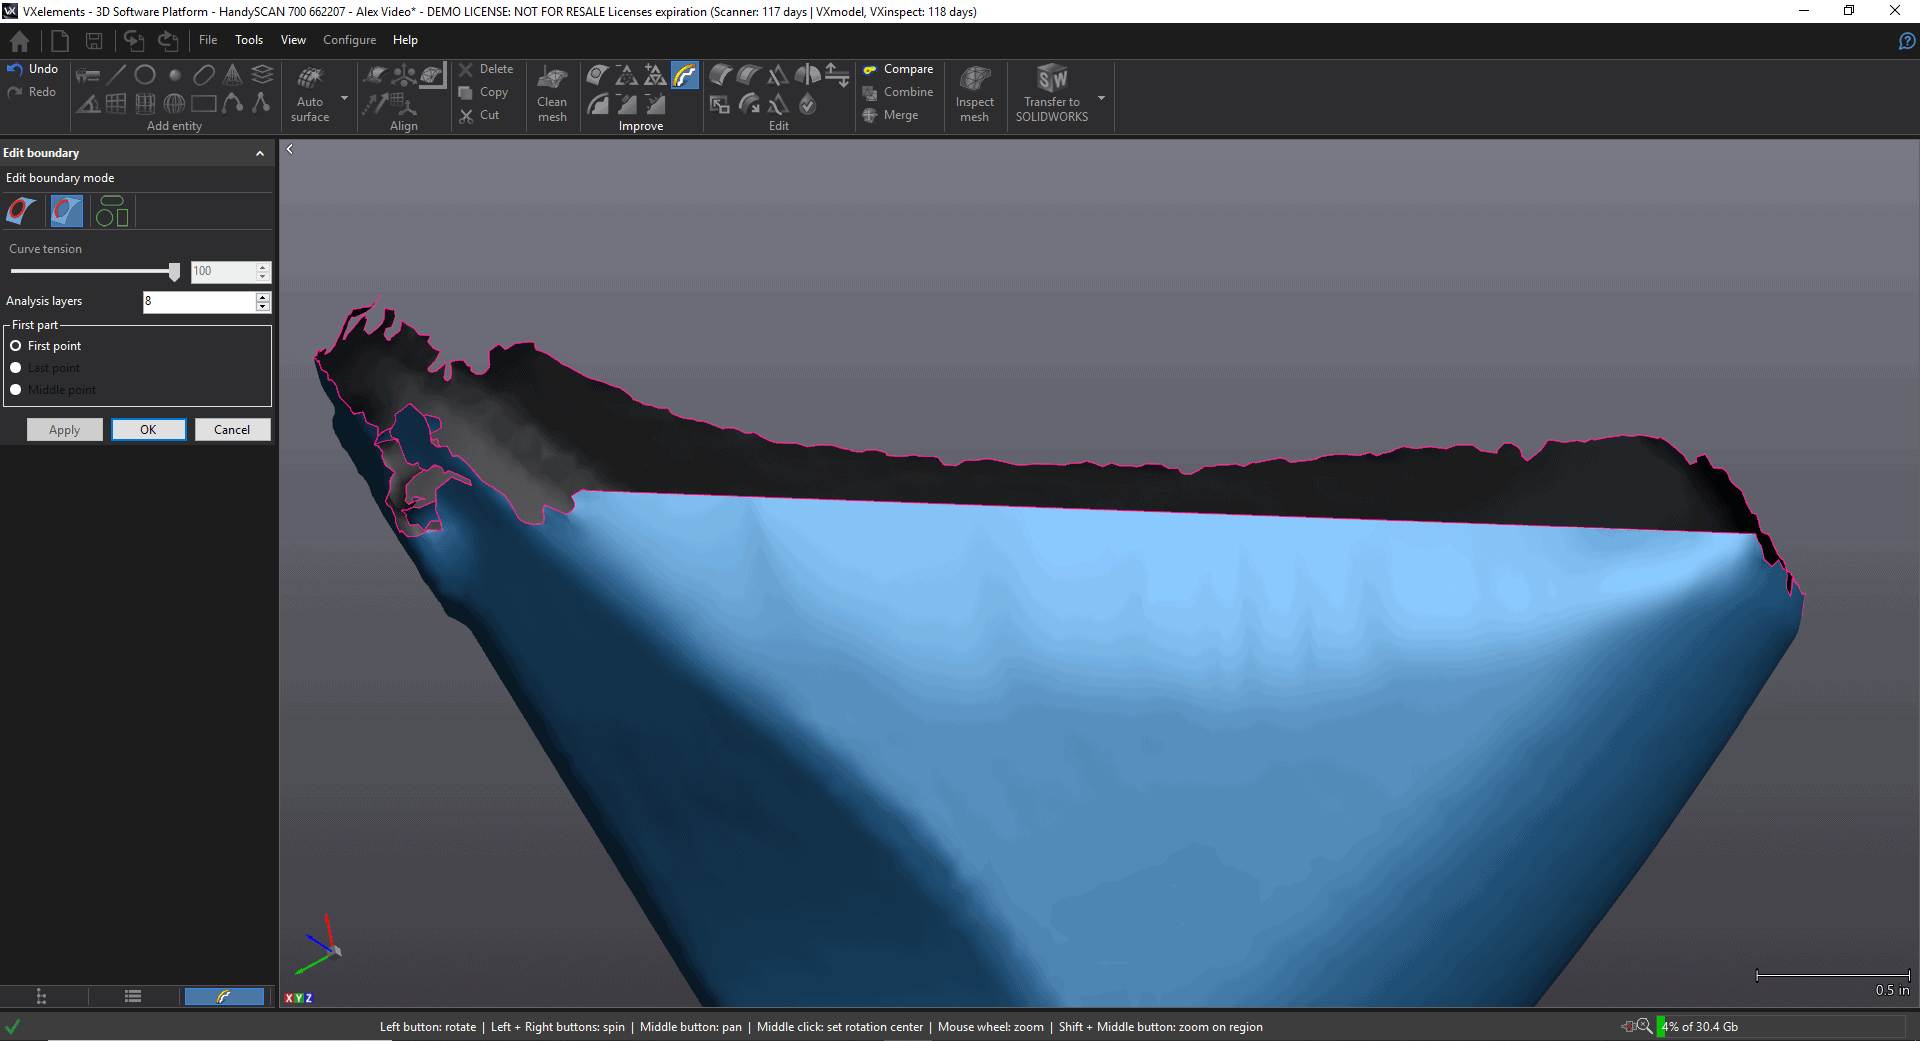
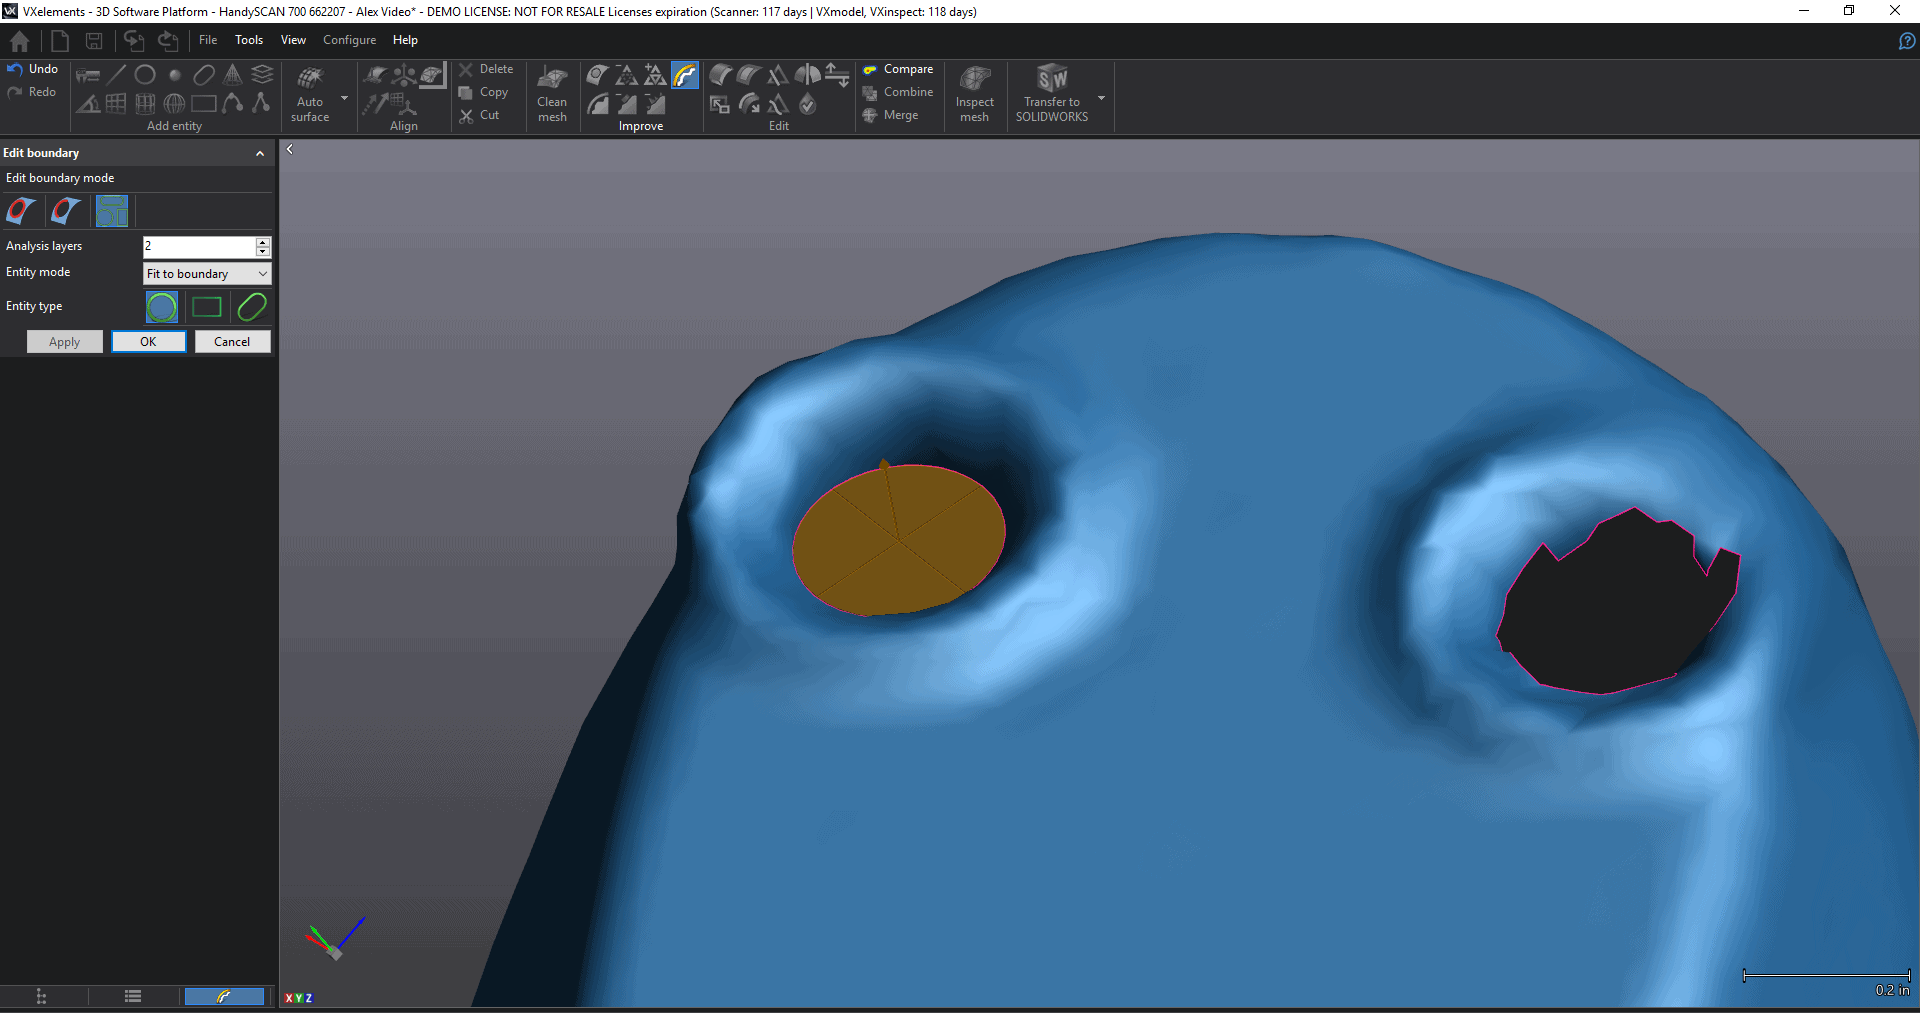
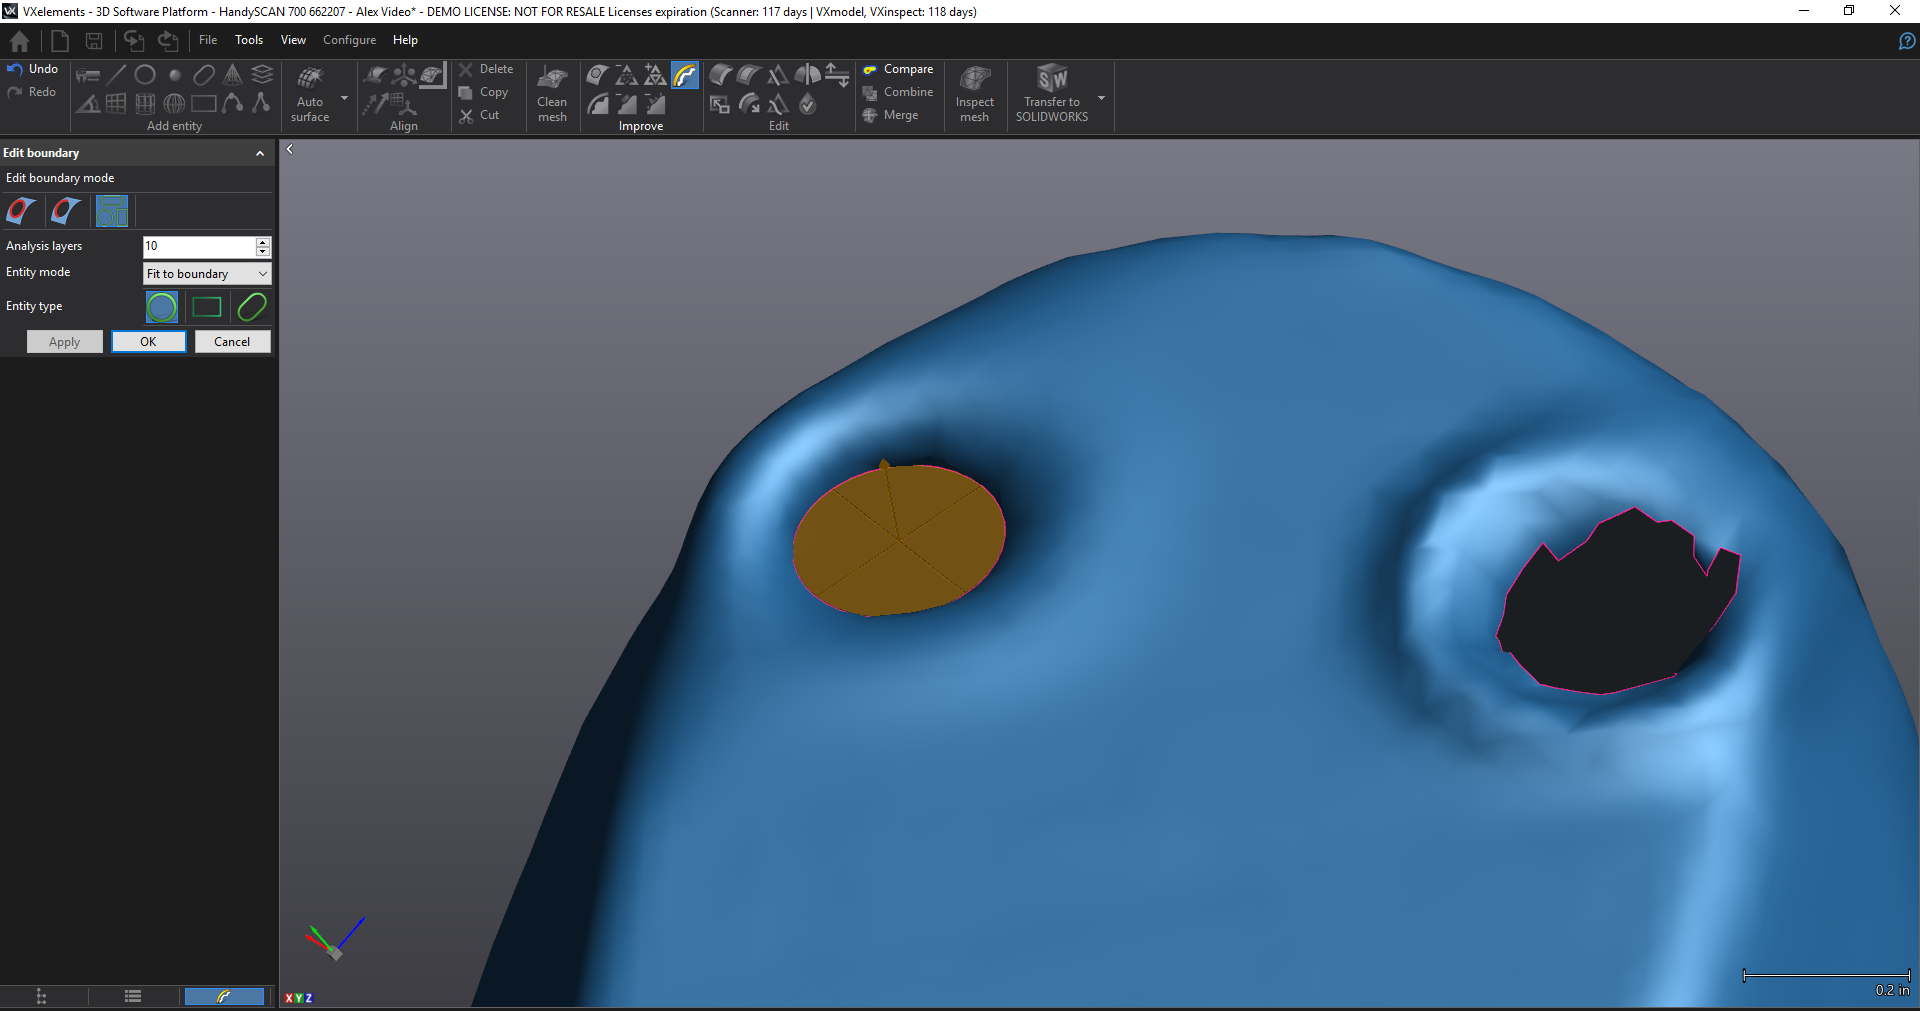
Now use the Fit to entity boundary edit tool, select the slot in method, and select the main boundary. In this case, my boundary is still a little far off from the slot entity, so I increased my number of analysis layers to try to get a better result.
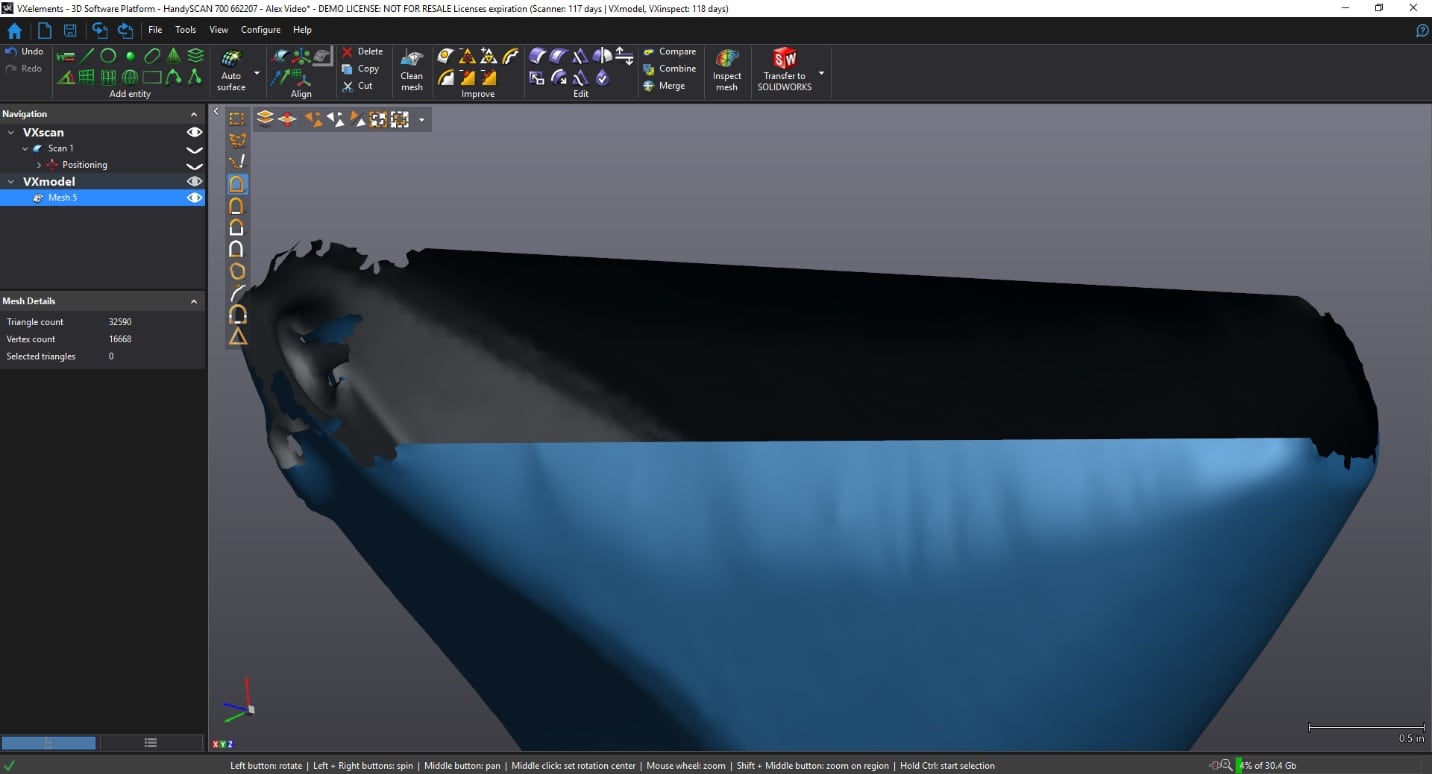
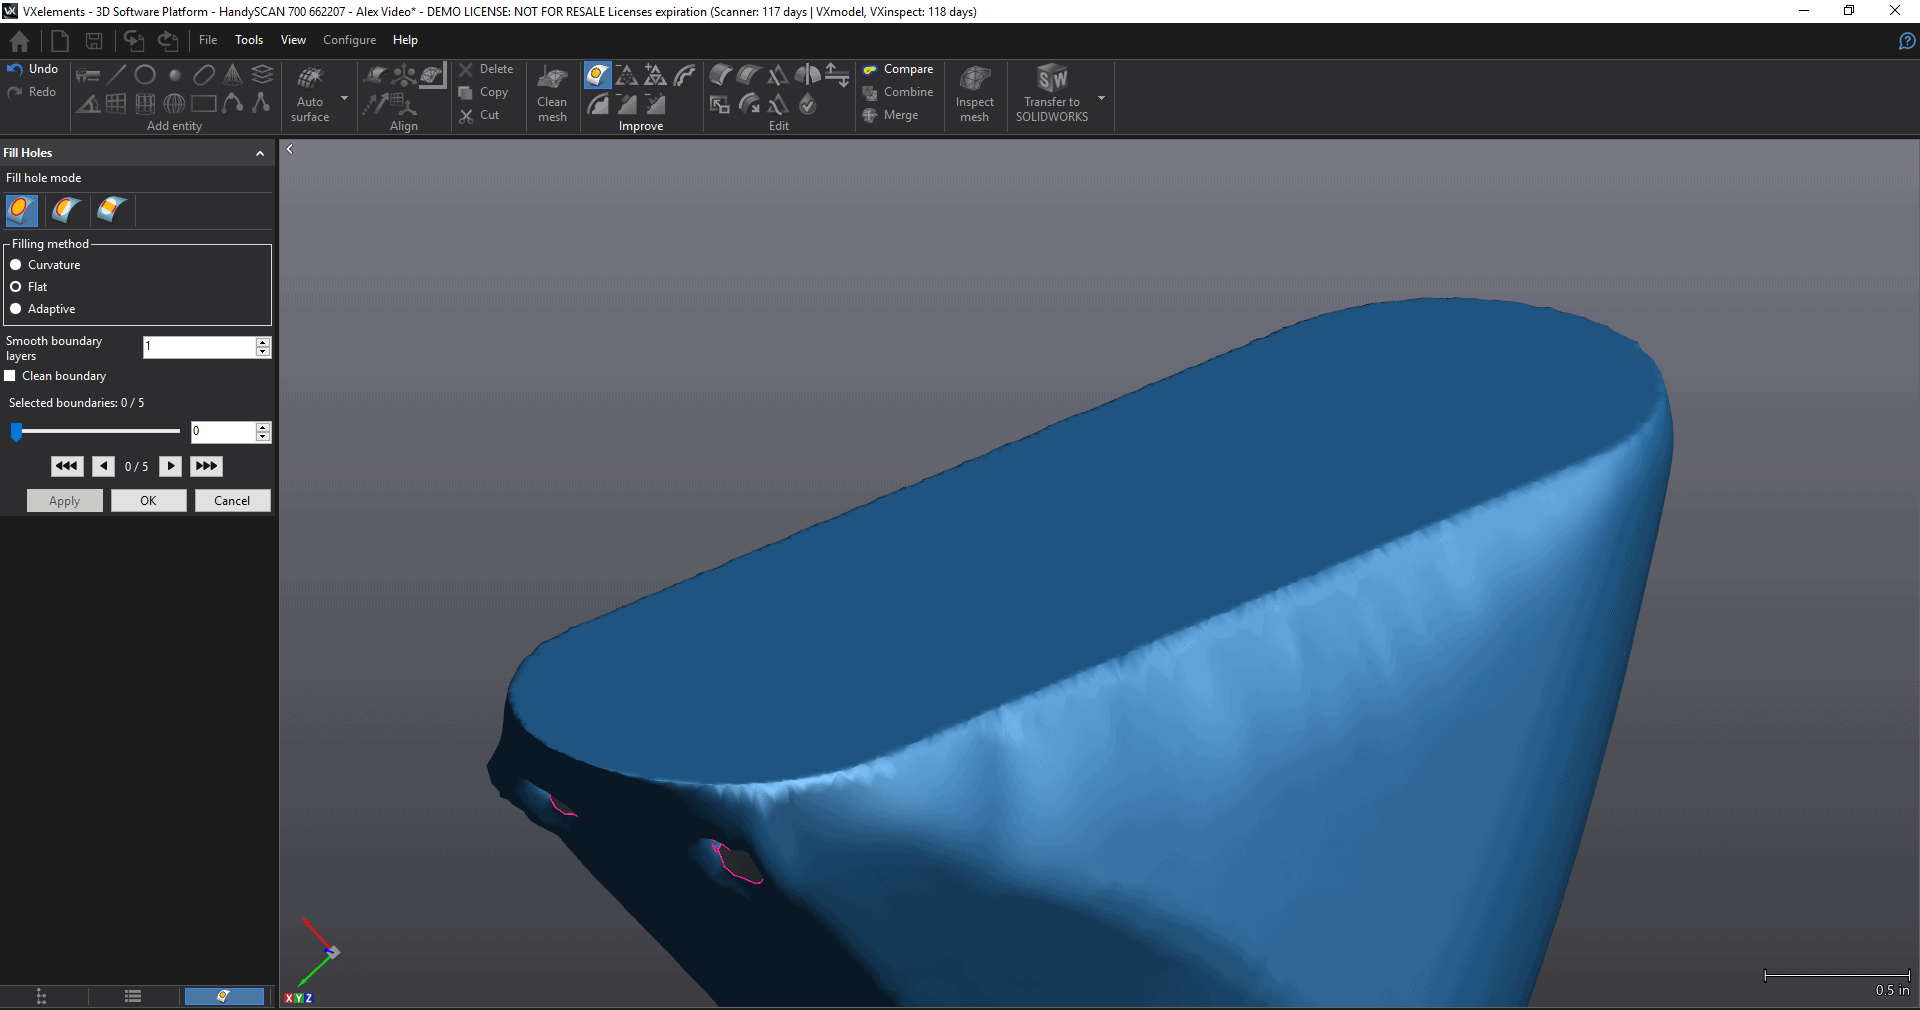
Now you can use a normal flat fill hole command to fill the hole evenly.
For the smaller holes, we will want to clean them up a bit so the walls are more even. I like to use the brush tool to select triangles and then delete.
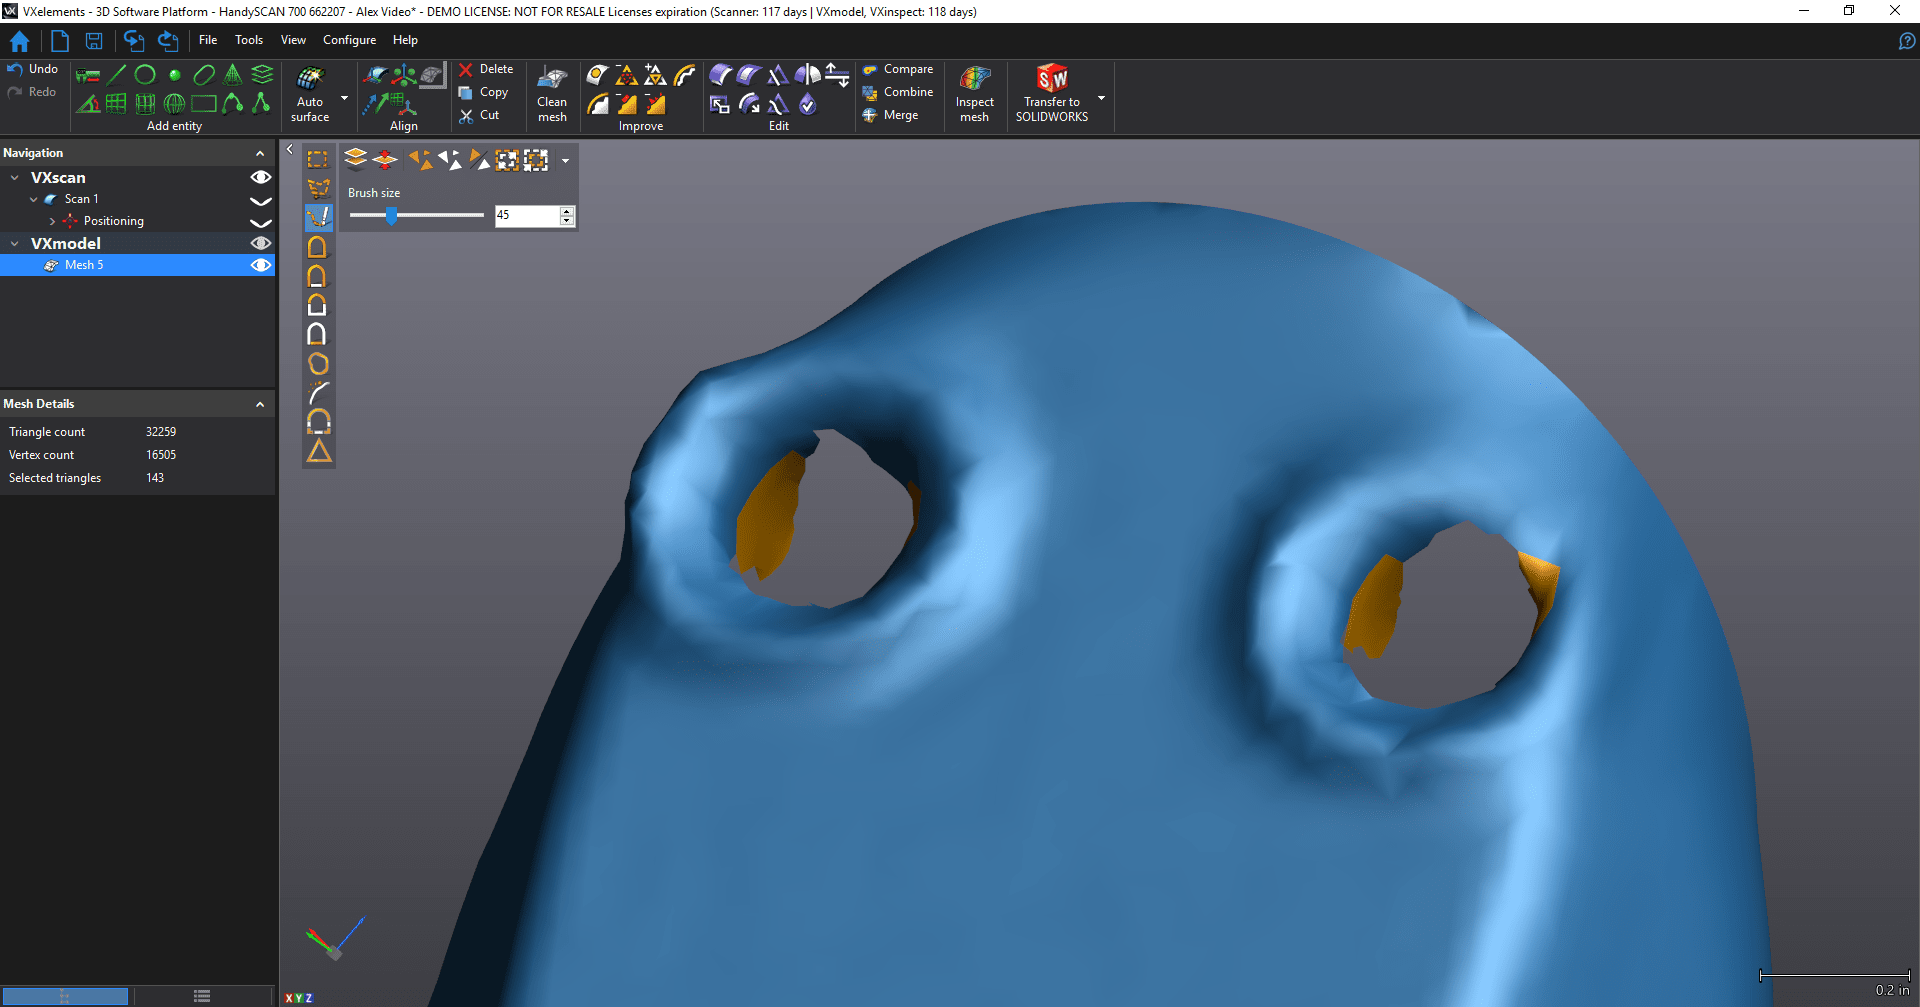
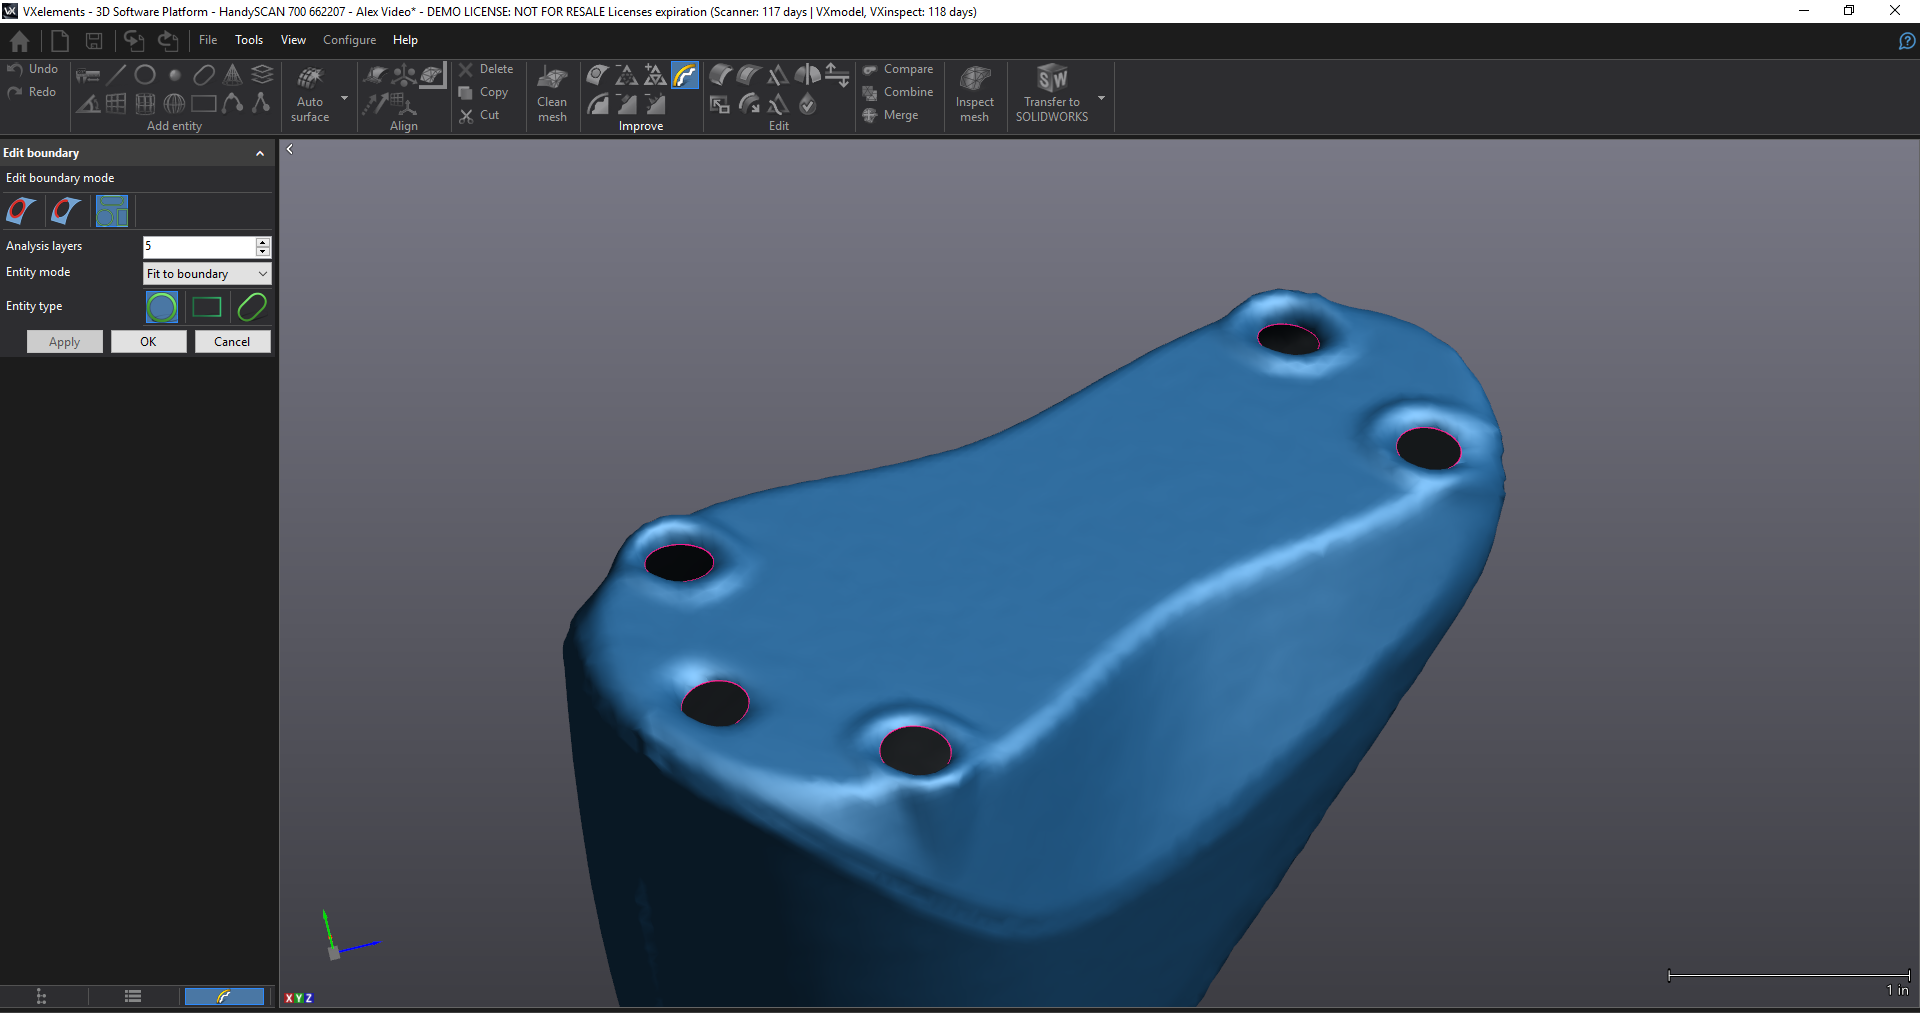
Now you can do a similar process as before. Use the fit to entity edit boundary tool, to make nice circular boundaries. Then fill them with a flat fill hole command. Adjusting the analysis layers or smoothing setting can be used to create either smoother or more natural holes.

Hopefully these quick little tips and tricks help you on your next VX Model project!
Cody Doiron
Field Service/Application Engineer
Computer Aided Technology, LLC