What's New with Stratasys: Digital Anatomy Printer Updates
With the latest update to GrabCAD 1.46, the Digital Anatomy Printer received some very welcome updates: Bone Analyzer and Cross Section.To understand why these updates are so useful, let’s take a trip back in time.
When the Digital Anatomy Printer first came out its offerings were leaps and bounds ahead of anything available on the 3D printing market in its ability to replicate complex bone structures for authentic haptic feedback during practice procedures. However, the software used to process Digital Anatomy parts would soon receive an update.
With GrabCAD Print update 1.43, the ability to change the proximal and distal regions of a long bone part was added. This update brought an even greater anatomical accuracy to long bone parts. This update also added the option to incorporate “strain relief” reinforcements in the long bone part to prevent cracking when drilling or inserting screws into the printed part.
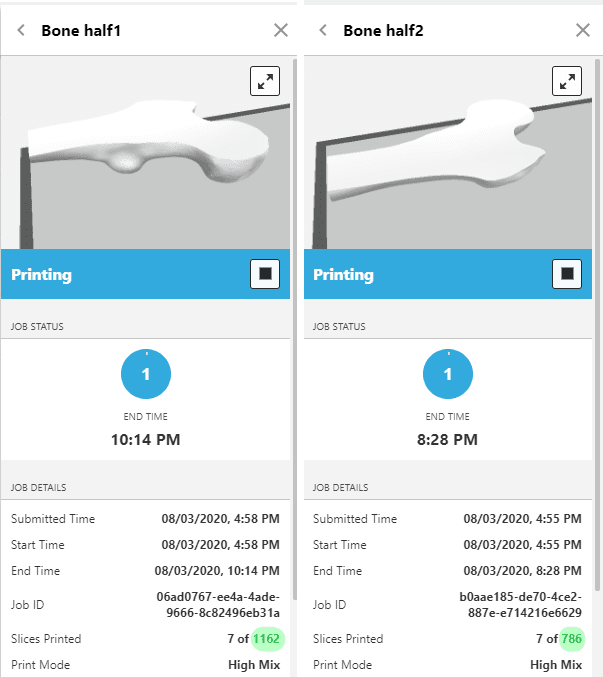
An area that had not been addressed yet was printing bones with the simulated marrow and spongy bone visible. To interact with the simulated spongy bone and simulated marrow internal structures required either sawing the bone in half or pausing the print job. Feeling the simulated marrow was something I was very interested in when Computer Aided Technology received their Digital Anatomy Printer, so I decided to use the “pause the print job” method. However, I wanted two halves of a bone that would fit together seamlessly, so I had to calculate the exact slice to pause each half of the bone and then stay up late into the night to pause the print job. Below are some screenshots from GrabCAD Print that helped me calculate the layer height to pause. I used sliced bone parts set to “glossy” in model options to get the layer height of the desired stopping points.
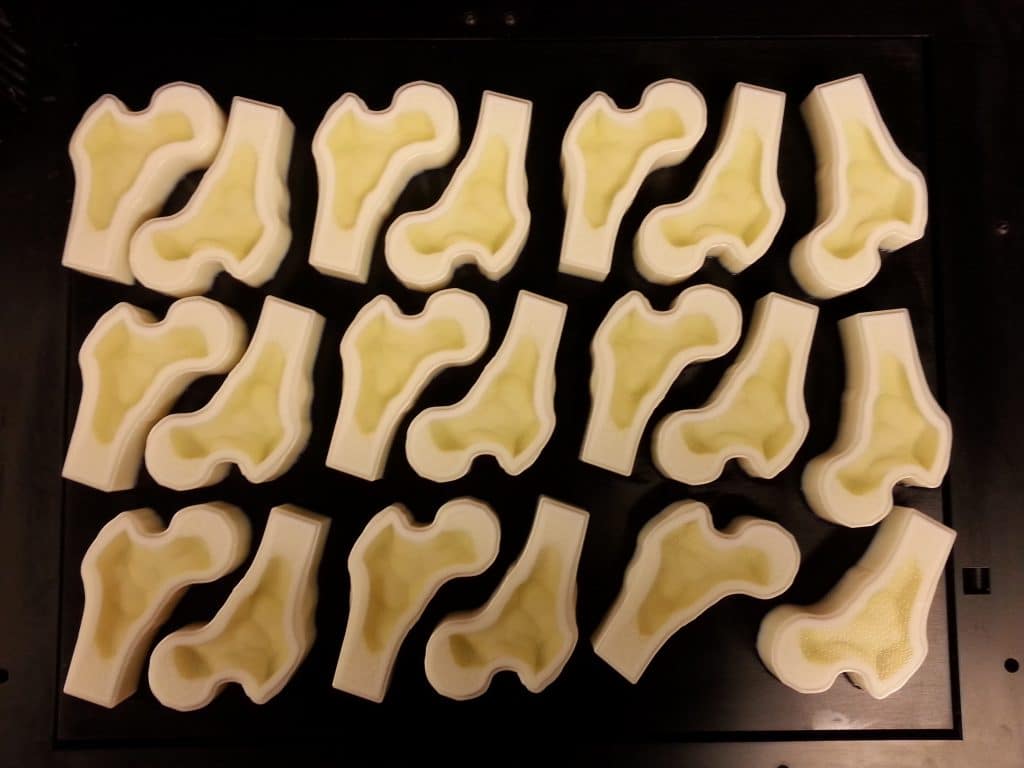
These parts also had to be printed with the bumpy parts of the bone facing down, which doubled the amount of support material used and increased cleaning time. While this solution did work, it was not something I would expect anyone else to attempt. Below is the results from one of the printed halves. Notice the large support structure under each of the parts.
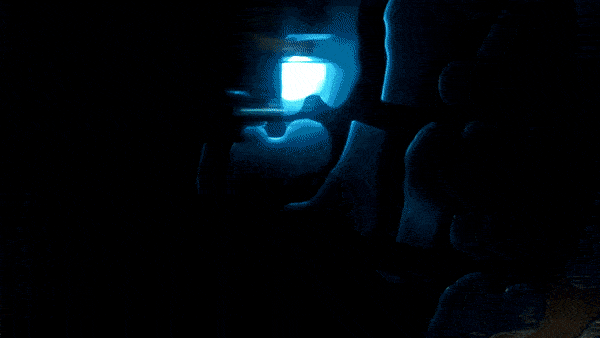
Here is a time-lapse of these bone parts being printed. The different layers of the bone are very visible in the time-lapse.
The 1.46 update to GrabCAD Print added the ability to do 80% of this work through two features made for Digital Anatomy bone printing.
- Cross Section: This feature allows the user to identify a face on a bone (ideally a flat face) and an off-set distance and the bone will print with a “window” into the internal structure of the bone. This “window” can be coated in a clear material or left open to the air.
- Bone Analyzer: This feature allows for the internal structure of the bone to be previewed slice-by-slice, allowing for greater anatomical accuracy. This is also a great way to double-check that the Cross Section feature is working as intended.
To print two halves of a bone like I attempted before, the bone part will still need split it into two chunks before importing into GrabCAD Print. After the bone part has been split, the rest of the work can be done within GrabCAD Print. (I think a future update may allow you to do the splitting yourself, which would make the process even more simple!)
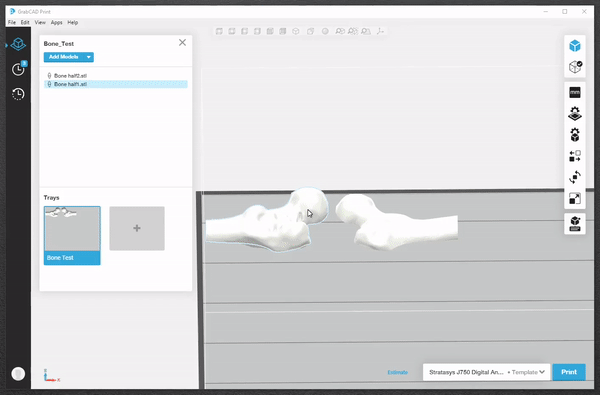
With the two bone halves in GrabCAD Print, start by classifying them as long bone parts.
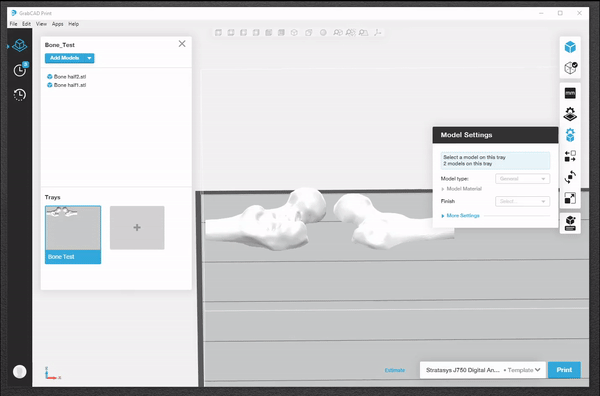
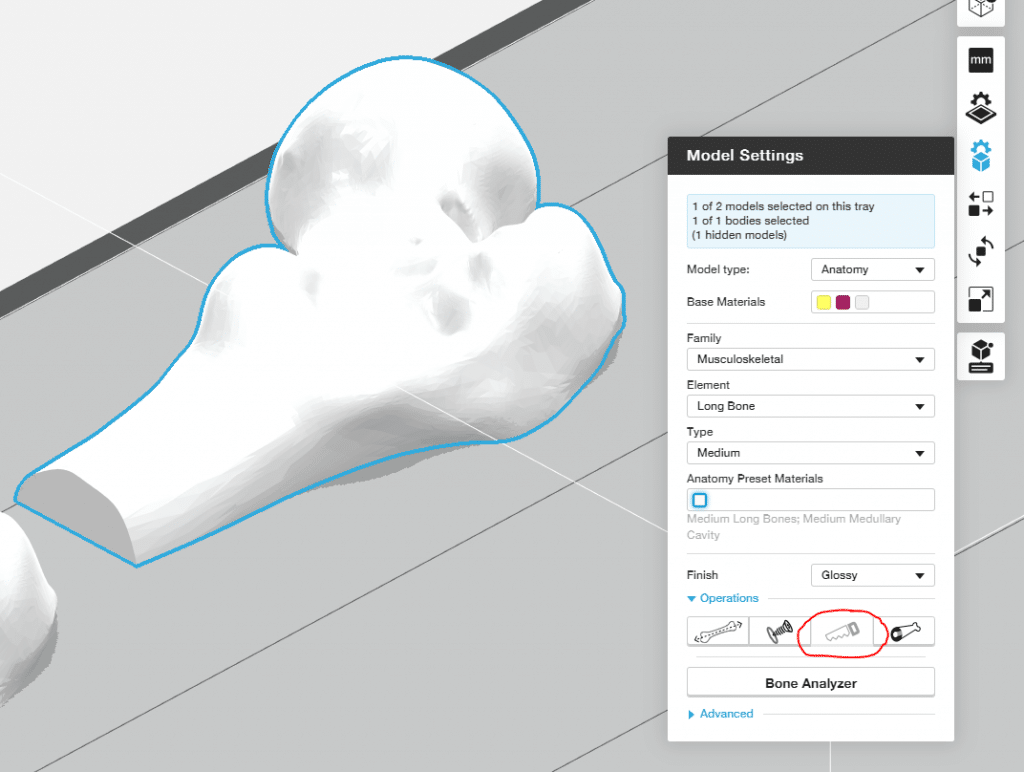
Once classified, use the new “Cross Section” tool to identify the flat face for the internal structure to be visible. Uncheck the “Cover the opening with clear material” to print the part with touchable simulated marrow and spongy bone. Keeping the box checked will print a clear layer over the opening so the internal structure is visible, but not interactive.
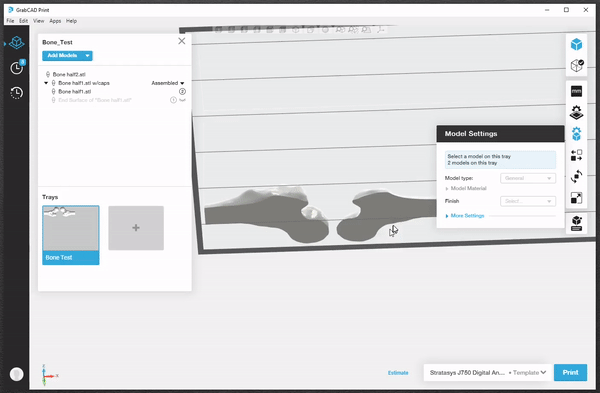
To double-check that the part will print correctly, use the “Bone Analyzer” tool. This will give a sliced preview of the print job. The bottom layer of the print job has a yellow core, which is used to identify the bone marrow internal structure.
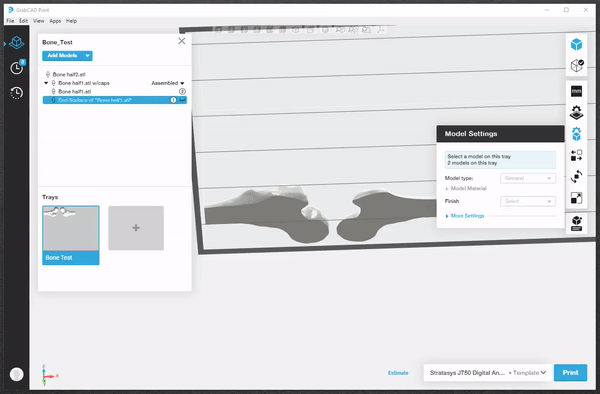
Compare this preview to a part that hasn’t gone through the Cross Section tool. The very bottom layer is a solid blue color, which is the material used on the outer shell of the bone.
With just a few clicks, these bone parts are able to be printed with visible internal structures and with the flat face down, saving support material and time! No more calculating the slice to pause the printer at and taking averages of the time to print per slice. Another big advantage of this method is the ability to print the outer bone material as “glossy”, which saves support material, reduces post processing and creates a better surface finish.
Be sure to keep an eye on the Computer Aided Technology blog for more updates on the Digital Anatomy printer and other Stratasys products.
Until next time!
Kelsey Gabel
Application Engineer, Manufacturing Solutions
Computer Aided Technology, Inc