Detail Views – How to create and utilize custom shapes in SOLIDWORKS
Detail views are a great way to convey detail in a part or assembly. The tool in the software defaults to a circle shape to describe the model’s detail. However, there are many times that the shape used to enclose the detail calls for a more robust shape. To utilize a user-defined shape, unique options and setup steps are necessary.
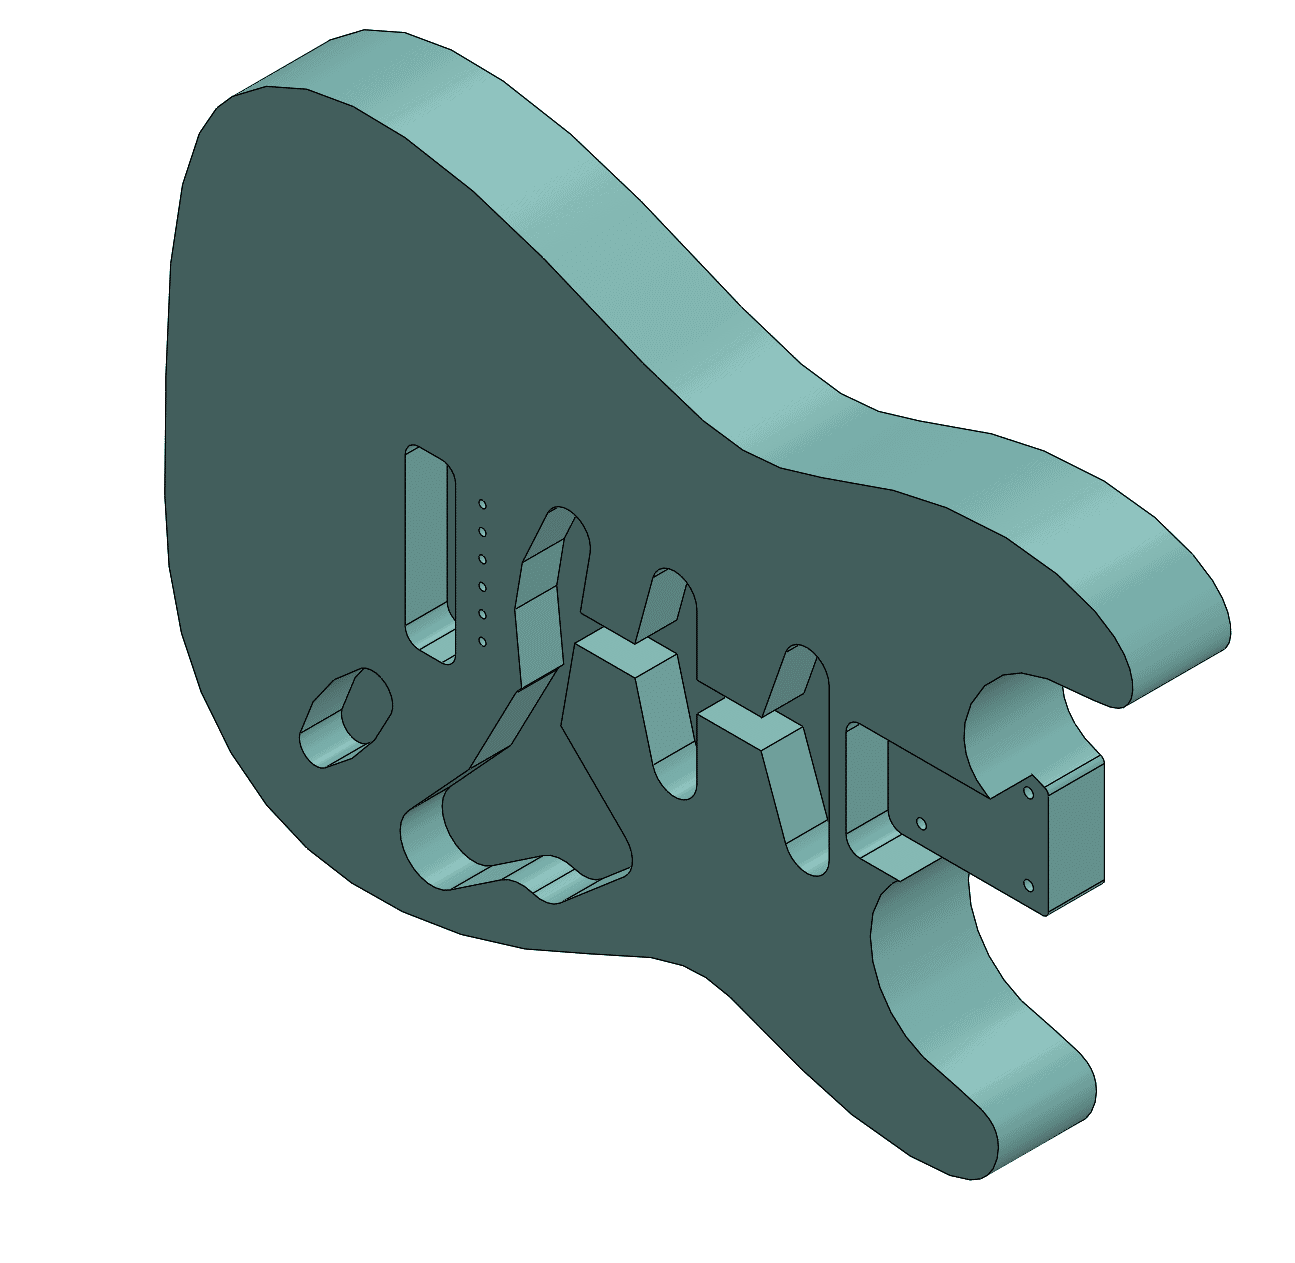
Let’s use this example, the body of an electric guitar. The body has many routes and holes for placement of the necessary components and hardware:
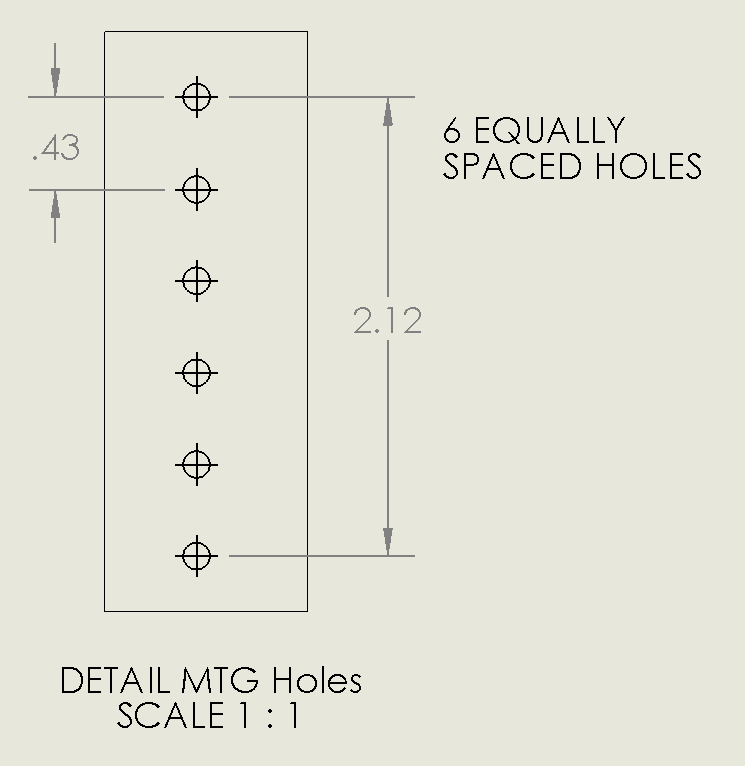
In the drawing of this component, we want to create a Detail View of the mounting holes for the tremolo bridge system:
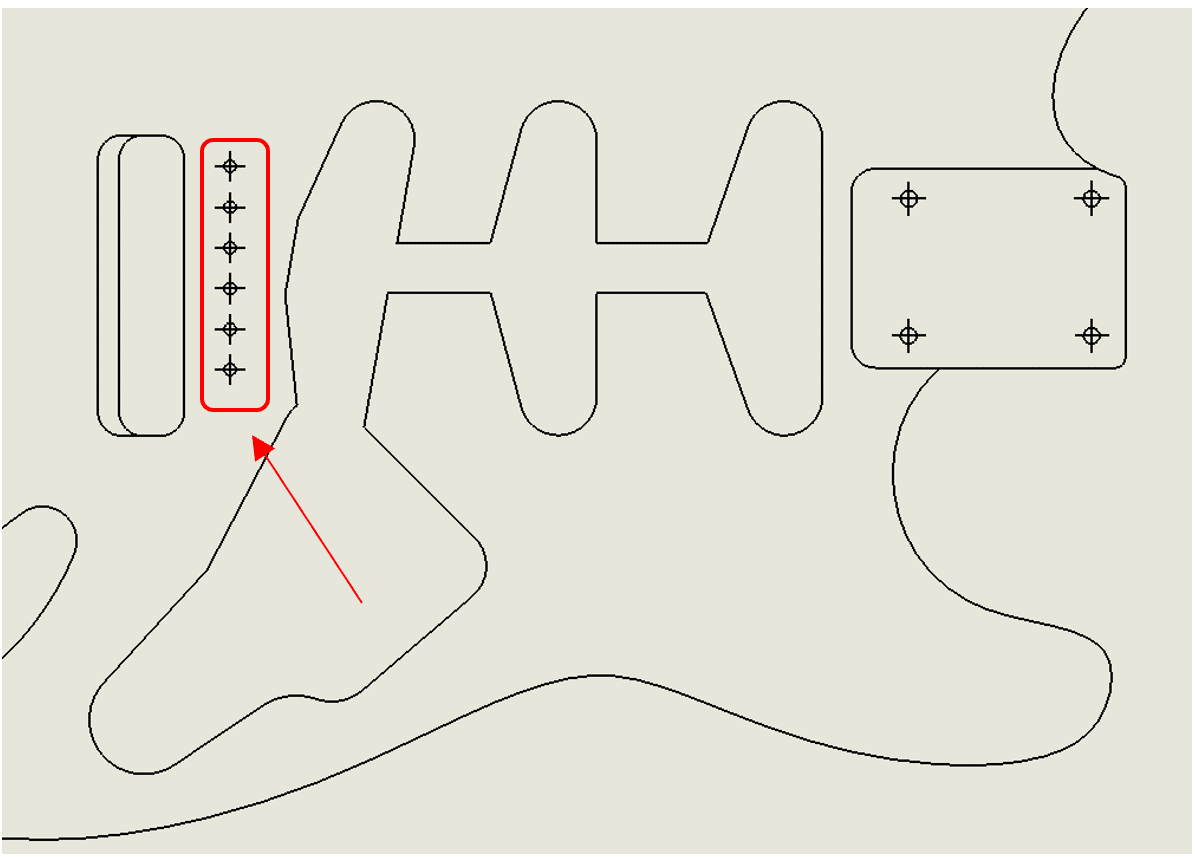
The problem is, we do not want to include the routed pockets surrounding these holes. So, a circle shape is not viable. We will use a rectangle shape instead.
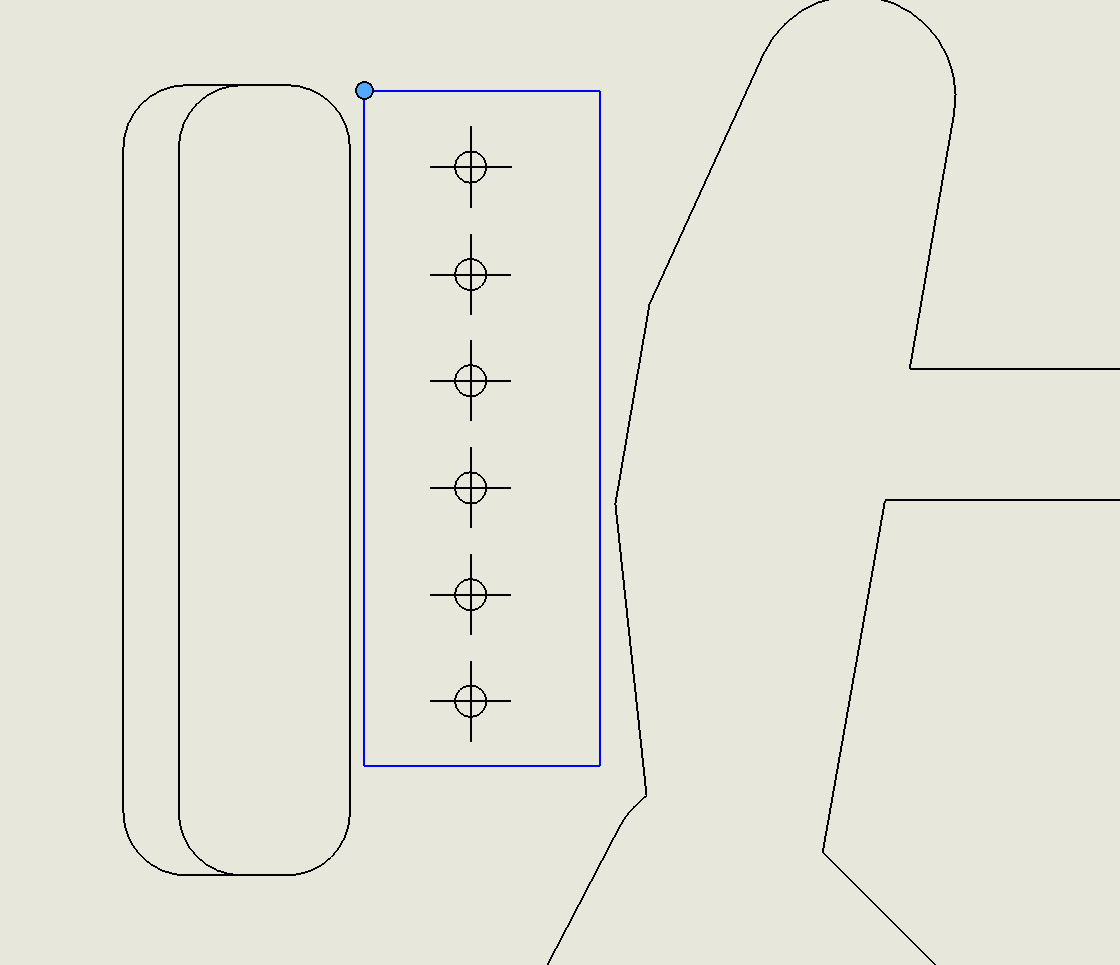
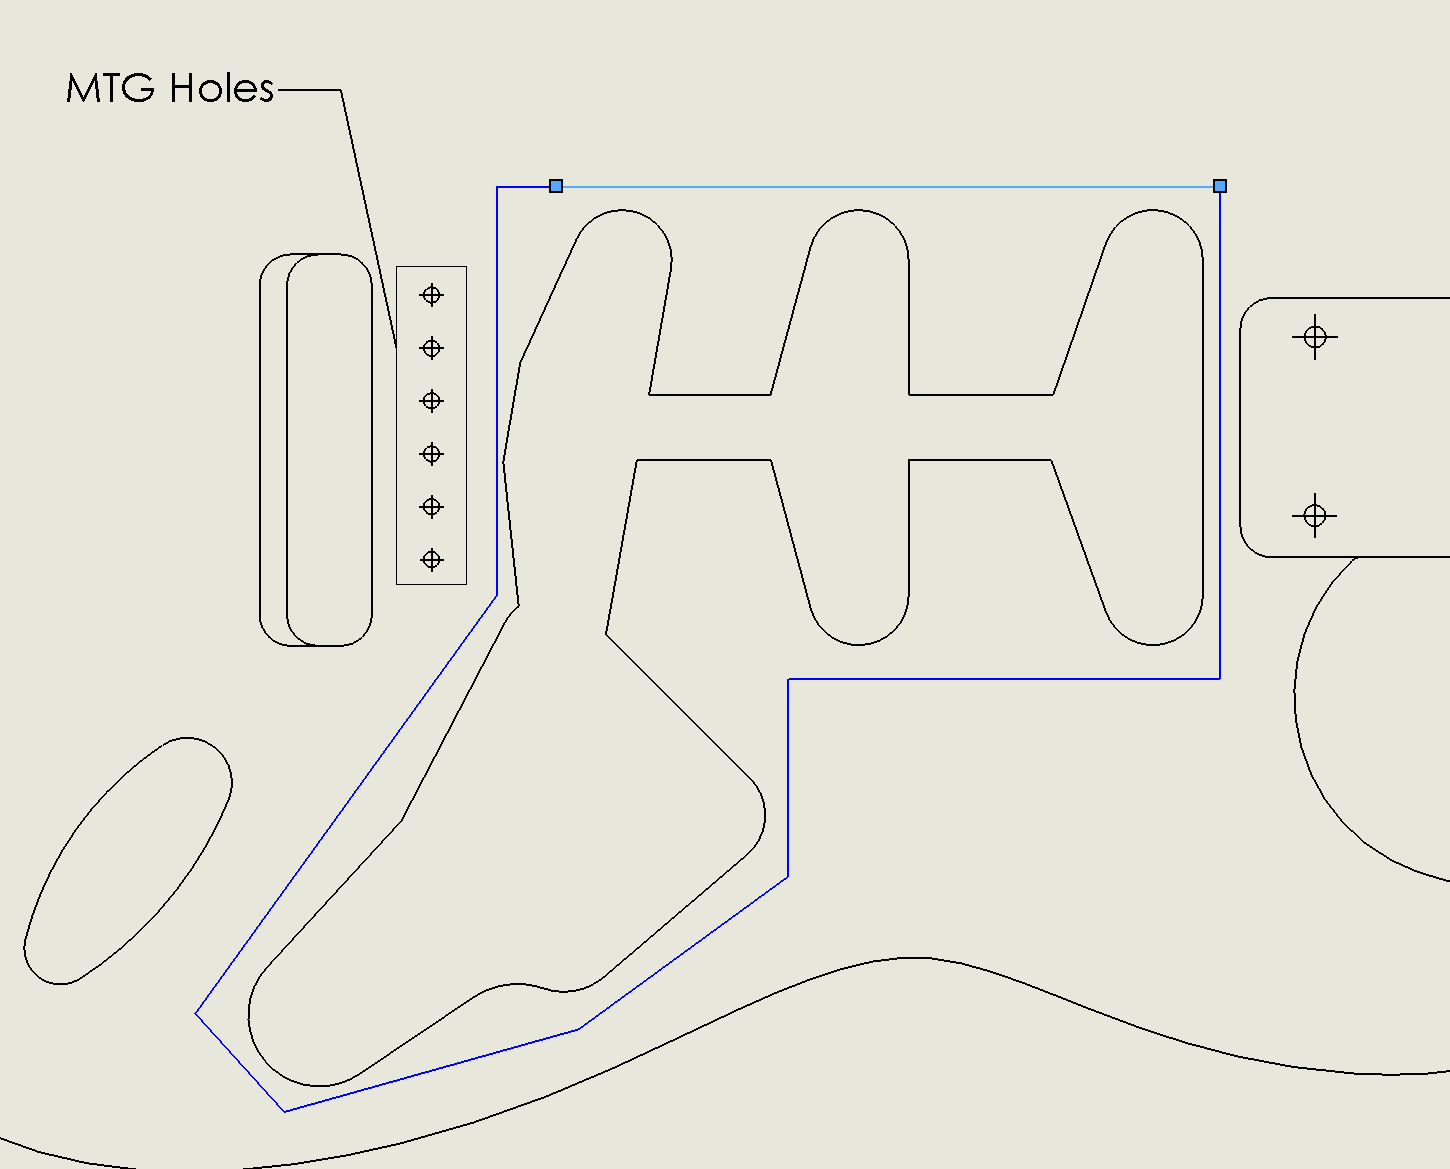
The first step is to draw the sketch surrounding the contents of the detail view:
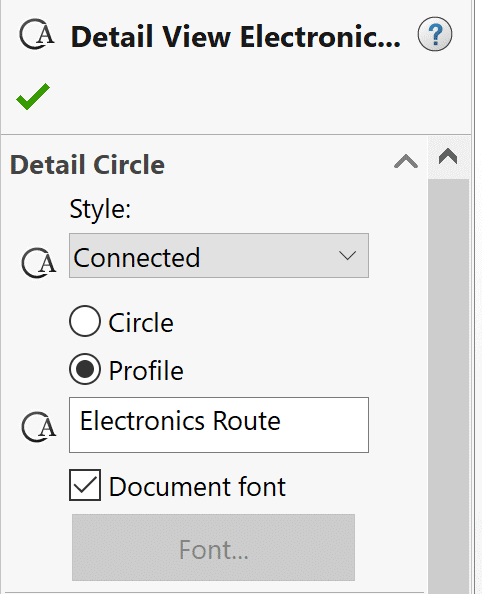
After sketching the shape, make sure the sketch is pre-selected. Then, activate the detail view command. Initially, the command will use the default “Per Standard” style. In order to use the “Profile” option, we need to utilize the “With Leader”, “No Leader”, or “Connected” style options.
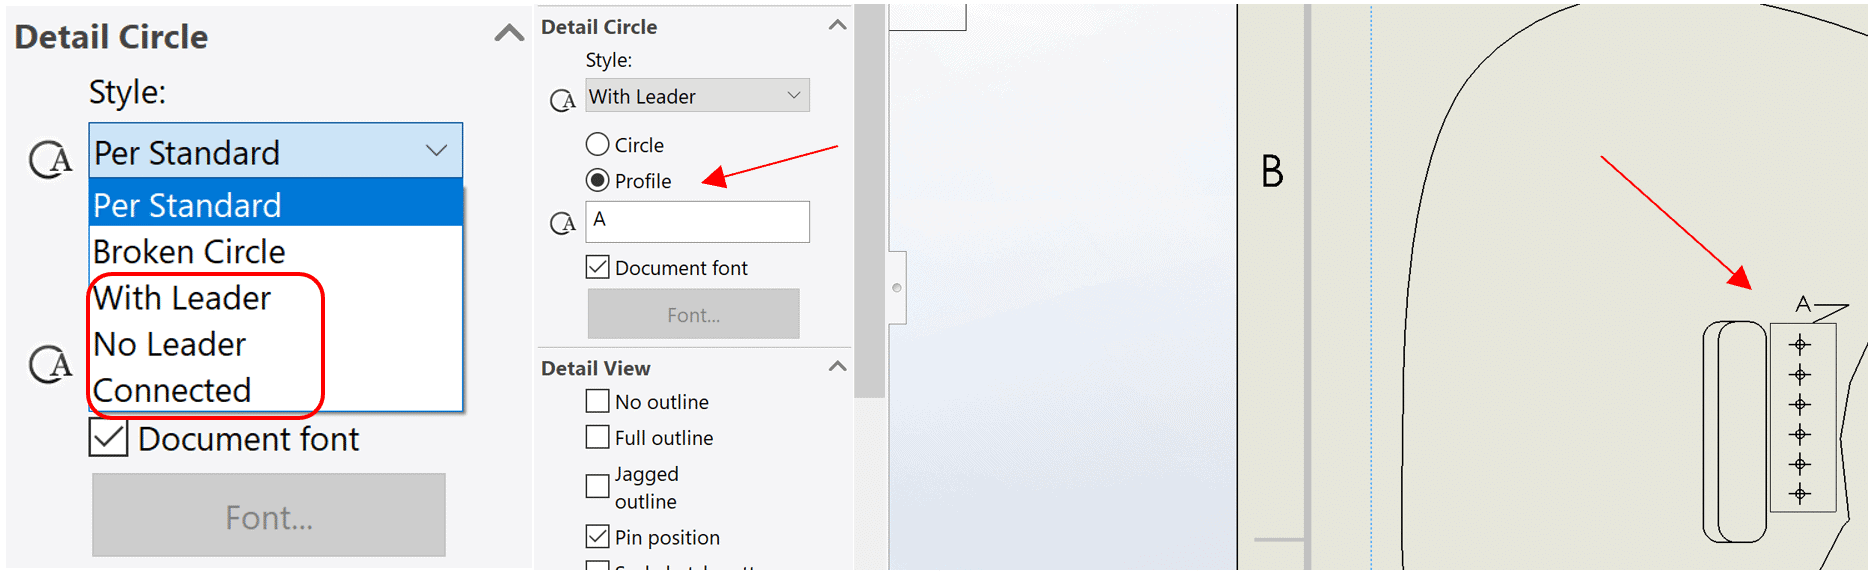
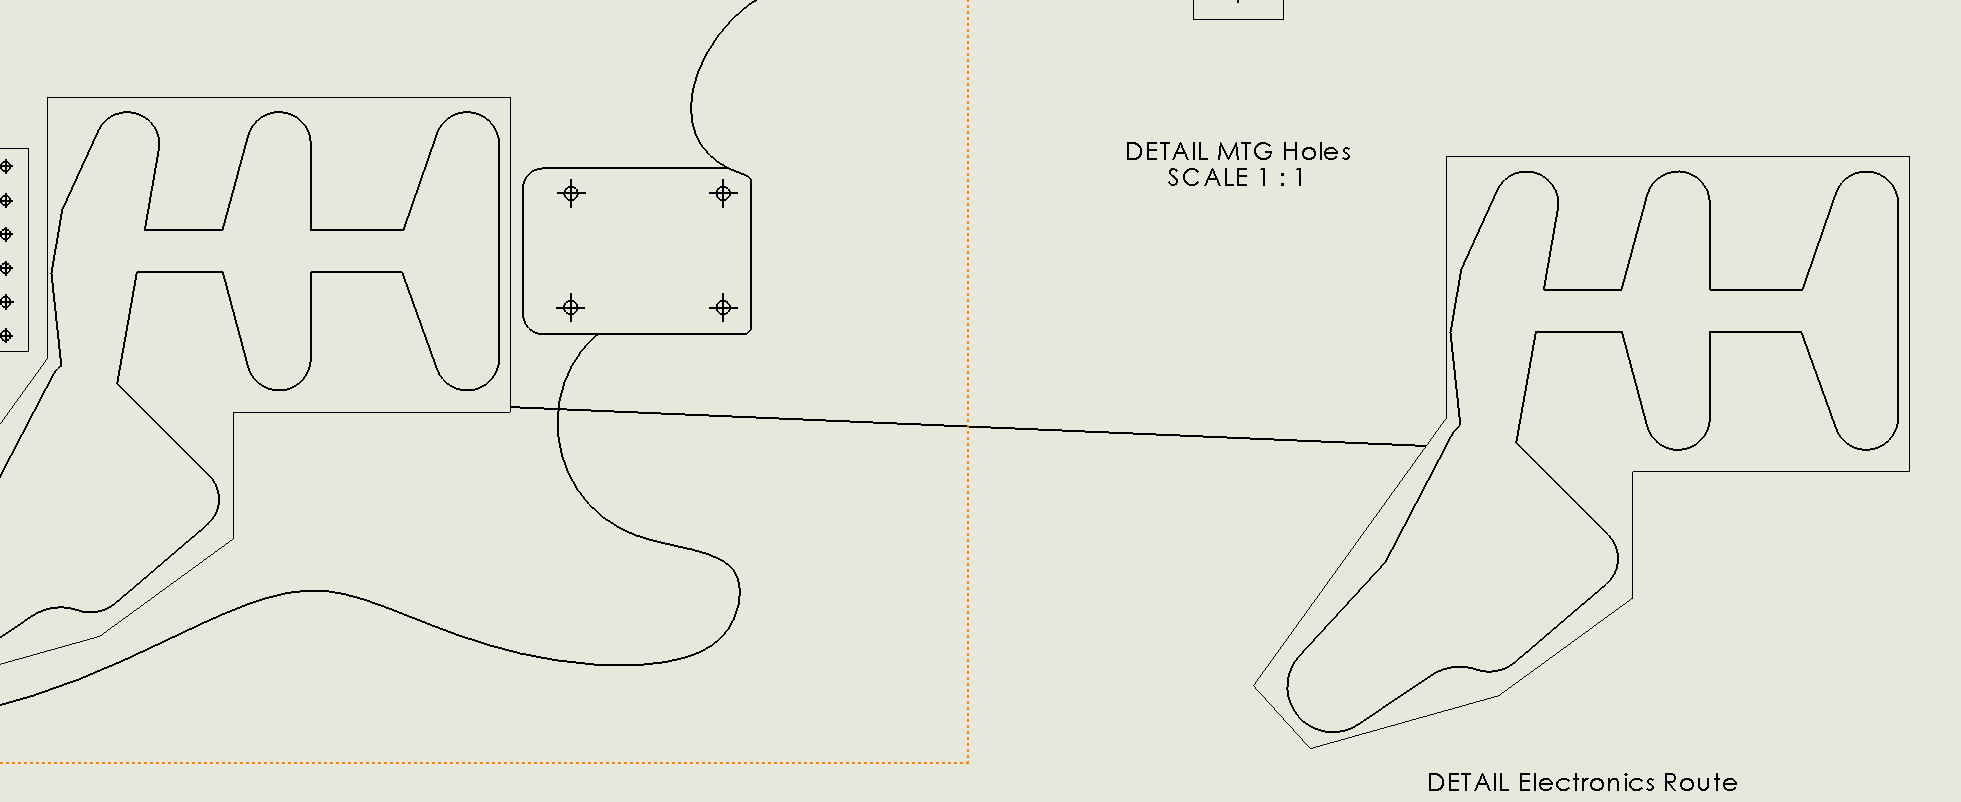
Now we have a robust detail view for the schematic.
Let’s do another example. This time, a detail view is developed for the largest pocket on the guitar body. The sketch consists of a series of connected lines:
The same process is used, but this time, a “Connected” style is implemented:
So, when creating a custom shaped Detail View, start by sketching the shape. Then, select the sketch and start the command. Lastly, set the style to “With Leader”, “No Leader”, or “Connected” and enable the “Profile” option.
Cameron Hosimer
Application Engineer
Computer Aided Technology