Auto Arrange Dimensions
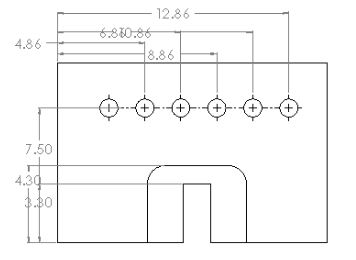
One of my favorite enhancements to drawings over the past couple of years has got to be Auto Arrange Dimensions. This might be as close as you get to an ‘easy’ button in drawings. See the image below to discover a drawing view with the dimensions in a complete mess.
To fix this in flash, SOLIDWORKS introduced Auto Arrange Dimensions the the 2011 release. This function will automatically arrange the selected dimensions for you. The procedure is as follows:
- Box-select all of the dimensions.
- Next, move the mouse pointer over the Dimension Palette rollover button
 to display the dimension palette. (Incidentally, if you mouse AWAY from the Dimension Palette rollover button, it will disappear. To get it back just hit the CTRL button on your keyboard.)
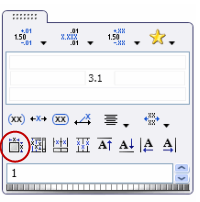
- On the Dimension Pallete, click Auto Arrange Dimensions in the lower left corner
- Click in the graphics area to turn off the Dimension Pallete – Easy!
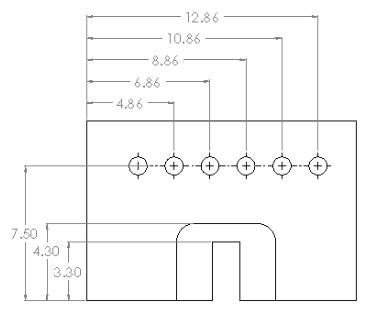
When you use Auto Arrange Dimensions, the selected dimensions are placed as follows:
- Spaced from smallest to largest
- Aligned and centered, if possible
- Spaced with the offset distances defined in Document Properties – Dimensions
- Adjusted to avoid overlapping
- Staggered, if necessary
There are a number of other tools on the Dimension Palette that you will also want to check out for when you have multiple dimensions selected and you want to make some adjustments – including Space Evenly Linear/Radial, Align Collinear, Align Stagger, Justify Text and Dimension Spacing Value (either numerical input or thumbwheel). Enjoy.